How To Install Led Lights In Your Car (Beginner-Friendly)
Installing LED lights in your car is a rewarding DIY project that can enhance both aesthetics and functionality. This guide provides simple, step-by-step instructions for beginners, covering everything from understanding LED types to the actual installation process, ensuring a safe and successful upgrade.
Understanding LED Car Lights
LED stands for Light Emitting Diode. These are small light sources that are super efficient. They use much less power than old-school bulbs.
Plus, they last a whole lot longer. This means fewer trips to the store for
There are many types of LED lights for cars. You’ve got your headlights. These use powerful LEDs for better vision.
Then there are interior lights. These are for footwells, door panels, or dashboards. You can even get license plate LEDs.
Some folks like underglow kits. These light up the car from underneath. Each type has its own way of being installed.
But the basic ideas are the same.
Choosing the right LEDs is important. Make sure they are designed for automotive use. They need to handle vibrations.
They also need to work with your car’s electrical system. Check the voltage. Most cars use 12-volt systems.
This is standard for most car LEDs. Don’t buy cheap, unbranded lights. They might not last.
They could even damage your car’s wiring. Stick to reputable brands. Your car will thank you for it.
Think about the color too. White is common for headlights. It’s bright and clear.
For interior lights, you have more freedom. Blue, red, green, or purple are popular choices. Just be aware of local laws.
Some colors might not be allowed for external use. Check your state’s regulations. Safety is always the top priority.
Gathering Your Tools and Supplies
Before you start, get your tools ready. This makes the job much smoother. You’ll need a basic toolkit.
This should include screwdrivers. Get a set with different sizes and types. You might need Phillips and flathead ones.
A set of socket wrenches is also very helpful. Sometimes you need to remove a bolt or nut.
Wire strippers are a must. You’ll need these to expose the wires for connecting. Pliers are good for gripping things.
A multimeter can be useful. It helps test for power and ground. Safety glasses are important.
You don’t want anything in your eyes. Work gloves can protect your hands. A flashlight or headlamp will help you see.
For the LEDs themselves, you’ll need the actual light bulbs or strips. Make sure they come with connectors or are designed for easy splicing. You might need some extra wiring.
Get some good quality electrical tape. This is for insulating connections. Zip ties are handy for securing wires neatly.
A wire crimper can make connections stronger.
If you’re installing headlights, there might be specific adapters. Some LEDs don’t fit directly into the old bulb sockets. The packaging for your LEDs should tell you if you need these.
Always read the instructions that come with your new lights. They often have specific tips for your product.
It’s wise to disconnect your car’s battery. This prevents electrical shorts. It also stops you from getting a shock.
Find the battery. Usually, it’s under the hood. Loosen the clamp on the negative (-) terminal first.
Then loosen the positive (+) terminal. Remove the negative clamp first. Put it aside so it can’t touch the battery post.
Step-by-Step: Installing Interior LED Lights
Interior LEDs are a great starting point for beginners. They are usually less complex than exterior lights. Let’s say you want to add some footwell lighting.
This makes finding things on the floor easier. It also adds a nice mood to your car’s cabin.
First, decide where you want the lights. Common spots are under the dashboard. You can also put them on the sides of the center console.
Many LED kits come with adhesive backing. This makes mounting them simple. Clean the area where you want to stick the lights.
This helps the adhesive stick well.
Next, you need to find a power source. The easiest place is often the 12-volt accessory outlet. This is the cigarette lighter socket.
You can tap into its power. Or, find a fuse that only has power when the car is on. This is called an “always-on” fuse.
You can use a fuse tap for this. Be sure to pick a low-amperage fuse. Check your car’s fuse box diagram.
It tells you what each fuse is for.
Connect the positive wire from your LED strip to the power source. Connect the negative wire to a ground point. A good ground point is often a metal bolt that goes into the car’s frame.
Make sure the metal is bare, not painted. Use a wire stripper to expose a little bit of wire. Then, twist it around the connection point.
Secure it with electrical tape.
Many interior LED kits are plug-and-play. They might have a remote control. Or they could have a switch.
Test the lights before you put everything back. Turn on your car. See if the lights come on.
If they don’t, double-check your connections. Make sure the power source is working.
Once you are sure they work, tidy up the wiring. Use zip ties to secure loose wires. Hide them behind panels or under carpets.
This makes the installation look professional. It also keeps wires from getting snagged. Carefully put any panels you removed back into place.
You’ve just installed interior LEDs!
Interior LED Project: Footwell Lights
Goal: Add soft lighting under the front seats.
Materials: LED strip (1-2 meters), wire taps, 12V adapter, zip ties, electrical tape.
Steps:
- Clean under-dash area.
- Adhere LED strip.
- Tap into a fuse that’s on when the car is on.
- Connect LED positive wire to the tap.
- Connect LED negative wire to a metal chassis bolt.
- Test lights.
- Secure wires with zip ties.
Installing LED Headlights: A Deeper Dive
Upgrading your headlights to LEDs can make a huge difference. It’s like going from black and white TV to color. But headlight installations can be a bit trickier.
Your car’s headlight assembly can be tight. You might need to remove some parts to get access.
First, identify your headlight bulb type. Common types are H4, H7, H11, and 9005. Your car’s manual will tell you this.
It’s also often written on the old bulb itself. You’ll want to buy LED bulbs that match this type. Many LED kits come with built-in fans.
These help keep the LEDs cool. They can be a bit bulky. Make sure they will fit in your headlight housing.
Disconnect the car battery. This is crucial for safety. Then, locate the headlight bulb you want to replace.
This is usually behind the headlight assembly. You might need to remove the headlight housing. Sometimes, you can access it from under the hood.
Other times, you might need to remove the bumper. Check your car’s service manual for specific instructions.
Once you have access, unplug the old bulb. It usually has a connector. Gently twist and pull it off.
Remove the old bulb. It might be held in place by a clip or a retaining ring. Carefully remove it.
Now, insert the new LED bulb. Make sure it’s seated correctly. Follow the instructions for your specific LED bulb.
Some have a specific orientation.
Connect the wiring harness for the LED bulb. It should plug right into your car’s existing connector. If your LED kit has a ballast or driver, connect that now.
These devices help regulate the power. They are often boxy. Tuck them away neatly.
They need to be secured so they don’t rattle.
Before reassembling everything, test the lights. Turn on your car. Turn on your headlights.
Check both low beam and high beam. Make sure they work correctly. If one doesn’t, check the connections again.
You might need to reseat the bulb. Or there could be an issue with the driver.
If everything is working, reassemble any parts you removed. Secure the headlight housing. Reattach the bumper if needed.
Make sure all clips and screws are back in place. Some LED headlights need adjustments. You might need to aim them.
Incorrectly aimed headlights can blind other drivers. Check your car’s manual or look up guides for your car model.
Important Note: Some states have rules about headlight color. Most require a white or yellow light. Blue or green lights can get you pulled over.
Always check your local laws.
LED Headlight Quick Check
Before You Buy:
- Confirm your car’s bulb type (H4, H7, H11, etc.).
- Check headlight housing space for fan/driver size.
- Verify legality of LED color in your state.
After Installation:
- Test low and high beams.
- Check for any dashboard warning lights.
- Aim headlights to avoid blinding others.
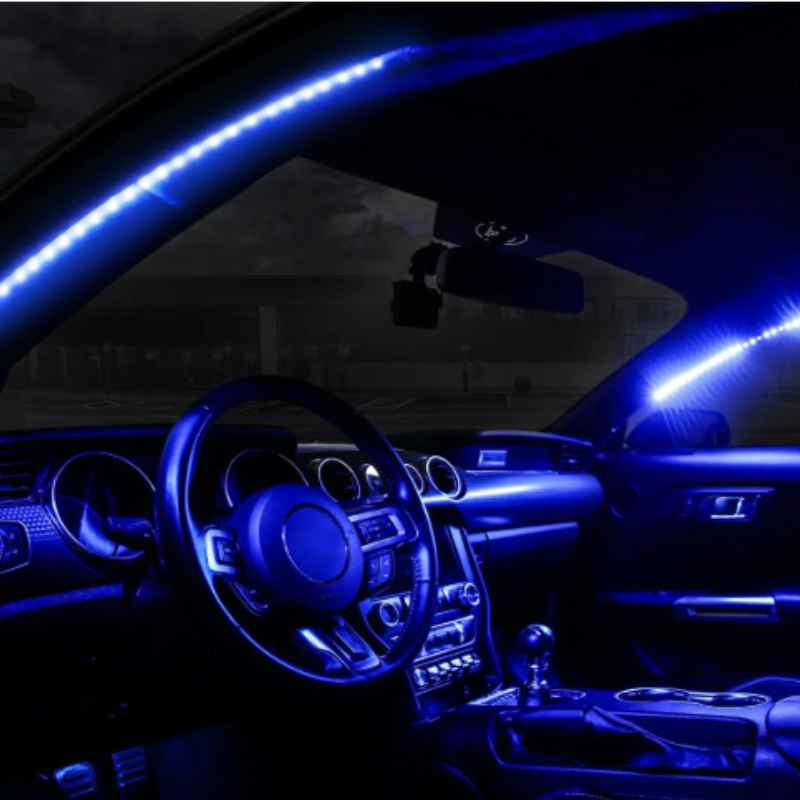
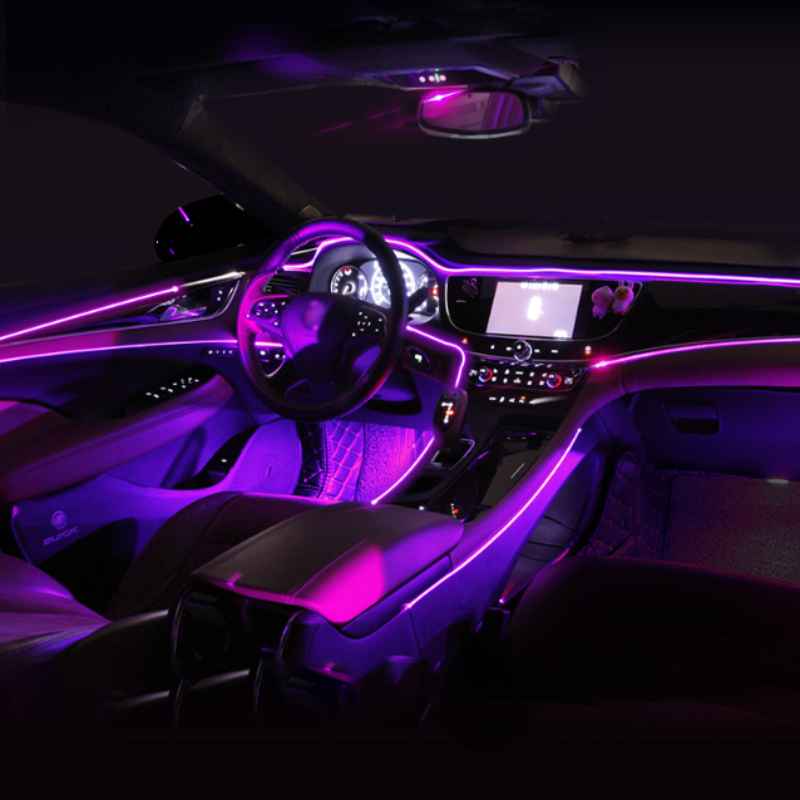
Installing LED Strip Lights (Underglow, Accent)
LED strip lights are very versatile. You can use them for underglow, accent lighting inside, or even for trunk lighting. They come in flexible strips.
This makes them easy to shape around curves.
First, plan your layout. Where do you want the strips? For underglow, you’ll want them along the bottom edges of your car.
For accent lighting, think about the interior door panels, dashboard trim, or under the seats. Measure the length needed for each section.
Clean the surface where the strip will stick. For underglow, this might be the car’s frame or plastic trim. For interior lights, clean the plastic panels.
Most LED strips have strong adhesive tape on the back. Peel off the backing paper carefully. Press the strip firmly onto the surface.
Hold it for a few seconds to ensure it sticks well.
Now, you need to connect the power. For underglow, you’ll want the lights to turn on with your parking lights or headlights. You can often tap into the wiring for your license plate lights.
This is usually located at the back of the car. For interior accent lights, you can use the same methods as described for footwell lights (fuse tap, 12V outlet).
You might need to drill small holes. This is for running wires through panels or the car’s body. If drilling, use a small bit.
Go slowly. Protect the area with painter’s tape before drilling. This prevents the drill bit from slipping.
Use grommets to protect wires going through drilled holes.
Most LED strip kits come with connectors. You might need to splice wires. Use wire strippers and crimpers for secure connections.
Always insulate your connections with electrical tape. For underglow, make sure the wiring is protected from water and road debris. Use flexible conduit if possible.
Test your strip lights. Turn on the power source. See if the lights glow.
If you have a remote or app control, test those features. Make sure all sections are working. Tuck away all wires neatly.
Use zip ties to keep them organized. This prevents them from dragging or getting damaged.
Some people like to add a switch. This gives them manual control over the lights. You can install a small toggle switch in a convenient location.
Wire it into the positive line of your LED strip. This lets you turn them on or off anytime.
Experience Corner: I remember installing underglow on my old truck. I thought I could just tape the wires up under the frame. Big mistake.
After a few rainy drives, parts of the strip stopped working. Water got in. I had to redo it, this time using proper waterproof connectors and sealing everything with silicone sealant.
Lesson learned: weatherproofing is key for exterior LEDs!
Underglow Installation Tips
- Plan Layout: Map out where strips will go.
- Surface Prep: Clean all mounting areas well.
- Adhesive: Press strips firmly for good adhesion.
- Power Source: Tap into license plate lights or parking lights.
- Wire Protection: Use conduit or protective wraps for exterior wiring.
- Waterproofing: Use waterproof connectors and seal all connections.
- Testing: Test before securing all wiring.
Real-World Context: Why LEDs are Better
When we talk about car lights, LEDs stand out. They’ve changed how cars look and how we see at night. Old bulbs, like halogen ones, get hot.
They use a lot of energy. This can even affect your car’s battery. LEDs are the opposite.
They are cool to the touch. They sip power.
In the U.S., car manufacturers are using more LEDs. You see them in headlights, taillights, and even interior lighting. This is because they last longer.
Think about it: your car’s headlights are on a lot. If you have bulbs that last only a year or two, you’ll be replacing them often. LEDs can last for many years.
Some even outlast the car itself!
The light quality is also a big deal. Halogen headlights have a yellowish tint. LEDs produce a whiter, cleaner light.
This makes road signs and markings clearer. It helps you see better in fog or rain. This is a major safety boost.
More visibility means fewer accidents. The National Highway Traffic Safety Administration (NHTSA) recognizes the safety benefits of better lighting.
Consider the design possibilities too. The small size of LEDs means designers can be creative. They can make slim light strips for cool daytime running lights.
They can create intricate patterns for taillights. This adds a modern, stylish look to vehicles. It’s one reason why many new cars have such distinctive lighting signatures.
For car owners, switching to LEDs is often seen as an upgrade. It makes the car look newer. It improves visibility.
And it can save money on bulb replacements over time. Even though the initial cost of LEDs can be higher, their long lifespan makes them a smart investment. The energy savings are a nice bonus too.
Less drain on your alternator means the engine works a bit easier.
LED vs. Halogen: The Key Differences
LEDs:
- Energy Use: Very low
- Lifespan: Very long (50,000+ hours)
- Heat: Low heat emission
- Light Quality: Bright, clear white light
- Durability: Solid-state, less prone to vibration damage
Halogen:
- Energy Use: High
- Lifespan: Shorter (1,000-2,000 hours)
- Heat: High heat emission
- Light Quality: Yellowish tint
- Durability: Filament-based, can break easily
What This Means for Your Car
So, what does installing these LEDs mean for you and your car? Well, for starters, it means better visibility. Brighter headlights mean you can see the road better at night.
This is especially true on dark country roads or during bad weather. It can make driving feel safer and less stressful.
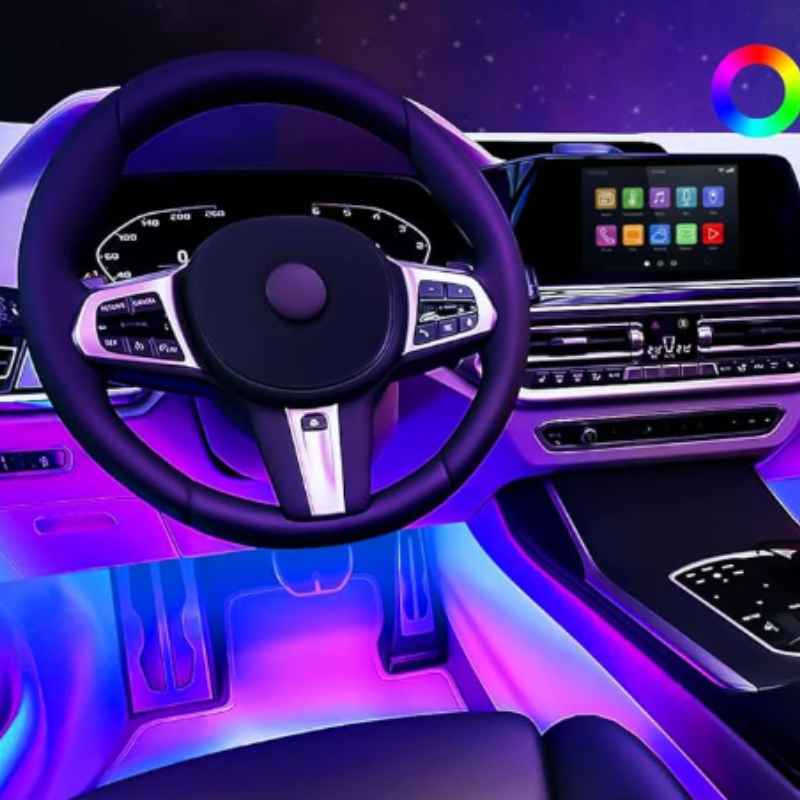
Interior LEDs can change the feel of your car. They can make it more comfortable. Finding things in your bag or on the floor becomes easier.
Mood lighting can make long drives more enjoyable. It’s like adding a personal touch to your space. Many people find it makes their car feel more premium.
When is it normal to have issues? Sometimes, new LEDs can cause problems. Cars have complex computer systems.
Sometimes, a new LED light might confuse the system. This can lead to a “bulb out” warning light on your dashboard. This is especially common with LED headlights.
Many LED kits include “CAN bus decoders” or “resistors” to prevent this. These trick the car’s computer into thinking a normal bulb is still there.
Another thing to watch for is heat. While LEDs produce less heat than old bulbs, their drivers and internal components can still get warm. Make sure there’s good airflow around them.
Don’t cover them up. For headlights, ensure the cooling fans can spin freely.
When should you worry? If your lights flicker constantly, there might be a bad connection. Or the LED itself could be faulty.
If you smell burning plastic, turn off the lights immediately. This could mean a short circuit. You should also check local laws.
Using illegal lighting could lead to fines.
Here’s a simple check: After installing new lights, drive your car at night. Pay attention to how well you can see. Ask a friend to check your headlights from across the street.
Are they aimed correctly? Are they too bright for oncoming traffic? Small adjustments can make a big difference.
My Experience: I once put some bright blue LEDs in my interior dome light. It looked cool for about a week. Then, every time I started the car, the dome light would flash a few times.
My car’s computer was getting confused. I had to remove them and put in a standard bulb. It taught me that not all “upgrades” work smoothly.
It’s always good to research your specific car model.
LED Installation: What to Watch For
- Dashboard Warnings: Use CAN bus decoders if your car shows “bulb out” errors.
- Flickering Lights: Check connections or try a different LED bulb.
- Overheating: Ensure good airflow and don’t cover LED components.
- Smell of Burning: Disconnect power immediately; check for shorts.
- Legal Compliance: Ensure your chosen lights are legal in your state.
Quick Fixes and Tips for LED Upgrades
Here are some quick tips to make your LED installation go smoother. Think of these as little helpers. They can save you time and frustration.
- Read the Manual: This might sound obvious, but always read the instructions for your specific LED kit.
- Start Simple: If you’re new to this, begin with interior lights. They are generally easier.
- Battery Disconnect: Always disconnect the negative battery terminal before working on electrical components.
- Test First: Before you secure everything, test the lights. Make sure they work.
- Tidy Wiring: Use zip ties and electrical tape to keep wires neat and safe. This prevents damage and looks professional.
- Waterproofing: For exterior lights, ensure all connections are waterproof. Use silicone sealant or waterproof connectors.
- Quality Matters: Invest in good quality LEDs from reputable brands. They will last longer and perform better.
- Patience: Don’t rush the job. Take your time. Double-check your work.
If you’re installing headlights, aim them correctly. This is super important for safety. Most headlights can be adjusted up or down.
You might need a Phillips head screwdriver or a small socket wrench. Look for adjustment screws on the back of the headlight assembly. Aim them so the beam hits the road about 50-100 feet ahead.
Don’t point them too high.
For interior lights, consider dimmers. Some LED strips can be dimmed. This gives you more control over the light intensity.
It’s great for creating a relaxing atmosphere. You can also find LED bulbs that come in different brightness levels.
If you encounter a warning light on your dashboard, don’t panic. It’s often because the car’s computer sees the new LED as a fault. A resistor or CAN bus decoder usually fixes this.
These are small devices that add a bit of resistance to the circuit. Your LED kit might come with them. If not, you can buy them online.
Always ensure your connections are solid. Loose wires can cause flickering. They can also lead to intermittent power.
A good crimp connection is better than just twisting wires together. Electrical tape should be used to insulate, not to hold wires together.
Common LED Upgrade Pitfalls & Fixes
Problem: Dashboard warning light (e.g., “bulb out”).
Fix: Install a CAN bus decoder or resistor.
Problem: Lights flicker or don’t turn on.
Fix: Check all wire connections. Ensure they are secure and insulated.
Problem: Headlights blind other drivers.
Fix: Properly aim your headlights. Check your car’s manual for aiming procedures.
Problem: Exterior lights damaged by water.
Fix: Use waterproof connectors and seal all connections with silicone sealant.
Frequently Asked Questions About Car LED Lights
Are LED headlights legal in all U.S. states?
Legality varies by state. Most states allow white or yellow LED headlights. Blue or overly bright lights can be illegal.
Always check your local Department of Motor Vehicles (DMV) or state laws before installation.
Do LED lights use less battery power?
Yes, LEDs are much more energy-efficient than traditional halogen bulbs. They draw significantly less power, which is easier on your car’s battery and alternator.
Can I install LED lights myself?
Yes, many LED installations, especially interior lights, are beginner-friendly. Headlight installations can be more complex and may require some mechanical skill. Always follow instructions and prioritize safety.
What does a CAN bus decoder do for LED headlights?
Cars with CAN bus systems monitor the electrical load of bulbs. LEDs use less power, so the car’s computer may think a bulb is out. A CAN bus decoder simulates the load of a traditional bulb, preventing dashboard warning lights.
How long do car LED lights typically last?
High-quality automotive LEDs can last for 50,000 hours or more. This is significantly longer than standard halogen bulbs, which often last only 1,000-2,000 hours.
My new LED lights are causing dashboard errors. What should I do?
This is common. You likely need to install a CAN bus decoder or a load resistor. These devices trick your car’s computer into thinking a standard bulb is still installed.
Ensure you buy the correct type for your vehicle.
Can I mix LED and regular bulbs in my car?
It’s generally not recommended. Mixing bulb types, especially in headlights or taillights, can create uneven lighting and may not be legal. For safety and consistency, it’s best to use the same type of bulb for a specific function.
Conclusion
Upgrading your car with LED lights is a fantastic way to improve its look and function. You can make night driving safer with brighter headlights. You can also add cool ambiance with interior lighting.
Remember to choose quality products. Always prioritize safety by disconnecting your battery. Take your time, follow the steps, and don’t be afraid to ask for help.
Your car will look and feel great!