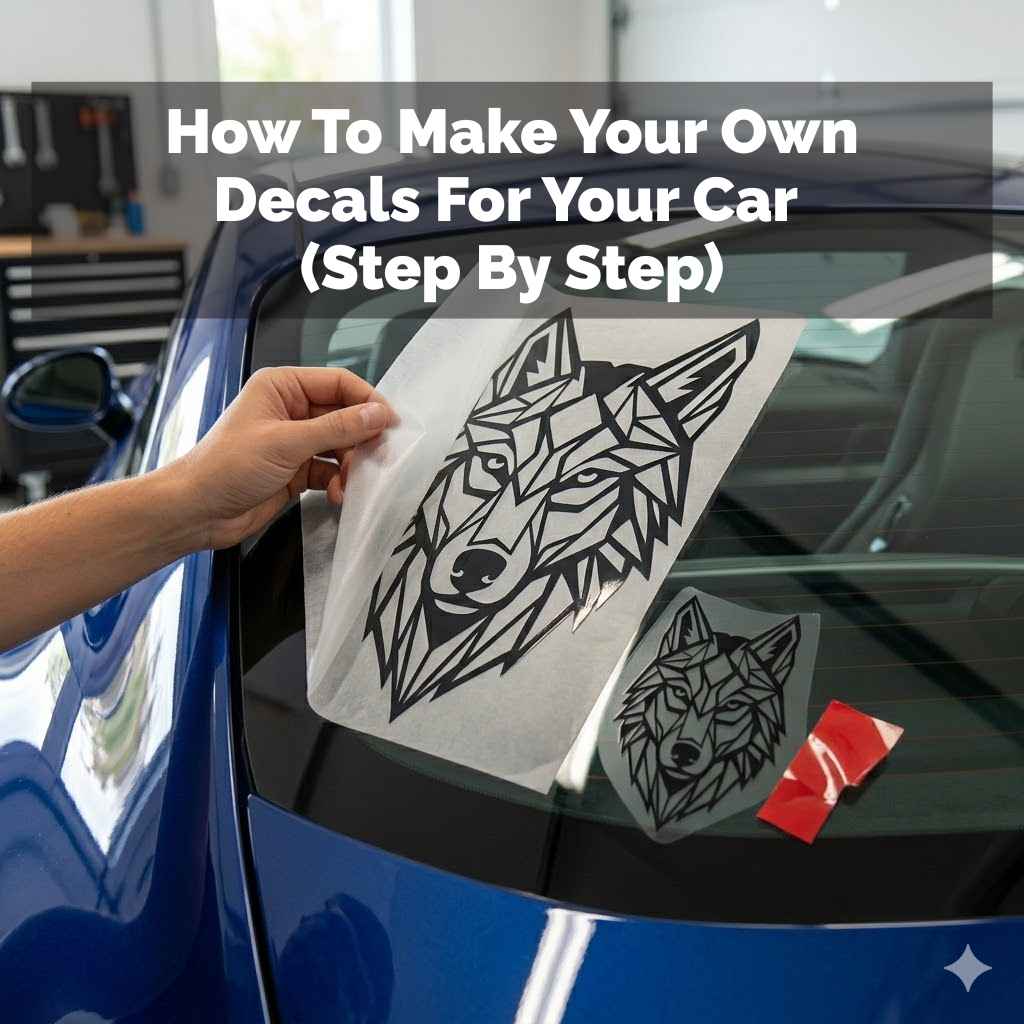
How To Make Your Own Decals For Your Car (Step By Step)
It can feel so frustrating when you have a cool idea for your car. You want it to stand out, to show off your personality or a message you care about. But finding the perfect decal is tough. You see what you like, but it’s too expensive, or not quite right. Or maybe you’ve searched everywhere and just can’t find what you’re dreaming of. That’s where making your own car decals comes in. It might sound tricky, but it’s totally doable. We’ll walk through it, step by step, so you can get that custom look you want.
Making your own car decals is a great way to personalize your vehicle with custom designs. This guide explains the tools, materials, and process needed to create durable vinyl decals at home, offering a cost-effective and creative solution for car enthusiasts.
Understanding Custom Car Decals
Car decals, often called stickers, are graphics made from vinyl. They stick to your car’s surface. Think of them as cool art for your ride.
People use them for all sorts of reasons. Some show off a hobby, like surfing or gaming. Others share a funny quote or a band they love.
Some use them for business logos or team names. They can be simple words or detailed pictures.
The magic is in the vinyl. It’s tough and made to last outside. It can handle sun, rain, and even car washes.
Good vinyl doesn’t fade easily. It also peels off cleanly when you want to change things up. This means you can get creative without worrying about damaging your car’s paint.
It’s a fun way to make your car truly yours.
Why go through the trouble of making your own? For starters, it’s way cheaper than ordering custom ones. You also have total control over the design.
If you can imagine it, you can probably make it. Plus, there’s a real sense of pride in putting something on your car that you made with your own hands. It’s a project that lets you express yourself.
My First Decal Disaster (and What I Learned)
I remember my first attempt. It was years ago. I wanted a simple outline of a mountain range for my old truck.
I had this image in my head, clear as day. I tried to cut it out by hand with an exacto knife. Let me tell you, it was a mess.
The lines were wobbly. I cut too deep in places. And getting the tiny peaks to peel off the backing without tearing?
Forget it. It looked… sad.
I ended up with a lopsided, ripped sticker that I couldn’t even apply without bubbles. It was sticky and frustrating. I felt like giving up.
But the mountain idea stuck with me. I realized I needed better tools and a better plan. That experience taught me that while the idea is simple, the execution needs precision.
It pushed me to learn about cutting machines and transfer tape. It was a humbling, but necessary, first step.
Gathering Your Decal-Making Supplies
To make your own decals, you’ll need a few key things. Don’t worry, most of them aren’t too expensive. Think of it as an investment in your car’s cool factor.
Essential Tools for Decal Making
Vinyl Cutting Machine: This is the most important tool. Machines like Cricut or Silhouette are popular. They connect to your computer.
You design your decal on software. Then, the machine cuts it out precisely from vinyl sheets.
Cutting Mat: This mat holds your vinyl steady while the machine cuts. It has a sticky surface. This keeps the vinyl from moving.
Weeding Tools: These are small, sharp tools. They help you remove the extra vinyl around your design. Think of a fine-tip hook or tweezers.
Transfer Tape: This is a clear, sticky tape. It lifts your cut vinyl design. It lets you move it to your car’s surface easily.
You also need the actual vinyl. This is what your decal is made from. There are different kinds.
For cars, you want outdoor-grade vinyl. It’s made to be tough.
Choosing Your Vinyl
Outdoor Vinyl: This is a must for cars. It stands up to sun, rain, and temperature changes. Brands like Oracal and Cricut make good outdoor vinyl.
Colors and Finishes: Vinyl comes in almost any color you can imagine. You can get shiny, matte, metallic, or even glitter finishes. Think about what look you want for your car.
Specialty Vinyl: There’s reflective vinyl that glows at night. There’s also printable vinyl if you want to add full-color graphics. But for most custom designs, standard colored outdoor vinyl is best.
Finally, you’ll need your computer and design software. Most cutting machines come with their own easy-to-use software. You can also use other graphic design programs.
Designing Your Perfect Decal
This is where your creativity shines. The design software for your cutting machine is usually pretty simple. You can draw your own shapes or use text.
You can also find free or paid designs online.
When you’re designing, keep a few things in mind. First, think about the size. Measure the space on your car where you want the decal.
You don’t want it too big or too small. Second, consider the complexity. Very fine details can be hard for the cutting machine.
They can also be hard to weed and apply. Simple shapes and bold lines often work best for beginners.
For example, if you want text, choose a font that’s easy to read. Very thin or scripty fonts can be difficult to cut and weed properly. If you’re doing a graphic, make sure all the parts connect or are cut as a single piece.
The software will let you see exactly how the machine will cut it.
Design Tips for Beginners
Start Simple: Begin with basic shapes or text. As you get more practice, try more complex designs.
Check Dimensions: Always measure your car space and set your design size accurately in the software.
One Piece Designs: For easier application, try to design your decal so it can be cut as one connected piece. This avoids having to line up many small parts.
Preview Your Cut: Use the software’s preview function to see how the machine will cut your design. This helps catch any potential issues.
I often sketch my ideas on paper first. This helps me visualize the shapes. Then I translate those ideas into the digital design software.
It’s a good way to make sure the design translates well from your head to the screen.
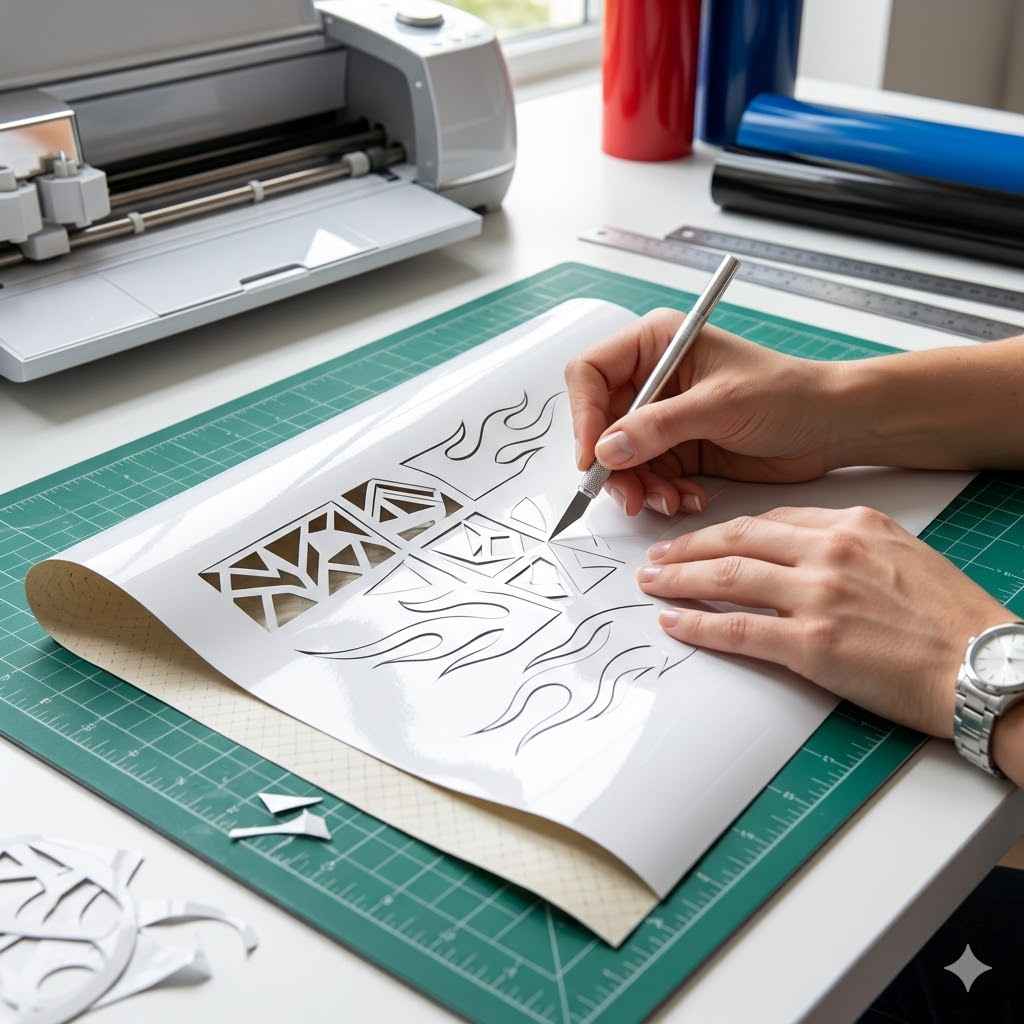
Step-by-Step: Cutting Your Vinyl Decal
Once your design is ready, it’s time to cut! This part is where the machine does the hard work. It’s pretty straightforward once you get the hang of it.
First, load your vinyl onto the cutting mat. Make sure the colored side is facing up. The cutting machine cuts from the top.
Place it carefully so it’s straight on the mat. Then, load the mat into your cutting machine. Follow your machine’s instructions for this part.
Some machines have sensors that help align it.
Next, send your design to the machine from the software. Double-check your cut settings. The software will suggest settings based on the type of vinyl you’re using.
It’s often a dial or a setting in the program. You want the blade to cut through the vinyl but not the backing paper. A test cut is always a good idea if you’re unsure.
The machine will then start cutting. You’ll hear it humming as the blade moves precisely across the vinyl. Watch for a minute to make sure it’s cutting correctly.
Once it’s done, carefully unload the mat from the machine.
Cutting Machine Basics
Load Vinyl: Place the vinyl color-side up on a sticky cutting mat.
Load Mat: Feed the mat into your cutting machine.
Set Blade: Choose the correct blade and material setting in your software.
Send to Cut: Confirm your design and send it to the machine.
Unload Mat: Carefully remove the mat once cutting is complete.
After cutting, you’ll have your design sitting on the vinyl sheet. It looks like a stencil at this point. The machine cuts the shape out, leaving the excess vinyl around it.
The Art of Weeding Your Decal
This is the step that requires patience. Weeding is the process of removing all the excess vinyl that you don’t want in your final decal. So, if you cut a letter ‘A’, you need to remove the vinyl inside the ‘A’ and the vinyl around the ‘A’.
Grab your weeding tools. Start from a corner and gently peel away the large unwanted pieces of vinyl. Then, use the sharp hook tool to pick out the smaller pieces.
This includes the insides of letters like ‘O’, ‘P’, ‘R’, or any other enclosed shapes in your design. Take your time. Rushing this step can lead to tearing your design.
When you’re done weeding, you should only see your design left on the paper backing. It will look like your design is floating on the backing paper. This is exactly what you want.
If you see any unwanted vinyl bits left, carefully remove them with your weeding tool.
Weeding Workflow
Remove Large Pieces: Start by peeling away the vinyl around your design.
Pick Out Insides: Use a hook tool to remove vinyl from inside letters and shapes.
Check Carefully: Ensure all unwanted vinyl is gone.
Smooth Edges: Make sure the edges of your design are clean.
I’ve found that good lighting makes a huge difference during weeding. A bright lamp or even natural daylight helps you see those tiny pieces of vinyl you need to remove. Also, try to keep your weeding tool at a shallow angle to the vinyl.
This helps prevent you from accidentally scratching or lifting your actual design.
Applying Transfer Tape to Your Decal
Now that your design is perfectly weeded, it’s time to use transfer tape. This tape is sticky. It will lift your design off the paper backing.
It then lets you place it onto your car’s surface smoothly.
Cut a piece of transfer tape slightly larger than your weeded decal. Peel the backing off the transfer tape. Carefully lay it over your decal.
Start from the center and smooth it outwards. You want to make sure there are no air bubbles trapped between the transfer tape and your vinyl design. Use a squeegee or a credit card to press it down firmly.
This helps the vinyl stick to the transfer tape.
Once the transfer tape is smooth and stuck to your vinyl, you’ll flip the whole thing over. The paper backing of your decal should now be on top. Slowly peel the paper backing away from the vinyl.
The vinyl should stick to the transfer tape. If any part of your vinyl doesn’t stick to the transfer tape, lay the paper backing back down. Press over that spot again with your squeegee.
Then try peeling the backing again.
Transfer Tape Tips
Size Appropriately: Cut transfer tape large enough to cover your entire design.
Smooth Firmly: Use a squeegee to ensure good adhesion between vinyl and tape.
Peel Backing Slowly: Gently remove the paper backing while keeping the design on the tape.
Address Sticking Issues: If vinyl stays on the backing, re-press and try again.
This step is critical for a clean application. If the vinyl doesn’t transfer to the tape, you’ll struggle to get it onto your car later. I learned this the hard way with a very intricate design that just wouldn’t cooperate because I hadn’t pressed the tape down well enough.
Preparing Your Car’s Surface
Before you put your new decal on, you need to clean the spot on your car. This is super important for the decal to stick properly. Dirt, dust, wax, or grease will make your decal fall off or bubble up.
Use a good car wash soap and water. Clean the area where the decal will go. Then, rinse it well.
After rinsing, dry the area completely with a clean microfiber cloth. Make sure there are no water spots or lint left behind.
For an even better clean, you can use an isopropyl alcohol solution (about 70%). Wipe down the spot again with this. Alcohol helps remove any oily residue.
This ensures the vinyl has a perfectly clean surface to adhere to. Don’t use harsh cleaners or abrasive pads, as they can scratch your paint.
Surface Prep Checklist
Wash Thoroughly: Use car soap and water.
Rinse Well: Remove all soap residue.
Dry Completely: Use a clean microfiber towel.
Wipe with Alcohol: For a final clean and to remove grease.
Avoid Contaminants: Keep the area free of dust and wax.
Think about the weather, too. It’s best to apply decals on a calm, dry day. Avoid direct hot sun, as it can make the vinyl sticky and hard to work with.
Also, avoid applying in very cold weather, as the vinyl might not stick well. A mild temperature is ideal.
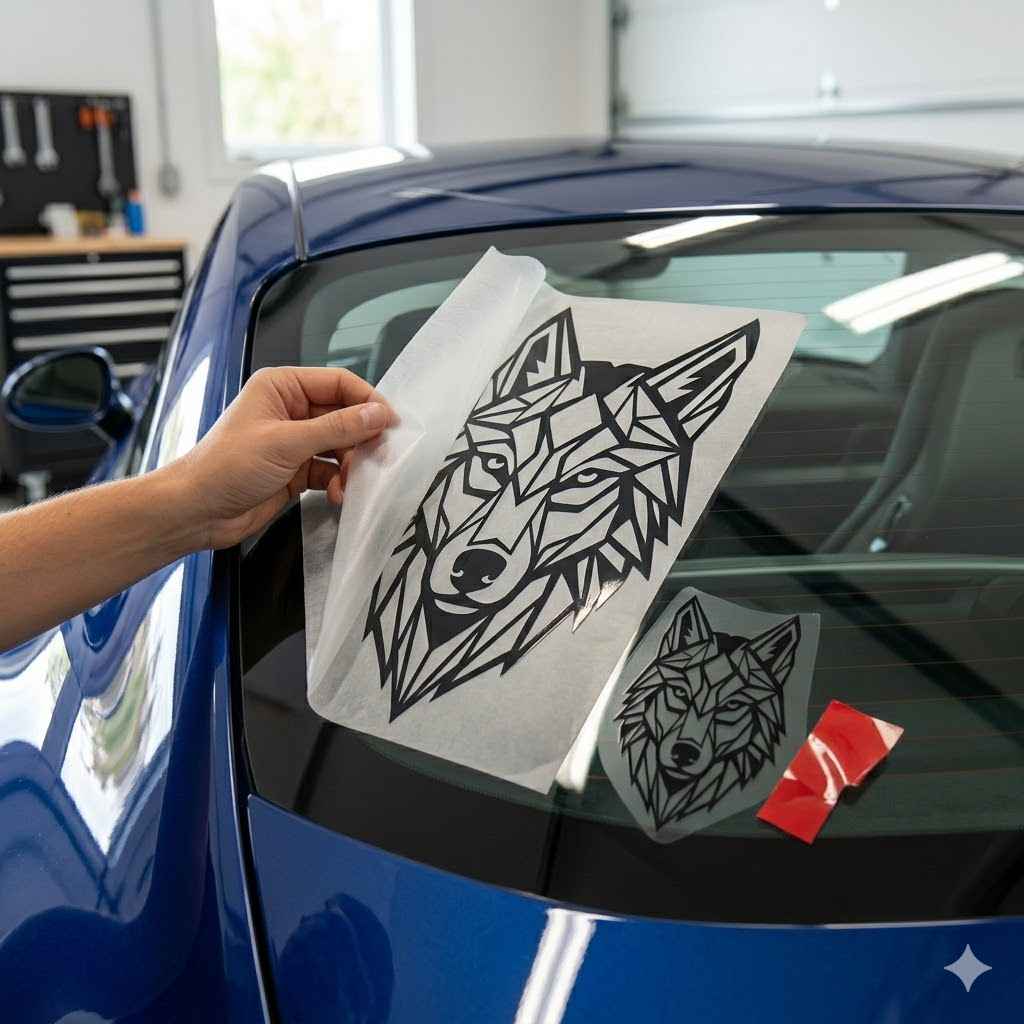
Applying Your Car Decal
You’ve designed, cut, weeded, and prepped. Now for the final act: putting the decal on your car!
Hold your decal (with the transfer tape still on) up to your car. Position it exactly where you want it. You can use painter’s tape to hold one edge in place.
This acts as a hinge. Then, you can lift it up to check the position.
Once you’re happy with the placement, start applying the decal. If you used the hinge method, peel the paper backing away from the opposite edge. Slowly press the vinyl onto the car’s surface.
Work from the hinged side outwards. Use a squeegee or credit card to smooth down the vinyl as you go. This pushes out air bubbles and ensures good adhesion.
Keep smoothing the vinyl onto the car. Once the entire decal is down, rub over it firmly with the squeegee. This makes sure every part of the vinyl is stuck to the car.
Pay extra attention to the edges.
After you’ve smoothed it down well, it’s time to remove the transfer tape. Start at a corner. Slowly peel the transfer tape away from the car.
It should come off at a sharp angle. The vinyl decal should stay perfectly in place on your car. If a part of the vinyl starts to lift with the tape, stop.
Lay the tape back down and rub over that spot again. Then try peeling the tape away slowly. Patience here is key.
Application Steps
Position: Place the decal on the car to confirm placement.
Apply with Hinge: Use tape for a hinge, then apply from one side to the other.
Squeegee Down: Smooth the vinyl firmly to remove air and ensure adhesion.
Remove Transfer Tape: Peel the tape away slowly at a sharp angle.
Final Check: Ensure all edges are adhered and no bubbles remain.
For larger decals, sometimes it helps to wet the surface very lightly with a spray bottle of water and a tiny drop of soap. This allows you to reposition the decal easily. Then, you squeegee out the water from the center outwards.
However, for most standard car vinyl, dry application is usually best. Check your vinyl manufacturer’s instructions for specific advice.
Dealing with Bubbles and Imperfections
Even with careful application, you might get a small bubble or two. Don’t panic! There are ways to fix them.
For tiny bubbles, you can often use a fine needle or a weeding tool. Gently poke a small hole in the center of the bubble. Then, use your squeegee or finger to press the air out through the hole.
Smooth it down flat.
Larger bubbles might need a bit more work. Sometimes, gently lifting the edge of the decal near the bubble and re-squeegeeing can help. If the bubble is stubborn and you can’t fix it, you might have to live with it, or even replace that part of the decal.
Bubble Fixes
Tiny Bubbles: Use a needle to poke a small hole and squeegee out air.
Larger Bubbles: Try lifting the edge and re-squeegeeing.
Stubborn Bubbles: Sometimes, they are unavoidable. For very minor ones, they might not be noticeable from a distance.
It’s also worth noting that many outdoor vinyls are designed to release air. Some have tiny channels to help with this. So, sometimes small imperfections might disappear on their own over a day or two as the vinyl settles.
Maintaining Your Custom Car Decals
Your custom decals can last a long time with a little care. Outdoor vinyl is built tough, but it’s not invincible.
When you wash your car, be gentle around the decals. Use a soft cloth or sponge. Avoid harsh brushes or high-pressure washers aimed directly at the edges of the decal.
These can lift the vinyl.
You can use mild car soap. Avoid abrasive cleaners or solvents. These can break down the vinyl or its adhesive.
If you’re going through a car wash, opt for the touchless ones if possible.
Waxing around your decals is generally fine. Just don’t try to wax over the decal itself. This can create a cloudy effect or affect the finish.
Decal Care Tips
Gentle Washing: Use soft cloths and mild soap.
Avoid Pressure Washers: Do not aim directly at decal edges.
Skip Harsh Cleaners: Stick to car wash soap.
Careful Waxing: Wax around, not over, the decal.
If you ever need to remove the decal, heat is your best friend. A hairdryer on a low to medium setting can warm up the vinyl. This softens the adhesive.
Then, you can slowly and carefully peel the decal away. You might need to use a plastic scraper or goo remover to get any leftover adhesive residue off your car.
When Is It Time to Worry?
Most of the time, your custom decals will look great and cause no issues. However, there are a few signs that might indicate a problem.
Fading is normal over time, especially with heavy sun exposure. But if your decal starts to peel, bubble excessively, crack, or show signs of the color lifting too quickly, that’s a concern. It might mean the vinyl wasn’t outdoor-grade, or it wasn’t applied properly.
Also, be aware of any signs that the decal is damaging your car’s paint. This is rare with good quality vinyl and proper application. But if you see paint discoloration or lifting around the edges, that’s a serious issue.
This could happen if the paint was poorly prepped before painting. Or if the adhesive on the vinyl is too strong for the paint. In these cases, removal and professional inspection might be needed.
Signs of Trouble
Peeling or Bubbling: Especially if it happens soon after application.
Cracking or Fading Too Fast: Indicates low-quality or incompatible vinyl.
Paint Damage: Look for discoloration or lifting paint near the decal edges.
Adhesive Residue: While common during removal, excessive residue might be a flag.
The best way to avoid these problems is to use high-quality outdoor vinyl and follow the application steps carefully. Always test a small piece of vinyl if you’re unsure about its effect on your car’s surface, though this is rarely an issue with reputable brands.
Alternatives and Advanced Techniques
While vinyl cutting is the most common way to make car decals, there are other options. If you want full-color graphics, you can use printable vinyl with an inkjet or laser printer. You’ll need a printer that can handle the vinyl sheets.
Then, you cut the printed design with your machine. These often need a clear laminate over them for extra protection.
For a more permanent look, some people consider custom paint jobs or airbrushing. These are much more involved and expensive. They also require professional skills.
Another option is plasti-dip, which is a spray-on rubber coating. You can spray patterns or shapes this way.
If you get really into decal making, you might explore more advanced vinyl types. There’s carbon fiber wrap vinyl, chrome finishes, and even glow-in-the-dark options. These can add unique touches to your car.
The process for applying these is usually similar, but some require specific techniques or heat guns for proper adhesion and shaping.
Beyond Basic Vinyl
Printable Vinyl: For full-color graphics using your printer.
Specialty Finishes: Explore chrome, carbon fiber, reflective, and glitter vinyls.
Laminates: Use clear overlays for added protection on printed decals.
Paint vs. Vinyl: Understand that custom paint is permanent and costly.
I once saw a car with a beautiful, intricate dragon design that looked like it was painted on. I later learned it was actually made from multiple layers of expertly cut and applied vinyl. It showed me the potential for complex designs with the right skill and patience.
Frequently Asked Questions About Making Car Decals
Can I make car decals without a cutting machine?
It is very difficult to achieve professional results without a vinyl cutting machine. While you could technically try to cut designs by hand with a craft knife, achieving clean lines and intricate shapes is extremely challenging. A machine ensures precise cuts that are essential for a good-looking decal and for the vinyl to adhere correctly.
How long do homemade car decals typically last?
With good quality outdoor vinyl and proper application, homemade car decals can last anywhere from 3 to 7 years, or even longer. Factors like sun exposure, climate, car washes, and general wear and tear will affect their lifespan. High-quality vinyl will resist fading and peeling better than cheaper alternatives.
Will vinyl decals damage my car’s paint?
When applied and removed correctly, high-quality vinyl decals should not damage your car’s paint. Manufacturers design them to adhere securely but also to be removable without residue or paint damage. However, older paint jobs, poorly maintained paint, or very cheap vinyl could potentially cause issues.
Always clean the surface thoroughly before application and use heat to aid removal.
What’s the difference between permanent and removable vinyl for cars?
For car decals, you absolutely want to use permanent outdoor-grade vinyl. Removable vinyl is designed for temporary applications on indoor surfaces and will not withstand the elements or washing cycles required for a vehicle. Permanent vinyl has a stronger adhesive that is necessary for long-term outdoor use.
Can I put decals on car windows?
Yes, you can put decals on car windows. For windows, you can use the same vinyl you use for the body. When applying to windows, remember that the decal will be visible from both sides.
If you want it to appear correctly from the outside, you’ll need to mirror your design in the software before cutting.
How do I remove old car decals?
The best way to remove old car decals is by using heat. A hairdryer or a heat gun on a low setting can warm up the vinyl and soften the adhesive. Once warm, you can start to peel the decal away slowly, ideally at a sharp angle.
For any remaining sticky residue, a product like Goo Gone or isopropyl alcohol can help clean it up. Be patient and avoid scraping with sharp objects that could scratch the paint.
Final Thoughts on Your Custom Creations
Making your own car decals is a rewarding process. It lets you put your personal stamp on your vehicle. From simple text to complex graphics, the possibilities are endless.
With the right tools and a bit of patience, you can create designs that truly stand out. Enjoy the process and the unique look you’ll give your car!