Why Does My Car Horn Sound Weak: Essential Fixes
A weak car horn often signals a simple electrical issue. Common culprits include a loose connection, a dying horn fuse, a failing horn relay, or a weak horn button. These are usually easy fixes you can tackle yourself with basic tools, boosting your car’s safety and your confidence.
Has your car’s honk gone from a confident bellow to a pathetic squeak? It’s frustrating, and more importantly, it can be a safety concern. You rely on your horn to alert others, and a weak sound might not be heard when you need it most. The good news is, a faint horn is usually not a sign of a major problem. Often, it’s a simple fix that you can handle right at home. Let’s dive into why your car horn might be sounding weak and how you can get it singing loud again.
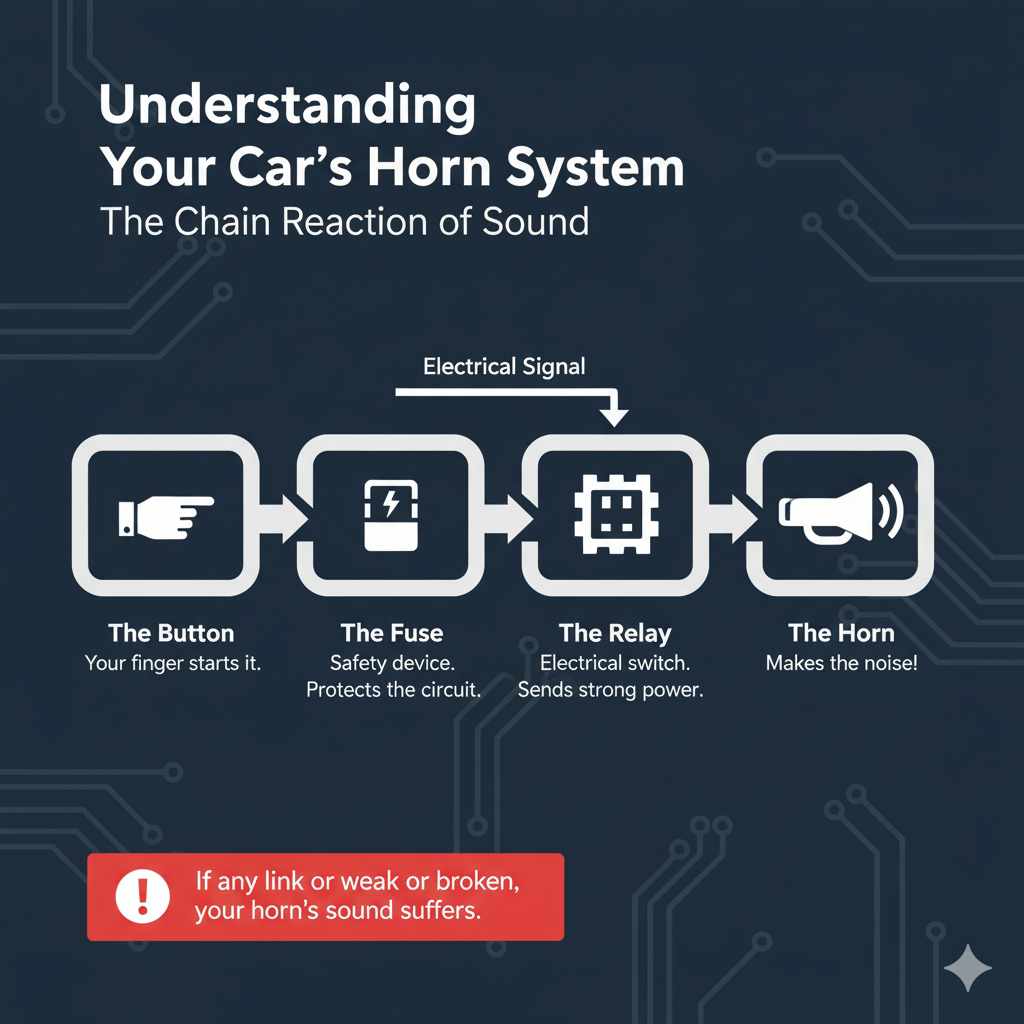
Understanding Your Car’s Horn System
Before we start troubleshooting, it’s helpful to know how your car horn works. It’s a surprisingly straightforward electrical system. When you press the horn button, you complete an electrical circuit. This circuit activates a relay, which then sends a strong current to the horn itself. The horn is essentially a small electric motor that vibrates a metal diaphragm, creating that familiar sound.
Think of it like a chain reaction:
- The Button: Your finger presses it, and it initiates the process.
- The Fuse: A safety device that blows if too much electricity flows, protecting other parts.
- The Relay: A kind of electrical switch that uses the small current from the button to control a much larger current going to the horn.
- The Horn: The part that makes the noise.
If any link in this chain is weak or broken, your horn’s sound will suffer.
Common Reasons for a Weak Car Horn
A weak horn usually points to an issue with the electrical supply or the horn component itself. It’s rarely a mechanical problem with the engine or transmission. Here are the most common reasons:
1. Loose or Corroded Electrical Connections
This is the most frequent offender. Electrical current needs a clean, solid path to flow. Over time, wires can become loose, or corrosion can build up on terminals, creating resistance. This resistance chokes the flow of electricity, making the horn sound weak and breathless.
Where to Look:
- Horn Button Connections: Inside your steering wheel, the contacts that connect to the horn circuit can get dirty or corroded.
- Relay Terminals: The electrical connectors going into the horn relay can loosen or corrode.
- Horn Terminals: The wires connecting to the actual horn unit under the hood are prime spots for corrosion, especially if the horn is exposed to moisture.
Why it matters for beginners: This is a great starting point because it often requires minimal tools and is relatively easy to access on many vehicles.
2. Blown Fuse
The horn circuit has a fuse to protect it from electrical surges. If this fuse blows, the horn won’t work at all, or it might sound very weak if the connection is only partially compromised due to the faulty fuse. Sometimes, a fuse might be partially deteriorated rather than completely blown, leading to reduced current flow.
What it looks like:
A blown fuse will often have a broken wire inside its plastic casing. You can usually see the break clearly. If it looks intact but you suspect it’s the issue, swapping it with a known good fuse of the same amperage can help diagnose the problem.
The National Highway Traffic Safety Administration (NHTSA) emphasizes the importance of functional safety features like the horn, so ensuring your fuses are in good condition is crucial.
3. Failing Horn Relay
The horn relay acts like a gatekeeper. It uses a small electrical signal to switch on a larger electrical current that powers the horn. If the internal contacts within the relay start to wear out or corrode, they might not be able to pass the full amount of current needed for a strong horn sound.
Symptoms of a failing relay:
- Intermittent horn operation.
- Horn works only sometimes.
- Horn sounds weak.
Relays are relatively inexpensive and often accessible, making them a good suspect.
4. Weak Car Battery
While less common for a weak horn specifically (a dead battery usually means no horn at all), an older or struggling battery might not provide consistent voltage. If the battery is weak, the entire electrical system can be affected, including the horn. This is especially true if you notice other electrical quirks in your car.
How to check your battery:
You can use a multimeter to check the battery’s voltage. A fully charged battery should read around 12.6 volts or higher when the engine is off. When the engine is running, it should be around 13.7 to 14.7 volts.
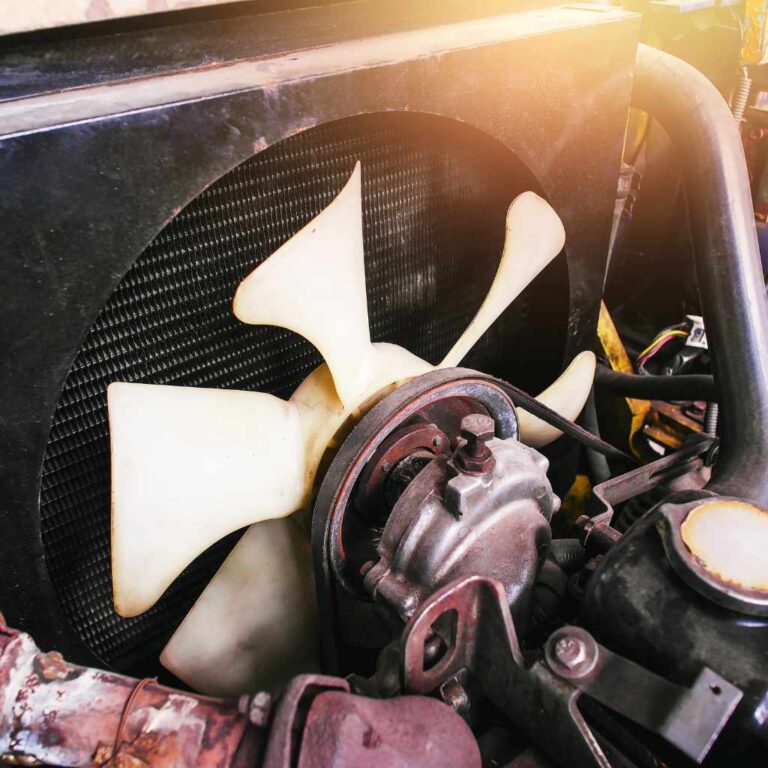
5. Damaged or Failing Horn Unit
The horn itself is an electro-mechanical device. Over time, the internal components can wear out, or the diaphragm can get damaged, especially if it’s exposed to a lot of water or debris under the hood. If the horn unit is damaged, it simply can’t produce a loud sound anymore.
Visual checks:
- Look for physical damage.
- Check for rust or corrosion around the horn unit.
6. Button Issues
The horn button itself can be the problem. The electrical contacts inside the steering wheel that the button activates can become worn, dirty, or misaligned. This prevents a good electrical connection from being made, leading to a weak signal to the relay and subsequently, the horn.
Why it’s often overlooked:
It seems simple, but the button is the first point of contact. If it’s not sending a strong signal, none of the other components can do their job properly.
Troubleshooting Your Weak Car Horn Like a Pro (Beginner Edition!)
Don’t worry! You don’t need to be a master mechanic to figure this out. We’ll go step-by-step. Safety first: always disconnect your car’s battery before working on electrical components. For most cars, this means removing the negative terminal first.
Step 1: Locate Your Horn System Components
You’ll need to find the fuse, relay, and the horn itself. Check your car’s owner’s manual. It usually has diagrams showing where these are located. Generally:
- Fuses: Often in a fuse box under the dashboard or in the engine compartment.
- Relay: Usually found in the same fuse box area as the horn fuse, or in a dedicated relay box under the hood.
- Horn: Most commonly located behind the front grille or bumper. You might need to remove some plastic panels to access it.
Step 2: Check the Horn Fuse
This is the easiest starting point.
- Open your car’s fuse box.
- Refer to your owner’s manual to find the horn fuse. It’s usually labeled with a horn icon or “Horn.”
- Carefully pull out the fuse using a fuse puller (often found in the fuse box or sold separately).
- Inspect the fuse element. If the metal wire inside is broken, the fuse is blown.
- If blown, replace it with a new fuse of the exact same amperage rating. Never use a fuse with a higher rating.
Try the horn. If it works, great! If not, continue to the next step.
Step 3: Inspect and Test the Horn Relay
Testing a relay can be a bit trickier, but checking connections is straightforward.
- Locate the horn relay.
- Check the electrical connector where the relay plugs in. Are the terminals clean and free of corrosion? If corroded, you can clean them with a wire brush or electrical contact cleaner.
- Ensure the relay is firmly seated in its socket.
- Swapping Test (if possible): Many cars use identical relays for non-essential systems (like fog lights or A/C clutch). If you can find an identical relay for a system you don’t use often, carefully swap them. If the horn now works, your old relay was faulty. Replace it with a new one.
- Listen: With the ignition on, have someone press the horn button while you listen near the relay. You might hear a faint click, indicating it’s trying to engage. No click could mean a bad relay or no signal reaching it.
Step 4: Examine the Horn Unit(s) and Wiring
This is where you might need to get your hands a little dirty.
- Access the Horn: Safely jack up your car if needed to get to the horn(s) behind the bumper or grille. Consult your manual for location.
- Visual Inspection: Look for any obvious damage, cracks, or corrosion on the horn unit(s).
- Check Connections: The horn usually has two wires connected to it. Make sure these wires are securely attached and that the terminals are clean. If there’s corrosion (a greenish or whitish powder), disconnect the wires (usually with a small screwdriver or by squeezing a clip) and clean the terminals with contact cleaner or a small wire brush until they are shiny.
- Test Directly (Advanced, but helpful): This requires a bit more caution and ideally someone to help. With the battery disconnected, you can disconnect the horn wires. Then, using jumper wires, briefly connect each terminal of the horn to a 12V source (like the battery terminals, but be careful not to short them). If the horn sounds loud when directly powered, the problem is upstream (relay, fuse, wiring). If it still sounds weak or doesn’t sound, the horn unit is likely bad.
Step 5: Inspect the Horn Button and Clock Spring
This is often the most involved step, as it requires accessing the steering wheel.
- Safety First: Disconnect the battery. Wait at least 10-15 minutes for any residual charge to dissipate, especially if your car has airbags.
- Steering Wheel Cover: You might need to remove a steering wheel cover or airbag module to access the horn contacts. This is best left to those comfortable with these components, as airbags can be dangerous if mishandled. Consult a professional if unsure.
- Check Contacts: Once accessible, look for the electrical contacts for the horn. Sometimes a simple cleaning with contact cleaner can resolve issues. Ensure the contacts are making good, firm pressure when the horn button is pressed.
- Clock Spring: The “clock spring” is a coiled ribbon cable behind the steering wheel that allows electrical connections (like for the horn, airbag, and steering wheel controls) to work as you turn the wheel. If this is damaged, it can cause intermittent horn issues or a weak signal. Replacing a clock spring is a more advanced repair.
Helpful Tools for Horn Repair
You don’t need a massive toolbox, but a few essentials will make the job much easier and safer.
- Owner’s Manual: Your best friend for identifying parts and locations.
- Basic Socket Set & Wrenches: For removing battery cables, horn mounting bolts, or panels.
- Screwdriver Set: Phillips and flathead, for prying panels or removing covers.
- Wire Brush or Contact Cleaner: Essential for cleaning corroded terminals.
- Multimeter: To test battery voltage and check for continuity in circuits (useful for advanced troubleshooting).
- Fuse Puller: Makes removing fuses safe and easy.
- Jumper Wires (optional): For directly testing the horn unit.
- Work Gloves and Safety Glasses: Always protect yourself.
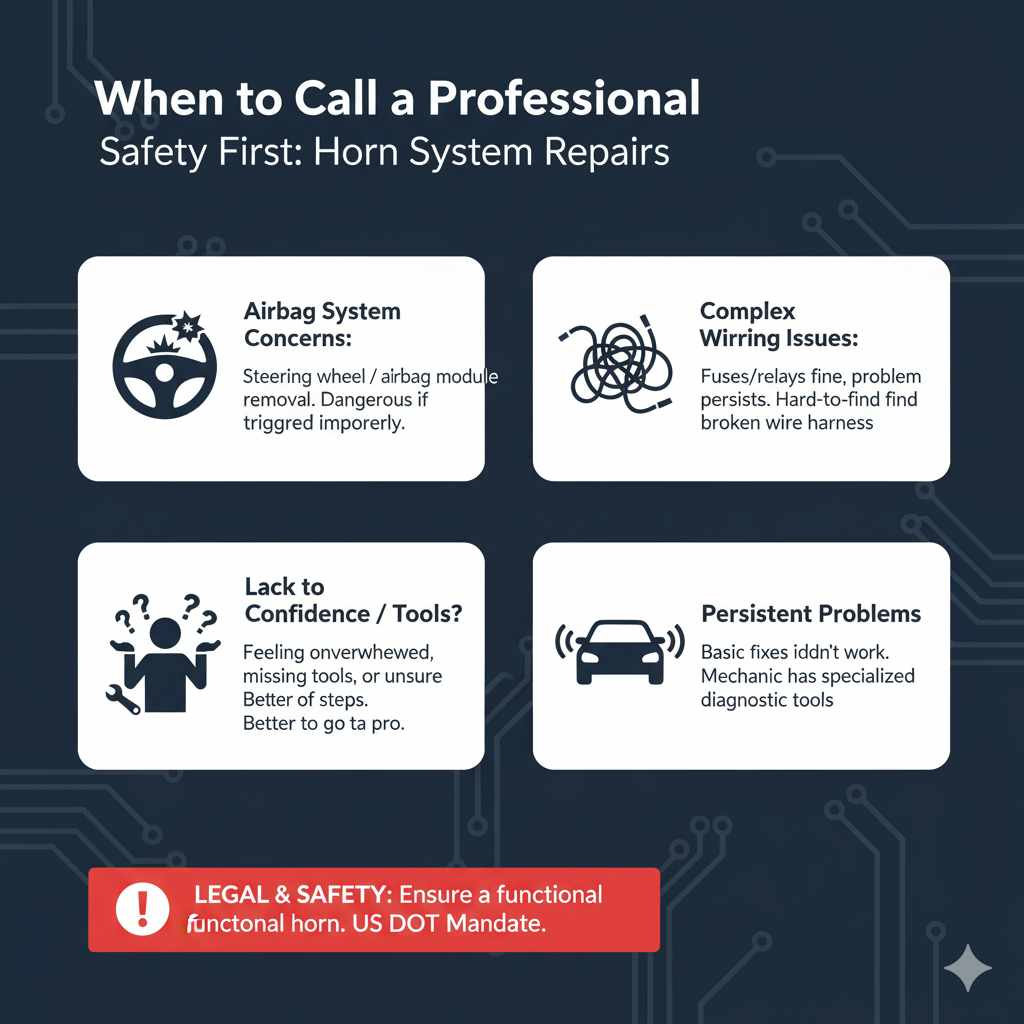
When to Call a Professional
While many horn issues are DIY-friendly, there are times when it’s best to let a mechanic take over:
- Airbag System Concerns: If you need to remove the steering wheel or airbag module and aren’t comfortable with it, leave it to the experts. Airbags are powerful explosive devices if triggered improperly.
- Complex Wiring Issues: If you’ve checked fuses, relays, and connections, and the problem persists, there might be a break in the wiring harness that’s hard to find.
- Lack of Confidence or Tools: If you feel overwhelmed, lack the right tools, or are unsure about any step, it’s always safer and more cost-effective in the long run to go to a qualified technician.
- Persistent Problems: If you’ve tried the basic fixes and the horn is still weak, a mechanic has specialized diagnostic tools to pinpoint the exact cause.
For instance, the U.S. Department of Transportation mandates that vehicles must have audible warning devices. Ensuring yours is functional is a legal and safety requirement.
Cost Guide: DIY vs. Professional Repair
Understanding the potential costs can help you decide whether to tackle it yourself.
| Repair Area | DIY Cost (Parts) | Professional Cost (Parts & Labor) | Notes |
|---|---|---|---|
| Fuse Replacement | $1 – $5 | $50 – $150 | Very simple DIY. Professional cost includes diagnosis. |
| Horn Relay Replacement | $10 – $40 | $75 – $200 | Modest DIY. Labor for diagnosis and replacement. |
| Horn Unit Replacement | $15 – $80 | $100 – $300 | Moderate DIY. Access might be tricky. Includes parts, labor for removal/install. |
| Wiring Repair | $5 – $20 (for connectors/tape) | $150 – $400+ | Complex DIY. Professional diagnosis and repair is often needed. |
| Horn Button/Clock Spring | $50 – $250 (for part) | $200 – $600+ | Advanced DIY. Airbag component requires specialized knowledge. High labor cost. |
As you can see, DIY can save you a significant amount of money, especially on common issues like fuses and relays. However, always factor in the cost of tools and your own time. For more complex issues, the expertise of a professional is invaluable.
Frequently Asked Questions (FAQ)
Q1: How do I know if my car horn is actually broken or just the button?
A: If pressing the horn button does absolutely nothing (no click from the relay, no sound at all), it could be the button, the relay, or a fuse. If you hear a faint click from the relay, it suggests the button is sending a signal, and the issue might be the relay itself, the horn unit, or corroded connections to the horn.
Q2: Can a weak horn be fixed without special tools?
A: Yes, for many common issues like a blown fuse or corroded terminals on the horn itself, you won’t need specialized tools. A basic set of screwdrivers, a fuse puller, and perhaps a wire brush are often enough. For more complex issues like the clock spring, professional tools are usually required.
Q3: My horn used to be loud, but now it’s weak. Does that mean the horn itself is going bad?
A: It’s possible, but not always. A weak sound can indicate the horn unit is failing internally, or it could be a lack of sufficient electrical power reaching it due to a weak battery, corroded wires, a failing relay, or a partially blown fuse. It’s best to check the simpler electrical components first.
Q4: How often should my car horn be checked?
A: It’s not something you typically check on a regular maintenance schedule, but it’s wise to test it periodically, perhaps during your routine oil changes or car washes. If you notice any decrease in loudness or intermittent operation, address it immediately.
Q5: Can I ignore a weakening horn?
A: No, you absolutely should not ignore a weakening horn. Your horn is a critical safety device. A weak horn might not be heard by other drivers, pedestrians, or cyclists, increasing the risk of an accident. It’s essential to fix it as soon as you notice a problem.