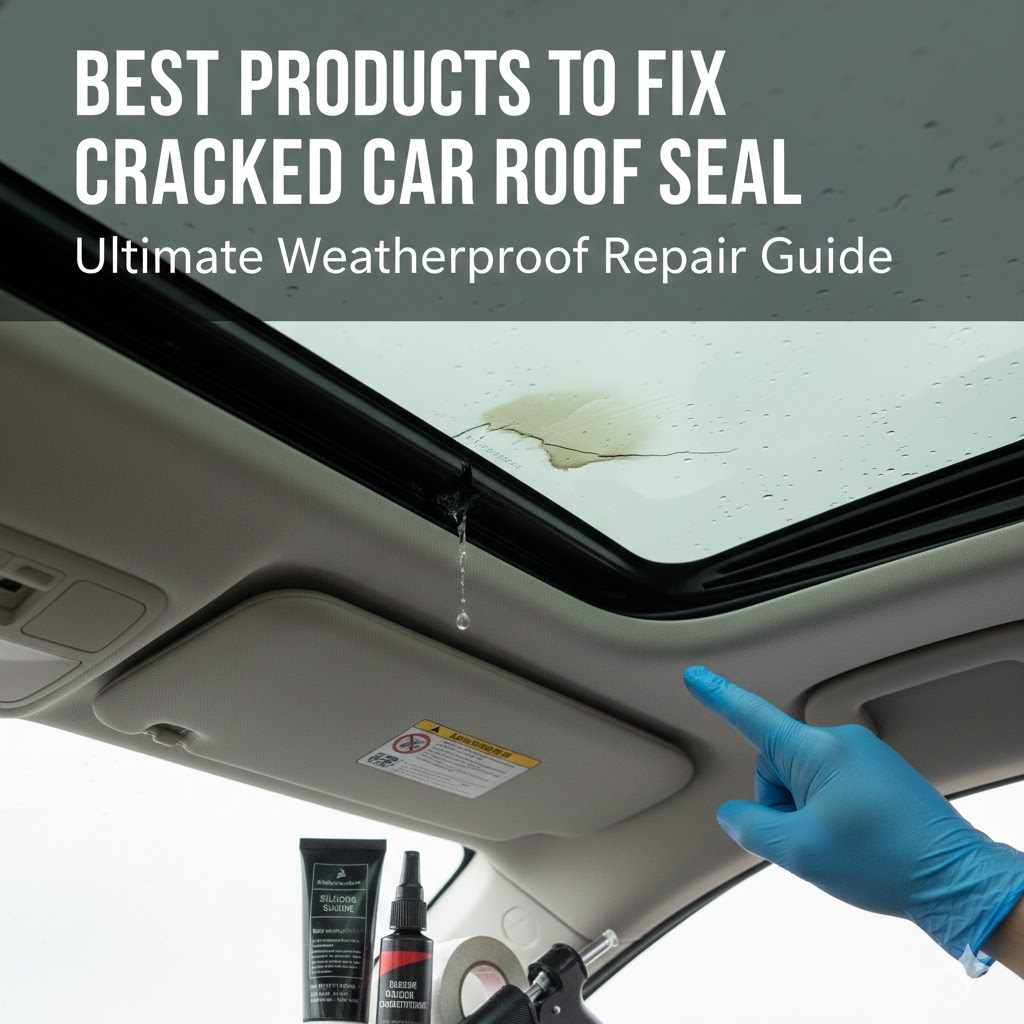
Best Products To Fix Cracked Car Roof Seal
Fixing a cracked car roof seal might seem like a big job, especially if you’re new to car care. Water leaks can cause all sorts of problems, from mold to electrical issues. But don’t worry, it’s easier than it looks!
We’ll go through the best products to fix a cracked car roof seal and show you how to do it step-by-step. You’ll be able to tackle this yourself and save some money. Let’s get your car leak-free again!
Choosing the Right Sealant for Your Car Roof
Selecting the correct sealant is the most important step when you’re dealing with a cracked car roof seal. The type of sealant you choose will depend on the material of your roof, the size of the crack, and how much flexibility you need. Using the wrong product can lead to a temporary fix that fails quickly or even damages your car further.
This section will guide you through the different types of sealants available, explaining their pros and cons so you can make an informed decision. We want to ensure your repair lasts and protects your car effectively.
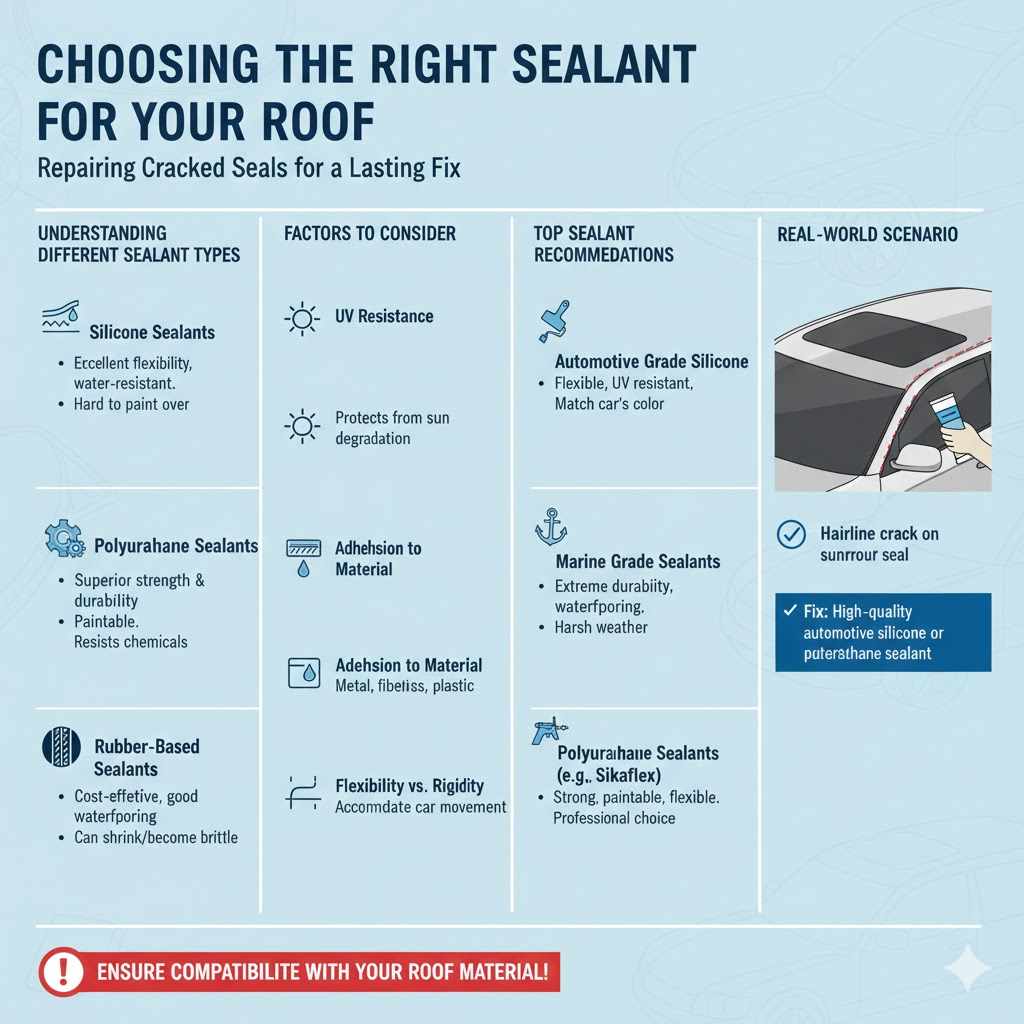
Understanding Different Sealant Types
Sealants are not all created equal. They come in various chemical formulations, each designed for specific applications. For car roof seals, you’ll often encounter silicone, polyurethane, and rubber-based sealants.
Each has unique properties like adhesion, durability, and resistance to weather. Understanding these differences helps you pick the product that will best bond with your car’s roof material and withstand the elements.
Silicone Sealants are known for their excellent flexibility and water resistance. They cure by absorbing moisture from the air. This makes them great for sealing small gaps and joints that might move slightly.
However, some silicones can be difficult to paint over, and their adhesion might not be as strong on certain surfaces as other types.
Polyurethane Sealants offer superior strength and durability. They are often used in automotive applications because they form a strong, paintable bond. Polyurethane sealants are also very resistant to chemicals, abrasion, and weathering.
They tend to be stiffer than silicone when cured, which can be a benefit for structural sealing but might be less ideal for areas needing extreme flexibility.
Rubber-Based Sealants, often called rubberized sealants or asphalt-based sealants, are typically very cost-effective. They provide good waterproofing and some flexibility. These are common for general sealing tasks around vehicles.
However, they can sometimes shrink over time or become brittle in extreme temperatures, and painting them can also be an issue.
Factors to Consider When Selecting a Product
When you’re looking for the best products to fix a cracked car roof seal, several factors beyond just the sealant type come into play. Think about the environment your car lives in. Does it experience extreme heat or cold?
Is it exposed to a lot of rain or UV radiation? The longevity and effectiveness of your repair depend on these considerations.
- UV Resistance: Your car roof is directly exposed to the sun. A sealant that degrades under UV rays will fail prematurely. Look for products specifically stating UV resistance to ensure a long-lasting seal. Without this, the sun’s rays can break down the sealant, leading to cracks and leaks again.
- Paintability: If you want the repair to blend in seamlessly with your car’s paint job, you’ll need a paintable sealant. Not all sealants can be painted over. Some silicones, for example, will not accept paint, and trying to paint them can cause peeling. Polyurethane sealants are usually the best choice if you plan to paint the area after sealing.
- Adhesion to Your Roof Material: Cars have roofs made of various materials like metal, fiberglass, or composite plastics. Ensure the sealant you choose is formulated to bond well with your specific roof material. A poor bond means the sealant will lift away, and the leak will return. Always check the product label for compatibility.
- Flexibility vs. Rigidity: Some seals need to remain flexible to accommodate the natural movement of the car body. Others require a more rigid bond for structural integrity. For roof seals, a good balance of flexibility and durability is usually best to prevent new cracks from forming due to vibrations or temperature changes.
Top Sealant Recommendations
Based on performance and common automotive needs, a few product types consistently stand out as the best products to fix a cracked car roof seal. These are often readily available at auto parts stores and hardware stores.
- Automotive Grade Silicone Sealants: These are formulated for car use and often have better UV resistance and adhesion than general household silicones. They offer excellent flexibility, which is vital for car roofs.
- Marine Grade Sealants: Because marine environments involve constant exposure to water and harsh weather, marine sealants are built for extreme durability and waterproofing. Many of these are also suitable for automotive exterior use.
- Polyurethane Sealants (e.g., Sikaflex): These are a favorite among professionals for their strength, flexibility, and paintability. They form a very durable, waterproof, and weather-resistant bond.
For instance, a common scenario is a hairline crack developing along the edge of a car’s sunroof seal. Many owners find that a high-quality automotive silicone or a flexible polyurethane sealant works wonders here. These products are designed to flex with the movement of the car and resist the harsh sunlight that can cause older seals to break down.
A properly applied sealant can stop that annoying drip that appears during heavy rain, saving the interior from water damage.
Preparing the Cracked Area for Repair
Before you apply any sealant, proper preparation of the cracked area is crucial for a successful and long-lasting repair. This is where many DIY repairs go wrong because this step is rushed or skipped. A clean, dry, and sound surface is essential for the sealant to adhere properly.
If the surface is dirty, greasy, or wet, the sealant won’t stick well, and the leak will likely return. This section will walk you through the necessary steps to get the area ready.
Cleaning the Damaged Area
Cleaning is the first and most vital step. You need to remove all dirt, debris, road grime, old sealant, and any traces of rust. Even a tiny bit of contamination can prevent the new sealant from forming a strong bond.
Use appropriate cleaning agents to ensure the surface is spotless.
Start by brushing away any loose debris. Then, use a good quality automotive degreaser or an isopropyl alcohol solution. Isopropyl alcohol is excellent because it evaporates quickly and leaves no residue.
For stubborn grime or old sealant, you might need a plastic scraper or a putty knife to gently lift away the old material. Be careful not to scratch the surrounding paint or material.
After cleaning, wipe the area down with a clean, lint-free cloth. If you used a degreaser, you might need to rinse the area with water and allow it to dry completely. For the best adhesion, the surface must be completely dry.
Removing Old or Damaged Sealant
If there’s existing sealant around the crack, it needs to be removed. Old sealant can become brittle and lose its adhesion over time. Applying new sealant over old, failing sealant is like building on a weak foundation.
It’s doomed to fail.
Use a plastic razor blade or a dedicated sealant removal tool. These tools are designed to lift sealant without damaging the underlying surface. Work slowly and patiently.
For very stubborn sealant, a solvent like mineral spirits might help soften it, but always test the solvent in an inconspicuous area first to ensure it doesn’t damage your car’s finish.
Once the bulk of the old sealant is removed, go over the area again with your cleaner to ensure no residue remains. The goal is to expose the original material of the roof and the edges of the crack.
Ensuring the Area is Dry
Moisture is the enemy of adhesion for most sealants. Even a small amount of water trapped under the sealant can compromise the bond and lead to leaks. After cleaning, you must ensure the area is thoroughly dry.
Allow the area to air dry for at least a few hours, or preferably overnight, especially if you used water for rinsing. In humid conditions, or if you’re in a hurry, a hairdryer on a low setting can help speed up the drying process. Make sure to dry all nooks and crannies.
You can even use compressed air to blow out any moisture from tight spots.
A simple test is to place a piece of masking tape on the dried area. If any moisture transfers to the tape, it’s not dry enough. The area should feel and look completely dry to the touch.
Sanding (Optional but Recommended)
For certain materials and sealants, a light sanding can improve adhesion. This is not always necessary, but it can be beneficial, especially if the surface is very smooth or glossy.
Use fine-grit sandpaper (e.g., 220-grit or higher). Lightly scuff the area where the sealant will be applied. The goal isn’t to remove material but to create a slightly rougher surface profile for the sealant to grip.
After sanding, clean the area again thoroughly to remove all dust particles. A quick wipe with isopropyl alcohol is usually sufficient for this.
This step creates a better mechanical bond. Think of it like preparing a wall for paint; you want a surface that the new coating can really stick to.
Applying Sealant for a Lasting Repair
Once the area is perfectly prepped, it’s time to apply the sealant. This is the part where you actually fix the crack. The key here is to apply the sealant evenly and ensure it fills the crack completely, creating a watertight barrier.
Following these steps will help you achieve a professional-looking result that holds up against the elements. We’ll cover everything from using the sealant gun to achieving a smooth finish.
Tools and Materials You’ll Need
Having the right tools makes the job much easier and leads to a better outcome. Don’t underestimate the importance of preparation, which includes gathering your supplies before you start.
- Sealant Gun: For cartridges of sealant, a good quality sealant gun is essential for consistent and controlled application. Look for one with a smooth trigger action and a drip-stop feature.
- Applicator Tool or Spreader: While you can use your finger (gloved, of course), specialized tools help create a smooth, uniform bead. These can be plastic spreaders, putty knives, or even the back of a spoon.
- Masking Tape: To protect surrounding areas and create clean lines.
- Gloves: To keep your hands clean and protected from the sealant.
- Paper Towels or Rags: For wiping away excess sealant and cleaning up mistakes.
- Your Chosen Sealant: Make sure it’s appropriate for automotive exterior use and your specific roof material.
How to Apply the Sealant
Applying sealant requires a steady hand and a bit of practice. The goal is to force the sealant into the crack and create a smooth, continuous seal.
- Prepare the Sealant Cartridge: If using a cartridge, cut the tip at a 45-degree angle. The opening size should be slightly smaller than the crack you are filling. If the crack is wider, you might need to cut the tip a little larger. Puncture the inner seal of the cartridge if your gun doesn’t have an automatic mechanism for this.
- Load the Sealant Gun: Place the cartridge into the sealant gun.
- Apply a Consistent Bead: Hold the gun at a 45-degree angle to the crack. Squeeze the trigger steadily, moving the gun along the crack. Aim to fill the crack completely with sealant. Don’t apply too much; it’s better to apply a little more and smooth it out than to have excessive squeeze-out.
- Tool the Sealant: Immediately after applying the sealant, use your chosen tool (gloved finger, spreader, etc.) to smooth the bead. Press gently to push the sealant into the crack and create a neat, slightly concave or flat surface that blends with the surrounding area. This step is crucial for both aesthetics and ensuring no air pockets remain. Wipe off excess sealant from the tool onto a rag as you go.
- Remove Masking Tape: If you used masking tape, remove it immediately after tooling the sealant, while the sealant is still wet. Pull the tape away at an angle. This will leave a clean, sharp line. If you wait until the sealant dries, it can peel away with the tape, ruining your clean edge.
A practical example involves sealing a crack near a roof rack mounting point. These areas are prone to leaks because the mounts can compromise the original seal. Using a high-quality, flexible automotive sealant around the base of the mounts after ensuring the area is clean and dry will prevent water from seeping into the vehicle’s interior.
Applying a smooth, even bead and then tooling it will ensure it looks neat and protects against future water ingress.
Dealing with Larger Cracks or Gaps
For larger cracks or gaps, you might need to use a backing material before applying the sealant. This is known as backer rod.
- Backer Rod Installation: Backer rod is a flexible foam rod you want your final sealant bead to be.
- Sealant Application Over Backer Rod: Once the backer rod is in place, apply the sealant over it, ensuring it makes good contact with the edges of the crack on either side of the backer rod. Tool the sealant as usual to create a smooth, continuous seal. This method is particularly effective for wider gaps that a single bead of sealant might not fill properly or might sag into.
Curing and Drying Times
Sealants need time to cure properly. This is when they form their final, durable bond. Always check the product instructions for specific curing times, as these can vary significantly between products and depend on temperature and humidity.
Some sealants are “skin over” within minutes or hours, meaning they form a dry outer layer. However, they may take 24 hours or even several days to fully cure internally. During the curing process, it’s best to keep the repaired area dry and protected from excessive stress or vibration.
Avoid washing the car or exposing it to heavy rain until the sealant has fully cured.
Maintaining and Inspecting Your Car Roof Seal
Once your car roof seal is repaired, it’s important to maintain it and perform regular inspections. This proactive approach will help you catch any new issues early and ensure your repair lasts for a long time. A well-maintained seal is key to preventing future leaks and protecting your car’s interior.
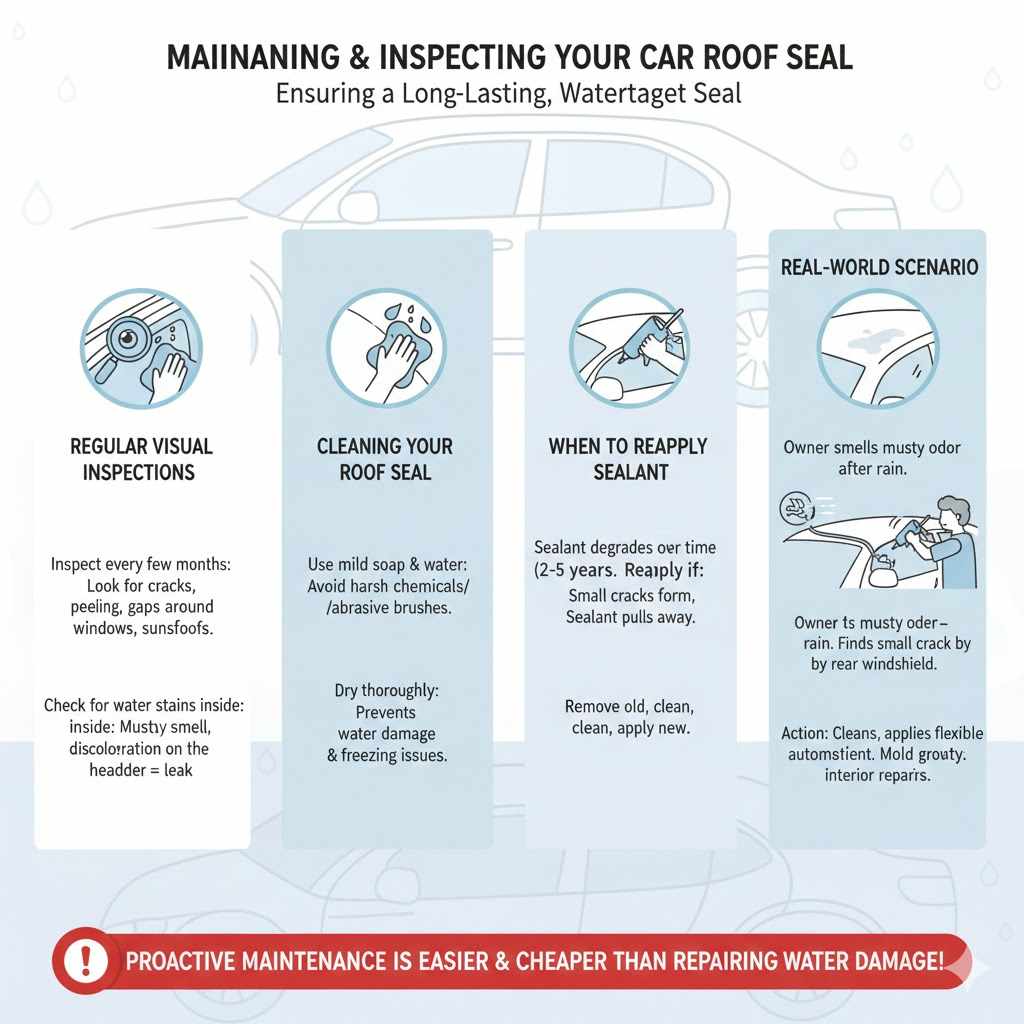
Regular Visual Inspections
Make it a habit to visually inspect your car’s roof seal regularly, perhaps every few months or during car washes. Look for any signs of wear and tear, such as cracking, peeling, or gaps. Pay close attention to areas around windows, sunroofs, roof racks, and body seams.
During your inspection, also check the surrounding paintwork for any signs of rust or delamination, which could indicate a problem with the seal that has gone unnoticed. Look for water stains or discoloration on the headliner inside the car, which is a tell-tale sign of a leak.
Cleaning Your Roof Seal
Proper cleaning of your car’s exterior will also help preserve the seal. When washing your car, gently clean the roof seal area with mild soap and water. Avoid using harsh chemicals or abrasive brushes that could damage the sealant or the surrounding paint.
After washing, dry the seal area thoroughly with a clean, soft cloth. This prevents water from sitting on the seal and potentially causing damage over time, especially in freezing temperatures where water can expand and create new cracks.
When to Reapply Sealant
Even the best sealant will eventually degrade. Depending on the product quality, environmental exposure, and how well it’s maintained, you might need to reapply sealant every few years.
If you notice new small cracks forming, or if you see signs of the sealant starting to pull away from the surface, it’s time for a touch-up or a complete reapplication. The process would involve removing the old sealant, cleaning the area thoroughly, and applying a fresh coat of your chosen high-quality sealant. Proactive maintenance is much easier and cheaper than repairing extensive water damage.
Consider a real-world scenario: A car owner notices a slight musty smell inside their car after heavy rain. Upon inspection, they find a small crack in the sealant around the rear windshield. Instead of waiting for the smell to worsen or for visible water to appear, they promptly clean the area, apply a flexible automotive sealant, and tool it for a smooth finish.
This simple action prevents potential mold growth and costly interior repairs down the line.
Frequently Asked Questions
Question: What is the best type of sealant for a car roof leak
Answer: For most car roof leaks, a flexible polyurethane sealant or a high-quality automotive-grade silicone sealant is recommended. These offer good adhesion, durability, and resistance to weather and UV rays.
Question: Can I use regular household silicone sealant on my car roof
Answer: While some household silicones might offer temporary relief, they are often not designed for the harsh conditions cars endure, such as UV exposure and temperature fluctuations. Automotive-specific sealants are generally a better choice for long-term durability.
Question: How long does it take for car roof sealant to cure
Answer: Curing times vary by product. Many sealants skin over within an hour or two but may take 24 hours or more to fully cure. Always check the product’s instructions for specific drying and curing times.
Question: Do I need special tools to apply sealant
Answer: A standard sealant gun is highly recommended for controlled application of sealant from a cartridge. Tools for smoothing the bead, like a spreader or even a gloved finger, are also helpful for a neat finish.
Question: Can I paint over car roof sealant
Answer: Some sealants, like many polyurethane-based products, are paintable. Silicone sealants are often not paintable. Always check the product label to confirm if it’s suitable for painting.
Summary
Fixing a cracked car roof seal is manageable with the right approach. By selecting appropriate best products to fix a cracked car roof seal and preparing the area carefully, you can achieve a lasting repair. Always clean thoroughly, ensure dryness, and apply sealant with care.
Regular checks will keep your car protected from leaks.