Car Refinishing: How To Mix Paint For A Perfect Match
Getting that car paint to match just right can feel like a puzzle. You’ve got a scratch or a small dent. You want to fix it yourself.
But then you look at the paint. It’s just not quite the same. Maybe it’s too light, or too dark.
Or the color is a bit off. This is a common problem for anyone trying to do a quick car repair. It can be frustrating.
You want your car to look its best. Let’s break down how to mix car paint so you can get that seamless look.
Car paint mixing involves understanding color codes, types of paint, and precise measurement. Achieving a perfect match often requires adjustments based on environmental factors and the condition of the existing paint. This guide will walk you through the steps for successful DIY car paint mixing.
Understanding Car Paint Basics
Cars use many types of paint. Knowing these helps you choose the right one. There are base coat, clear coat, single-stage, and more.
Base coat is the color part. It needs a clear coat over it. This protects the color.
Single-stage paint has color and gloss in one. It’s simpler but often not as durable. The original paint on your car is key.
Look for a paint code. This code tells you the exact color. You can usually find it on a sticker inside your car’s door jamb or under the hood.
The paint code is like a recipe. It lists all the pigments needed. But it’s not always that simple.
Over time, car paint fades. Sunlight and weather change its hue. So, a direct match from the code might still be a little off.
This is where mixing comes in. You might need to tweak the formula. Think of it like adjusting spices in a recipe.
A little bit of this or that makes a big difference.
For example, older cars might have single-stage enamel. Modern cars often use water-based base coats. Using the wrong type will lead to poor results.
It won’t stick right. It won’t look right. So, always try to identify your car’s original paint system first.
This sets the stage for everything else.
Gathering Your Tools and Supplies
Before you start mixing, get everything ready. This makes the process smooth. You’ll need the paint itself.
Get your base coat color. You’ll also need the clear coat. And possibly a reducer and hardener.
Reducers thin the paint. Hardeners help it cure. Always use products from the same brand if possible.
They are designed to work together. Check the paint can or product data sheet.
You’ll need mixing cups. These have measurement lines. Get a good set with different sizes.
You’ll also need stir sticks. Wooden ones are fine. Make sure they are clean.
A good scale can be very helpful. It’s more accurate than cups for small amounts. Weighing tiny amounts of pigment is crucial.
You’ll also need a way to strain the paint. Paint filters are cheap. They catch any dried bits or dirt.
This stops them from ruining your finish.
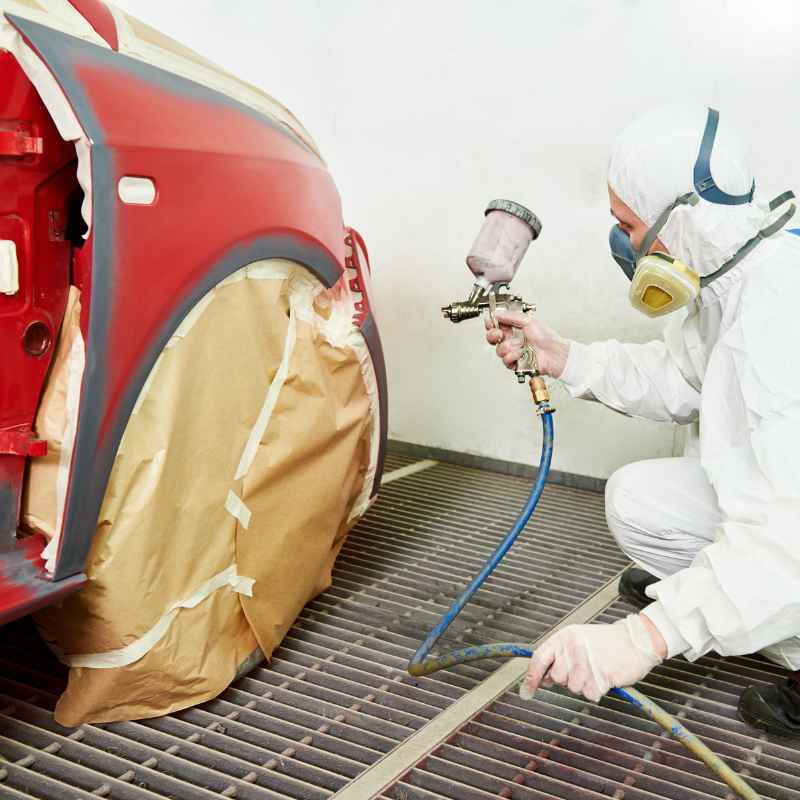
Safety gear is a must. Always wear a good respirator mask. Car paint fumes are bad to breathe.
Wear gloves too. Nitrile gloves are best. They resist solvents.
Eye protection is also important. Safety glasses or goggles will do. Work in a well-ventilated area.
Outdoors or in a spray booth is ideal. If you’re inside, open windows and use fans. Don’t skimp on safety.
It’s just not worth the risk.
You will also need a spray gun. A gravity-feed spray gun is common. Make sure it’s clean.
Any old paint can contaminate your new mix. Have rags on hand for spills. And a tack cloth to clean surfaces before spraying.
Identifying Your Car’s Paint Code
Finding the paint code is step one. It’s the starting point for any color match. In the U.S., most cars have a sticker.
Look on the driver’s side doorjamb. Sometimes it’s on the passenger side. It might also be under the hood.
Or in the glove box. The sticker often has your car’s VIN. It also lists tire pressure.
And, importantly, the paint color code. It’s usually a few letters or numbers.
For example, a common GM code might be WA9999. A Ford code could be PJS. Honda uses codes like NH700M.
These codes are specific. But they can be tricky. Some manufacturers use different codes for different finishes.
Or for different years. A quick online search for your car’s make, model, and year plus “paint code location” can help.
If you can’t find the code, don’t despair. You can take a small sample of the paint to an auto paint store. They have special machines.
These machines can scan your paint. They can then find the exact formula. This is called a spectral analysis.
It’s very accurate. It’s a good option if you’re unsure or can’t locate the code.
Remember that the code is for the original paint. Your car’s paint might have changed. Maybe it was repainted before.
Or it has faded. This is why color matching is an art. The code gives you the baseline.
But you may need to adjust.
Understanding Paint Types and Components
Car paints have different layers. The first is primer. It helps paint stick.
It also fills small flaws. Then comes the base coat. This is the actual color.
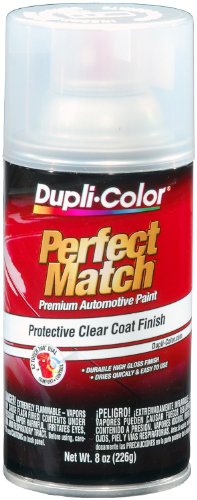
It’s often a metallic or pearl finish. After the base coat, you apply clear coat. Clear coat protects the color.
It gives the paint its shine. It also adds depth. It is made of resins and solvents.
Some paints are single-stage. This means the color and gloss are in one layer. They are simpler to apply.
They are often used for older cars. Or for solid colors that don’t need a lot of depth. However, they don’t offer the same UV protection as a clear coat.
They can fade faster.
You might also encounter pearls and metallics. Metallic paints have tiny metal flakes. These catch the light.
They give a sparkling effect. Pearl paints have mica flakes. They change color depending on the light angle.
These finishes are harder to match. They need careful spraying to get the flakes to lay right.
When mixing, you’ll work with concentrates. These are the pure pigments. You mix them with a binder.
The binder is the base liquid. For base coat systems, you’ll mix color concentrates. Then you add a reducer.
The reducer thins the paint. It lets it spray evenly. For 2K (two-component) paints, you’ll also add a hardener.
The hardener makes the paint cure. It hardens and becomes very durable. Always follow the manufacturer’s instructions for mixing ratios.
These ratios are vital for proper curing and finish.
The Mixing Process: Step-by-Step
Start with your paint code. Get the formula from your paint supplier. Or find it online.
The formula lists percentages. Or grams of each color pigment. You’ll use mixing cups with lines.
Or a digital scale for accuracy. Let’s say the formula calls for 100 grams of paint. It might be 70 grams of white.
20 grams of black. And 10 grams of blue.
Get a clean mixing cup. Add the primary color first. If it’s white, add 70 grams of white base.
Then add 20 grams of black. Stir well after each addition. Use a clean stir stick.
Or swirl the cup gently. Next, add the 10 grams of blue. Mix again thoroughly.
Make sure all pigments are blended. You want a uniform color.
Now, add the reducer. The formula will tell you the ratio. It might be 1:1.
This means one part reducer to one part mixed paint. Or it might be a percentage, like 10% reducer. Add the correct amount of reducer to your cup.
Mix it in well. The paint should now be a sprayable consistency. It should flow smoothly.
If you are using a 2K system, add the hardener last. Follow the exact ratio. Usually, it’s a specific percentage.
For example, 2:1:1. This means 2 parts paint, 1 part reducer, 1 part hardener. Mix this very well.
Once you add the hardener, the paint has a pot life. This is how long it stays usable. Usually, it’s 30 minutes to a few hours.
Don’t mix more than you can use in that time. This hardener makes the paint set chemically. It hardens and becomes very tough.
After mixing, strain the paint. Pour it through a paint filter into another clean cup. This catches any clumps or debris.
This step is crucial. It stops dust from getting into your spray job.
Adjusting for Color Match and Fading
This is the trickiest part. The formula is a starting point. Your car’s paint has aged.
It has likely faded. Especially if it’s an older car. Or if it sat in the sun a lot.
The original color code formula might be too vibrant. Or too dark compared to your car.
This is where test sprays come in. You need to spray a bit of your mixed paint. On a test panel.
A piece of scrap metal or cardboard works. Or a hidden part of your car. Let it dry.
Then compare it to your car. Hold it next to the original paint in good light.
If the test spray is too dark, you need more white or a lighter base. If it’s too light, you need more of the main color or a darker pigment. If it’s too yellow, add a tiny bit of blue.
If it’s too blue, add a tiny bit of yellow. These are small adjustments. Use only drops of pigment.
Stir very well after each tiny addition.
It’s often easier to make small batches for testing. Mix only a small amount, say 30 grams. Adjust that.
Then you can scale up your final mix. When adjusting for metallics or pearls, be very careful. Too much or too little can change the effect.
The flakes need to be evenly distributed.
What about fading? If your car’s paint is faded, the new paint might look too bright. You might need to add a tiny bit of a gray or black tint.
Just a drop or two. This dulls the color slightly. It helps it blend better with the aged paint.
This takes practice. Don’t be afraid to do several test sprays. It’s better to get it right on the test panel.
Sunlight affects paint color. So does weather. Different car parts can fade differently.
The hood might fade more than the doors. Always compare your test spray in natural daylight. Avoid fluorescent lights.
They can distort color. Try to match the color under the same light conditions your car lives in.
Consider the sheen too. Some paints have a gloss. Some are matte.
The clear coat will affect gloss. But the base coat needs to be right first. If your original paint is dull, your new mix might look too shiny.
You may need a slightly less glossy base. Or a matte clear coat.
Quick Color Matching Tips
- Start with the Code: Always get your car’s paint code first.
- Use a Scale: For small adjustments, a digital scale is more precise than cups.
- Test, Test, Test: Always spray a test area before painting the main spot.
- Natural Light is Best: Compare colors in daylight.
- Small Adjustments: Add pigments in tiny amounts. A drop can make a big difference.
- Stir Thoroughly: Ensure all pigments are fully blended after each addition.
- Consider Fading: Old paint is often duller. You might need to “de-brighten” your mix.
Applying the Paint: Spraying Techniques
Once your paint is mixed and tested, it’s time to spray. Clean the area you’re painting thoroughly. Use a tack cloth to pick up any dust.
Load your cleaned spray gun. Make sure it’s set up correctly. Check the air pressure.
Hold the spray gun about 6–8 inches from the surface. Move your wrist and arm together. Keep a consistent distance.
Start spraying before the panel. Release the trigger after you pass the panel. This avoids heavy spots at the start and end of your spray pass.
Overlap each pass by about 50%. This ensures even coverage.
Apply the base coat in light, even coats. Don’t try to cover everything in one go. Several thin coats are better than one thick one.
Allow flash time between coats. This means waiting a few minutes. It lets the solvents evaporate.
The paint should look dull before you spray the next coat. Check your paint manufacturer’s recommendations for flash times.
For metallic or pearl paints, the spray pattern is important. This affects how the flakes lay. Try to keep the spray gun at a consistent angle.
Some painters prefer to spray metallics with the gun held slightly more upright. Or they might use a specific spray pattern. This is something to practice.
After the base coat is applied and has flashed off, you’re ready for clear coat. Mix your clear coat and hardener according to instructions. Apply clear coat in 2–3 medium coats.
Again, allow flash time between coats. The clear coat will give your paint its depth and shine. Make sure your base coat is properly flashed off before clear coating.
If it’s too wet, the clear coat might not adhere well. If it’s too dry, you might get poor adhesion or dull spots. This is called “intercoat adhesion.”
The final clear coat should be a bit heavier. This is your “wet coat.” It gives the final gloss. Move smoothly.
Don’t let the paint drip. If you get a drip, you’ll have to fix it later. It might involve sanding and re-spraying that area.
Common Mistakes and How to Avoid Them
One common mistake is not cleaning tools well. Old paint residue can ruin your new mix. Always clean your spray gun thoroughly.
Before and after each use.
Another error is not mixing enough paint. If you run out mid-spray, you’ll have a color difference. It’s better to mix a little extra.
Or be confident you can mix more identical batches. This is where accuracy is key. If your first batch is perfect, a second identical batch should be too.
Measure precisely.
Spraying too close or too far is also a problem. Too close causes drips and runs. Too far creates a dusty, uneven finish.
Find that sweet spot. Practice your distance. Keep it consistent.
Not allowing enough flash time is another big one. Rushing can lead to solvent entrapment. This can cause defects later.
Like blistering or delamination. Be patient. Let the paint dry properly between coats.
The paint should look dull, not shiny, before the next coat.
Forgetting to strain the paint is a frequent oversight. Tiny particles can cause bumps and imperfections. These are hard to fix.
Always use a paint filter.
Contrast: Myth vs. Reality
Myth: You can just eyeball car paint colors for a perfect match.
Reality: Car paint is a complex mix of pigments. Matching requires precise formulas and often adjustments. Fading and environmental factors mean the original code is rarely an exact match without tweaking.
Myth: Any spray gun will work for car paint.
Reality: Different spray guns are suited for different paint types and jobs. A good quality, properly adjusted spray gun is essential for a professional finish.
Myth: You can mix brands of paint, reducers, and hardeners together.
Reality: While some may be compatible, it’s always best to stick to one brand. Products from the same manufacturer are formulated to work together for optimal results.
When to Call a Professional
While DIY car paint mixing is possible, some jobs are best left to pros. If you have a rare or exotic color, it can be very hard to match. High-end luxury cars or classic vehicles often have special paint finishes.
These require specialized knowledge and equipment.
Large areas of damage can also be challenging. If you have dents covering a large panel, it needs more than just a paint touch-up. It requires body work.
This is something a professional auto body shop handles. They have the tools and skills for panel straightening and filling.
Complex paint jobs like matte finishes, candy colors, or color shifts are also difficult. These paints have unique application needs. They often require specific techniques and environmental controls.
Mistakes here can be costly to fix. A professional has the experience to get these right the first time.
If you’re unsure about any step, it’s wise to consult an expert. Auto paint supply stores often have knowledgeable staff. They can offer advice.
Sometimes, the cost of professional repair is worth it. It saves you time and potential frustration. It ensures a high-quality finish.
Consider the tools needed. Professional spray guns, booths, and safety equipment are expensive. If you only plan to do one small touch-up, buying all that might not make sense.
Renting equipment can be an option. But even then, the skill required is significant.
For small chips and scratches, DIY is often achievable. But for full panel refinishing or complex designs, professional help is usually the best route. They have access to high-quality, professional-grade paints.
They also have the expertise to apply them perfectly. This guarantees a durable and beautiful finish.
Think about the value of your car too. If it’s a collector’s item, you don’t want to risk damaging its finish. A professional can restore it to its former glory.
They understand the nuances of vintage paints. They can match the original sheen and texture. This preserves the car’s value and appeal.
Understanding Paint Codes and Variations
Paint codes are not always straightforward. Sometimes a single code covers several variations. For example, a code might have sub-codes for different finishes.
Like metallic or non-metallic. Or for different years the car was produced. This is where getting the specific color for your car’s VIN is important.
If you can get that, it’s more accurate than just the code.
Many manufacturers use a “WA” prefix for their codes. Like WA1234. Others use simpler codes.
Like GM’s “U” numbers. Or Ford’s two-letter codes. Always check with your paint supplier.
They can cross-reference codes. They can also tell you about known variations.
Metallic and pearl paints add another layer of complexity. The amount and type of flakes used can vary. Even within the same paint code.
The direction the flakes lie when sprayed also changes the appearance. This is why test spraying is so critical for these finishes. You need to see how the metallic effect looks on your test piece.
If your car has had bodywork before, it might have been repainted with a non-factory color. Or the painter might have had trouble matching the original. In these cases, the paint code may no longer be accurate for the current paint.
This is when spectral analysis by a paint store becomes invaluable. They can scan the actual paint on your car.
Consider the condition of the paint. Is it chalky and faded? Or is it still vibrant?
The age of the paint matters. Older paint tends to lose its pigment saturation. It becomes duller.
If you’re painting over faded paint, you may need to “de-tint” your new mix. This means adding a tiny amount of gray or black. It makes the new paint look less bright.
It helps it blend with the aged surrounding paint. This is a subtle adjustment.
Some repair shops use “visualizers.” These are digital tools that show you how a color will look. They can simulate different lighting conditions. They can also account for fading.
This technology is becoming more common. It helps painters make more accurate matches.
Quick Scan: Paint Types
| Type | Description | Best For |
| Base Coat/Clear Coat | Color layer (base) then protective gloss layer (clear). | Modern cars, durable finish, deep shine. |
| Single-Stage | Color and gloss in one layer. | Older cars, solid colors, simpler jobs. |
| Metallic | Contains metal flakes for sparkle. | Many modern cars, adds visual depth. |
| Pearl | Contains mica flakes for color shift. | High-end finishes, unique color effects. |
Maintaining Your Refinished Paint
After you’ve successfully mixed and applied your paint, keeping it looking good is next. Proper washing and waxing are essential. Use a pH-neutral car wash soap.
Avoid harsh detergents. These can strip away wax and damage the clear coat.
Wash your car in the shade. Or when the panels are cool. Washing a hot surface can cause water spots.
Use a soft wash mitt. And two buckets: one for soapy water, one for rinsing the mitt. This prevents spreading grit.
Drying is also important. Use a clean, soft microfiber drying towel. Blot or gently wipe the water.
Avoid rubbing too hard. This can cause micro-scratches.
Wax your car regularly. A good quality carnauba wax or synthetic sealant will protect the clear coat. It adds UV protection.
It also makes the paint look richer and deeper. Aim to wax every 3–6 months. Depending on your climate and exposure.
Be careful with automatic car washes. Some use brushes that can scratch paint. Touchless washes are safer.
But hand washing is always the best way to ensure proper care. If you notice any new scratches or chips, address them quickly. Small chips can be touched up.
Leaving them can lead to rust.
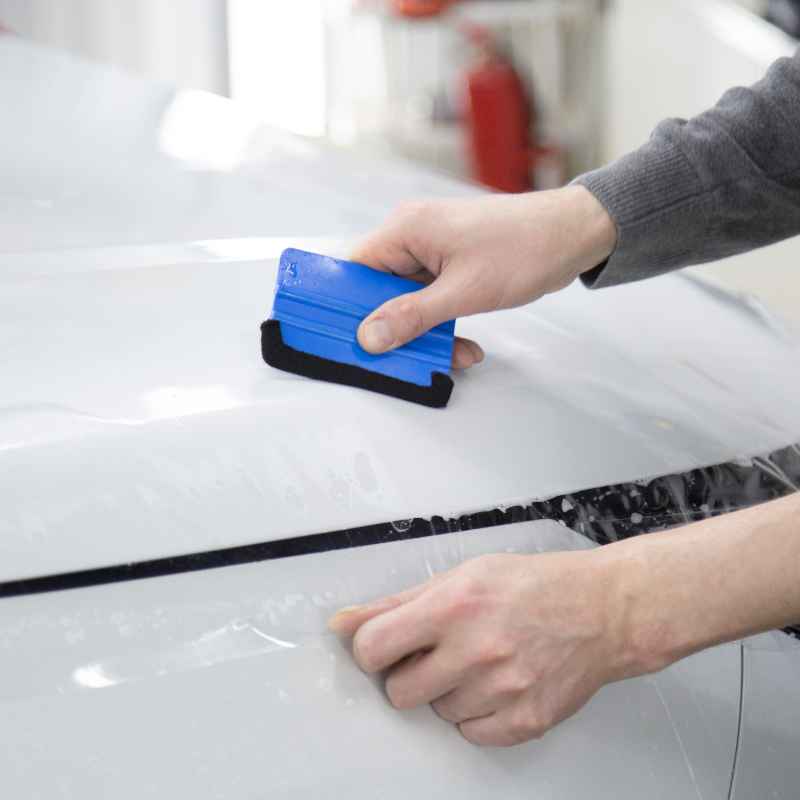
Consider paint protection films (PPF). These clear films can be applied to high-impact areas like the front bumper and hood. They offer excellent protection against chips and scratches.
They are an investment but can save your paintwork in the long run.
Avoid parking under trees for long periods. Sap and bird droppings can etch into the paint. If you notice any contaminants, clean them off immediately.
A quick detailer spray can help lift these safely. Keeping your car clean and protected is key to a lasting finish. Even on DIY repairs.
FAQs About Car Paint Mixing
What is the most important tool for mixing car paint?
The most important tool is accuracy. This means using precise measuring tools like a digital scale and clean mixing cups with clear markings. Attention to detail in measurement ensures the correct ratios for proper paint performance.
Can I use automotive touch-up paint directly from a bottle?
Yes, for very small chips and scratches, pre-mixed touch-up paint bottles can work. However, for a near-perfect match, especially on metallic or pearl finishes, custom mixing or professional advice is often needed. The color may not be exact due to fading.
How long does mixed car paint last?
Once mixed with a hardener (in 2K systems), car paint has a limited pot life, typically 30 minutes to a few hours. Unmixed base coat or clear coat can last much longer if stored properly in a sealed container away from heat and light.
What does “reducer” do in car paint?
A reducer is a solvent that thins the paint to the correct viscosity for spraying. It helps the paint flow smoothly through the spray gun and creates an even finish. The type of reducer needed depends on the paint system and the ambient temperature.
Why does my test spray look different from the car?
This can happen for several reasons. The car’s paint may have faded. Environmental factors like sunlight and age change paint color.
Your test spray might also be affected by lighting conditions. Always compare test sprays in natural daylight.
Is it safe to mix different brands of automotive paint?
It is generally not recommended to mix different brands of automotive paint, reducers, or hardeners. They may not be chemically compatible. This can lead to poor adhesion, curing issues, and finish defects.
Stick to products from the same manufacturer when possible.
Conclusion
Mixing car paint for a perfect match is a skill. It takes practice and attention to detail. By understanding paint types, using the right tools, and following accurate formulas, you can achieve great results.
Remember to always prioritize safety. And don’t be afraid to do test sprays. Your car’s finish will thank you for the effort.
Products related to this article
Sponsored / affiliate links. As an Amazon Associate I earn from qualifying purchases. I may earn additional commission from eligible campaigns.