Deep Cleaning Vacuum for Rental Cars: Avoid the Cleaning Fee
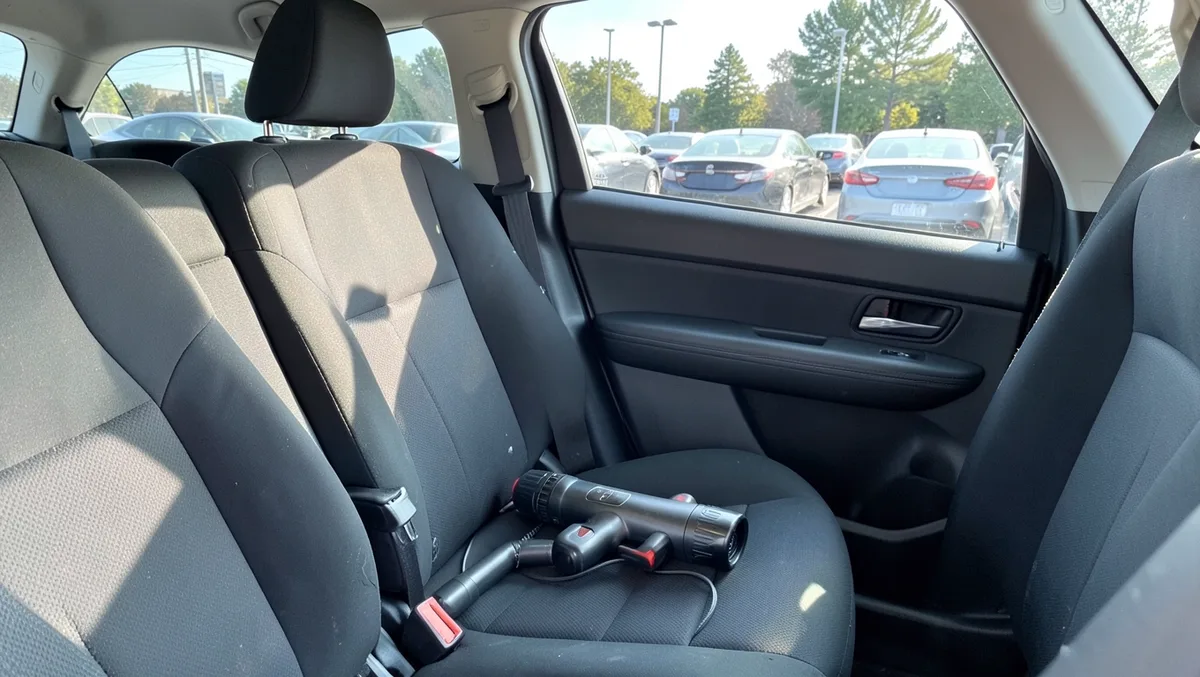
Use a bagged, portable vacuum and spend about 20 to 30 minutes on seats, mats, cupholders, cargo areas, and door pockets; blot spills, clear debris, and take photos before returning the car. Miss the obvious mess and the rental company can bill a cleaning fee, plus smoking, sand, pet hair, or food residue often gets flagged fast. This guide shows what to vacuum, what to blot, what to document, and how to cut return-time risk without overcleaning.
What rental companies charge


A rental car cleaning fee can be added when the car needs cleaning beyond standard practices. That usually means the cabin is not simply dusty or lightly used; it has visible trash, embedded hair, food residue, heavy mud, stains, or odor that needs extra work at return. Severity and company policy both matter.
What counts as extra cleaning
Rental companies generally do a basic interior clean after returns, so the issue is not ordinary use. The fee risk starts when the car needs treatment that goes beyond that reset: vacuuming packed debris from seams, removing pet hair from fabric, handling strong odors, or cleaning up wet residue that has soaked into surfaces.
Pet hair and fur can trigger a fee. Strong odors can too. Mud on the exterior can also go beyond normal wear, and smoking cleanup can become expensive fast. Booking says some companies charge up to $400 for smoking cleanup, and Budget and Avis charge up to $450 for smoking cleanup.
How company policy affects the bill
The rental agreement matters because it can spell out cleanliness standards and fee language. One company may treat a little sand or a few crumbs as ordinary, while another may bill for the same mess. Read the return section before you drive to the airport or drop-off point.
Do not assume a quick wipe means no charge. The standard is reasonably clean, not showroom-ready. If the cabin has a smell, stain, or heavy debris, the company may add a cleaning fee to the final bill.
What should you vacuum first?
Start with the places that trap debris and create the most fee risk: seats, seams, seat rails, floor mats, under-seat areas, cupholders, consoles, and boot or trunk edges. If you are short on time, hit the visible messes first, then move to the tight spaces where sand, crumbs, and hair collect.
Seats, seams, and seat rails
Vacuum the seat surfaces first, then the stitched seams and the rails under the seats. Those are the usual hiding places for crumbs, sand, and pet hair. A crevice tool reaches between seat cushions and along rails much better than a wide nozzle.
Floors, mats, and under-seat areas
Pull out floor mats and vacuum both sides if they are removable. Sand and mud often settle into the mat texture, then shake loose later and make the car look dirtier after a cursory clean. Clean under the seats next, because debris there is easy to miss in a quick inspection.
Suppose a family trip leaves goldfish crumbs on the second-row floor and a layer of sand under the child seat. A fast pass over the visible floor helps, but the fee-risk cleanup is the sand in the seams and under-seat tracks. That is where a crevice tool matters most.
Cupholders, consoles, and boot edges
Vacuum cupholders, door pockets, and the boot or trunk lip. Those spots collect food bits, loose sand, and sticky residue that can turn into a return complaint. If the car has a cargo liner or boot liner, remove it and clean it separately.
Portable vacuum vs wet-dry vacuum
A portable cordless vacuum is usually enough for dry messes, especially crumbs, sand, and hair. A wet-dry vacuum is the better fit for spills, muddy mats, and deeper cleanup when you need extraction rather than simple pickup. The right choice depends on whether the mess is dry, wet, or both.
When a cordless handheld is enough
A cordless handheld works best for light to moderate dry debris and quick return cleanup. Carrenting recommends a portable cordless vacuum with a crevice tool and upholstery brush, and Gtech says its car vacuums are cordless and designed for tricky interiors. That setup helps when you need speed, tight-cabin reach, and easy storage in the trunk.
Look for short runtime or quick-charge expectations, because you are cleaning a car, not a living room. The best cordless option for this job is the one you can grab fast, move around tight cabin spaces, and pack back into the trunk without friction.
When a wet-dry unit is the better fit
A modern compact wet-dry vacuum is the better choice for spills, muddy mats, and deeper upholstery cleanup. The same source notes that these units help with spill cleanup and deeper upholstery cleaning. They are especially useful when sand and moisture are mixed together, since plain suction often leaves residue behind.
Use a wet-dry tool carefully. It helps with extraction, but too much liquid can push a stain deeper or leave fabric damp at drop-off. That can worsen odor risk, especially in warm weather.
Which attachments matter most?
The crevice tool and upholstery brush do most of the work. Family Handyman points to the pull-out crevice tool for tight spots. Use the crevice tool for seat rails, seams, cupholders, and boot edges. Use the upholstery brush on seats and mats to loosen embedded crumbs and hair before you vacuum.
| Mess type | Fee risk level | Best vacuum/tool | Liquid cleaner safe? | Estimated cleanup time | Photos before drop-off? |
|---|---|---|---|---|---|
| Loose crumbs, wrappers, light dirt | Low | Portable cordless vacuum with crevice tool | Usually no | 5-10 minutes | Usually no |
| Sand in seats, mats, and rails | Medium to high | Vacuum with crevice tool and upholstery brush | No, unless a small spot remains | 10-15 minutes | Yes |
| Pet hair on cloth seats or mats | High | Upholstery brush plus vacuum | Sometimes, very sparingly | 10-20 minutes | Yes |
| Coffee, soda, or food spill | High | Blot first, then wet-dry vacuum if needed | Yes, for targeted stain treatment | 10-20 minutes | Yes |
| Mud on mats or boot liner | High | Wet-dry vacuum or handheld with strong pickup | Yes, on removable mats only if needed | 10-15 minutes | Yes |
| Smoke or vape odor | Very high | Remove source, ventilate, then odor control steps | No for odor alone | 10-30 minutes | Yes |
How do you clean spills without making them worse?
Blot first, do not rub. For coffee, food, vomit, urine, or other organic messes, use an enzyme stain spray sparingly after blotting, and keep moisture controlled. The goal is to remove the stain and source material without soaking upholstery or pushing liquid deeper into the seat foam.
Blot first, do not rub
Use a clean cloth or paper towel and press straight down. Rubbing spreads the stain and works liquid deeper into the fabric. If the spill is still wet, pick up as much as you can before it dries. That lowers both stain and odor risk.
A common first-timer mistake is spraying too much cleaner on the seat, then calling it “clean” while the cushion stays damp. That can leave a bigger odor problem by the time the car is returned. Small, controlled cleanup is safer than soaking the panel.
When enzyme stain spray is safe
Carrenting advises enzyme spray for organic stains like vomit or urine. Use it only on the affected spot and only after blotting. Enzyme cleaner is for organic residue, not for every mark in the cabin. Keep it away from electronics, switches, and seams that can hold excess liquid.
How to handle mud and wet sand
Let thick mud dry enough to break apart, then vacuum or lift it off before you use any liquid. Wet sand should be removed as much as possible with suction first, because water can turn it into a paste that sticks to carpet fibers. Use a wet-dry vacuum if the mix is truly damp.
Do not hose down a floor mat or pour cleaner into the carpet. Too much liquid can create a larger problem than the original stain. If a mat is removable, clean it outside the car and let it dry before reinstalling it.
Cleaning fee risk matrix
This matrix separates the messes that usually stay in the “normal use” range from the ones most likely to trigger a return charge. Use it as a quick decision guide when you are under time pressure and need to choose the right tool first.
Risk by mess type
| Mess type | Fee risk level | Best vacuum/tool | Liquid cleaner safe? | Estimated cleanup time | Photos before drop-off? |
|---|---|---|---|---|---|
| Trash, wrappers, empty bottles | Low | Portable cordless vacuum plus hand removal | No | 5-10 minutes | No |
| Crumbs in seats and cupholders | Low to medium | Crevice tool | No | 5-10 minutes | Usually no |
| Sand in seams, rails, and mats | Medium to high | Crevice tool plus upholstery brush | No | 10-15 minutes | Yes |
| Pet hair on cloth upholstery | High | Upholstery brush plus vacuum | Sometimes, sparingly | 10-20 minutes | Yes |
| Coffee, soda, or food stain | High | Blotting cloth, then wet-dry vacuum if needed | Yes, sparingly | 10-20 minutes | Yes |
| Mud on mats or exterior lower panels | High | Wet-dry vacuum for interior mats | Yes, on removable mats only if needed | 10-15 minutes | Yes |
| Smoke or vape odor | Very high | Source removal, ventilation, charcoal or baking soda | No for odor alone | 10-30 minutes | Yes |
How can you beat odor fees?
Odor is one of the fastest ways to get flagged at return, especially smoke and vape residue. Remove the source first, then use short-term odor control like activated charcoal pouches or baking soda sachets. That will not guarantee a clean bill, but it can reduce the chance of a complaint about smell.
Smoke and vape residue
Do not treat smoking or vaping as a low-risk habit in a rental car. Some rental companies charge up to $400 for smoking cleanup, and Budget and Avis charge up to $450 for smoking cleanup. Smoke odor can cling to fabric, headliners, and ventilation paths, so it is one of the highest-risk return issues.
Ventilate the car, remove ash or residue, and check the cabin scent again after it has sat closed for a short period. If the smell is still obvious, do not assume a quick air freshener will fix it. Air fresheners can mask the odor for a few minutes and leave the underlying problem in place.
Pet odors
Pet hair and fur can trigger a fee, and odor often travels with it. Vacuum the seats, mats, and cargo area first, then remove any soft items the pet used. If a fabric seat still smells after vacuuming, focus on the source material before reaching for fragrance products.
Charcoal and baking soda for short-term control
Activated charcoal pouches and baking soda sachets can help reduce odor in the short term. Place them in the cabin after the visible source is gone. They are not a fix for smoke cleanup, but they can help a lightly musty or pet-smell cabin before drop-off.
What should you photograph before return?
Take timestamped pre-return inspection photos of the floor, seats, boot or trunk, and under-seat areas. The goal is dispute prevention, not proof of perfection. If the company later claims the car was returned dirty, those photos can show the condition at drop-off.
Floor and seat surfaces
Photograph the front and rear seats, plus the floor area around them. Include wide shots and a few close-ups if there are stains, crumbs, or pet hair that you removed. That gives you a record of the cabin’s general condition and the spots most likely to be questioned.
Under-seat and seat-rail areas
Take a low angle photo under each front seat and along the seat rails. Those areas are easy to overlook during a return inspection and easy to miss in a dark parking lot. If you cleaned them, the photo shows you did more than a quick surface wipe.
Boot or trunk and mats
Photograph the boot or trunk, the cargo floor, and any removable mats or liners. If beach sand, sports gear, luggage dirt, or pet hair was involved, those photos matter more than a general cabin shot. Timestamped photos are strongest when they include the actual problem area.
- Open the rental agreement and check the return-cleanliness language.
- Remove trash, food wrappers, bottles, and loose items.
- Pull out mats and liners, then clean both sides if removable.
- Vacuum seats, seams, rails, cupholders, door pockets, and under-seat areas.
- Blot any spill, then treat organic stains sparingly with enzyme spray.
- Use odor control only after the visible source is gone.
- Take timestamped photos of the floor, seats, boot, and under-seat areas.
- Return the car with no obvious debris, wet spots, or strong odor.
Frequently asked questions
How dirty can a rental car be before they charge a cleaning fee?
There is no universal rule of thumb. A rental car cleaning fee is added for cleaning beyond standard practices, and the decision depends on severity and company policy. Visible trash, pet hair, strong odors, stains, mud, and smoke residue are the kinds of issues that most often move a return from acceptable to chargeable.
What should I vacuum in a rental car before returning it?
Focus on the high-risk zones: seats, seams, seat rails, floor mats, under-seat areas, cupholders, console bins, door pockets, and boot edges. Those are the places where crumbs, sand, hair, and small debris collect. If you are short on time, clean those spots before anything cosmetic.
Do rental companies charge for pet hair and odors?
Yes, they can. The same source says pet hair or fur can trigger a cleaning fee, and strong odors can too. Pet hair often embeds in upholstery and mats, which means it may need more than a quick vacuum pass. Odor control helps only after the source material is removed.
Is it worth using a portable vacuum on a rental car?
Yes. A portable cordless vacuum is one of the fastest ways to reduce return risk because it handles crumbs, sand, and loose hair before they spread or settle deeper into the cabin. Look for a crevice tool and upholstery brush, since those attachments matter more than raw size.
Will smoking in a rental car trigger a cleaning fee?
It often can. The same source says some companies charge up to $400 for smoking cleanup, and Budget and Avis charge up to $450. Smoke odor is especially difficult to remove because it settles into fabric, vents, and trim. Even if the car looks clean, the smell alone can lead to a charge.
Can a wet-dry vacuum remove sand and mud from a rental car?
Yes, especially when the mess is damp or mixed with liquid. The same source says modern compact wet-dry vacs are useful for spills and deep upholstery cleaning. They are a better choice than a dry handheld when you need extraction from muddy mats or wet sand, but avoid soaking the fabric.
How can I document the car’s condition before drop-off?
Take timestamped photos of the floor, seats, boot or trunk, and under-seat areas before you hand the car back. Include any cleaned spots that were dirty earlier. Check the rental agreement too, since it may spell out cleanliness standards and fee language that matters in a dispute.
Products related to this article
Sponsored / affiliate links. As an Amazon Associate I earn from qualifying purchases. I may earn additional commission from eligible campaigns.