How Often to Change Cabin Air Filter: Essential Guide
The simplest answer: Change your cabin air filter every 15,000 to 30,000 miles or at least once a year. This keeps the air you breathe inside your car fresh and clean, improving comfort and protecting your car’s HVAC system.
Is the air in your car feeling a bit… less than fresh? Maybe you’re noticing more dust, funny smells, or your car’s air conditioning and heating system isn’t working quite as well as it used to. If so, it might be time to think about your cabin air filter. Many car owners overlook this small but mighty part, leaving them wondering, “How often to change cabin air filter in car?” It’s a simple question, but the answer can make a big difference in your driving comfort and even your health. Don’t worry if you’ve never thought about it before – that’s exactly why we’re here! We’ll guide you through everything you need to know in easy-to-understand steps, helping you keep your car’s air clean and your wallet happy.
Why Your Cabin Air Filter Matters More Than You Think
Think of your cabin air filter as the lungs of your car’s climate control system. Its main job is to trap tiny particles like dust, pollen, dirt, soot, and even some annoying allergens before they can enter your car’s interior through the vents. When it’s doing its job well, you get clean, fresh air to breathe while you drive.
But like any filter, it can only do this for so long. Over time, it gets clogged with all the gunk it’s collected. A dirty, clogged cabin air filter means:
- Reduced Airflow: Your car’s fan has to work harder to push air through a blocked filter, which can strain the system and reduce the effectiveness of your AC and heater.
- Unpleasant Odors: Trapped moisture and debris can lead to mold, mildew, and musty smells circulating in your car.
- Increased Allergens: When the filter is full, it can’t trap pollen and other allergens effectively, meaning they get blown right into your face.
- Potential System Damage: In severe cases, a completely blocked filter can cause your HVAC system to overheat or even fail, leading to expensive repairs.
How Often to Change Cabin Air Filter in Car: The General Rule
So, what’s the magic number? For MOST vehicles, the general recommendation is to change your cabin air filter somewhere between 15,000 and 30,000 miles. However, this is just a guideline. Several factors can influence how often you should really be swapping it out. Think of it like changing the oil in your car – there are typical intervals, but driving conditions can speed up or slow down the need for a change.
It’s also a good practice to replace it at least once a year, even if your mileage is lower. Air filters can degrade over time and can still accumulate moisture, dust, and become a breeding ground for mold and bacteria.
Factors That Affect Your Cabin Air Filter’s Lifespan
Your driving environment plays a huge role in how quickly your cabin air filter gets dirty. Here are some key things to consider:
- Driving in Dusty or Gritty Areas: If you live or frequently drive on unpaved roads, in construction zones, or through areas with lots of dust and dirt, your filter will clog up much faster.
- High Pollen Seasons: If you suffer from allergies and drive in an area with heavy pollen during certain times of the year, replacing your filter before and after these seasons can significantly improve your breathing comfort.
- City Driving: Stop-and-go city traffic often means more exposure to exhaust fumes and airborne pollutants, which can load up your filter quickly.
- Frequent Use of HVAC System: If you run your air conditioning or heater constantly, the filter is always working.
- Driving with Pets: Pet hair and dander can quickly accumulate in the cabin air filter.
Signs Your Cabin Air Filter Needs Replacing
Your car will often give you clues when it’s time for a new cabin air filter. Here are the most common signs to watch out for:
- Reduced Airflow from Vents: Turn on your fan to the highest setting. If the air coming out is weak or barely noticeable, the filter is likely clogged.
- Unpleasant Smells: Musty, stale, or even foul odors coming from your vents are a strong indicator that your filter is full of mold, mildew, or trapped debris.
- Increased Allergy Symptoms: If you find yourself sneezing or experiencing itchy eyes more often when you’re in your car, even with the windows up, your filter might not be trapping allergens effectively anymore.
- Dust Accumulation on Dashboard: If you notice an unusual amount of dust settling on your dashboard and other interior surfaces shortly after cleaning, it could mean the filter isn’t doing its job.
- AC or Heater Not Working Efficiently: If your air conditioning isn’t as cold or your heater not as warm as it used to be, a blocked filter could be the culprit.
Checking Your Owner’s Manual: The Ultimate Source
While the 15,000-30,000 mile or annual replacement is a solid general rule, the absolute best place to find out how often to change your specific vehicle’s cabin air filter is your owner’s manual. Car manufacturers will provide specific maintenance schedules tailored to your exact make and model. This is often found in the “Maintenance” or “Service” section of the manual.
Can’t find your owner’s manual? No worries! Many manufacturers have digital versions available on their websites. A quick search for “[Your Car Make and Model] owner’s manual PDF” should help you find it.
Cabin Air Filter Replacement Intervals: A Quick Comparison
To give you a better idea, here’s a table comparing typical replacement intervals for different driving conditions. Remember, these are general guidelines, and your owner’s manual is the final authority.
| Driving Condition | Recommended Replacement Interval |
|---|---|
| Normal Driving (Mixed City/Highway) | 15,000 – 30,000 miles or 1 year |
| Heavy City Driving / Dusty Environments | 10,000 – 15,000 miles or potentially sooner |
| Frequent Driving in High Pollen/Allergen Areas | 10,000 – 20,000 miles, or before/after peak seasons |
| Minimal Driving (Less than 7,500 miles/year) | 1 year (consider more frequent checks) |
Types of Cabin Air Filters
Did you know there are different types of cabin air filters? Understanding them can help you choose the best one for your needs. The two main categories are:
1. Standard/Particulate Filters
These are the most common and cost-effective. They are designed to trap larger particles like dust, dirt, and pollen. They offer a good baseline level of air filtration.
2. Activated Carbon/High-Efficiency Filters
These filters go a step further. In addition to trapping particulate matter, they contain activated carbon. Activated carbon is excellent at absorbing odors, fumes, and gases. If you’re particularly sensitive to smells, drive in areas with heavy pollution, or want the freshest possible air, these are a great upgrade.
While activated carbon filters might cost a little more upfront, many drivers find the improved air quality and odor reduction to be well worth the investment. For best results, you’ll want to replace these just as frequently as standard filters, following the same mileage and time guidelines.
How to Visually Inspect Your Cabin Air Filter
Sometimes, the best way to know if it’s time is to see it for yourself. While the exact location varies by car, most cabin air filters are relatively easy to access. Here’s a general guide on how to find and inspect it:
Common Locations for Cabin Air Filters:
- Behind the Glove Box: This is the most common spot. You might need to release the glove box from its hinges or remove a small panel to access the filter housing.
- Under the Dashboard: In some vehicles, the filter housing is located under the passenger side of the dashboard.
- Under the Hood, Near the Firewall: Less common, but some vehicles place the filter in a housing near the windshield wipers, accessible from under the hood.
Steps for Inspection:
- Consult Your Owner’s Manual: Seriously, this is the most reliable way to find out where it is for YOUR car.
- Gather Basic Tools (if needed): You might need a Phillips head screwdriver or a small pry tool, depending on how your filter cover is secured.
- Locate the Filter Housing: Once you’ve identified the area (e.g., behind the glove box), look for a black plastic cover or clip-on mechanism.
- Open the Housing: Carefully unclip or unscrew the cover. Some glove boxes may need to be carefully pulled down or detached from their stops to allow clearance.
- Remove the Old Filter: Note the direction of airflow (there’s usually an arrow on the filter or housing). Gently slide out the old filter.
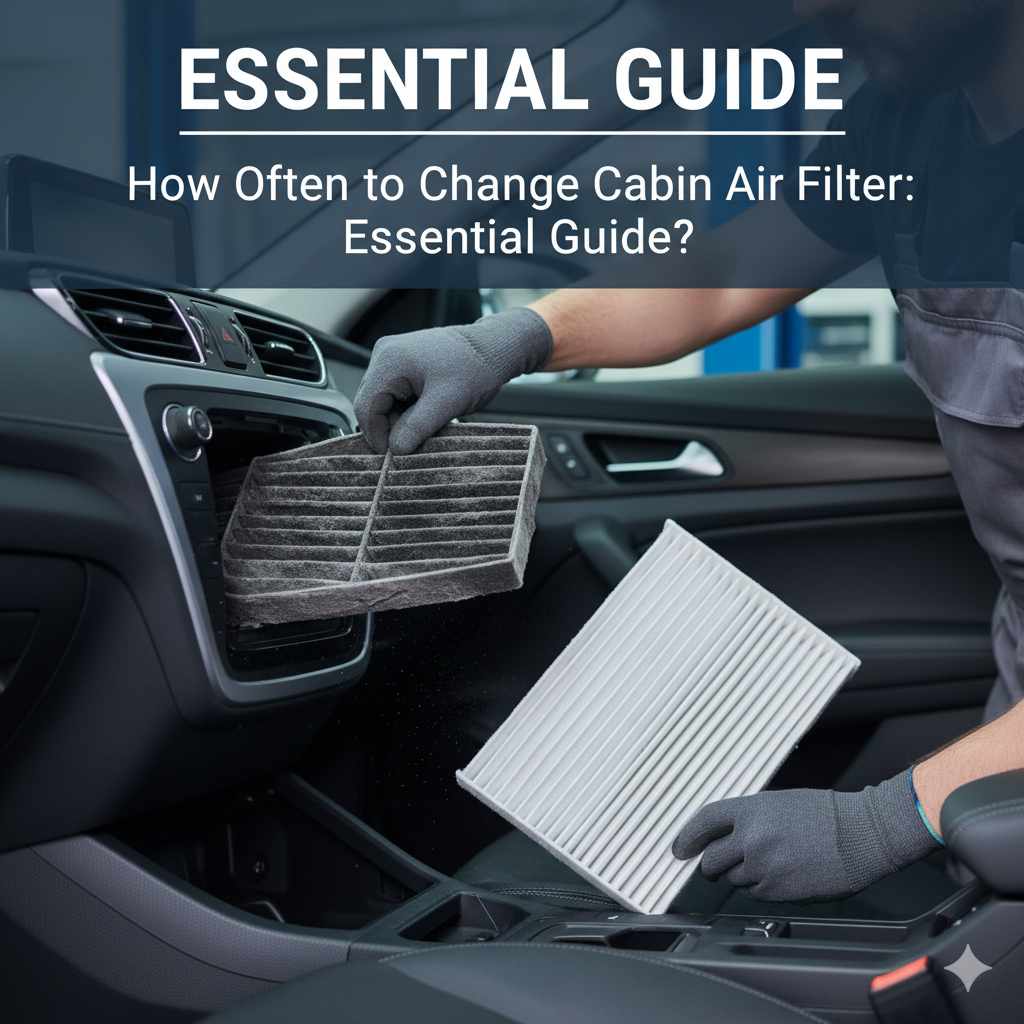
- Inspect the Filter: Hold it up to the light. Is it covered in thick layers of dust and debris? Does it look grey or black instead of white? Does it have leaves, twigs, or other large debris stuck in it? If you answered yes to any of these, it’s time for a replacement.
- Clean the Housing (Optional but Recommended): While the filter is out, use a vacuum or a damp cloth to clean out any loose dust or debris from the filter housing itself.
- Reinstall or Replace: If it looks good, you can reinstall the old one, but if you’re seeing dirt, replace it with a new one!
A visual inspection is one of the best ways to confirm if you’re due for a change, regardless of mileage. If it looks dirty, change it!
How to Replace Your Cabin Air Filter (DIY Guide)
Replacing a cabin air filter is one of the easiest DIY car maintenance tasks. It takes about 15-30 minutes and can save you money on labor costs at a shop. Here’s a step-by-step guide:
Tools You Might Need:
- Replacement Cabin Air Filter (Make sure it’s the correct one for your car!)
- Phillips Head Screwdriver (sometimes needed)
- Small Flathead Screwdriver or Pry Tool (for gentle prying if needed)
- Gloves (optional, to keep hands clean)
- Mask (optional, if you’re sensitive to dust)
- Your car’s owner’s manual (highly recommended!)
Step-by-Step Replacement Process:
- Find the Filter Location: Again, check your owner’s manual! For example, on many Honda or Toyota vehicles, you’ll need to access it behind the glove box.
- Prepare the Area: Remove any items from your glove box. You might want to lay down a towel to catch any falling debris.
-
Access the Filter Housing:
- Glove Box Models: Often, you’ll need to gently pull the glove box downwards from its stops. Some have phillips screws holding them in. Look for clips or screws on the sides.
- Under-Dash Models: Look for a plastic panel or cover and unscrew or unclip it.
- Open the Filter Cover: Once the glove box is open enough or the panel is removed, you should see the old cabin air filter. It’s usually housed in a plastic frame or door. Gently push tabs or unlatch the cover.
- Remove the Old Filter: Carefully slide the old filter out. Pay attention to the airflow direction arrow marked on the filter or the housing. Write down or take a picture of which way the arrow is pointing.
- Vacuum the Housing: Use a shop vac or household vacuum to clean out any leaves, dust bunnies, or debris from the filter compartment.
- Install the New Filter: Take your new cabin air filter and slide it into the housing, making sure the airflow arrow points in the same direction as the old one (this is crucial for proper operation). If you’re unsure, the arrow should point down and towards the cabin for many vehicles, but always verify.
- Close the Filter Cover: Securely reattach the filter cover or door.
- Reassemble: Reattach the glove box (if you removed it) by pushing it back onto its hinges or refastening any screws. Put items back in your glove box.
- Test the System: Start your car and turn on the fan. You should notice air flowing more freely, and if you installed an activated carbon filter, you might immediately notice fresher air.
If you encounter any resistance or are unsure about a step, it’s always best to consult a professional. However, most people find this to be a straightforward and rewarding DIY task!
When to Seek Professional Help
While changing a cabin air filter is usually simple, there are times when it’s best to let a mechanic handle it:
- If you cannot locate the cabin air filter housing after consulting your owner’s manual.
- If the filter housing is difficult to access or requires extensive disassembly of your car’s interior.
- If you feel uncomfortable or aren’t sure about any part of the process.
- If you suspect a more significant issue with your HVAC system, such as a blower motor problem or a leak.
A professional mechanic can quickly diagnose and resolve these issues, ensuring your car’s climate control system functions optimally and safely.
The Benefits of a Clean Cabin Air Filter
Keeping up with your cabin air filter replacement schedule isn’t just a good idea; it offers tangible benefits:
- Improved Air Quality: Breathe cleaner air, free from dust, pollen, and other irritants, which is especially important for allergy and asthma sufferers.
- Enhanced HVAC Performance: Your AC and heater will work more efficiently, providing quicker and more consistent temperature control.
- Reduced Odors: Eliminate musty smells and keep your car’s interior smelling fresh, especially if you use an activated carbon filter.
- Extended HVAC System Life: By reducing the strain on your blower motor and HVAC components, you help prevent premature wear and tear.
- Cost Savings: Regular DIY replacement is much cheaper than paying for it during other service appointments or dealing with costly repairs from neglect.
- Increased Comfort: A well-functioning HVAC system with clean air makes every drive more comfortable for you and your passengers.
FAQ: Your Cabin Air Filter Questions Answered
Q1: How often should I change my cabin air filter if I have allergies?
A1: If you suffer from allergies, it’s highly recommended to change your cabin air filter more frequently. Consider replacing it every 10,000 to 15,000 miles or at the start and end of peak allergy seasons (spring and fall) to effectively trap allergens like pollen. Using a high-efficiency filter with activated carbon can also provide extra relief.
Q2: Can I drive without a cabin air filter?
A2: While your car will still blow air, driving without a cabin air filter is not advisable. The filter protects your car’s HVAC system from debris like leaves and dirt, and without it, these can get drawn into and damage the blower motor and evaporator core. Plus, all the unfiltered dust and pollutants will enter your cabin, making the air quality very poor and potentially causing health issues.
Q3: What’s the difference between an engine air filter and a cabin air filter?
A3: They serve different purposes. The engine air filter cleans the air that goes into your car’s engine for combustion. The cabin air filter cleans the air that circulates inside the passenger compartment for you and your passengers to breathe. While both are important, their locations, replacement intervals, and the contaminants they filter are distinct.
Q4: My car smells musty when I turn on the AC. Is it the cabin air filter?
A4: A musty smell is a very common sign that your cabin air filter is dirty and possibly harboring mold or mildew. Replacing the filter is the first and easiest step to fix this. If the smell persists after replacement, it might indicate a deeper issue within the HVAC system, like moisture buildup in the ducts or on the evaporator coil, which may require professional attention.