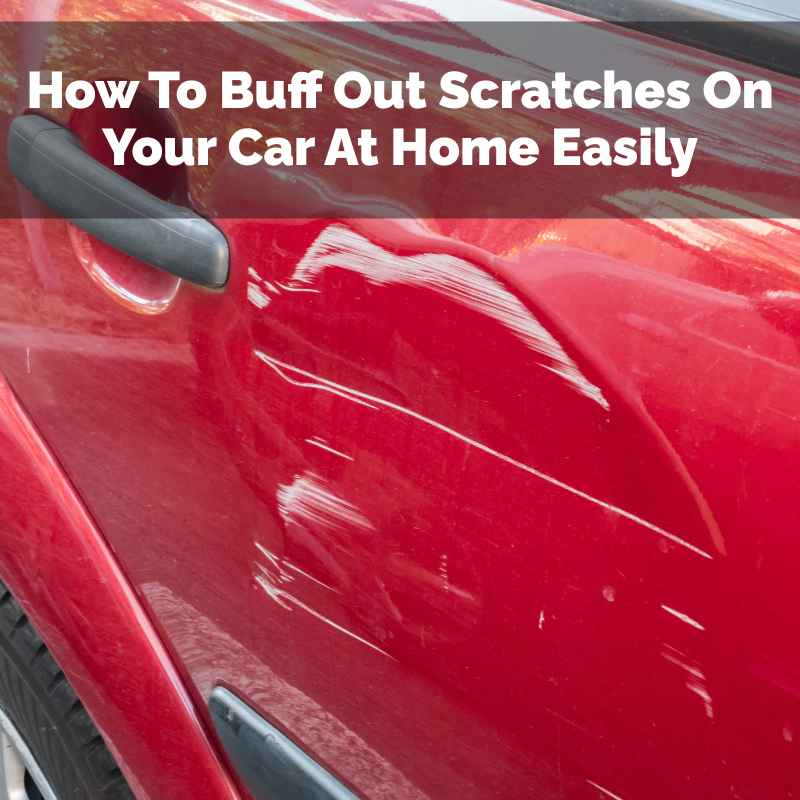
How To Buff Out Scratches On Your Car At Home Easily
It’s a moment that makes your stomach drop. You find a scratch on your car. Maybe it was a rogue shopping cart.
Or perhaps a tree branch. Whatever caused it, that scratch takes away from your car’s beautiful shine. You want to fix it.
But going to a repair shop can cost a lot. And it takes time. What if you could fix it yourself?
At home? It sounds good, right? This guide will show you simple ways to buff out those annoying scratches.
You’ll learn what you need. You’ll also learn how to do it step-by-step. Get ready to make your car look great again.
Quick Answer
Buffing out a car scratch at home works for light, clear-coat-only damage. Clean the area, apply a scratch remover or mild rubbing compound with a microfiber pad or foam applicator, work it in small circles, then wipe clean and follow up with wax. If your fingernail catches on the scratch or you see a different color underneath (primer or bare metal), buffing won’t fix it — you’ll need touch-up paint or a body shop.
Understanding Car Scratches
Our Pick
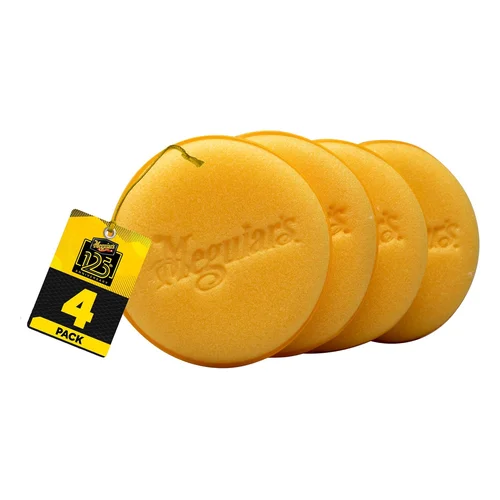 |
Meguiar’s Supreme Shine Foam Applicator Pads (4-Pack) For hand buffing or drill-attachment application when working compound or polish into a scratch repair.
|
Cars get scratched more often than we think. These marks happen on the car’s paint. Paint has layers.
The top layer is clear coat. This is like a shield. Under that is the color coat.
Then there’s the primer. And finally, the metal body of the car.
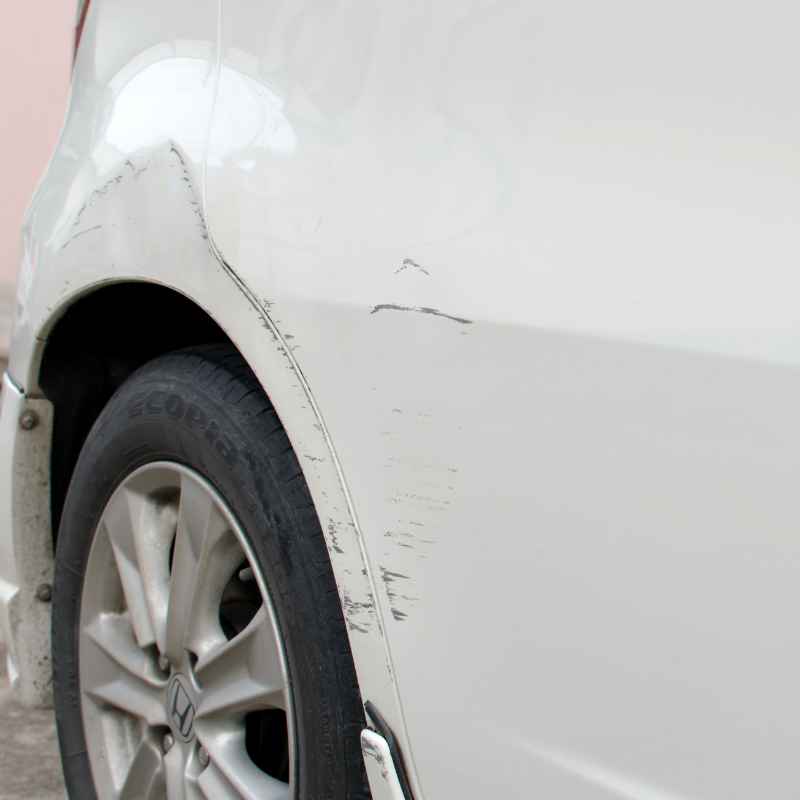
A scratch’s depth matters. Some scratches only go through the clear coat. These are often called clear coat scratches.
They look white or cloudy. They don’t go down to the color. These are the easiest to fix at home.
We can buff these out.
Deeper scratches go past the clear coat. They reach the color coat. Or even the primer.
If you see the primer (often gray or white), it’s a deeper scratch. If you see bare metal, it’s very deep. These deep scratches are harder to fix.
They might need more than just buffing. Sometimes, you might need touch-up paint. Or even professional help.
Knowing the scratch depth helps choose the right method. For this guide, we focus on those easy-to-fix clear coat scratches. We want to bring back the shine.
We want to make those marks disappear.
Gathering Your Supplies
To buff out scratches, you need a few key things. Don’t worry, these aren’t super expensive. You can find most at auto parts stores.
Or even online.
First, you need a good car wash soap. This is for cleaning the area. You also need clean microfiber towels.
These are soft. They won’t scratch your paint. Have a few ready.
Next, you need a scratch remover product. There are many types. Some are called ‘scratch removers’.
Others are ‘rubbing compounds’. Some are ‘polishes’. For light scratches, a mild polish or scratch remover is best.
A rubbing compound is a bit stronger. Use it carefully.
You might also need a clay bar kit. This helps clean the paint surface really well. It lifts out hidden dirt.
It makes the buffing work better.
Finally, you might want a car wax. After buffing, wax protects the paint. It adds a nice shine too.
So, let’s list it out:
- Mild car wash soap
- Clean microfiber towels (at least 3)
- Car scratch remover or mild rubbing compound
- Clay bar kit (optional, but recommended)
- Car wax (optional, for finishing)
Having all this ready makes the job go smoothly. You won’t have to stop and search for something mid-task.
My Own Scratchy Encounter
I remember one time. It was a sunny Saturday. I was so proud of my car.
It was a deep blue. It gleamed. I went to the grocery store.
As I walked back, I saw it. A long, thin scratch. Right on the passenger door.
It looked like a white line. My heart sank. I felt so annoyed.
I touched it. It felt rough. I knew it was a clear coat scratch.
But it looked so bad!
I didn’t want to pay for a repair. Not for something like that. I went home and looked up what to do.
I bought a simple scratch remover kit. I washed the car very carefully. Then, I used the little rubbing pad and the cream.
I worked in small circles. It took a bit of time. I kept checking.
Slowly, slowly, the white line started to fade. When I was done, I wiped it clean. It was gone!
Well, almost gone. You could barely see it. I felt so happy.
It was such a small thing, but it made a big difference to how I felt about my car.
That experience showed me that many scratches aren’t the end of the world. With the right tools and a little patience, you can fix them. You can bring back that smooth, shiny look.
It’s a great feeling of accomplishment.
“That deep blue passenger door scratch felt like the end of the world when I first saw it, but the fingernail test told me it hadn’t gone past the clear coat — a $15 scratch remover kit and about twenty minutes of gentle circular buffing brought it back to almost invisible. I didn’t touch a body shop.”
— Md Meraj, The Daily Automotive
Step-by-Step: Buffing Out the Scratch
Let’s get to the fun part. Fixing that scratch. Follow these steps.
They are simple and effective.
Step 1: Clean the Area
This is super important. You must start with a clean surface. Dirt and grit can make scratches worse.
They can cause new ones.
Wash the whole car if you can. Or at least the area around the scratch. Use your car wash soap and water.
Rinse it off well. Dry the area completely with a clean microfiber towel. No water spots!
If you have a clay bar kit, this is the time to use it. Follow the kit’s instructions. It will make the paint feel smooth like glass.
This removes any invisible contaminants. They can get in the way of the scratch remover.
Step 2: Apply the Scratch Remover
Now, grab your scratch remover product. Or your mild rubbing compound. Read the label first.
Some products come with their own applicator pads. Others you apply to a cloth.
Put a small amount of the product on the pad or cloth. Don’t use too much. A little goes a long way.
Gently rub the product onto the scratch. Use a back-and-forth motion. Or small circles.
Don’t press too hard. You are trying to level the clear coat around the scratch. You are not trying to remove paint.
Work on a small section at a time. Cover the scratch itself. Also, work a little around it.
This helps blend the fix.
Step 3: Buff and Inspect
After rubbing for a minute or two, take a clean, dry microfiber towel. Gently buff the area. This removes the product residue.
It also helps you see your progress.
Look closely at the scratch. Has it faded? Is it less noticeable?
You might need to repeat the process. Apply more product. Rub again.
Then buff again.
Most light scratches need 2 to 3 applications. Be patient. It’s better to do it a few times gently.
Than to press too hard and damage the paint more.
If the scratch is still visible after several tries, it might be deeper than you thought. At that point, you might need a stronger compound. Or, it might be time to consider touch-up paint.
But for many light marks, this process works wonders.
Step 4: Clean and Protect
Once you’re happy with the result, clean the area again. Use a clean, damp microfiber towel. This removes any leftover product.
Then dry the area thoroughly.
Now, it’s a great time to apply car wax. Wax protects the paint. It adds a deep shine.
It helps prevent future scratches from sticking. Apply a thin layer of wax. Let it haze over.
Then buff it off with another clean microfiber towel.
Your car’s paint should now look much better. The scratch should be gone or very hard to see. You did it yourself!
Quick Check for Scratch Depth
Test with your fingernail. Gently run your fingernail across the scratch.
- If your nail doesn’t catch, it’s likely a clear coat scratch. These are fixable by buffing.
- If your nail catches slightly, it might be a deeper scratch into the color coat. Buffing might help, but touch-up paint could be needed too.
- If your nail catches a lot, or you see primer (a different color like gray or white), it’s a deep scratch. Buffing alone won’t fix this.
Choosing the Right Product
This guide focuses on light clear-coat scratches specifically — if you’re dealing with a wider, more textured scrape (like a curb rub or a parking-lot sideswipe) rather than a thin line, see how to buff out a scrape on a car instead, since the technique differs slightly for larger surface damage.
The world of car scratch removers can be confusing. Let’s break it down a bit. This helps you pick what’s best for your home repair.
Polishes: These are the mildest. They contain very fine abrasives. They work by smoothing out minor imperfections in the clear coat.
They are great for swirl marks and very light scratches. They add shine too.
Scratch Removers: These are a step up from polishes. They have slightly more abrasive particles. They are designed specifically for light to moderate scratches.
They often contain fillers that can temporarily hide deeper scratches. But the abrasion is what truly fixes it.
Rubbing Compounds: These are the strongest of the DIY options. They have coarser abrasives. They are best for noticeable scratches in the clear coat.
You need to use them with care. Pressing too hard can create more scratches. Always follow up with a polish or wax to restore shine.
What to Avoid: Some very cheap or generic “scratch removers” might not work well. Or they might be too harsh. Stick to reputable brands.
Check reviews. For very deep scratches that go into the color coat or primer, no amount of buffing will work. You’ll need touch-up paint for those.
Always start with the least aggressive product. You can always move to something stronger if needed.
For most home users, a good quality scratch remover or a mild rubbing compound is a safe bet. They balance effectiveness with ease of use.
Product Application Styles
How you apply matters. Here are common ways:
- With a cloth: Many scratch removers are applied using a soft microfiber or foam applicator pad. Work in small sections.
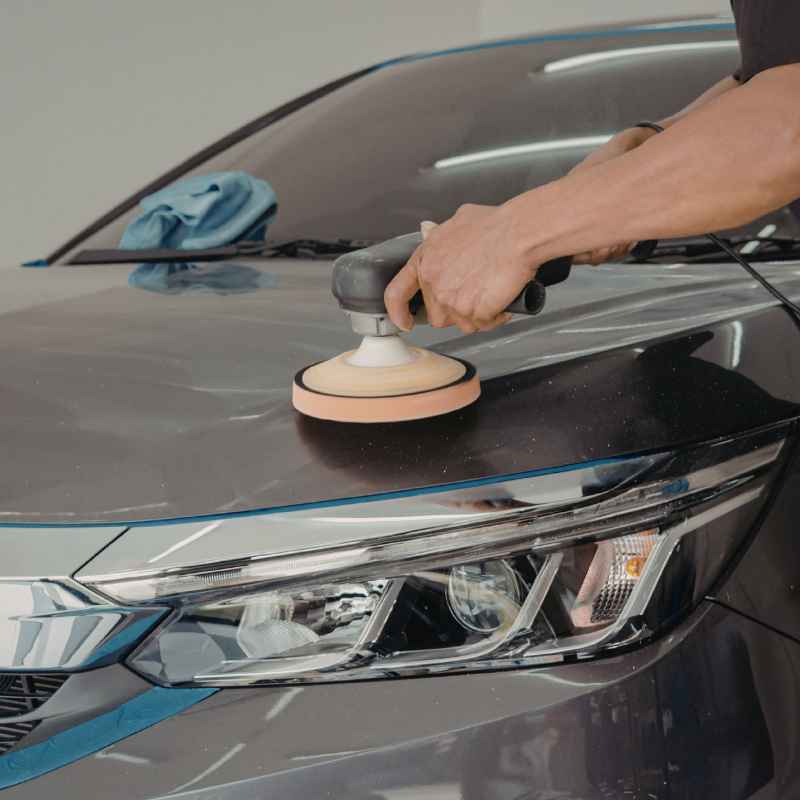
- With a foam pad and drill attachment: Some kits include a foam pad that attaches to a power drill. This makes buffing faster. Use low speed. Move constantly. Be careful not to overheat the paint.
- Hand buffing: This is the most basic. Use a soft cloth. Apply the product. Rub in circles. Then buff the residue off. It takes more effort but offers great control.
Real-World Scenarios and Habits
Why do these scratches happen? It’s often a mix of things. Our daily lives create opportunities for car damage.
Parking Lot Hazards: This is a big one. Cars are close together. Doors swing open.
Shopping carts roll away. Even someone parking too close can cause a scrape. This is why you see so many door dings and fender scratches.
Washing and Drying Mistakes: Many people don’t realize how abrasive dirt is. Using an old sponge or a dirty towel to wash a car. Or washing in a dusty area.
This grinds dirt into the paint. It causes many fine scratches called swirl marks. Even automatic car washes with worn brushes can cause this.
Environmental Factors: Trees branch over cars. This causes scratches. Little stones or debris on the road can get kicked up by tires.
They hit the car’s paint. Bird droppings can also etch into the paint if left too long. Especially in hot weather.
Accidental Bumps: Hitting a garage wall. Scraping a curb. Backing into something.
These common events lead to scrapes and gouges.
Understanding these habits helps prevent future scratches. Parking further away from other cars. Using the two-bucket method for washing.
Being mindful when driving in tight spaces. These small changes make a big difference. They protect your car’s finish.
Myth vs. Reality: Scratch Repair
What This Means for You
So, what’s the takeaway? Most minor scratches on your car are not a big deal. They can be fixed at home.
This saves you money and hassle. It gives you a sense of control over your car’s appearance.
When is it normal? If you see a light white line on your car’s paint. Especially on darker colored cars. This is usually a clear coat scratch.
It happens from everyday use. It’s normal. You can likely buff it out yourself.
When to worry? If you see a scratch that is a different color than your car’s paint. This means it has gone through the clear coat. If you see primer (often gray or white), or bare metal.
These are deeper. They need more than just buffing. They need touch-up paint.
Simple checks: Always do the fingernail test. Does your nail catch? If not, you’re probably safe to buff.
If it catches a lot, be cautious. Don’t push it. Also, try to work in good light.
Natural daylight is best. It lets you see the scratch clearly. And how the buffing is working.
Knowing these things helps you decide. Is this a DIY job? Or do I need professional help?
For the most common scratches, the answer is usually yes, you can do it yourself!
Quick Guide: Normal vs. Concerning Scratches
| Feature | Normal (Likely Clear Coat) | Concerning (Deeper) |
|---|---|---|
| Appearance | White or hazy line | Color is different from car paint (primer or metal visible) |
| Fingernail Test | Nail doesn’t catch | Nail catches easily |
| Fix Approach | Buffing, polish, scratch remover | Touch-up paint, professional repair |
Quick Fixes and Tips
Here are some extra tips to help you get the best results. These little tricks can make the process easier.
- Work in the shade: Never buff your car in direct sunlight. The heat can dry out the product too fast. It can also make the paint too hot. This can cause problems. Find a shady spot. Or wait for a cooler part of the day.
- Use gentle pressure: I can’t stress this enough. Let the product do the work. You are guiding it. Not forcing it. Too much pressure is your enemy.
- Apply in small sections: Don’t try to fix a huge scratch all at once. Work on a small area. Then move to the next. This gives you better control. You can see your progress better.
- Keep your towels clean: Use a clean side of the towel. Or switch to a new one often. A dirty towel can reintroduce grit. This can cause more scratches.
- Test in an inconspicuous area: If you’re unsure about a product. Or how it will look. Test it on a hidden spot first. Like the lower part of a door sill. This way, you can see how it behaves.
- Patience is key: Some scratches might take more than one try. Or need a bit more time. Don’t rush the process. Take breaks if you need them.
These simple tips can make a big difference. They help you get a professional-looking finish. All from your own driveway.
Frequently Asked Questions
Can I really remove any scratch by buffing?
No, you can only buff out scratches that are in the clear coat layer of your car’s paint. If a scratch is deep enough to reach the color coat or primer, buffing won’t remove it. You’ll need touch-up paint for those.
What’s the difference between a rubbing compound and a polish?
A rubbing compound has coarser abrasives and is used to remove more significant scratches. A polish has finer abrasives and is used to remove lighter imperfections and restore shine after using a compound or for very minor marks.
How often should I wax my car after buffing?
It’s a good idea to wax your car after buffing to protect the fresh finish. Generally, waxing your car every 3-6 months is recommended to maintain its shine and protection against the elements.
Can I use a regular household cleaner to remove scratches?
It’s best to avoid regular household cleaners. Many contain harsh chemicals or abrasives not meant for car paint. Always use products specifically designed for automotive paint care to avoid damage.
What if the scratch is very long but looks shallow?
Even a long scratch can be shallow if it’s only in the clear coat. Use the fingernail test. If your nail doesn’t catch, it’s likely a candidate for buffing. Work slowly along the length of the scratch.
Is it safe to use a power buffer on my car?
Yes, a power buffer can be used, but with caution. Always use the lowest speed setting. Keep the buffer moving constantly to avoid concentrating heat in one spot. Practice on scrap metal or an old car panel if you’re new to it. Hand buffing is safer for beginners.
Final Thoughts
Seeing a scratch on your car is never fun. But it doesn’t have to be a big problem. For most light marks, you have the power to fix them yourself.
With the right tools and a little patience, you can buff out those scratches. You can restore your car’s shine. Enjoy the satisfaction of a job well done.
Your car will thank you for it.
Products related to this article
Sponsored / affiliate links. As an Amazon Associate I earn from qualifying purchases. I may earn additional commission from eligible campaigns.