How to Clean a Car Interior Like a Pro
Cleaning your car’s inside can feel like a big job. Many people find it tricky to get that fresh, showroom look. You might wonder where to start or what products to use to really make it shine.
Don’t worry! This guide will show you How to Clean a Car Interior Thoroughly Like a Pro with easy steps. We’ll break it down so you can get your car looking amazing without the hassle.
Get ready to make your car feel new again!
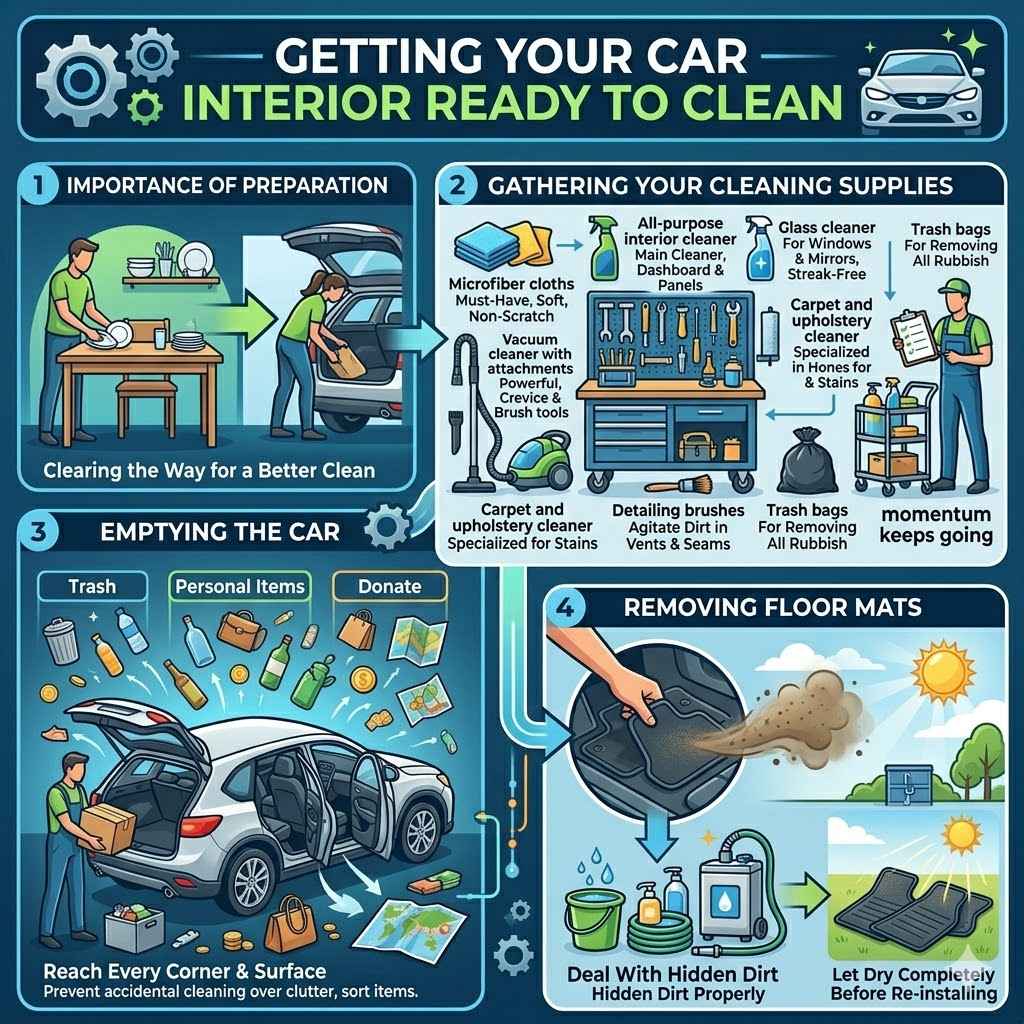
Getting Your Car Interior Ready to Clean
Before you can truly deep clean your car’s interior, you need to prepare it properly. This initial step is super important. It makes the actual cleaning much easier and more effective.
Think of it like clearing the table before you can wash the dishes. You’ll remove all the loose stuff and get things organized. This way, you won’t be bumping into things or cleaning around clutter.
A good prep job means you can focus on making surfaces spotless.
Gathering Your Cleaning Supplies
Having the right tools and cleaning agents is key. You don’t need a whole professional shop, but a few smart choices will make a big difference. Having everything ready before you start means you won’t have to stop and search for things.
This keeps your cleaning momentum going. Good supplies help you tackle different types of dirt and messes. They make the job faster and give you better results.
- Microfiber cloths: These are a must-have. They are soft and great for wiping surfaces without scratching. They pick up dust and dirt really well. You’ll want several of these for different tasks.
- All-purpose interior cleaner: This is your main cleaner for most surfaces like the dashboard, door panels, and center console. Make sure it’s safe for automotive interiors.
- Glass cleaner: For windows and mirrors, a good glass cleaner leaves a streak-free shine.
- Vacuum cleaner with attachments: A powerful vacuum with crevice tools and brush attachments is essential for getting into tight spots and removing dirt from carpets and seats.
- Carpet and upholstery cleaner: For stubborn stains on your seats or floor mats, a specialized cleaner will be needed.
- Detailing brushes: Small brushes help agitate dirt in vents, seams, and other hard-to-reach areas.
- Trash bags: For quickly removing all the rubbish.
Emptying the Car
The first real action you take is to empty your car completely. This means taking out everything that doesn’t belong there permanently. Grab all the trash, personal items, floor mats, and anything else cluttering up the space.
Open all the doors, including the trunk, to get full access. This step is vital because you can’t clean thoroughly if things are in the way. Getting everything out allows you to reach every corner and surface.
Think about all the little nooks and crannies where things like coins, receipts, and wrappers can hide. Removing all loose items also prevents you from accidentally cleaning over them or missing spots. It’s a good chance to sort through things too – maybe something needs to be thrown away or put back in its proper place at home.
Removing Floor Mats
Take out your car’s floor mats. These collect a lot of dirt, sand, and grime. Cleaning them separately allows you to deal with them properly.
You can shake them out vigorously outside. For deeper cleaning, a good scrub with soap and water or a carpet cleaner might be needed, depending on the material. Letting them dry completely before putting them back in is also important.
This prevents any dampness from causing issues inside the car.
Cleaning Different Car Interior Surfaces
Now that your car is prepped and empty, it’s time to get into the cleaning itself. This part focuses on tackling each type of surface you find inside your car. Different materials need different care.
The goal is to clean them effectively without causing damage. We will look at the main areas: plastics and vinyl, upholstery and leather, glass, and then the smaller details. Following these steps will help you achieve a spotless finish across the entire cabin.
Dashboard and Console Cleaning
The dashboard and center console are often high-touch areas. They accumulate dust, fingerprints, and smudges. Start by using a dry microfiber cloth to wipe away loose dust.
Then, spray your all-purpose interior cleaner onto a separate, clean microfiber cloth, not directly onto the surfaces. This prevents overspray from getting into electronics. Gently wipe down the dashboard, steering wheel, gear shifter, and console.
For vents and tight crevices, use a detailing brush or a cotton swab dampened with cleaner. This helps dislodge dust and grime. Pay attention to buttons and screens, using a light touch.
After cleaning, you can use a separate, dry microfiber cloth to buff the surfaces. This removes any residue and can leave a clean, non-greasy finish. Some products also offer UV protection, which is good for preventing fading over time.
Dashboard Materials
The dashboard is usually made of various materials. Common ones include hard plastics, soft-touch plastics, vinyl, and sometimes even leather or wood trim. Understanding the material helps you choose the right cleaner and technique.
Hard plastics are quite durable but can scratch if you use abrasive cloths. Soft-touch plastics are more prone to damage and often have a matte finish that can be dulled by harsh chemicals. Vinyl is similar to plastic but can become sticky or discolored with age and sun exposure.
For all these surfaces, the general rule is to start with the gentlest method. A quick wipe with a dry microfiber cloth is always the first step to remove loose dust. If more cleaning is needed, a slightly damp cloth can sometimes be enough.
When using cleaners, always test them on an inconspicuous area first. This is to make sure they don’t cause discoloration or damage.
Upholstery and Seat Cleaning
Seats can get dirty from spills, crumbs, and general wear and tear. The method you use depends on the seat material.
Fabric Seats
For fabric seats, start by vacuuming them thoroughly. Use a brush attachment to lift embedded dirt and debris from the fabric fibers. For stains, use a dedicated fabric or upholstery cleaner.
Spray the cleaner onto a clean cloth or directly onto the stained area, following the product’s instructions.
Gently blot the stain with the cloth, working from the outside in. Avoid rubbing too vigorously, as this can spread the stain or damage the fabric. You might need to repeat this process for stubborn stains.
After cleaning, you can use a separate, damp cloth to rinse away any cleaner residue. Then, use a dry cloth to absorb excess moisture. Allow the seats to air dry completely before using the car.
Good ventilation helps speed up the drying process.
A real-life example: A parent spilled coffee on their car’s fabric seat. They immediately blotted it with a paper towel. Then, they used a fabric cleaner, applying it to a cloth first.
They gently dabbed the stain, and it lifted surprisingly well. They followed up with a damp cloth to remove residue and let it air dry. The stain was gone, and the seat looked good as new.
This shows how prompt action and the right cleaner can save fabric seats.
Leather Seats
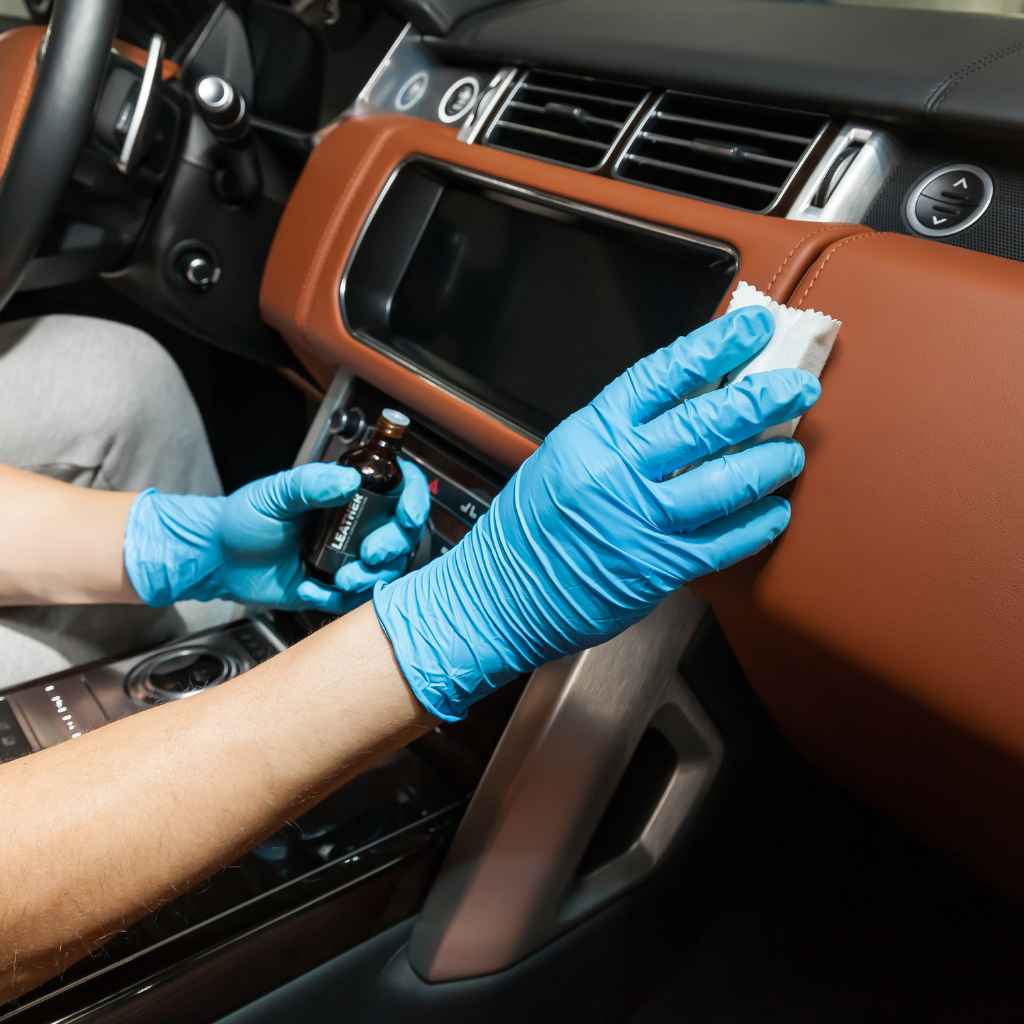
Leather seats need gentle care. First, vacuum the seats to remove any loose dirt and crumbs. Then, use a dedicated leather cleaner.
Apply the cleaner to a soft microfiber cloth and gently wipe down the leather surfaces. Work in small sections, cleaning and then wiping off the cleaner with a separate, clean cloth.
It’s important not to saturate the leather with cleaner. Leather can dry out and crack if not properly cared for. After cleaning, it’s a good idea to apply a leather conditioner.
This replenishes the natural oils in the leather, keeping it soft, supple, and protected. Buff the conditioner in with a clean cloth. This step helps prevent premature aging and keeps the leather looking its best.
A case study: A car owner noticed their leather seats were starting to feel a bit dry and looked dull after a few years. They decided to deep clean them. They used a pH-neutral leather cleaner, which is specifically designed to be safe for leather.
After cleaning, they applied a good quality leather conditioner. The result was amazing. The leather felt much softer, had a richer look, and no longer felt dry.
This showed the importance of conditioning for long-term leather care.
Cleaning Glass and Mirrors
Clear windows make a big difference in how your car looks and how well you can see. Use a dedicated automotive glass cleaner. Spray it onto a clean microfiber cloth, not directly onto the glass.
This avoids drips and overspray onto other surfaces. Wipe the inside of the windows and mirrors using overlapping strokes.
For stubborn spots like watermarks or film, you might need to go over them a couple of times. After cleaning one side, use a separate, dry microfiber cloth to buff the glass to a streak-free shine. This is essential for that crystal-clear finish.
Don’t forget the rearview mirror and any vanity mirrors.
Best Practices for Glass Cleaning
To get perfectly clear glass, consider these tips. Always use a clean, lint-free cloth. Microfiber is ideal.
Avoid cleaning windows when the car is in direct sunlight or when the glass is hot. Heat can cause the cleaner to dry too quickly, leading to streaks.
Work from top to bottom on the inside of the windows. This way, any drips will fall onto areas you haven’t cleaned yet. For the outside, do the opposite, working from bottom to top, so dirt doesn’t run onto a clean area.
Some people use a bit of diluted vinegar in water as a homemade glass cleaner, but test this first to ensure it works well for your car.
Cleaning Carpets and Floor Mats
Car carpets and floor mats trap a lot of dirt. After shaking out the floor mats, it’s time to clean them and the car’s main carpet. Start by vacuuming everything very thoroughly.
Get into all the seams and corners with your crevice tool. This removes loose dirt, sand, and debris.
For stains on the carpet or floor mats, use a carpet and upholstery cleaner. Spray it onto the affected area and let it sit for a few minutes according to the product’s directions. Then, use a brush to gently agitate the stain.
Blot the area with a clean, damp cloth to lift the stain and cleaner. Repeat if necessary.
After cleaning, it’s important to allow the carpets and mats to dry completely. You can speed this up by opening the car doors and windows to let in fresh air. If the mats are rubber or plastic, they can often be washed with soap and water and then dried.
This thorough cleaning makes a big difference in the overall freshness of your car’s interior.
Dealing with Tough Stains
Sometimes, stains are really stubborn. For grease or oil stains, you might need a stronger degreaser specifically made for fabrics. For mud, let it dry completely first, then vacuum it up before treating any remaining stain.
If you have very old or deeply set stains, a steam cleaner can be very effective. It uses heat and moisture to lift dirt from deep within the carpet fibers.
Always read the labels on cleaning products. Some are designed for spot treatment, while others are for overall cleaning. It’s also a good idea to have an old towel handy to blot up excess moisture.
This helps prevent mildew and keeps the drying process quicker.
Scenario: You notice a sticky soda spill on your car’s carpet that has dried. You’ve vacuumed it, but it’s still tacky. You spray a carpet cleaner on a cloth, then dab the sticky area.
You use a brush to gently loosen the residue. Then you blot with a damp cloth to rinse. After a second pass, the stickiness is gone, and the carpet feels normal.
Detailed Cleaning and Finishing Touches
Once the main surfaces are clean, it’s time to focus on the smaller details that truly make an interior look professionally cleaned. This involves cleaning areas you might overlook, like door jambs, seat belts, and the headliner. These finishing touches elevate the cleanliness of your car and make it feel much more inviting.
They show you’ve gone the extra mile.
Cleaning Door Jambs and Seals
The door jambs are the painted areas around the door frame. They can get very dirty from road grime, mud, and water. Open all the doors and use an all-purpose cleaner and a microfiber cloth to wipe them down.
Pay attention to the rubber seals around the doors as well.
These seals help keep water and noise out, but they can collect dirt and debris. Gently wipe them with your cleaner. After cleaning, you can apply a rubber protectant to the seals.
This keeps them supple and prevents them from drying out or cracking, which helps maintain a good seal. A clean door jamb makes the whole car look cleaner when you open the door.
Cleaning Seat Belts
Seat belts can get dirty from constant use. They are often overlooked, but a dirty seat belt can detract from the overall cleanliness. You can clean them using a mild soap and water solution or an interior cleaner.
Spray the cleaner onto a microfiber cloth. Gently wipe down the seat belt. Pull the belt out fully so you can clean the entire length.
Make sure to let the seat belt dry completely before retracting it. Avoid saturating the belt, as excess moisture can affect its function or cause mold. It’s a simple step that adds to the polished look.
Cleaning the Headliner
The headliner is the fabric on the roof of your car. It’s usually made of delicate material, so it needs gentle cleaning. Avoid spraying cleaner directly onto it.
Instead, spray a small amount of interior cleaner or a diluted fabric cleaner onto a clean microfiber cloth.
Gently dab at any marks or dirt on the headliner. Do not scrub or rub, as this can cause the fabric to sag or tear. For most headliners, a light touch is all that’s needed to remove surface grime.
If you encounter a tough spot, you might need to repeat the dabbing process. The goal is to clean without damaging the material.
Cleaning Small Details
These are the little things that make a big difference. Think about the pedals, the steering wheel, the rearview mirror, and the sun visors. Use appropriate cleaners for each surface.
For pedals, a bit of degreaser might be helpful if they are oily.
Wipe down the steering wheel again to remove any residue from cleaning other parts of the dash. Clean the rearview mirror and any other mirrors with glass cleaner. Ensure your sun visors are wiped down too.
These small details contribute to a fully cleaned interior and a more pleasant driving experience.
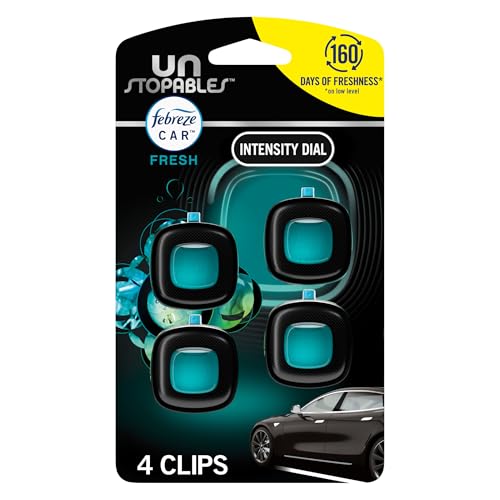
Adding an Air Freshener
Once everything is sparkling clean, a good air freshener can complete the job. Choose a scent you like. You can use a hanging air freshener, a vent clip, or even a spray.
Avoid anything too overpowering. A light, pleasant scent can make your clean car feel even more refreshing. This is the final touch that makes your interior smell as good as it looks.
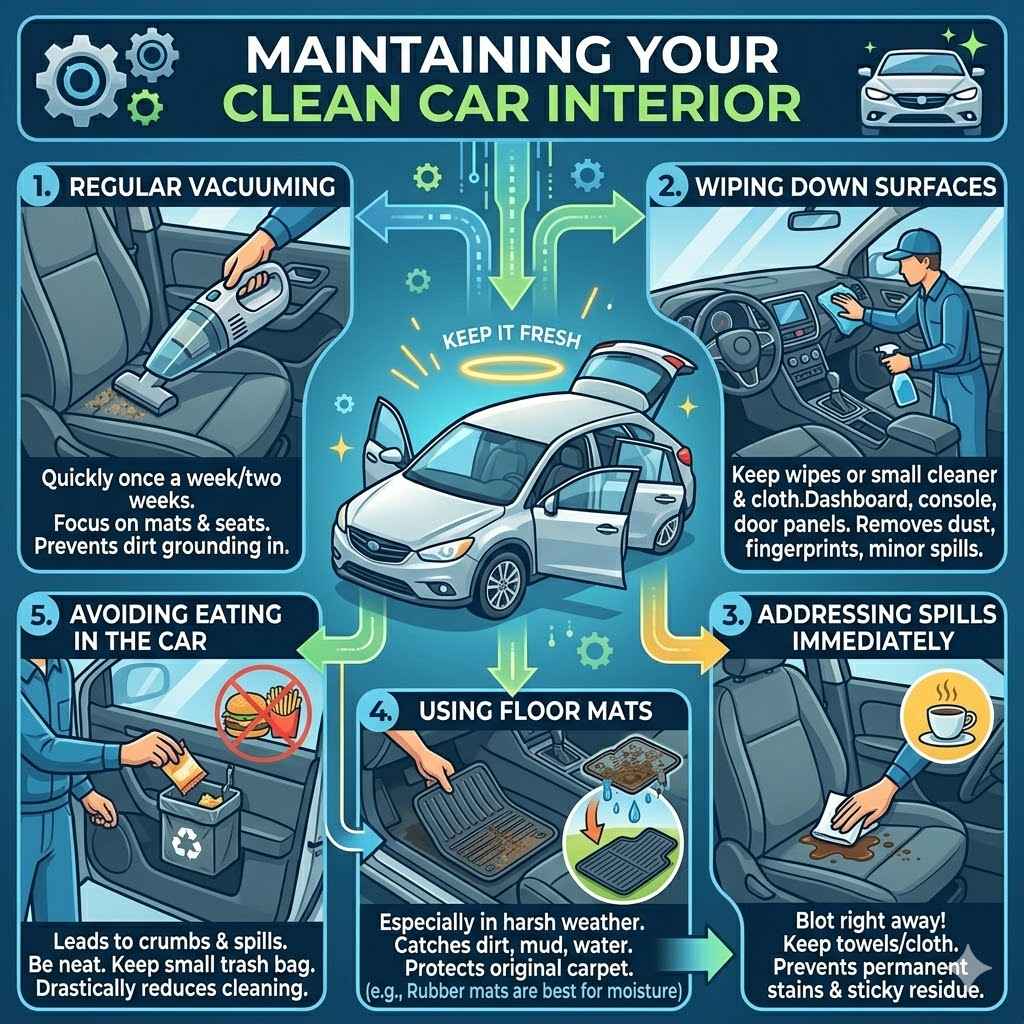
Maintaining Your Clean Car Interior
Keeping your car’s interior clean isn’t just about a one-time deep clean. Regular maintenance is key to preserving that fresh look and making future cleaning sessions easier. Simple habits can prevent dirt and grime from building up.
This saves you time and effort in the long run. Think of it as small actions that keep your car in top shape.
Regular Vacuuming
Make it a habit to vacuum your car’s interior regularly. Even a quick vacuum once a week or every two weeks can make a huge difference. Focus on the floor mats and seats where most dirt accumulates.
This prevents dirt from getting ground into the fibers and becoming harder to remove. Having a small portable vacuum or keeping a larger one accessible makes this easy.
Wiping Down Surfaces
Keep a pack of interior cleaning wipes or a microfiber cloth and a small spray bottle of interior cleaner in your car. Use these to quickly wipe down the dashboard, console, and door panels as needed. Fingerprints, dust, and minor spills can be cleaned up in seconds.
This prevents them from becoming stubborn marks.
Addressing Spills Immediately
If you spill something in your car, clean it up right away. Even a small spill can leave a stain or a sticky residue if left to sit. Keep a few paper towels or a small cloth in your car for emergencies.
Blotting up spills immediately is much easier than dealing with dried-on messes later. This is one of the most effective ways to prevent permanent damage.
Using Floor Mats
Always use floor mats, especially in areas with harsh weather. They catch dirt, mud, and water, protecting your car’s original carpet. Rubber floor mats are particularly good for trapping moisture and are easy to clean.
Regularly removing and cleaning your floor mats will significantly help in maintaining the cleanliness of your car’s interior.
Avoiding Eating in the Car
While it’s convenient, eating in the car often leads to crumbs and spills. If you must eat, try to be as neat as possible. Consider keeping a small trash bag in your car to collect wrappers and uneaten food.
This small step can drastically reduce the amount of cleaning needed for your seats and carpets.
Frequently Asked Questions
Question: How often should I deep clean my car’s interior
Answer: A deep clean every 3-6 months is usually sufficient for most cars, depending on usage and environment. If you live in a dusty area or have kids and pets, you might need to do it more often.
Question: What are the best cleaners for car interiors
Answer: For general use, an all-purpose interior cleaner is great. For specific materials, use dedicated leather cleaners, fabric cleaners, or glass cleaners. Always choose products made for automotive interiors.
Question: Can I use household cleaners on my car interior
Answer: It’s generally not recommended. Household cleaners can be too harsh and may damage or discolor automotive interior materials. Stick to products specifically designed for cars.
Question: How do I remove a stubborn stain from fabric seats
Answer: For tough stains, try a dedicated fabric stain remover. Let it dwell for a few minutes, then gently agitate with a soft brush or cloth. Blot with a damp cloth to rinse.
You may need to repeat the process.
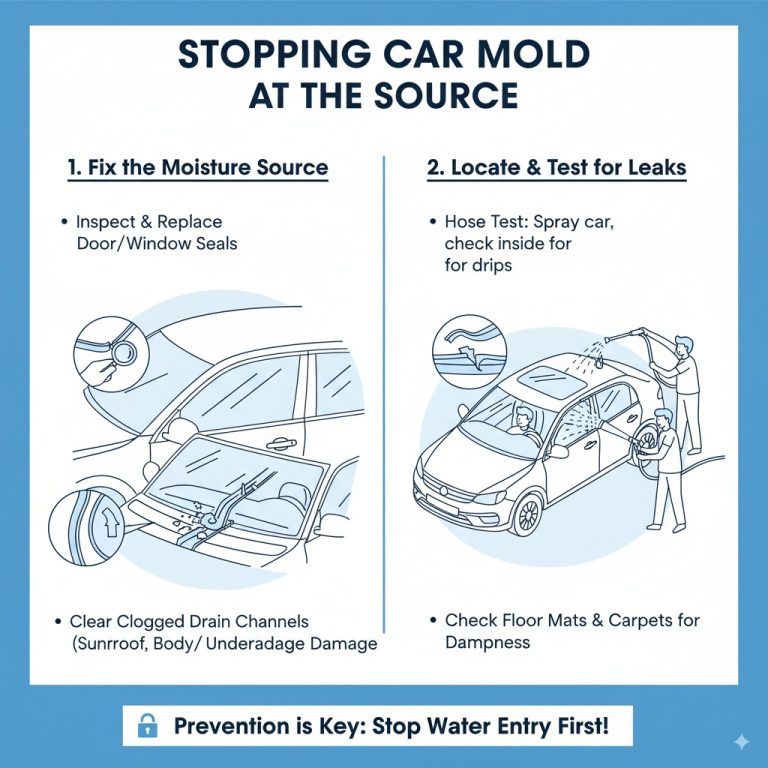
Question: My car’s interior smells musty. What can I do
Answer: A musty smell often indicates moisture. Ensure your carpets and upholstery are completely dry. Check for any leaks.
An air-neutralizing odor eliminator or a very light application of baking soda can help absorb smells.
Summary
You have learned How to Clean a Car Interior Thoroughly Like a Pro by following simple steps. We covered preparing your car, cleaning all surfaces like plastic, leather, fabric, and glass, and handling details. Regular maintenance with quick vacuums and wipes keeps it looking great.
Now you can enjoy a spotless and fresh-smelling car interior with confidence.