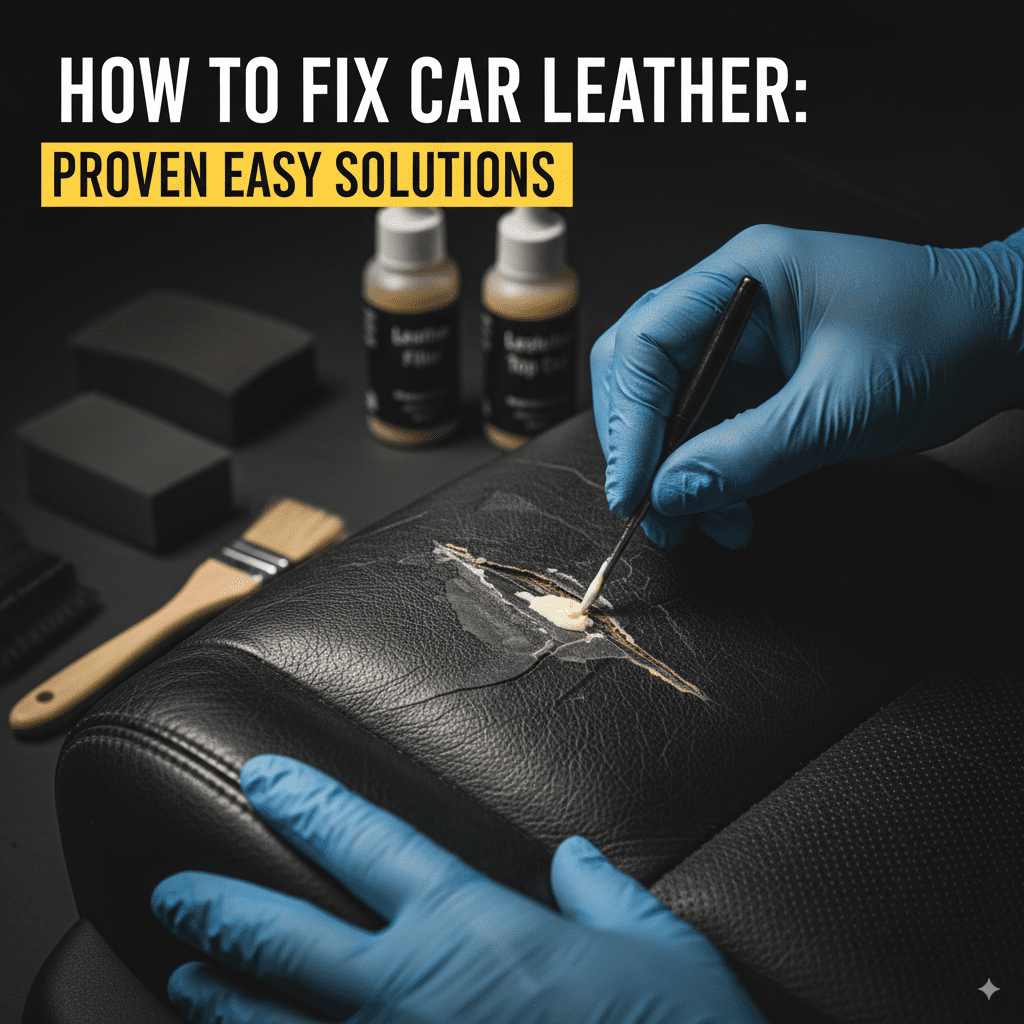
How to Fix Car Leather: Proven Easy Solutions
Fixing car leather is simpler than you think! For common issues like minor scratches, tears, or fading, easy DIY kits and cleaning techniques can restore its look and feel. This guide offers proven, beginner-friendly solutions to tackle everyday leather wear and tear, saving you money and boosting your car’s appearance.
Are your car’s leather seats looking a little tired? Maybe there are a few small scratches, some uncomfortable cracks, or the color has started to fade from the sun. It’s a bummer when those beautiful leather interiors get damaged, but don’t worry! You don’t need to be a professional mechanic or a master craftsman to bring them back to life. Many common car leather problems can be fixed right at home with simple, budget-friendly methods. We’ll walk you through easy steps to clean, repair, and protect your car’s leather, making it look great again and feel comfortable for every drive.
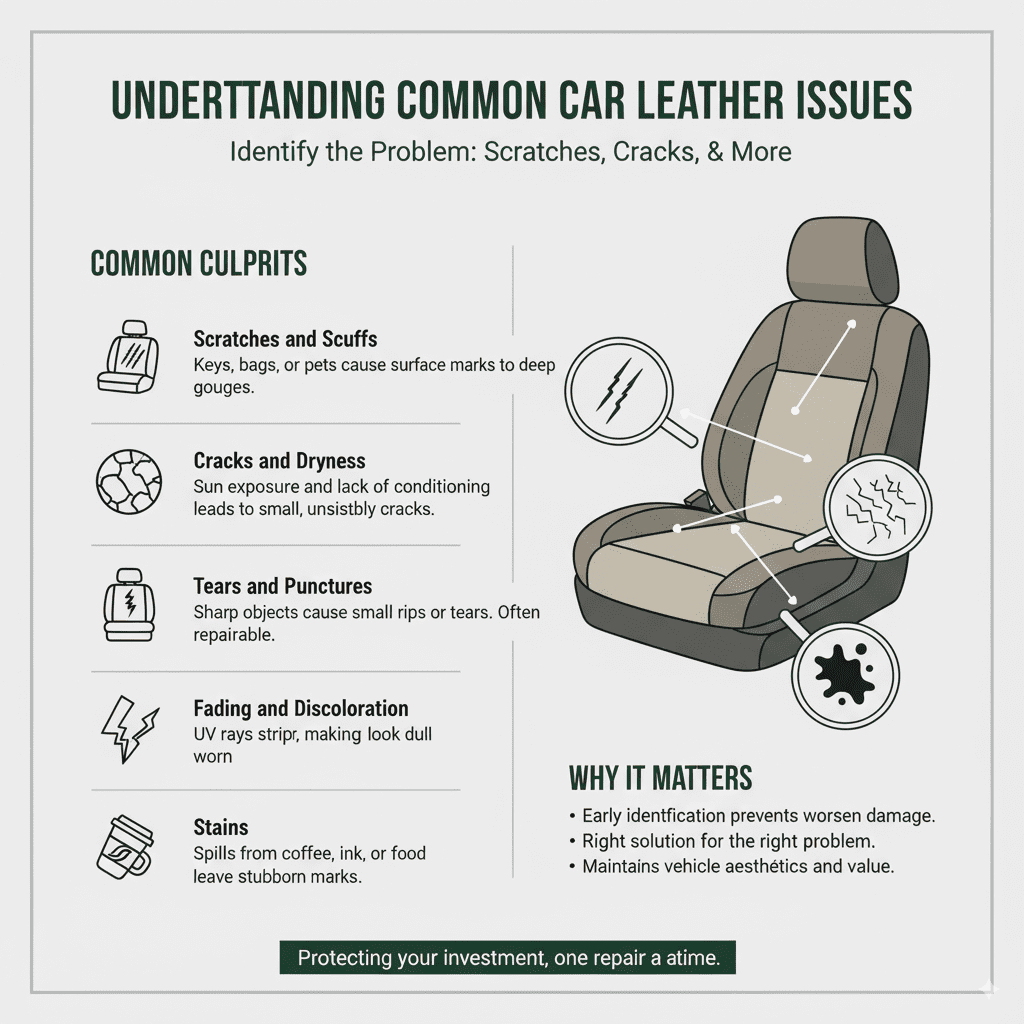
Understanding Common Car Leather Issues
Before we dive into fixing things, let’s quickly look at the most common culprits that make car leather look worn out. Knowing what you’re dealing with helps you pick the right solution. Think of it like knowing if you have a cut or a bruise before you decide on a bandage!
- Scratches and Scuffs: These are usually from everyday use – keys, bags, even your pet’s nails. They can range from light surface marks to deeper gouges.
- Cracks and Dryness: When leather dries out, especially from sun exposure or lack of conditioning, it can start to form small, unsightly cracks. These are often early signs of leather damage.
- Tears and Punctures: Sometimes, a sharp object can cause a small rip or tear in the leather. While this seems serious, small tears are often repairable.
- Fading and Discoloration: Prolonged exposure to sunlight (UV rays) can strip the color from your leather, making it look dull and faded.
- Stains: Spills from coffee, ink, or food can leave stubborn marks on your leather seats.
Essential Tools and Supplies for Leather Repair
Gathering the right supplies before you start makes the whole process smoother and more successful. You don’t need a huge toolbox; most of these items are readily available at auto parts stores, craft stores, or even your local supermarket. Let’s get prepared!
For Cleaning and Conditioning:
- Leather Cleaner: A pH-balanced cleaner specifically designed for automotive leather. Avoid harsh household cleaners.
- Leather Conditioner: This nourishes the leather, keeping it soft and supple, and helps prevent future cracking.
- Microfiber Cloths: You’ll need a few of these. They are soft, absorbent, and won’t scratch the leather.
- Soft Brush (Optional): A soft-bristled brush can help work cleaner into textured leather grains without damage.
For Minor Scratch and Tear Repair:
- Leather Repair Kit: These often come with a colorant, filler compound, spatula, and applicator sponge. They are designed for DIY use.
- Rubbing Alcohol (Isopropyl Alcohol): For cleaning the area before repair. Use sparingly.
- Hair Dryer (Low Heat Setting): Can help speed up drying times for some repair compounds.
- Fine-Grit Sandpaper (e.g., 2000-grit): Used very gently to smooth repaired areas.
Step-by-Step: Fixing Minor Scratches and Scuffs
Scratches are probably the most common issue. The good news is that minor scuffs and light scratches can often be easily remedied without needing a full repair kit. Let’s see how!
Step 1: Thoroughly Clean the Affected Area
Start by cleaning the scratch and the area around it. Even a small scratch can have dirt and grime trapped in it, which will interfere with any repair attempts. Use a dedicated leather cleaner on a microfiber cloth. Gently wipe the area, removing any surface dirt. If the scratch is deeper, you might need to use a tiny bit of rubbing alcohol on a cotton swab to clean the edges of the scratch itself. Let it dry completely.
Step 2: Assess the Scratch Depth
Run your fingernail gently across the scratch. If your fingernail doesn’t catch much, it’s likely a surface scratch and might be fixable with just conditioning. If your fingernail catches slightly, it’s a bit deeper, and you might need a repair kit. If your fingernail catches significantly, it’s a deeper scratch that will likely require a filler compound from a repair kit.
Step 3: For Light Surface Scratches – Conditioning is Key
Sometimes, all a light scratch needs is a good dose of moisture and nourishment. After cleaning and drying, apply a quality leather conditioner to the scratched area and then to the entire seat. Use a clean microfiber cloth and work the conditioner into the leather in a circular motion. Allow it to soak in for about 15-20 minutes, then buff off any excess with another clean cloth. Often, this simple step can make light scratches disappear or become much less noticeable as the leather plumps up.
Step 4: For Deeper Scratches – Using a Leather Repair Kit
If conditioning isn’t enough, it’s time for a leather repair kit. These kits are designed to fill and recolor minor damage.
- Prepare the Scratch: Make sure the scratch is clean and dry. If there are any loose flaps of leather, you can gently trim them with small, sharp scissors or a craft knife.
- Apply Filler (if needed): For deeper scratches, you might need a leather filler or compound. Follow the kit’s instructions carefully. Typically, you’ll apply a thin layer into the scratch using the spatula provided. You might need to build up layers, allowing each to dry according to the kit manufacturer’s advice. A hairdryer on a low, cool setting can sometimes speed this up.
- Smooth the Area: Once the filler is completely dry and hard, you might need to gently sand the filled area to make it flush with the surrounding leather. Use very fine-grit sandpaper (like 2000-grit or higher) and go very lightly. The goal is to smooth, not to remove the filler.
- Apply Colorant: The repair kit will have a colorant that you need to match to your leather. Test it on an inconspicuous area first. Apply the colorant in thin coats using the sponge or applicator. Allow each coat to dry before applying the next. You’re aiming for an even match to the original color.
- Seal and Protect: Once the color is a good match and dry, some kits come with a sealant or finish. Apply this according to the instructions to protect the repair and give it a uniform sheen.
It’s important to remember that a perfect, invisible repair for deep scratches can be challenging for DIYers. However, these kits can significantly improve the appearance and prevent further damage, making the area much less noticeable.
How to Address Minor Tears and Small Holes
A small tear or puncture might seem daunting, but with patience and the right materials, you can make it much less visible. The key is to stabilize the torn edges and then fill and color.
Step 1: Clean and Prepare the Tear
Start by cleaning the area around the tear with a leather cleaner and then a little rubbing alcohol on a cotton swab to ensure it’s free of oils and dirt. Carefully examine the tear. If there are loose flaps, you can try to gently tuck them back. For best results, you might want to lift the torn edges slightly. Some repair kits include a backing fabric or patch; if yours does, gently slide it under the tear with tweezers or a spatula. This helps support the repair.
Step 3: Apply Leather Adhesive or Filler
If your kit includes a leather adhesive, apply a small amount to the edges of the tear, pressing them together carefully. Hold them in place until the adhesive sets. For tears with missing pieces or small holes, you’ll likely use a leather filler compound, similar to fixing deeper scratches. Apply the filler in thin layers, allowing each to dry and curing as per the product’s instructions. You might need to use a backing fabric first, as mentioned above, to give the filler something to adhere to and bridge the gap.
Step 4: Sand and Color Match
Once the filler is completely dry and cured, very gently sand the repaired area to make it smooth and flush with the surrounding leather. Use fine-grit sandpaper. Then, carefully apply the colorant from your repair kit in thin layers, letting each dry. Blend the new color into the surrounding area as best as possible. Always test your color in an unseen spot first.
Step 5: Seal and Finish
Apply a leather finish or sealant if provided in the kit to protect the repair and ensure it blends in with the sheen of the rest of the leather. Allow everything to cure fully before using the seat.
Reviving Faded Car Leather
Sunlight is enemy number one for car leather’s color. Over time, it can bleach and fade your seats, making them look old and sad. Fortunately, recovering that vibrancy is achievable.
Step 1: Clean the Leather
First, give your leather a thorough cleaning. Use a dedicated leather cleaner to remove any dirt, oils, or protectants that might be on the surface. This ensures the new color has a clean canvas to adhere to. Dry the area completely with a microfiber cloth.
Step 2: Apply a Leather Colorant or Re-Dye Kit
For fading, the best solution is a leather colorant or a kit designed for re-dyeing leather. These products are specifically formulated to restore color. Select a product that closely matches your car’s original leather color. Many kits come with a shade-matching guide or even offer custom color-matching services.
Application Process:
- Test Color: Always test the colorant on a hidden area, like under the seat or on a small, less visible patch, to ensure a perfect match.
- Apply Thin Coats: Using a sponge or applicator pad, apply the colorant in very thin, even coats. Work in one direction, overlapping strokes slightly.
- Allow Drying Between Coats: Let each coat dry completely before applying the next. This might take 15-30 minutes depending on the product and humidity. You can use a hairdryer on a low, cool setting to speed up drying between coats.
- Build Color Gradually: Continue applying thin coats until you achieve the desired color saturation and an even finish. It’s much better to apply many thin coats than a few thick ones.
Step 3: Seal and Protect
Once you’re happy with the color and it’s fully dry, apply a leather finish or topcoat that comes with the kit. This seals in the color, protects it from UV rays, and restores the natural sheen of the leather. Buff gently with a clean microfiber cloth after the finish has dried.
Tackling Stains on Car Leather
Car leather can get stained by all sorts of things, from spilled coffee to pen marks. Different stains require different approaches, but most can be handled with care.
General Stain Removal:
For most common spills (like soda or food):
- Act Quickly: The sooner you address a spill, the easier it is to remove. Blot up as much of the spill as possible with a clean, dry microfiber cloth immediately. Don’t rub, as this can spread the stain and push it deeper into the leather grain.
- Use a Leather Cleaner: Apply a pH-balanced leather cleaner to a clean microfiber cloth. Gently dab and wipe the stained area. Work from the outside of the stain inward to avoid spreading it.
- Rinse and Dry: Wipe the area with a clean cloth dampened with plain water to remove any cleaner residue. Then, dry the leather thoroughly with a clean, dry microfiber cloth.
Specific Stain Types:
Ink Stains:
Ink can be tricky. For fresh ink marks, rubbing alcohol can sometimes work. Dip a cotton swab in rubbing alcohol and gently dab the ink mark. Be very careful not to spread it. You may need to use several swabs. For older or more stubborn ink stains, a specialized ink remover for leather might be necessary. Always test these in an inconspicuous spot first.
Grease or Oil Stains:
For greasy or oily stains, try using a smallAmount of cornstarch or talcum powder. Sprinkle it generously over the stain and let it sit for several hours, or even overnight. The powder will absorb the oil from the leather. Brush off the powder and then clean the area with your regular leather cleaner.
Dye Transfer (from clothing):
Dye transfer from jeans or dark clothing can be tough. Often, a good leather cleaner is the first line of defense. If that doesn’t work, you might need a specialized dye transfer remover, available from auto detailers. These products are designed to lift the transferred dye without damaging the leather itself.
Important Note: Always use gentle, dabbing motions. Avoid harsh scrubbing. If a stain persists after trying these methods, it might be best to consult a professional detailer. You can find more information on stain removal from sources like automotive care publications.
Preventative Maintenance for Long-Lasting Leather
The best way to fix car leather is to prevent damage in the first place! A little regular care goes a long way in keeping your seats looking and feeling new for years.
Regular Cleaning
Wipe down your leather seats once a month with a damp microfiber cloth to remove surface dust and grime. This prevents dirt from settling into the grain where it can cause wear over time.
Routine Conditioning
Apply a quality leather conditioner every 3-6 months, depending on your climate and how much sun exposure your car gets. Conditioning replenishes the natural oils in the leather, keeping it supple, preventing cracks, and protecting it from UV damage. Use a product specifically designed for automotive leather. You can find excellent guides on conditioning from automotive care websites or manufacturer recommendations.
Sun Protection
Park your car in a shaded area whenever possible. Consider using a sunshade for your windshield to reduce the amount of direct sunlight hitting your dashboard and seats. UV rays are a primary cause of fading and drying.
Be Mindful of What You Carry
Be careful about placing sharp objects, abrasive materials, or heavily dyed clothing directly on your leather seats. Use seat covers or blankets if you frequently transport pets or messy items.
Comparing DIY Repair vs. Professional Service
Deciding whether to tackle a leather repair yourself or take it to a professional is a common dilemma. Here’s a quick comparison to help you choose:
| Factor | DIY (Do It Yourself) | Professional Service |
|---|---|---|
| Cost | Low. Kits are affordable, and you save on labor. | High. Professional services charge for expertise, time, and materials. |
| Time Investment | Moderate to High. Requires learning, patience, and execution time. | Low for you. Drop off the car and pick it up when done. |
| Skill Level Required | Beginner to Intermediate. Kits are designed for ease of use, but deep repairs require precision. | Expert. Professionals have the tools, techniques, and experience for flawless repairs. |
| Risk of Error | Moderate. Potential for color mismatch, poor finish, or making the damage worse if not careful. | Low. Professionals generally guarantee their work. |
| Best For | Minor scratches, scuffs, small tears, light fading, stains that haven’t penetrated deeply. Budget-conscious owners. | Major tears, extensive cracking, deep gouges, significant color loss, valuable or classic cars where perfection is critical. |
For most everyday issues like minor scuffs, light cracking, or small stains, a DIY approach is often sufficient and very rewarding. However, if you have a significant tear, large area of damage, or a high-value vehicle where perfection is paramount, professional service might be the better investment.
FAQ: Your Car Leather Questions Answered
Q1: How often should I clean and condition my car’s leather seats?
It’s generally recommended to clean and condition your car leather every 3 to 6 months. However, if your car is frequently exposed to direct sunlight or harsh weather, you might need to do it more often, perhaps every 2-3 months.
Q2: Can I use household cleaners on car leather?
No, it’s best to avoid household cleaners. Many contain harsh chemicals that can dry out, crack, or even discolor car leather. Always use a cleaner specifically formulated for automotive leather.
Q3: Will a DIY leather repair kit make my seats look brand new?
DIY kits can significantly improve the appearance of your leather and make minor damage much less noticeable. For small to moderate issues, the results can be excellent.