How To Hide Stone Chips: Effortless Car Fix
Hiding stone chips on your car is an easy DIY fix! With the right tools and a simple kit, you can expertly touch up those small chips, protecting your paint and making your car look its best. Follow these straightforward steps to restore a smooth finish.
Hey there, car enthusiast! As you cruise down the road, those little stone chips can be a real bummer. They’re like tiny battle scars on your car’s paintwork, and over time, they can grow and even lead to rust if left untreated. But don’t worry! You don’t need to be a professional detailer or spend a fortune at the body shop to fix them. I’m here to show you how to hide those pesky stone chips yourself, making your car look a whole lot better and protecting your investment. We’ll go through it step-by-step, so you’ll feel confident tackling this common car issue.
Why Do Those Stone Chips Happen Anyway?
It’s a question many of us ask. Stone chips happen when small particles, like pebbles, grit, or even bits of tire, are thrown up from the road. This usually occurs when you’re driving behind another vehicle, especially on highways or unpaved roads. The impact force, though small, is enough to chip away at your car’s protective layers: the clear coat, the base coat (color), and sometimes even the primer. The front bumper, hood, and windshield are the most common culprits for these little imperfections.
While they might seem minor, these chips are more than just an eyesore. They break the seal of your car’s paint, leaving the metal underneath exposed. This can make your car vulnerable to rust, especially in humid or wet climates. Think of it like a cut on your skin – if it’s not cleaned and protected, it can get infected. Your car’s paintwork is its skin!
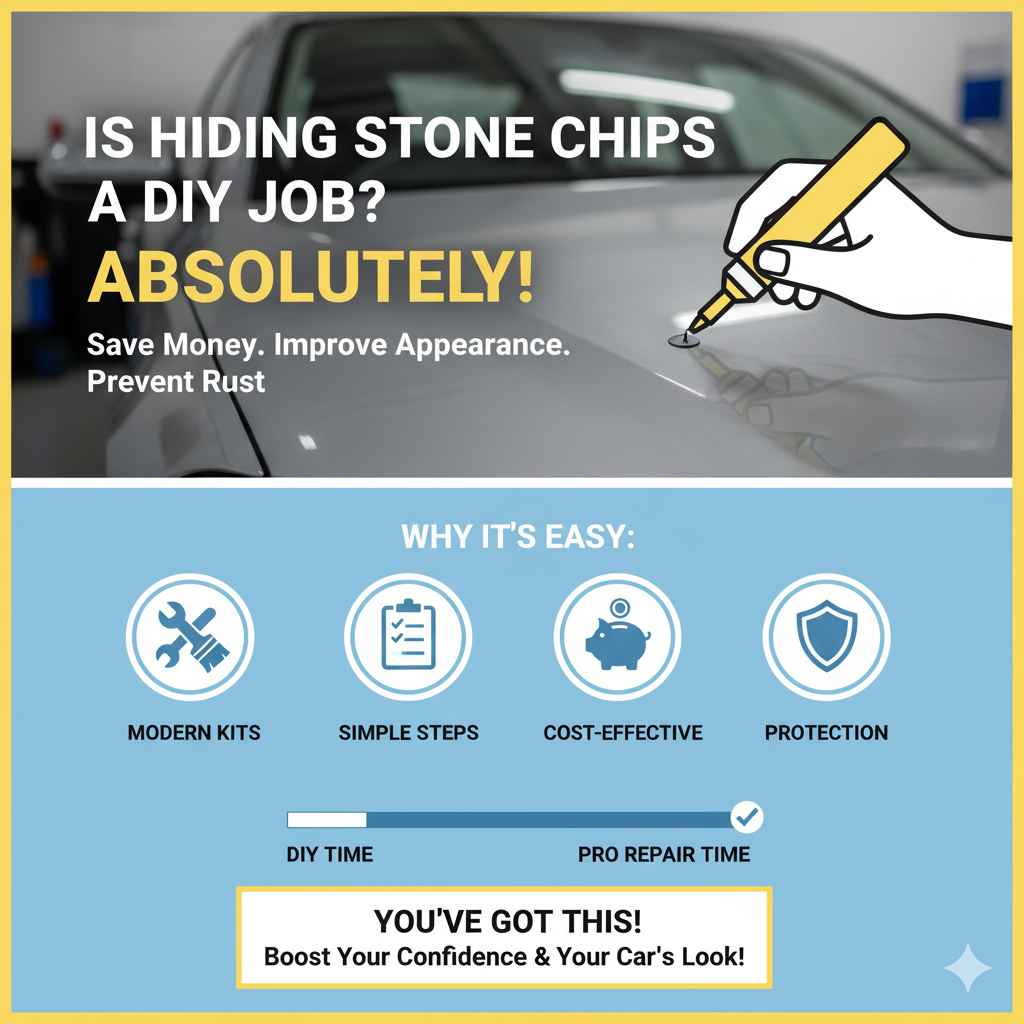
Is Hiding Stone Chips a DIY Job? Absolutely!
The good news is that yes, fixing those small stone chips is totally achievable for any car owner, even if you’ve never done anything like it before. Modern touch-up kits are designed for ease of use. They come with everything you need, and the process itself isn’t complicated. It’s all about taking your time and following a few simple steps. This is a fantastic way to save money on professional repairs and keep your car looking its best.
By learning how to hide stone chips, you’re not just improving your car’s appearance; you’re also performing a crucial bit of preventative maintenance. It’s a win-win! Let’s get down to the nitty-gritty and prepare you with the knowledge and confidence to tackle this yourself.
What You’ll Need: Your Stone Chip Repair Toolkit
Before we dive into the actual repair process, let’s gather our supplies. Having the right tools makes the job much smoother and ensures a better result. Think of this as your personal car detailing starter pack!
Essential Tools and Materials:
- Paint Touch-Up Kit: This is the star of the show! You’ll need a kit that matches your car’s paint color. Most kits include a bottle of color-matched paint and sometimes a clear coat. You can usually find your car’s paint code on a sticker in the doorjamb, glove box, or under the hood. Many automotive parts stores or online retailers can help you find the exact match.
- Car Wash Soap and Water: For a thorough cleaning of the affected area.
- Microfiber Towels: Essential for gentle cleaning and buffing without scratching.
- Rubbing Alcohol (Isopropyl Alcohol): To degrease the area and ensure the paint adheres properly.
- Fine-Tip Applicator Tool: Some kits come with these, or you might use a very fine detail brush (like a 000 or 00 brush), a toothpick, or a sharpened wooden skewer. This is for precise application of the paint.
- Clay Bar (Optional but Recommended): For removing contaminants and creating a perfectly smooth surface. Learn more about using a clay bar in this helpful guide from Meguiar’s.
- Masking Tape or Painter’s Tape: To protect surrounding paintwork if needed.
- Gloves: To keep your hands clean and protect your skin from paint and chemicals.
- Good Lighting: Natural daylight is best, or a well-lit garage.
Choosing the Right Touch-Up Paint
Getting the color match right is crucial for a seamless repair. Here’s how:
-
Find Your Paint Code: This is the most important step. Look for a sticker on your car. Common locations include:
- Driver’s side doorjamb
- Passenger side doorjamb
- Under the hood
- Inside the glove box
- Use the Paint Code: Once you have the code (it’s usually a combination of letters and numbers, like ‘B554P’ or ‘NH-700M’), you can order touch-up paint from your car dealership, an automotive parts store, or specialized online vendors.
- Consider a Kit: Many kits come with multiple components, like a primer, base coat (color), and clear coat. This is ideal for deeper chips.
Don’t guess your paint color! An incorrect match will be noticeable and might look worse than the original chip.
Step-by-Step: How to Hide Stone Chips Like a Pro
Now that you have your supplies, let’s get to work. Remember, patience is key! Taking your time will give you the best results.
Step 1: Clean the Area Thoroughly
This is non-negotiable. Any dirt, wax, or debris in the chip or around it will prevent the touch-up paint from adhering properly and can ruin the repair.
- Wash the Car: Start by washing the entire car, paying extra attention to the area with the stone chips, using a pH-neutral car soap and clean water.
- Dry Completely: Gently dry the area with a clean microfiber towel.
- Degrease: Dampen a clean microfiber cloth or cotton swab with rubbing alcohol and gently wipe the stone chip and the surrounding paint. This removes any remaining oils or wax. Make sure the area dries completely.
Step 2: Inspect and Prepare the Chip
Take a close look at the chip. Is there any loose paint around the edges? If so, gently remove it. You can use a very fine-tipped tool, like a toothpick or a specialized paint pick, to carefully scrape away any flaking paint. The goal is to have a clean, smooth edge.
If you’re using a clay bar, now is a good time to use it on the affected panel to remove any embedded contaminants that washing might have missed. This ensures a flawlessly smooth surface for painting.
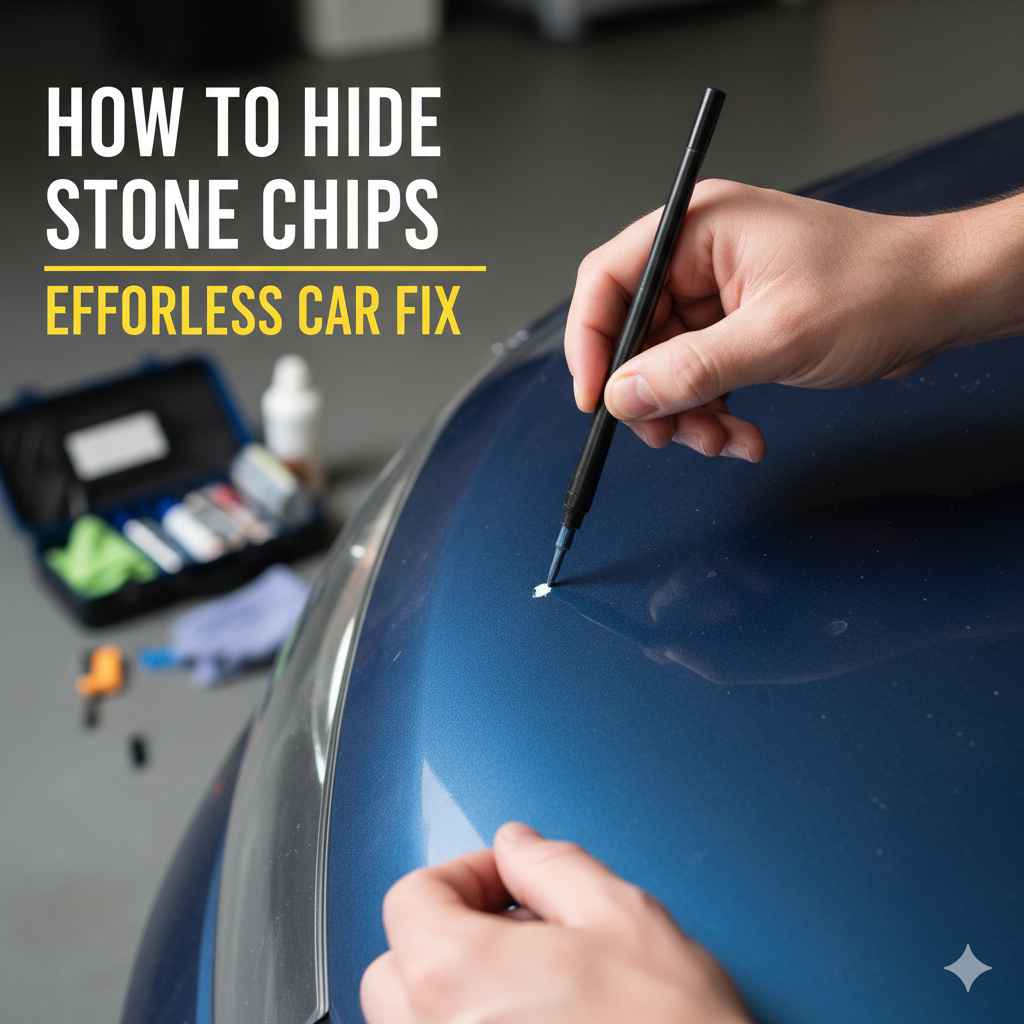
Step 3: Apply the Touch-Up Paint (Color Coat)
This is where precision is important!
- Shake the Paint: Thoroughly shake the touch-up paint bottle for at least 30 seconds to ensure the pigment is evenly mixed.
- Test (Optional but Recommended): If you have a spare piece of metal or plastic, try applying a small dab of paint to test the consistency and color match.
- Apply Sparingly: Dip your fine-tip applicator tool (brush, toothpick, etc.) into the paint. You want just a small amount of paint on the very tip.
- Fill the Chip: Gently dab the paint directly into the chip. The goal is to fill the indentation, not paint a broad area. Try to apply it in thin layers. If the chip is deep, it might take a couple of thin coats.
- Avoid Overlapping: Be careful not to get too much paint on the surrounding good paint. If you do, wipe away the excess immediately with a clean cloth very gently.
- Let it Dry: Allow the first coat to dry completely according to the manufacturer’s instructions. This could be anywhere from 30 minutes to a couple of hours, depending on the paint and humidity.
It’s better to apply multiple thin coats than one thick coat. Thick coats can sag, run, or dry unevenly, creating a noticeable blob.
Step 4: Apply Additional Coats (If Needed)
Once the first coat is dry, assess the chip. If it’s still visible and not completely filled, repeat Step 3. Apply another thin layer of paint, letting each layer dry thoroughly before applying the next. You’re aiming to build up the paint so it’s level with the surrounding surface.
This might take two or three coats. Be patient! The goal is to make the chip level with the original paint, not create a raised bump.
Step 5: Apply the Clear Coat (If Your Kit Includes It)
If your touch-up kit came with a clear coat, this is applied after the color coat has fully dried (allow at least several hours, or even overnight, for optimal drying). The clear coat protects the color you just applied and adds a layer of gloss for a more seamless finish.
- Shake the Clear Coat: Shake the clear coat bottle well.
- Apply Carefully: Using your fine-tip applicator, apply a thin layer of clear coat over the filled chip. Again, aim to cover only the repaired area.
- Let it Dry: Allow the clear coat to dry completely. This usually takes at least an hour or two, but check your product’s instructions.
The clear coat helps to blend everything together and provides crucial protection.
Step 6: Curing and Optional Finishing (Buffing)
The paint needs time to fully cure, which means harden and bond. This can take 24 hours to several days, depending on the product and environmental conditions. Avoid washing the car or applying any waxes or polishes to the repaired area during this time.
Once the paint has fully cured (check your product’s instructions for recommended curing times), and if the repaired area feels slightly raised, you can gently level it out:
- Use a Fine Polishing Compound: Apply a tiny amount of automotive polishing compound to a soft microfiber cloth.
- Gently Buff: Gently rub the polished or buff the repaired area. The aim is to slightly level the touch-up paint so it’s flatter and blends better with the surrounding paint. Be very careful not to rub too hard, or you could remove the touch-up paint.
- Clean Up: Wipe away any residue with a clean microfiber cloth.
Some guides suggest using a leveling compound or even very fine-grit sandpaper (like 2000-3000 grit) for an absolutely flat finish, but this really is for advanced users and carries a risk of damaging adjacent paint. For beginners, a gentle polish is usually sufficient. If you’re unsure, skipping this step is perfectly fine and still yields great results.
Understanding Different Types of Stone Chip Kits
Not all touch-up solutions are created equal. Knowing the different types can help you choose the best option for your needs.
Paint Pen vs. Brush-in-Bottle
These are the two most common formats for DIY touch-up paint. They serve the same purpose but have slightly different application styles.
Paint Pens:
- Pros: Offer more precise application, similar to a marker. Good for very small chips and scratches. Easy to control.
- Cons: Can sometimes dispense paint too readily if not used carefully. May not be ideal for larger chips where a thicker layer is needed.
Brush-in-Bottle:
- Pros: The traditional method. The brush (often attached to the cap) allows for more paint to be applied, which can be good for slightly larger chips or multiple small chips.
- Cons: Can be trickier to get a fine, controlled application. The brush can sometimes leave “brush strokes” if not used carefully.
Both work well if used with care. The key is always applying thin layers and building up the paint.
Multi-Component Kits
Some higher-end touch-up kits come with more than just the color paint. They might include:
- Primer: For chips that have gone through to the metal or plastic of the car. Primer helps the paint adhere better to bare surfaces.
- Base Coat (Color): The actual paint color of your car.
- Clear Coat: Protects the color coat and adds gloss.
- Leveling Compound/Activator: Sometimes included to help smooth out the repaired area.
These kits offer a more professional, durable finish but can be slightly more complex to use. If your chips are deep or you want the best possible result, consider a multi-component kit. The U.S. Government’s National Institute of Standards and Technology (NIST) provides research and standards that inform the development of high-quality automotive coatings, ensuring durability and finish.
Table: Pros and Cons of DIY Stone Chip Repair
Like any DIY project, there are advantages and disadvantages to hiding stone chips yourself.
| Pros | Cons |
|---|---|
| Cost-Effective: Significantly cheaper than professional repair. | Time Consuming: Can take time, especially if multiple coats are needed. |
| Preventative Maintenance: Stops rust and further paint damage. | Skill Dependent: Results can vary based on your patience and precision. |
| Improves Aesthetics: Makes your car look much neater. | Not Invisible: Small chips might still be detectable up close. |
| Confidence Boost: Empowers you with car care skills. | Risk of Error: Imprecise application can sometimes be noticeable. |
| Convenience: Can be done at home on your own schedule. | Color Matching: Requires accurate identification of your paint code. |
When to Call a Professional
While most stone chips are perfect for DIY repair, there are times when it’s best to let the experts handle it. Consider professional help if:
- The Chips are Deep and Large: If the chip is very deep, exposes a lot of metal, or has cracked the surrounding paint, a professional might be needed for proper repair and refinishing.
- You’re Uncomfortable with the Process: If you’re still hesitant after reading this guide, it’s okay to seek professional help. Peace of mind is valuable.
- The Area is Difficult to Access: Chips on complex body lines, edges, or very low on the vehicle might be challenging for DIY work.
- You Want a Perfect, Invisible Finish: While DIY can make chips unnoticeable from a distance, professionals have specialized tools and techniques to make repairs exceptionally difficult to detect, even up close.
- The Vehicle is a High-Value or Classic Car: For precious vehicles, you might prefer the assurance of a professional detailer or body shop specializing in high-end work.
A professional detailer can often perform paint correction and touch-up services that might be beyond the scope of a simple DIY kit.

Frequently Asked Questions (FAQ)
Q1: How long does touch-up paint take to dry?
A: Drying times vary greatly depending on the product and environmental conditions (temperature, humidity). Typically, multiple thin coats of color paint might dry to the touch in 30-60 minutes each. Clear coat can dry in about an hour. However, full curing—where the paint hardens completely—can take 24 hours to several days. Always refer to the specific product instructions.
Q2: Can I fix multiple stone chips at once?
A: Yes, you can address multiple chips in one session. Just ensure you clean the entire affected panel thoroughly. You’ll work on each chip individually, following the same application process for each one.