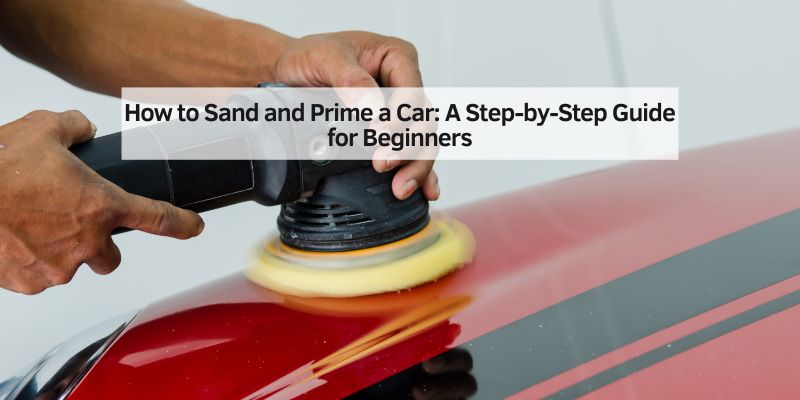
How to Sand and Prime a Car: Grit Guide, Primer Types & Step-by-Step
To sand and prime a car correctly, use 80–320 grit sandpaper to strip old paint and prep bare metal, apply 2–3 coats of automotive primer, then sand the primer smooth with 400–600 grit before topcoating. The biggest mistake beginners make is starting too fine — 400 grit won’t remove old paint or heavy rust effectively. This guide covers the complete grit sequence for both phases, which primer type to use for your situation, and the full step-by-step process from bare metal to paint-ready surface.
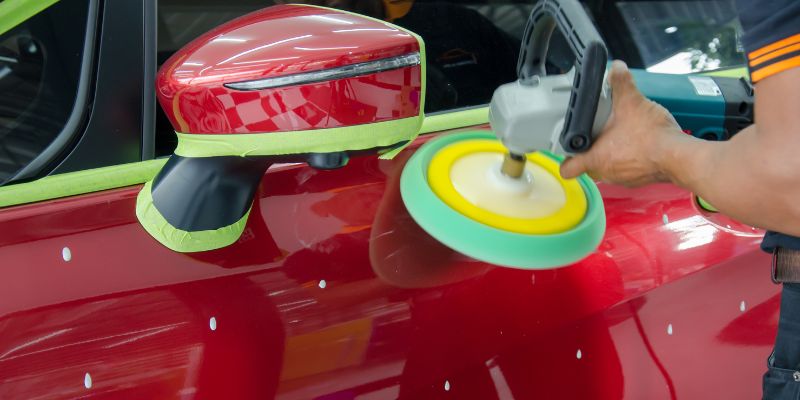
Sand bare metal with 80→150→220→320 grit before primer. After primer cures (24–48 hrs), sand with 320→400→600 grit before topcoat. Apply 2–3 thin primer coats, holding the gun 8–12 inches away. Always degrease first, sand in straight lines (not circles), and wet-sand anything 400 grit or finer.

Why Sanding and Priming Your Car Matters
Sanding removes old paint, rust, and surface contamination to give primer a clean, mechanical bond. Without proper sanding, primer sits on top of grease or oxidation and peels — taking your topcoat with it. Primer then seals the bare metal against rust and corrosion while providing a uniform surface for the paint to adhere to. A poor prep job is the number one cause of paint failure on DIY projects — bubbling, peeling, and fish-eye defects almost always trace back to a skipped or rushed sanding step.
Sandpaper Grit Sequence for Sanding a Car
Using the correct grit at each phase is the most technically important part of the job. There are two distinct phases: sanding before primer and sanding after primer. Using the wrong grit in either phase causes either surface damage (too coarse) or insufficient adhesion (too fine).
| Phase | Grit | Purpose | Technique |
|---|---|---|---|
| Before primer — heavy removal | 80 grit | Remove heavy rust, thick old paint, body filler high spots, welds | Dry sand, orbital sander OK |
| Before primer — medium prep | 150 grit | Refine body filler, remove 80-grit scratches, general bare metal prep | Dry sand, sanding block |
| Before primer — fine prep | 220 grit | Create consistent bonding surface, remove 150-grit scratches | Dry sand, sanding block |
| Before primer — final pass | 320 grit | Final smoothing before primer application | Dry sand, straight lines |
| After primer — leveling | 320–400 grit | Level primer texture and orange peel | Wet or dry, straight lines |
| After primer — smoothing | 600 grit | Refine for basecoat — removes 400-grit scratches | Wet sand recommended |
| After primer — final (optional) | 800 grit | Ultra-smooth finish before single-stage topcoat | Wet sand only |
Key rule: never skip more than one grit step — jumping from 80 to 220 leaves 80-grit scratches that show through primer. Always wet sand 400 grit and finer to prevent clogging and scratch marks. Sand in straight lines parallel to the panel edges, not circles — circular scratches catch light and show through paint.
Which Primer Type Should You Use?
Not all automotive primers are the same. The right choice depends on whether you’re working over bare metal, existing paint, body filler, or rust.
| Primer Type | Best For | Sand After? | Notes |
|---|---|---|---|
| High-build primer | Filling minor scratches and imperfections | Yes — 320→400 | Most common for DIY full repaints; thick enough to fill 220-grit scratches |
| Epoxy primer | Bare metal rust prevention | Only if topcoating after 7+ days | Best corrosion resistance; topcoat within the recoat window when possible |
| Self-etching primer | Bare metal bonding (acid etch) | Light 400 scuff only | Chemically bonds to metal; don’t sand through or you lose the etch |
| Urethane sealer primer | Over existing paint before respray | 600 grit scuff | Seals old paint and provides uniform base — no buildup needed |
For most DIY paint jobs on a bare panel or full car, a high-build primer is the right choice — it’s forgiving, fills minor prep scratches, and sands easily. If you’re working down to bare metal and want maximum rust protection, apply an epoxy primer first, then a high-build primer coat on top before sanding.
Tools and Materials You’ll Need
Gather everything before you start — mid-project supply runs interrupt drying times and contaminate surfaces.
| Item | Purpose | Note |
|---|---|---|
| Sandpaper (80, 150, 220, 320, 400, 600 grit) | Full grit sequence for both phases | Buy in packs — you’ll use more than you expect |
| Sanding block or orbital sander | Even pressure, especially on flat panels | Orbital sander for large areas; block for flat panels; hand for curves |
| Automotive-grade primer | Seals surface, prevents rust, adhesion base | Match primer type to your situation (see table above) |
| Spray gun or aerosol cans | Even primer application | Spray gun for full panels; aerosol for small areas |
| Masking tape and paper | Protect glass, trim, tires | Use automotive-grade tape — hardware store tape bleeds |
| Wax and grease remover / degreaser | Remove contamination before sanding | Never skip this — wax under primer causes lifting |
| Microfiber cloths | Wipe down between steps | Use tack cloths before primer application |
| Body filler (if needed) | Fill dents and deep scratches | Apply in thin layers; sand each layer before adding the next |
| Safety gear | Dust and fume protection | P100 respirator for sanding; organic vapor respirator for primer |
Recommended Products for Sanding & Priming

Automotive Sandpaper Assortment
80–2000 grit set — covers both pre-primer and post-primer sanding phases
View on Amazon
Rust-Oleum Automotive Primer
High-build filler primer — sandable in 20 min, fills 220-grit scratches
View on Amazon

Bondo Body Filler
Professional-grade 2-part filler — fills dents and scratches before primer
View on AmazonStep-by-Step Guide to Sanding Your Car
Follow this sequence for bare metal or existing paint prep. Each step builds on the last — don’t skip ahead.
Step 1: Prepare Your Workspace
Work in a clean, well-ventilated space with no wind — dust contamination in wet primer is one of the most common causes of a poor finish. Wash the car thoroughly and dry it completely. Remove mirrors, trim, and any parts you don’t want to sand. Cover windows, tires, and chrome with automotive masking tape and paper.
Step 2: Clean the Surface
Wax and grease remover is non-negotiable before sanding. Any residual wax, silicone, or road film under primer will cause lifting and fish-eye defects. Wipe down the entire surface with a clean microfiber detailing cloth, working in straight strokes and using a fresh section of cloth for each wipe. Let it flash off completely (about 5 minutes) before touching the surface again.
Step 3: Start with Rough Sanding
Start with 80 grit for heavy rust, thick old paint, or high spots in body filler. Move to 150 grit to refine and remove the 80-grit scratches, then 220 grit to create a consistent surface. Use an orbital sander for large flat panels and a sanding block for anything smaller. Sand in straight lines parallel to the panel edges — not circular motions. Keep even, light pressure and let the abrasive do the work.
Step 4: Fill Dents and Imperfections
After the initial sanding, any dents or deep scratches that remain need body filler. Mix the filler with hardener per the instructions and apply with a plastic spreader in thin layers — no more than 1/4 inch per coat. Let each layer cure fully (typically 20–30 minutes), then sand with 80–150 grit to shape, followed by 220 grit to smooth. Check for low spots by wiping on a guide coat (a thin layer of different-color spray paint) — low spots appear as unscratched color after sanding.
Step 5: Fine Sanding for a Smooth Finish
Finish the pre-primer sanding with 320 grit. This removes the 220-grit scratches and creates the ideal surface profile for primer adhesion. Sand in straight lines with a sanding block for flat panels, following the car’s contours with hand pressure on curved areas. After the final pass, wipe down with a tack cloth to remove all sanding dust before priming.
How to Prime Your Car Like a Pro
With the surface at 320-grit and dust-free, you’re ready to prime. Temperature matters — apply primer between 60°F and 90°F in low humidity. Cold or humid conditions extend dry times and can cause solvent popping.
Step 1: Choose the Right Primer
Match your primer to the situation using the primer type table above. For most DIY jobs on bare metal, a high-build filler primer is the right choice — it fills minor scratches and sands easily. If working over existing enamel paint, a urethane sealer primer is more appropriate. Read the primer label for compatibility with your intended topcoat — oil-based and water-based products are often not compatible.
Step 2: Mask Off Areas
Mask everything you don’t want primer on — glass, rubber seals, tires, chrome, badges. Use automotive-grade masking tape (3M 2090 or equivalent) — hardware store masking tape bleeds on fine edges. Run the tape edge carefully along trim lines and press it firmly to prevent primer creep. Overlap paper joints to prevent spray-through.
Step 3: Apply the Primer
Hold the spray gun (or aerosol can) 8–12 inches from the surface. Apply the first coat as a light “tack coat” — barely enough to change the color of the surface — and let it flash for 10 minutes. Then apply 2 full wet coats with 15–20 minute flash time between each. Three coats total is standard for high-build primer. Overlap each pass by 50% to avoid stripes. Don’t try to get full coverage on the first coat — building up thin coats prevents runs and sags.
Step 4: Sand the Primer (If Needed)
Wait 24–48 hours after the final primer coat before sanding — sanding too soon causes soft spots. Start with 320 grit to knock down any orange peel or primer texture, then move to 400 grit and finish with 600 grit wet-sanded for a paint-ready surface. Wipe with a tack cloth and inspect in raking light. If the surface looks dull and even with no shiny low spots, you’re ready for paint.

Tips for Success
- Work in a clean, enclosed space. Even a light breeze carries dust that embeds in wet primer. Close garage doors and let the air settle for 20 minutes before spraying.
- Don’t rush drying times. Primer that hasn’t fully cured will tear when sanded, leaving soft spots that show through paint.
- Use light coats. Thick primer coats sag, run, and crack when sanded. Three thin coats always outperform one heavy coat.
- Sand in straight lines. Circular sanding scratches are visible in the finished paint. Always sand parallel to the panel edges.
- Wear the right respirator. A dust mask doesn’t protect against isocyanate fumes in two-part primers. Use an organic vapor respirator rated for paint spraying.
Common Mistakes to Avoid
- Starting with too fine a grit. 400 grit won’t cut through old paint or rust — you need 80–150 for that. Starting too fine wastes time and leaves contamination under your primer.
- Skipping the degreaser. Any wax or silicone left on the surface causes primer to fish-eye or peel. Always degrease before sanding and again after sanding before priming.
- Sanding primer too soon. High-build primer needs 24–48 hours to fully cure. Sanding at 2–3 hours creates soft spots that collapse when topcoat is applied.
- Over-priming. More than 3 coats of high-build primer builds up so much material it can crack over time. Sand between coats if you need a fourth.
- Not masking properly. Primer on glass is difficult to remove. Take the extra 20 minutes to mask properly.
How Long Does It Take?
A full car takes 6–10 hours of sanding spread over 1–2 days, plus 4–6 hours for masking, priming, and cleanup. A single panel (hood, fender, door) is 2–4 hours total. The primer needs 24–48 hours to cure before sanding, so plan for at least 2 full days between bare metal prep and primer sanding. Don’t rush this — paint failures almost always trace back to skipped cure time.
Preparing for the Next Step: Painting
After the primer is sanded to 600 grit and wiped with a tack cloth, you’re ready for paint. If you’re not painting immediately, store the car in a clean, dry enclosed space — primer is not a finished surface and will absorb moisture and contamination. Most primers have a recoat window of 1–7 days after final sanding before adhesion begins to degrade. For guidance on removing paint errors later, see our article on how to get paint off a car.
Conclusion
Sanding and priming a car correctly comes down to using the right grit at each phase, choosing the right primer type for your surface, and respecting the cure times between steps. The grit sequence (80→320 before primer, 320→600 after) is the technical foundation — get that right and the rest follows. Take your time on prep, keep everything clean, and the paint job will reward you with a finish that lasts.
Frequently Asked Questions
Can I Sand and Prime My Car Without Professional Tools?
Yes — aerosol primer cans and hand-sanding with a block produce excellent results on small areas. For a full car, an orbital sander dramatically reduces time and fatigue but isn’t required. The technique matters more than the tools: correct grit sequence, straight-line sanding, and proper cure time will give professional results with basic equipment.
How Many Coats of Primer Do I Need?
Apply 3 thin coats for standard high-build primer — a light tack coat followed by 2 full wet coats. Let each coat flash for 15–20 minutes before applying the next. Three coats gives enough build to fill 220-grit scratches and provide material for sanding smooth without burning through to bare metal.
What If I Find Rust After Sanding?
Keep sanding with 80 grit until you reach completely bare, rust-free metal — any orange tint left under primer will continue corroding and lift the paint within months. After reaching bare metal, apply a self-etching or epoxy primer as a first coat for maximum rust inhibition before applying high-build primer on top.
Can I Skip Priming and Go Straight to Painting?
No — paint applied over bare metal or sanded old paint has poor adhesion, no rust protection, and will show every scratch and imperfection. Primer is what makes the topcoat stick and last. Skipping primer saves 4 hours of work but typically results in paint failure within 6–18 months.
How Do I Know If I’ve Sanded Enough?
Run your hand over the surface — it should feel uniformly smooth with no shiny spots (shiny = unsanded low areas). Use a guide coat (light spray of contrasting color paint) to make this visible: sand until all the guide coat is gone, and any spots where guide coat remains are low areas that need more sanding or filler.
What Grit Should I Use to Sand Car Primer Before Painting?
Start with 320 grit to level the primer texture, follow with 400 grit to smooth, then finish with 600 grit wet-sanded for the final paint-ready surface. For single-stage topcoats (enamel or urethane), 800 grit is the ideal final pass. Never use anything coarser than 320 on primer you intend to topcoat — the scratches will telegraph through the paint.