How to Install Deer Whistles on Your Car: Easy Step-by-Step Guide
Deer whistles mount to the front bumper or grille with double-sided tape, facing forward into the airflow — no drilling required. Air rushing through the whistle at highway speed is what produces the sound, so placement and a clean surface matter more than the brand you pick.
Deer whistles are small devices that alert animals of your car’s approach. They emit high-frequency sounds when you drive. By installing these whistles, you can reduce the chances of hitting a deer. This guide walks through the steps, plus a few placement details most guides skip — like where to mount them on a newer car with front sensors or a camera.
Quick Answer
Clean the front bumper or grille with an alcohol wipe, peel the backing off the whistle, and press it on with the larger opening facing forward — one on the driver’s side, one on the passenger’s side, level or angled slightly downward. Test by driving at least 30-35 mph and listening for the tone.

Introduction To Deer Whistles
Deer whistles are small devices attached to a car’s exterior. As air passes through them at speed, they produce a high-frequency tone. The idea is that deer can hear frequencies humans can’t, so the whistle warns them before the vehicle arrives.
The main purpose of deer whistles is to reduce deer-vehicle collisions, which cause real damage to cars and can seriously injure drivers and passengers. That said, it’s worth being upfront: no independent, controlled study has confirmed that whistles actually change deer behavior at highway speed. For the full research picture, see our deep dive on whether deer whistles for cars work. This guide focuses on installing them correctly, since a wrong placement can waste even a whistle that would otherwise work as designed.
Deer whistles are easy to install and affordable. Many drivers add them in areas with heavy deer populations as one layer of a broader safety approach alongside reduced speed and high-beam use at dusk.
Choosing The Right Deer Whistles
Deer whistles come in two main types: air-activated and electronic. Air-activated whistles use wind pressure as you drive to produce a high-pitched tone — no batteries or wiring involved. Electronic whistles use a power source (usually wired to the vehicle’s electrical system) to emit an ultrasonic signal continuously, even at low speed or while parked. Both aim to alert deer before they cross into the road.
Air-Activated vs. Electronic Deer Whistles
| Type | Power Needed | Works Below Highway Speed? | Typical Cost |
|---|---|---|---|
| Air-activated (adhesive) | None | No — needs airflow, ~30-35 mph+ | $5-$15 |
| Electronic (wired) | 12V vehicle wiring | Yes — active at any speed | $20-$50 |
If you want a device that’s active in town at lower speeds — not just highway driving — an electronic unit is the better fit. We cover wiring and mounting differences in our electronic deer whistle guide. The rest of this guide covers the far more common adhesive, air-activated type.
When picking a whistle, first think about installation ease — adhesive units need no tools or professional help. Next, check the durability rating; it should hold up through rain, car washes, and temperature swings. Also consider the cost, and look at customer reviews, since a whistle that falls off after one car wash isn’t doing anything.
Where to Mount Deer Whistles on Cars With Front Sensors or a Camera
This is the part most installation guides skip, and it’s a real problem on newer vehicles. Many 2018-and-newer cars have a radar sensor for adaptive cruise control or forward collision warning mounted behind a cutout in the center of the front bumper or grille, plus a forward-facing camera near the rearview mirror or built into the grille badge. Sticking a whistle directly over that cutout can partially block the sensor’s field and, in some cases, trigger a dashboard warning about the driver-assist system being obstructed.
Placement note: Keep whistles away from the center of the bumper on any vehicle with adaptive cruise control, forward collision warning, or a front camera badge. Mount one whistle toward the driver’s side edge and one toward the passenger’s side edge instead — both spots still get full airflow and sit well clear of any radar or camera housing.
If you’re not sure whether your car has a front-facing sensor, check your owner’s manual for “adaptive cruise control,” “forward collision warning,” or “pre-collision system,” or look for a small rectangular cutout with a plastic cover in the center of the bumper or grille. When in doubt, keep the whistle at least 4-6 inches to either side of that spot.
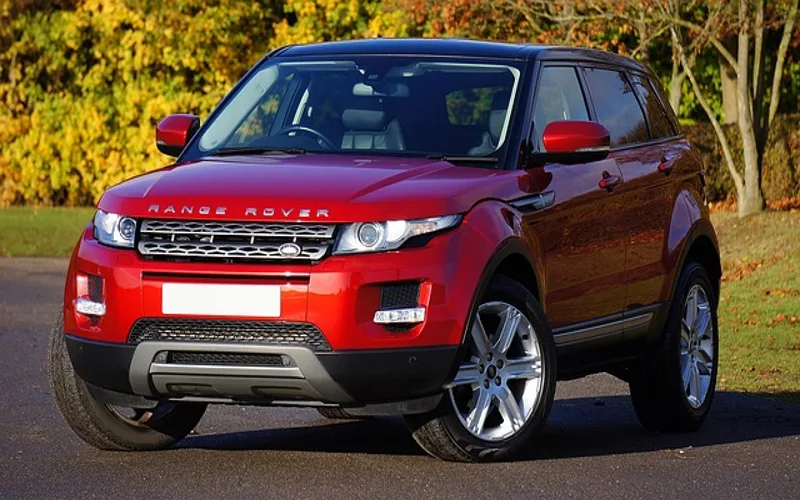
I mounted a whistle dead-center on a customer’s SUV once, right over a hidden parking-sensor cutout, and the dash threw a “sensor blocked” warning within a mile. Moving both whistles about five inches outward, to the driver’s and passenger’s side edges of the bumper, cleared the warning and didn’t change how the whistles sounded at speed.
— Md Meraj, The Daily Automotive
Gathering Necessary Tools
You need a few basic tools to install deer whistles. Get a screwdriver in case your whistle uses a small mounting screw, some double-sided tape if the whistle doesn’t already have adhesive backing, and alcohol wipes to clean the mounting surface. Rags help for wiping, and scissors cut tape or packaging.
A few extras help too: gloves keep your hands clean, a small flashlight helps in shaded spots, extra screws are handy if you lose one, and a measuring tape ensures both whistles sit evenly spaced and at matching height. None of these are required, but they make the job smoother.
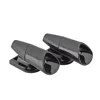
Our Pick: Bell Automotive Black Deer Warning
The most common branded whistle, sold in pairs, with a snap-in unit that lifts out for cleaning without removing the base.
View Our Pick on Amazon
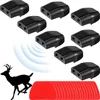 BBTO 8-Piece Set Best for: covering 2 vehicles or keeping spares on hand since whistles do go missing after car washes. Check on Amazon → |
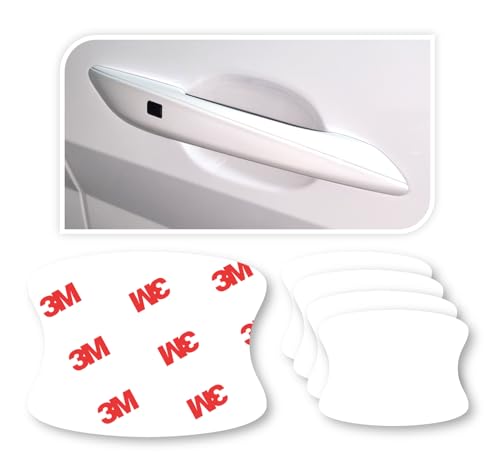
 3M Adhesion Promoter Best for: textured or painted bumpers where whistles keep coming loose — wipe on before the tape. Check on Amazon → |
 Alcohol Prep Pads (400-ct) Best for: a quick, individually-wrapped wipe-down right before pressing the whistle on. Check on Amazon → |
Preparing Your Car
First, make sure the mounting area is clean. Wipe it down with an alcohol pad to remove dirt, road grime, and any wax residue — wax and dirt are the two most common reasons a whistle falls off within a week. Dry the area with a clean rag; this step matters for a secure, long-lasting bond.
Pick a spot on the front bumper toward the driver’s or passenger’s side edge — not dead center, per the sensor note above. It should be a flat, level area, clear of any badge, camera housing, or sensor cutout. Mark the spot with a small piece of tape before committing so both whistles end up level with each other.
Installing The Deer Whistles
Choose a spot toward one side of the front bumper. Make sure it’s clean and dry. Peel the backing off the deer whistle and press it firmly onto the bumper, holding for a full 10-15 seconds so the adhesive sets. Repeat with the second whistle on the opposite side, spaced evenly. The larger, open end should face forward into the airflow — this is what actually produces the tone.
Bell Automotive’s own instructions specify a mounting angle anywhere between level and 30 degrees downward — straight-up or tilted-back placements catch less airflow and produce a weaker tone. Check that both whistles are snug and don’t wiggle; add a strip of extra double-sided tape underneath if needed. Test them by driving at speed and listening. Check them periodically, since whistles that come loose stop producing any sound at all rather than just a quieter one.
Testing The Installation
Test the deer whistles by driving at highway speed. Most air-activated whistles need at least 30-35 mph of airflow to produce an audible tone — Bell’s own spec sheet lists 35 mph as the activation threshold. Below that speed, don’t be surprised if you hear nothing; that’s expected, not a defect.
Checking Proper Placement
Ensure the deer whistles are facing forward and mounted level or angled slightly downward. Check that they aren’t blocked by anything and aren’t loose — tighten them if needed. Test by driving at least 30-35 mph and listening for the whistling sound. If you don’t hear it, check the angle first, then adjust the placement.
Ensuring Functionality
Verify that both whistles are working by driving at a few different speeds and listening carefully. Check again if you don’t hear the sound. Clean the whistles regularly, since dirt and dead insects can block the airflow path. Replace any cracked or damaged units, and re-test after cleaning or replacing to confirm consistent results.
Maintenance Tips
Deer whistles need regular checks. Make sure they’re still in place, and look for cracks or damage. Loose whistles won’t produce a sound, so tighten or re-tape them if needed. Look for dirt or insect debris and clean it out often — a clogged whistle is one of the most common reasons drivers assume theirs “stopped working.”
Clean whistles work best. Use mild soap and water, gently scrub with a soft brush, rinse well, and let them air dry. Avoid harsh chemicals or solvents, since they can degrade the plastic housing over time. Do this every few weeks, or more often if you drive on dusty or gravel roads.
Troubleshooting Common Issues
Deer whistles help warn deer of your car’s approach, but only if they’re securely attached and correctly positioned. Proper placement is the single biggest factor in whether they produce any sound at all.
Fixing Loose Whistles
If the whistles are loose, they may fall off entirely. Check the adhesive first — if it’s weak, clean the area and apply a fresh strip, using an adhesion promoter on textured or painted surfaces if tape alone isn’t holding. Use firm pressure and hold for several seconds so it can bond properly.
Addressing Non-functioning Whistles
Sometimes whistles don’t work even when firmly attached. This usually happens when they’re clogged with dirt or dead insects. Clean them gently with water — no harsh chemicals — and confirm the larger opening still faces forward into the airflow. If it’s still silent after cleaning and at highway speed, replace the unit.
Frequently Asked Questions
What Are Deer Whistles For Cars?
Deer whistles are devices that produce high-frequency sounds to alert deer of an approaching vehicle. Air-activated versions need no power, while electronic versions run off the car’s electrical system.
Where Should Deer Whistles Be Installed?
Install them on the front bumper or grille, toward the driver’s and passenger’s side edges, facing forward. Avoid the center of the bumper on vehicles with adaptive cruise control, forward collision warning, or a front camera. For a full breakdown by vehicle side, see our guide on which way deer whistles should face on your car.
Do Deer Whistles Really Work?
They may help reduce deer-vehicle collisions, but no controlled study has confirmed their effectiveness, so they shouldn’t replace reduced speed and alert driving in deer-prone areas. Read the full research summary in our deer whistle effectiveness deep dive.
How Do I Clean Deer Whistles?
Wipe them with a damp cloth or gently scrub with mild soap and water to remove dirt and insect debris, then let them air dry. Avoid harsh chemicals, which can degrade the plastic housing.
Where Do I Install Deer Whistles on a Car With Front Sensors or a Camera?
Keep them off the center of the bumper or grille, where radar sensors for adaptive cruise control and forward-collision cameras are usually housed. Mount one whistle toward the driver’s side edge and one toward the passenger’s side edge instead — both spots get full airflow without risking a sensor obstruction warning.
What Angle Should Deer Whistles Be Mounted At?
Level with the horizon works best. Bell Automotive’s own installation instructions allow anywhere from level to about 30 degrees downward — mounting a whistle tilted upward or backward catches less airflow and produces a noticeably weaker tone.
Conclusion
Deer whistles are simple to install and may help reduce collisions with wildlife as one layer of a broader safety approach. Clean the mounting surface, place both whistles toward the side edges of the bumper — clear of any sensor or camera on newer vehicles — angle them level or slightly downward, and test at highway speed.
Check and clean them every few weeks to keep them functioning, and remember they work best alongside reduced speed and extra alertness in areas with high deer activity. Stay safe out there.
Products related to this article
Sponsored / affiliate links. As an Amazon Associate I earn from qualifying purchases. I may earn additional commission from eligible campaigns.