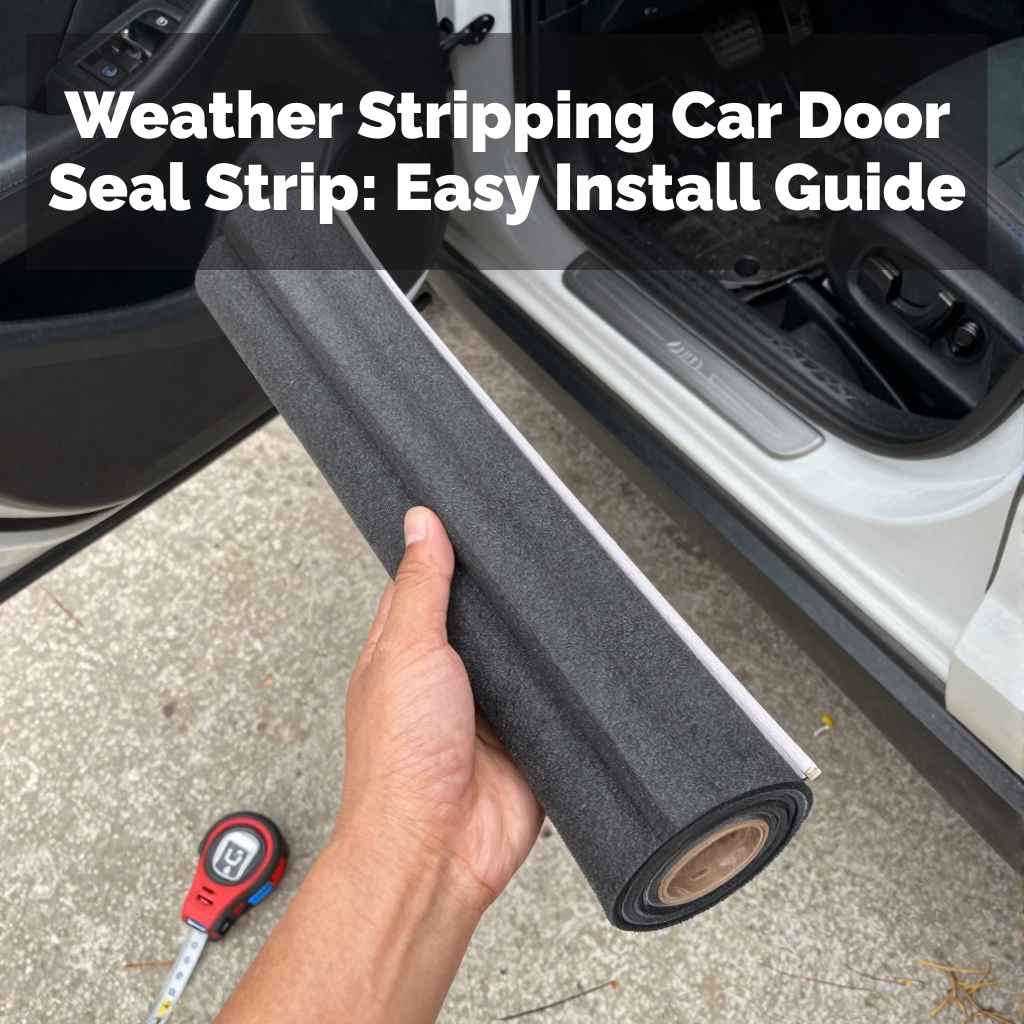
Weather Stripping Car Door Seal Strip: Easy Install Guide
It’s a common annoyance. You’re driving, and a draft of cold air sneaks in. Or maybe you hear a faint whistling sound.
That little gap around your car door can be a real pain. It lets in noise, weather, and even bugs. But there’s a simple fix that makes a big difference.
It’s called weather stripping. This guide will walk you through everything you need to know. We’ll cover what it is, why it’s important, and how to install it yourself.
You’ll learn how to get a better seal and enjoy a quieter, more comfortable ride.
Weather stripping for car doors is a flexible material that seals the gap between your car door and the frame. It helps block out wind, rain, noise, and drafts. Easy to install, it improves comfort and can even boost fuel efficiency by reducing air leaks.
What is Car Door Weather Stripping?
Think of weather stripping as a cozy blanket for your car doors. It’s a rubber or foam material. It attaches to the edges of your car doors or the door frame.
Its main job is to fill tiny gaps. These gaps happen where the door meets the car body when it’s closed.
Over time, the original seals can wear out. They might crack, become brittle, or get damaged. When this happens, air can escape your car’s cabin.
Water can also seep in. This is where new weather stripping comes in. It’s designed to create a tight seal.
This seal does more than just keep the weather out. It also keeps the conditioned air inside. This means your car’s heater or air conditioner doesn’t have to work as hard.
That can save you a bit on gas. It also makes your car much quieter inside. No more annoying wind noise or the sound of rain hitting the metal.
Why Does Your Car Door Need Good Seals?
A good seal on your car doors is super important. It affects your car’s comfort and its health. Let’s break down why you want those seals to be in top shape.
First, comfort is key. No one likes feeling a draft on a cold day. Or having the AC fight a losing battle on a hot afternoon.
Good seals keep the outside temperature outside. They keep your car’s climate steady and pleasant. This makes every drive more enjoyable.
It feels more like a calm space, not an extension of the weather.
Second, noise reduction is a big plus. Cars are noisy places. There’s the engine, the tires, and traffic.
Good weather stripping acts like a sound buffer. It blocks out a lot of the outside racket. This makes for a much quieter, more relaxing drive.
You can actually have a conversation without shouting. Or listen to your music without distractions.
Third, keeping water out is vital. A leaky door seal can let rain or washing water into your car. This can lead to damp carpets.
It can cause mold and mildew to grow. These problems are hard to get rid of and can make your car smell bad. They can also damage the interior over time.
A good seal protects your car’s inside from water damage.
Finally, it can help with fuel economy. When your car is sealed well, your engine doesn’t have to work as hard. The AC and heater don’t run non-stop trying to maintain temperature.
Less effort for the engine means less fuel used. So, good seals can offer a small but helpful boost to your gas mileage.
Types of Car Door Weather Stripping
There are a few main types of weather stripping you’ll find. They are made from different materials. They also have different shapes and installation methods.
Knowing these helps you pick the best one for your car.
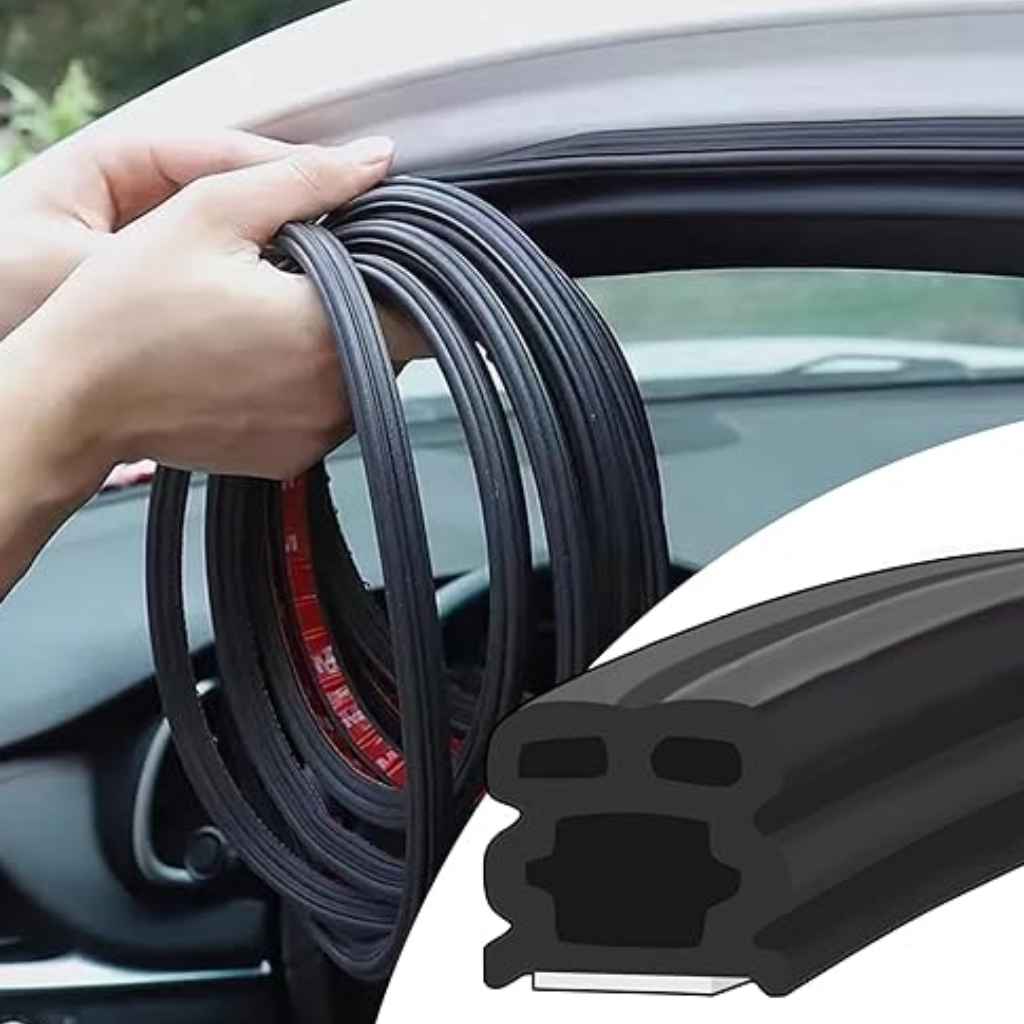
EPDM Rubber Stripping
EPDM stands for Ethylene Propylene Diene Monomer. This is a very common and durable synthetic rubber. It’s great for car weather stripping.
It holds up well against heat, cold, ozone, and UV rays. It stays flexible for a long time. EPDM seals are often shaped like hollow tubes or solid profiles.
They attach using adhesive or clips.
PVC (Polyvinyl Chloride) Stripping
PVC is another plastic material used for seals. It’s often less flexible than EPDM, especially in cold weather. However, it can be a more cost-effective option.
PVC seals are often designed with a channel that slides onto the metal edge of the door. They might also use adhesive.
Foam Stripping
Foam seals are typically made of closed-cell foam. This means the tiny bubbles within the foam are sealed off from each other. This helps prevent water absorption.
Foam stripping is very compressible. It’s good for filling smaller, uneven gaps. It’s usually self-adhesive.
However, it might not be as durable as rubber options for high-wear areas.
D-Shaped Seals
These are very common. They look like the letter ‘D’ when viewed from the side. The round part of the ‘D’ is the seal.
The flat part attaches to the car. They are often made of EPDM rubber. They provide a good cushion and seal.
P-Shaped Seals
Similar to D-shaped, but they look more like a ‘P’. They offer a slightly different profile. This can be useful for specific gaps or door designs.
They also provide good cushioning and sealing.
Lip Seals
These have a thin lip or flap that extends from the main body of the seal. This lip can press against the mating surface for a tighter seal. They are effective at preventing water and air intrusion.
Signs Your Car Needs New Weather Stripping
Your car will often give you clues when its weather stripping is past its prime. Ignoring these signs can lead to bigger problems down the road. So, keep an eye out for these common indicators.
Visible Wear and Tear
The most obvious sign is visual damage. Look closely at the rubber or foam around your doors. Do you see any cracks?
Is it torn? Does it look flattened or brittle? Has it started to crumble or flake off?
If the material looks damaged, it’s not sealing properly anymore.
Drafts and Air Leaks
Can you feel air coming in when the doors are closed? On a windy day, do you feel a stream of air near the door edges? This is a strong sign that the seal is broken.
It’s letting outside air in and inside air out. This is common when driving at higher speeds.
Water Leaks
After washing your car or after rain, do you find water inside your car near the door panels? If you see puddles or damp spots on the carpet or door sill, your seals are likely failing to keep water out. This is a serious issue that can lead to mold.
Increased Road Noise
Has your car suddenly become much noisier inside? Are you hearing more of the sounds from outside, like traffic or wind? Old or damaged weather stripping is less effective at blocking sound.
This is a clear sign that the seal is compromised.
Sticky or Hard-to-Close Doors
Sometimes, worn-out seals can actually make doors harder to close. The rubber might have lost its flexibility. It might be sticking to the frame.
Or, new, thicker seals can cause this if they aren’t the right fit. But if your old seals are the problem, they won’t compress correctly anymore.
Mold or Mildew Smells
If you start to notice a musty smell inside your car, it could be due to water intrusion. Dampness is the perfect breeding ground for mold and mildew. This often starts with a faulty door seal allowing moisture to collect in hidden areas.
Common Places for Weather Stripping to Fail
Door Frame Edge: This is the most common spot. The rubber compresses and expands with every door open/close. Over years, it can crack.
Corners: The top and bottom corners of the door frame are stressed. They often develop small tears or flatten out.
Around Hinges: While less common, the constant movement can sometimes cause wear here.
Window Channels: Seals around the windows also wear. They can make noise or let drafts in.
How to Choose the Right Weather Stripping
Picking the correct weather stripping is important for a good seal. You want something that fits your car and your needs. Don’t just grab the first roll you see.
Here’s how to make a smart choice.
Know Your Car Make and Model
The best weather stripping is often designed for specific vehicles. Car manufacturers use specific shapes and sizes. You can find exact replacements by searching for your car’s year, make, and model.
Auto parts stores or online retailers often have databases for this.
Identify the Type of Seal Needed
Look at your existing seals. What shape are they? Are they hollow tubes?
D-shaped? P-shaped? Matching the original profile is usually best.
This ensures the door closes properly. It also makes sure the seal contacts the car body correctly.
Consider the Material
EPDM rubber is generally the top choice. It’s durable, flexible, and long-lasting. It handles temperature changes well.
For less demanding areas or if budget is a concern, PVC might be an option. Foam is best for very minor gaps but may not last as long.
Adhesive vs. Channel-Fit
Some weather stripping has a strong adhesive backing. You peel and stick it on. Others have a channel.
This channel slides over the metal edge of the door. Channel-fit seals are often more secure. They can be harder to remove if needed.
Adhesive seals are easier to install but can fail if the adhesive degrades.
Buy Enough Material
Measure the length of all the door edges you need to cover. Then, add a little extra. It’s always better to have a bit too much than not enough.
You don’t want to run out mid-job.
Read Reviews and Ask Experts
If you’re buying online, read what other customers say. Does it fit well? Does it last?
If you’re unsure, ask a mechanic or a parts store employee. They can offer valuable advice.
Quick Guide to Seal Shapes
- D-Shape: Good for general door edges. Offers a nice cushion.
- P-Shape: Works well where a slightly different contact point is needed.
- T-Shape: Often used on trunk lids or hoods.
- Tubular/Hollow: Very compressible. Great for filling larger gaps.
- Solid Profile: Less compressible. Used for very specific fitments.
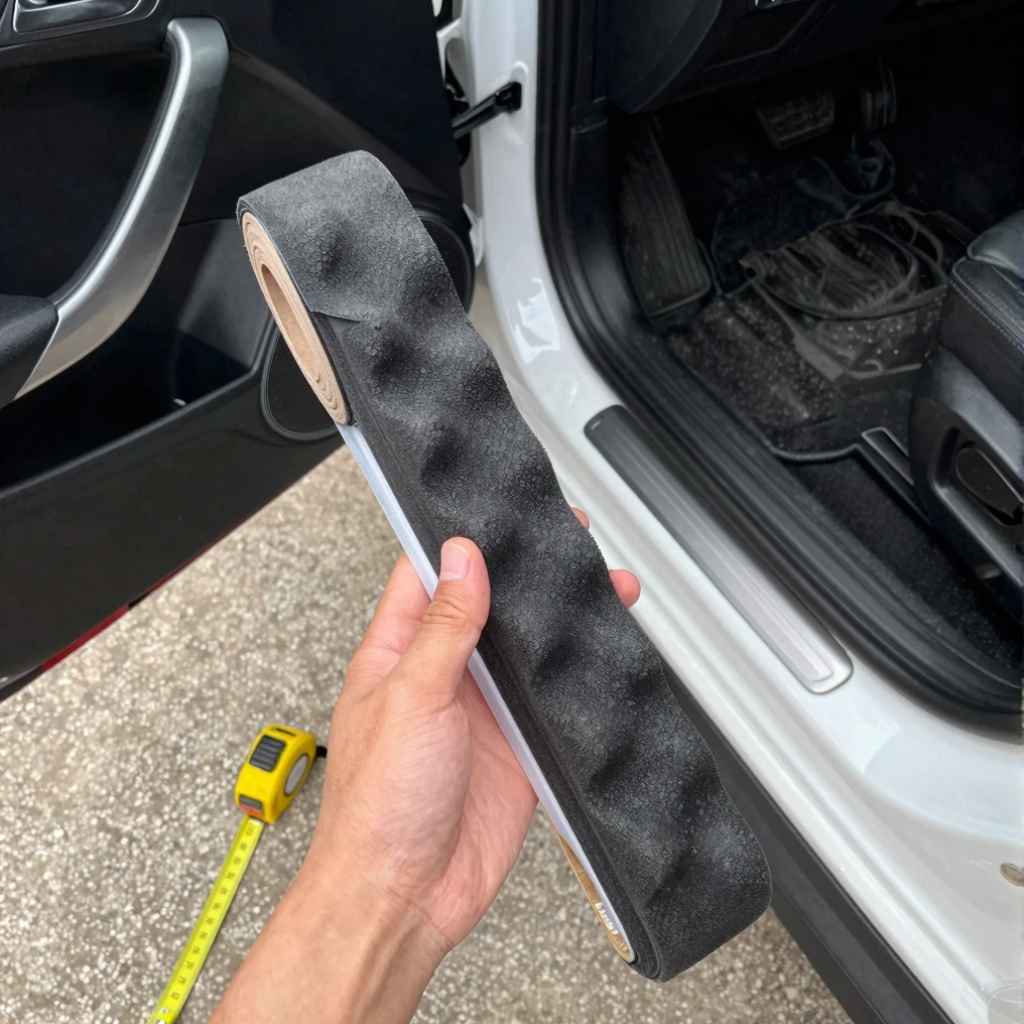
Tools You’ll Need for Installation
Installing car door weather stripping is a task most people can handle. You don’t need a huge toolkit. A few basic items will make the job go smoothly.
Having the right tools makes a big difference in the final result.
- New Weather Stripping: Of course! Make sure you have the correct type and enough of it.
- Measuring Tape: To measure the doors and cut the stripping to the right length.
- Sharp Utility Knife or Scissors: For cutting the stripping cleanly. A dull blade will tear the rubber.
- Rubbing Alcohol or Degreaser: To clean the door edge or frame where the new seal will attach. This ensures good adhesion.
- Clean Cloths or Rags: For cleaning and wiping away any residue.
- Gloves (Optional): To keep your hands clean, especially when using degreasers.
- Pry Tool or Flathead Screwdriver (Optional): If you need to remove old, stubborn seals or clips. Be gentle to avoid scratching paint.
- Heat Gun or Hair Dryer (Optional): Sometimes warming up the new seal slightly can make it more pliable and easier to work with, especially in cold weather.
Having these items ready before you start will save you trips back and forth. It makes the process much less frustrating.
Step-by-Step: How to Install Car Door Weather Stripping
Let’s get this done! Installing new weather stripping is a rewarding DIY project. It makes a noticeable difference.
Follow these steps carefully for the best results.
Step 1: Prepare the Area
Start by cleaning the area where the new weather stripping will go. This is usually the edge of the car door or the door frame. If you’re replacing old seals, carefully remove them.
You might need a pry tool for stubborn ones. Once the old seal is off, clean the metal edge thoroughly. Use rubbing alcohol or a degreaser.
Wipe it down with a clean cloth. This removes dirt, grease, and old adhesive. A clean surface is crucial for the new seal to stick well.
Step 2: Measure and Cut the New Stripping
Now, measure the length of the door edge. Use your measuring tape. You want to cover the entire perimeter.
It’s usually best to do one door at a time. Cut the new weather stripping to the measured length. Use a sharp utility knife or strong scissors.
Make sure your cut is straight and clean. If you’re using a rubber profile with adhesive, you might want to cut it slightly longer than needed. You can trim it perfectly at the end.
Step 3: Test Fit the Stripping (If Adhesive Type)
Before you remove the backing from the adhesive, hold the new stripping up to the door. See how it fits. Does it seem to cover the entire edge?
Does it lay flat? If it’s a channel-fit type, slide it onto the door edge to ensure it’s snug and secure. This is your chance to make minor adjustments before committing.
Step 4: Apply the Weather Stripping
If you have an adhesive-backed seal, peel off a small section of the backing at one end. Start applying the stripping to the door edge. Press it down firmly as you go.
Work in small sections. Peel the backing away gradually. Keep the stripping straight and aligned.
Ensure it’s centered on the edge. For channel-fit seals, carefully slide them onto the metal edge. You might need to gently tap them into place with your hand or a rubber mallet.
Some people use a heat gun or hair dryer on a low setting to warm up EPDM rubber. This makes it more flexible and easier to bend around corners. If you do this, don’t overheat it; just make it pliable.
Step 5: Work Around Corners and Curves
This is often the trickiest part. Go slow. For adhesive seals, gently bend the stripping around corners.
Don’t force it into sharp angles, as this can cause it to pucker or detach later. You might need to make small relief cuts on the adhesive side in very tight curves. For channel-fit seals, work them onto the edge.
Sometimes a little wiggling helps them seat correctly. If you are using pre-formed corner pieces, apply those first and then fit the straight sections to them.
Step 6: Complete the Seal and Trim
Once you have applied the stripping all the way around the door edge, bring the ends together. Overlap them slightly or meet them neatly, depending on the type of seal. If you cut it a bit long, carefully trim any excess with your sharp knife.
Ensure the ends meet without gaps. Press firmly along the entire length of the new seal one last time. Make sure it’s making good contact everywhere.
Step 7: Test the Door Closure
Now, close the car door. Does it close smoothly? Does it latch properly?
It should feel snug, but not so tight that you have to slam the door. If it’s too tight, the seal might be too thick or installed incorrectly. You may need to adjust its position or even re-cut it.
If it doesn’t close at all, you might have the wrong type of seal. It’s important to get this right. The seal needs to compress slightly, but not be crushed.
Infographic: Simple Installation Flow
1. Clean: Wipe door edge till spotless.
2. Measure: Get exact door perimeter length.
3. Cut: Trim new seal to size. Add a bit extra!
4. Apply: Peel backing, press firmly. Start slow.
5. Bend: Gently curve around corners. No kinks!
6. Finish: Seal ends, press all along. Check fit.
7. Test: Close door. Snug, not forced.
Perfect!
Real-World Scenarios and What to Look For
Life with cars involves different situations. The performance of your weather stripping can be tested in many ways. Understanding these scenarios helps you appreciate why good seals are so vital.
Scenario 1: The Winter Commute
It’s 5 AM, and it’s freezing outside. You start your car. If your seals are old, you’ll feel that biting cold air creeping in around the doors.
The wind noise might be loud. Your car’s heater will struggle to warm up the cabin. You might even see frost forming on the inside door panels where the seal is weak.
With good, new weather stripping, this is different. The cabin stays warmer. The heater works more efficiently.
The wind noise is minimal. You feel cozy and protected from the harsh weather. It makes that early morning commute much more bearable.
Scenario 2: The Summer Road Trip
You’re on the highway, miles from home. The sun is beating down. Your air conditioner is blasting, trying to keep you cool.
If your seals leak, that cool air escapes. Hot air from outside gets in. Your AC unit has to work overtime.
This wastes fuel and makes the car hotter than it should be.
Well-sealed doors keep that cool air trapped inside. The AC can maintain the temperature with less effort. This improves comfort and saves on gas.
Plus, you won’t hear that annoying highway wind noise. Your road trip is more peaceful and refreshing.
Scenario 3: The Rainy Day Drive
You’re driving through a downpour. Water is everywhere. If your door seals have cracks or are flattened, water can easily get into your car.
You might notice drips near the window or on the floor mats. This moisture can lead to unpleasant smells and damage the interior materials over time.
When seals are in good condition, they act like a dam. They effectively block water from entering. Your car’s interior stays dry and fresh.
This protects your car’s value and prevents costly mold remediation. It’s a small detail that makes a big difference in protecting your vehicle.
Scenario 4: The Unexpected Visitor (Bugs!)
Sometimes, small gaps in door seals can become entry points for unwelcome guests. Think tiny spiders or various bugs. They can crawl in when your car is parked, especially overnight or in warmer months.
A complete and tight seal leaves no room for these small invaders. It adds an extra layer of protection, keeping the inside of your car clean and bug-free. It’s a subtle benefit that contributes to overall vehicle cleanliness and comfort.
When Seals Go Bad: A Contrast
Normal Seal: Feels firm but flexible. Forms a complete, even contact with the car body when closed. Blocks drafts and noise effectively.
Concerning Seal: Looks cracked, brittle, or flattened. Feels mushy or has gaps. You can feel drafts easily.
Water leaks into the car. Road noise is significantly louder than it used to be.
Troubleshooting Common Installation Issues
Even with careful work, you might run into a small snag. Don’t worry! Most installation problems are fixable.
Here are a few common issues and how to deal with them.
Problem: The Door is Too Hard to Close
Why it happens: The new seal is too thick. Or it’s installed too high or too low on the door edge. It might also be catching on something.
Sometimes, if you replace seals on all doors, the car body might subtly shift due to pressure, making all doors tight.
The fix: First, check if the seal is seated correctly. If it’s a channel-fit, try sliding it slightly up or down. For adhesive seals, you might need to carefully peel it back and reapply it in a slightly different position.
If the seal material itself is just too thick for the gap, you might need a thinner profile or one designed for that specific car. Sometimes, just closing the door firmly a few times can help it seat.
Problem: The Seal Won’t Stick (Adhesive Type)
Why it happens: The surface wasn’t clean enough. Or the temperature was too cold when you applied it. Old adhesive seals can also leave residue that’s hard to remove.
The fix: If it’s not sticking, carefully remove it. Clean the surface again with alcohol. Let it dry completely.
If the adhesive is weak, you might need to use a special automotive adhesive specifically designed for rubber or plastic bonding. Apply it according to its instructions. Ensure the temperature is within the recommended range for the adhesive.
Patience is key here.
Problem: Gaps at Corners or Seams
Why it happens: The material isn’t flexible enough to bend tightly. Or the ends weren’t properly joined.
The fix: For corners, ensure you’re not forcing sharp bends. Gently guide the seal around curves. Some seals have specific corner pieces; make sure you’re using them correctly.
For joining ends, overlap them slightly if the design allows, or ensure a clean, flush cut. You can sometimes use a tiny bit of rubber cement to secure the seam if needed, but be sparing.
Problem: The Seal Is Too Short
Why it happens: You mismeasured. Or the seal stretched slightly during installation.
The fix: If it’s only a little short, you might be able to carefully stretch the last section. If it’s significantly short, you’ll likely need to cut it and start that section again. It’s better to have a proper seal all around than a gap.
Problem: Water is Still Leaking
Why it happens: The new seal isn’t the right profile. Or it’s not making contact all around. There might be another source of the leak, like a poorly sealed window or a seam in the door panel itself.
The fix: Re-inspect the seal. Is it fully seated? Is it compressed evenly?
Is there any damage? If you’re certain it’s the seal, check if it’s the correct type for your car. Sometimes, a leak might appear to be from the door seal but is actually coming from the window channel or a drain hole.
A garden hose test can help pinpoint leaks. Spray water systematically around the door and window, checking inside for drips.
Quick Fix Tips:
- Patience is Key: Don’t rush the job.
- Cleanliness Matters: A spotless surface ensures adhesion.
- Warm It Up: A little heat can make rubber friendlier.
- One Door at a Time: Avoid confusion and ensure proper fit for each door.
Maintaining Your New Weather Stripping
You’ve put in the effort to install new seals. Now, you want them to last. A little care goes a long way.
Keeping your weather stripping in good shape will ensure it continues to perform well for years.
Regular Cleaning
Wash your car regularly. When you do, pay attention to the weather stripping. Wipe it down with a damp cloth.
You can use a mild soap and water solution. This removes dirt, road salt, and grime that can degrade the rubber over time.
Inspection
Every few months, take a few minutes to look at your seals. Check for any signs of cracking, tearing, or flattening. Make sure they are still firmly attached.
Catching small problems early can prevent them from becoming bigger issues.
Lubrication
To keep the rubber supple and prevent it from sticking or drying out, you can use a silicone-based lubricant or protectant. Products designed for automotive rubber seals are ideal. Apply them sparingly with a clean cloth.
This helps maintain flexibility and prevents squeaking. It also adds a layer of protection against the elements. Avoid petroleum-based products, as they can damage rubber.
Avoid Harsh Chemicals
When cleaning your car, be mindful of what you’re using around the door seals. Harsh solvents, degreasers not meant for rubber, or abrasive cleaners can shorten the lifespan of the stripping.
Winter Care
In winter, ice can freeze seals shut. Don’t rip the door open forcefully. If the door is frozen shut, try gently pushing on the door panel around the edges.
You can also use a de-icer spray or warm water to melt the ice. Avoid using sharp objects to pry the door open, as this can damage the seals.
By following these simple maintenance steps, your new weather stripping will stay functional and effective. It will continue to keep your car comfortable and protected.
Frequently Asked Questions About Car Door Weather Stripping
How often should I replace my car door weather stripping?
Most high-quality weather stripping, like EPDM rubber, can last anywhere from 5 to 10 years or even longer. It really depends on the quality of the material, your climate, and how much wear and tear it experiences. Signs like visible cracks, drafts, or leaks are better indicators of replacement time than a strict schedule.
Can I use universal weather stripping for any car?
While “universal” kits exist, they might not offer the perfect fit for all vehicles. The best results usually come from seals designed for your specific car make and model. Universal seals often have a more generic profile and might not integrate as seamlessly, potentially leading to issues with door closure or sealing.
Is it okay if my door is a little harder to close after installing new seals?
A slight increase in effort to close the door is normal. The new seals are designed to be snug. However, if you have to slam the door hard, or if it won’t latch at all, the seal might be too thick or installed incorrectly.
You may need to adjust it or check if you have the right type for your car.
Does replacing weather stripping really improve gas mileage?
Yes, it can. By creating a better seal, you reduce air leaks. This means your car’s heating and cooling systems don’t have to work as hard to maintain the cabin temperature.
Less work for the engine translates to slightly better fuel efficiency, especially on longer drives or in extreme weather.
What’s the difference between EPDM and PVC weather stripping?
EPDM rubber is a more durable and flexible synthetic rubber. It performs better in a wide range of temperatures, resisting cracking and becoming brittle. PVC is a type of plastic that can be less flexible, especially in the cold, and may degrade faster under UV exposure.
EPDM is generally considered the superior choice for longevity and performance.
Can I just use silicone sealant instead of weather stripping?
No, silicone sealant is not a good substitute for weather stripping. Sealant is designed for gaps and cracks, but it’s rigid once cured and doesn’t offer the necessary flexibility or cushioning that weather stripping provides. Using sealant would likely prevent the door from closing properly and wouldn’t create a proper, durable seal against wind and water.
How do I remove old, hardened weather stripping?
Old, hardened stripping can be tough. Try using a plastic pry tool or a flathead screwdriver to gently lift the edge. Sometimes, a bit of heat from a hair dryer can soften it, making it easier to peel away.
Work slowly and carefully to avoid scratching the paint on your door frame. After removal, thoroughly clean off any leftover adhesive residue.
Conclusion
Replacing your car door weather stripping is a practical upgrade. It’s an achievable DIY project. It brings significant benefits.
You’ll enjoy a quieter, more comfortable ride. Your car will be better protected from the elements. Take a look at your car’s seals today.
If they show signs of wear, it’s time for an update. With the right materials and a little patience, you can restore that tight, fresh seal. Enjoy a more pleasant driving experience!