How to Read AC Gauges on a Car: Low Side, High Side, Pressure Chart
Reading car AC gauges is a two-number job: the blue gauge shows the low side, the red gauge shows the high side, and the pair together point to the fault. Most online charts give one set of numbers and stop there. This guide shows how to connect and read a manifold set safely, gives the R134a chart from a gauge maker’s own manual, then does something most guides skip: it compares that chart to a factory service procedure, because the two do not agree.
Blue gauge = low side (suction), red gauge = high side (discharge). Connect with the engine off and both manifold valves closed, then run the engine with the A/C and fan on high and read both gauges against the chart for the outside temperature. Gauge-maker Mastercool lists 40-50 psi low and 175-210 psi high for R134a at 80°F. Both low usually means low charge, both high usually means overcharge. Reading gauges is one thing: adding or removing refrigerant for pay needs EPA Section 609 certification, and venting is prohibited.
What Are AC Gauges, and How Do You Read Them?
| Best Manifold Gauge Set Pick | |
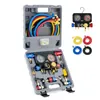 |
OMT AC Manifold Gauge Set with 5ft Hoses for R1234yf, R404a and R134a (4-Way)
|
| View Our Pick on Amazon | |
As an Amazon Associate we earn from qualifying purchases. This is a spec-based pick from the product listing, not a hands-on test.
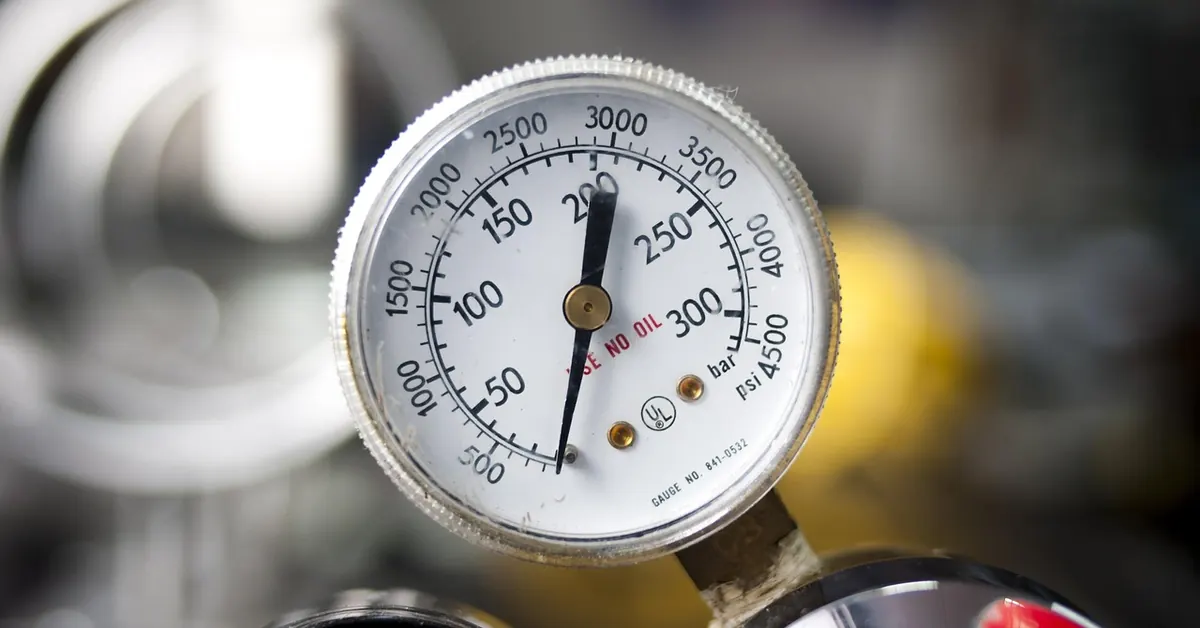
A manifold gauge set has two dials. Per Mastercool’s gauge instructions, the blue hose goes to the suction (low) side of the A/C system and the red hose goes to the discharge (high) side. The low side is the line that returns refrigerant toward the compressor inlet, and the evaporator sits on that low-pressure side (that last point is general refrigeration knowledge, not from the manual). The high side is the compressor outlet side, where the pressure is much higher, which is why the red dial reads up to several hundred psi.
The two service ports are different sizes so the hoses cannot be swapped. Mastercool’s schematic lists the discharge (high-side) fitting at 16 mm and the suction (low-side) fitting at 13 mm. Your vehicle’s own port sizes are in its service information. The yellow center hose on a standard set is the service hose, used only when charging or evacuating, which is outside this guide. For a tool-by-tool overview see our guide to AC gauges for cars.
Two rules from the gauge makers matter before any reading. First, Mastercool says not to use a gauge set on refrigerants other than those listed on the gauge face, so check the face matches the refrigerant on your under-hood label. Second, the same manual warns that fuel injection ports are often mistaken for A/C ports. If you are unsure, consult the system flow diagram for your vehicle.
Before You Connect: Safety and the Law
- Certification. Per EPA, Section 609 certification is required to service any vehicle A/C system for payment or barter, whatever the refrigerant. The same EPA page says Section 608 prohibits venting any refrigerant when servicing or disposing of an A/C system. Reading pressures is not the same as opening the system, and this guide stops at reading. We give no steps for adding, removing or recovering refrigerant.
- Frostbite and eyes. Wear safety glasses and gloves, as Mastercool’s instructions say. A refrigerant supplier’s safety data sheet for R134a says rapid evaporation of the liquid may cause frostbite, that liquid in the eye will damage it (flush with plenty of water for at least 15 minutes and get medical attention), and that the vapor is heavier than air and can cause suffocation. Work outdoors or with the garage door open.
- Flammable refrigerant. The 2023 Honda CR-V owner manual says the refrigerant is flammable and can be ignited during servicing, and notes that SAE J2845 recommends only trained and certified technicians service the refrigerant system. Its air conditioner label is under the hood: read it before connecting anything.
- Engine-running hazards. You read the gauges with the engine running. A Kia owner manual warns that the cooling fan motor may keep running or start when the vehicle is not running, and says to keep hands, clothing and tools away from the rotating fan blades. Keep loose sleeves, jewelry, hoses and the gauge set itself clear of fans, belts and pulleys, and route the hoses before you start the engine.
How to Use AC Gauges on a Car: Step by Step
This follows the hookup order in Mastercool’s R134a and R1234yf instructions, with the safety points above added. It covers reading only:
- Read the label. Find the A/C label under the hood and confirm the refrigerant matches the gauge face and couplers.
- Engine off, valves shut. Mastercool says to verify the service ports are clean and free of metal shavings and that both manifold valves are shut completely. In the 4-way manual’s valve table, all valves closed is the position that measures system pressure.
- Connect blue to low, red to high. Remove the port caps, confirm the ports are A/C ports and not fuel injection ports, and attach the blue coupler to the low side and the red coupler to the high side.
- Check the static reading. With the engine still off, the gauges show the system’s static pressure. The factory procedure below records this first and compares it with a minimum by outside temperature (50 psi above 60°F, 70 psi above 75°F, 100 psi above 90°F); readings outside spec send it to leak testing.
- Start the engine. Set the A/C to its coldest or MAX setting and the fan to high, as Mastercool’s instructions say. The factory procedure also uses recirculation and closed doors and windows, with the driver window open about 5-6 inches.
- Run it for 5 minutes. The factory procedure runs the A/C for 5 minutes with the engine warm before recording anything. Mastercool does not give a time, so use the factory figure.
- Record outside temperature, both pressures and the vent temperature, then compare them with the charts below. Mastercool says to refer to your automotive manual for proper diagnosis.
- Shut down and disconnect. Turn the A/C and engine off, then remove the couplers following the gauge maker’s instructions, still wearing glasses and gloves, and replace the port caps.
R134a AC Gauge Readings Chart by Ambient Temperature
Pressures rise with outside temperature, so a reading is meaningless without it. This is Mastercool’s chart from its Professional R134a Manifold Gauge Set (part 89660) instructions, reproduced as published:
| Ambient Temp | Low Side Gauge (psi) | High Side Gauge (psi) |
|---|---|---|
| 65°F | 25-35 | 135-155 |
| 70°F | 35-40 | 145-160 |
| 75°F | 35-45 | 150-170 |
| 80°F | 40-50 | 175-210 |
| 85°F | 45-55 | 225-250 |
| 90°F | 45-55 | 250-270 |
| 95°F | 50-55 | 275-300 |
| 100°F | 50-55 | 315-325 |
| 105°F | 50-55 | 340-345 |
A note on the older version of this page: it published the same figures without crediting the source and also quoted R1234yf numbers (a 20-30 psi low side) that we cannot trace to any manufacturer document, so those are gone. Mastercool’s R1234yf gauge instructions give no temperature chart, and neither do we.
Remember the gauge maker’s own advice: it says to refer to your automotive manual for proper diagnosis. This is a general chart for typical R134a systems, not your car’s specification. Our how to check AC pressure in a car page covers the checking side in more detail.
Factory Numbers vs. the Gauge-Maker Chart: Why They Disagree
Here is the angle most pages miss. The factory A/C performance test for the Saab 9-4X (a 2011 General Motors-built crossover; the page does not name its refrigerant), as republished on a Saab service-information site, publishes its own pressure ranges by ambient temperature and humidity, plus a maximum vent temperature. The page lists psi and kPa side by side, and the ranges below are the lowest and highest psi across the humidity bands for each temperature.
| Ambient | Mastercool chart low / high (psi) | Saab 9-4X factory low / high (psi) | Factory max center-vent temp |
|---|---|---|---|
| 65°F (factory band 55-65°F) | 25-35 / 135-155 | 25-30 / 70-125 | 40°F |
| 75°F (factory band 66-75°F) | 35-45 / 150-170 | 25-35 / 100-160 | 40-45°F |
| 80°F (factory band 76-85°F) | 40-50 / 175-210 | 25-40 / 145-200 | 50°F |
| 90°F (factory band 86-95°F) | 45-55 / 250-270 | 25-40 / 180-240 | 55°F |
| 100°F (factory band 96-105°F) | 50-55 / 315-325 | 35-45 / 215-275 | 60°F |
At 100°F the maker chart’s high side sits 40 to 110 psi above the factory range, and its low side is higher too. Neither is wrong. The two come from different vehicles and different test conditions, and the Mastercool chart does not state its engine speed, airflow or humidity. The practical lesson is that a generic chart finds gross faults, such as a high side that is half of what it should be, but it cannot tell you whether 230 psi at 90°F is normal for your car. Your vehicle’s service information can.
The factory procedure also contains rules generic guides rarely mention. Ambient temperature must be at least 60°F. Do not induce additional airflow across the front of the vehicle during the test, so do not point a shop fan at the grille unless your own manual says to. And humidity changes the numbers, which is why the factory table has humidity bands. For the vent-temperature side of the same test, see our car air conditioner temperature chart, which uses a different factory chart.
AC Pressure Diagnostic Chart: What Every Reading Means
Mastercool’s gauge instructions give four patterns. The last column is our own next step, not the maker’s, and it never involves opening the system yourself:
| Low side | High side | What the maker manual says | Safe next step |
|---|---|---|---|
| Low | Low | Usually indicates a low charge | Low charge means a leak. Have a certified technician find and repair it before any refrigerant is added |
| Low | High | Usually indicates a blockage in the system, such as at the expansion valve or orifice tube | Stop running the A/C and see a shop |
| High | Low | When accompanied by a vibrating gauge needle, usually indicates faulty reed valves in the compressor | Stop running the A/C and see a shop |
| High | High | Usually indicates an over charged system | Do not release any refrigerant: venting is prohibited. A certified technician must recover the excess |
Two cautions. First, “low” and “high” are relative to the chart for your outside temperature, not a fixed number. Second, a blocked condenser or no airflow over it can also push the high side up (general diagnostic knowledge, not stated in the manuals we read), so check that the condenser is not covered in debris and that the fan runs before blaming the charge. If the symptom is cold air that comes and goes rather than a steady fault, read why car AC blows cold then warm first.
Reading R1234yf Systems
Mastercool sells a separate R1234yf gauge set whose couplers are listed as meeting SAE J2888 and J639, and its troubleshooting tips are the same four patterns above. We found no maker or OEM chart of normal R1234yf pressures, so we are not publishing one. Use your vehicle’s service information, and note the Honda manual’s warning that the refrigerant is flammable.
Common Mistakes When Reading AC Gauges
- Using a chart for the wrong temperature. A 95°F reading judged against the 80°F row looks like an overcharge. Always match the outside temperature.
- Reading too soon. The factory procedure runs the A/C for 5 minutes with a warm engine before recording, and re-checks after 5 more minutes if the first reading is out of range.
- Wrong gauge for the refrigerant. Check the gauge face and couplers match the label under the hood.
- Fuel injection port instead of the A/C port. Mastercool flags this as a common mix-up.
- Treating a gauge reading as permission to add refrigerant. A low reading means there is a leak somewhere. See how to find an AC leak in your car for what a shop checks.
- Assuming a reset fixes pressure faults. Electronics resets do not change refrigerant pressure. See how to reset a car air conditioner for what a reset can and cannot do.
When to Stop and Call a Professional
- Any pattern in the diagnostic chart other than readings in range. Every row there ends with a certified technician.
- You smell or see refrigerant, or hear hissing at a fitting. Move away, ventilate the area and do not run the engine in a closed garage.
- Liquid refrigerant on skin or in the eyes. Flush eyes with water for at least 15 minutes and get medical attention, per the supplier SDS above. Warm frostbitten skin slowly and call a physician.
- Needle vibrating, grinding or squealing from the compressor. Stop using the A/C.
- Any work that means opening the system. That requires recovery equipment and Section 609 certification when done for pay, and venting is prohibited.
Flagged for human review: this page covers refrigerant, pressure and engine-running hazards. Its numbers come from one gauge maker’s manual and one factory procedure, and your own vehicle’s service information overrides both.
FAQs
Which AC gauge is the low side and which is the high side?
Blue is the low side (suction) and red is the high side (discharge), per the Mastercool gauge instructions. The low side reads far lower pressure, and its service port is the smaller one.
What should my AC gauges read?
It depends on the outside temperature and your vehicle. Mastercool’s R134a chart lists 40-50 psi low and 175-210 psi high at 80 degrees F. A factory procedure for one vehicle lists lower high-side ranges, so use your own vehicle’s service information when you have it.
What does it mean if both gauges read low?
The Mastercool manual says low pressure on both sides usually indicates a low charge. That means a leak, so have a certified technician find and fix it before any refrigerant is added.
What does it mean if the low side is high and the high side is low?
Mastercool says that, with a vibrating gauge needle, it usually indicates faulty reed valves in the compressor. Stop using the A/C and have it inspected.
Is it legal to work on my own car’s AC?
EPA says Section 609 certification is required to service a vehicle A/C system for payment or barter, and that venting refrigerant is prohibited. The EPA page we read does not address owners working on their own cars, so ask a certified technician or check the EPA’s current guidance before opening the system.
Do I need to run a fan in front of the car when reading the gauges?
Only if your own manual says so. The factory procedure we read says not to induce additional airflow across the front of the vehicle during the test.
Products related to this article
Sponsored / affiliate links. As an Amazon Associate I earn from qualifying purchases. I may earn additional commission from eligible campaigns.