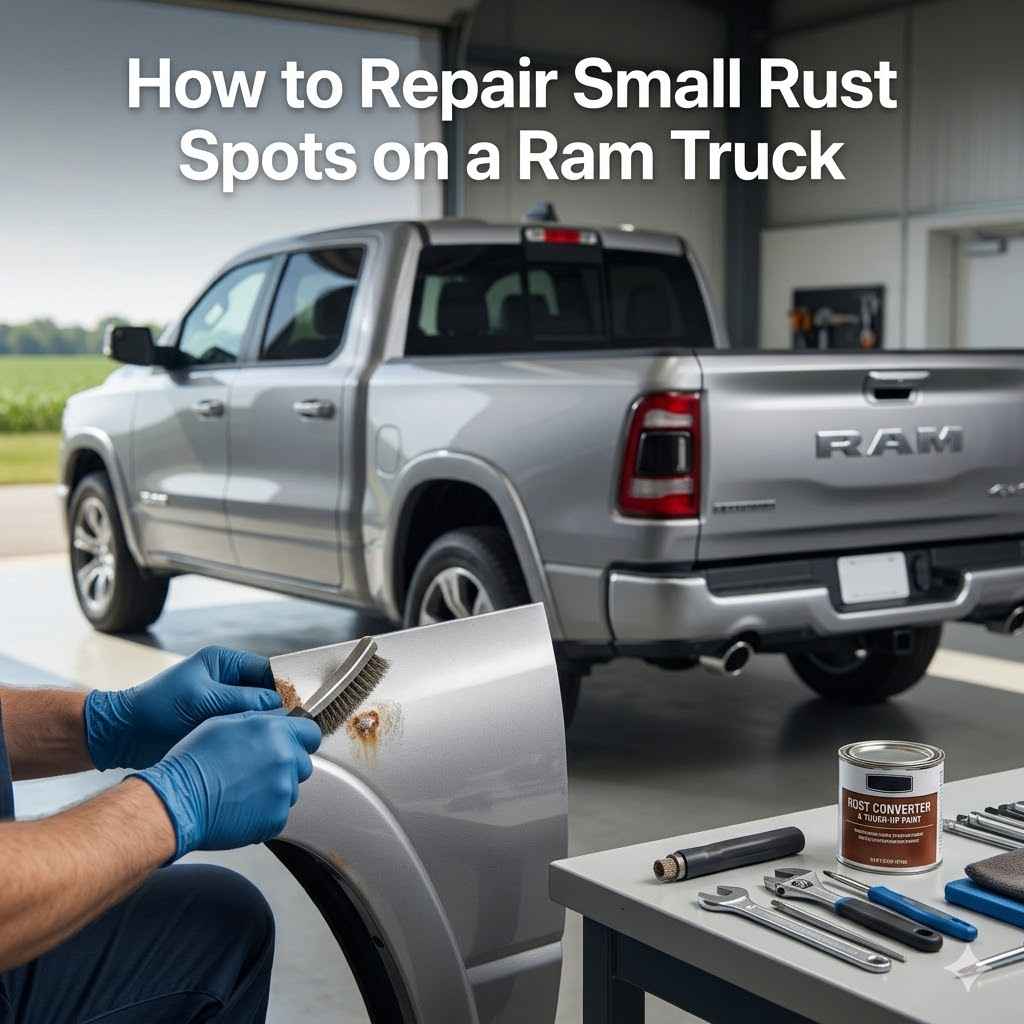
How to Repair Small Rust Spots on a Ram Truck
Rust on your Ram truck can be a bummer, especially those small spots that seem to pop up out of nowhere. Many truck owners find dealing with rust a bit tricky, not knowing where to start. But don’t worry, fixing these little rust patches is totally doable, even if you’re new to car care.
This guide will walk you through how to repair small rust spots on a Ram truck with easy, step-by-step instructions. We’ll cover everything you need to get your truck looking its best again.
Repairing Small Rust Spots On A Ram Truck
This section focuses on the core process of tackling small rust issues on your Ram truck. We’ll break down the essential steps involved in removing rust and preparing the surface for a lasting repair. Understanding these fundamental actions will help you approach the task with confidence.
We aim to provide a clear path to restoring your truck’s paint and preventing further rust damage.
Understanding Rust Formation
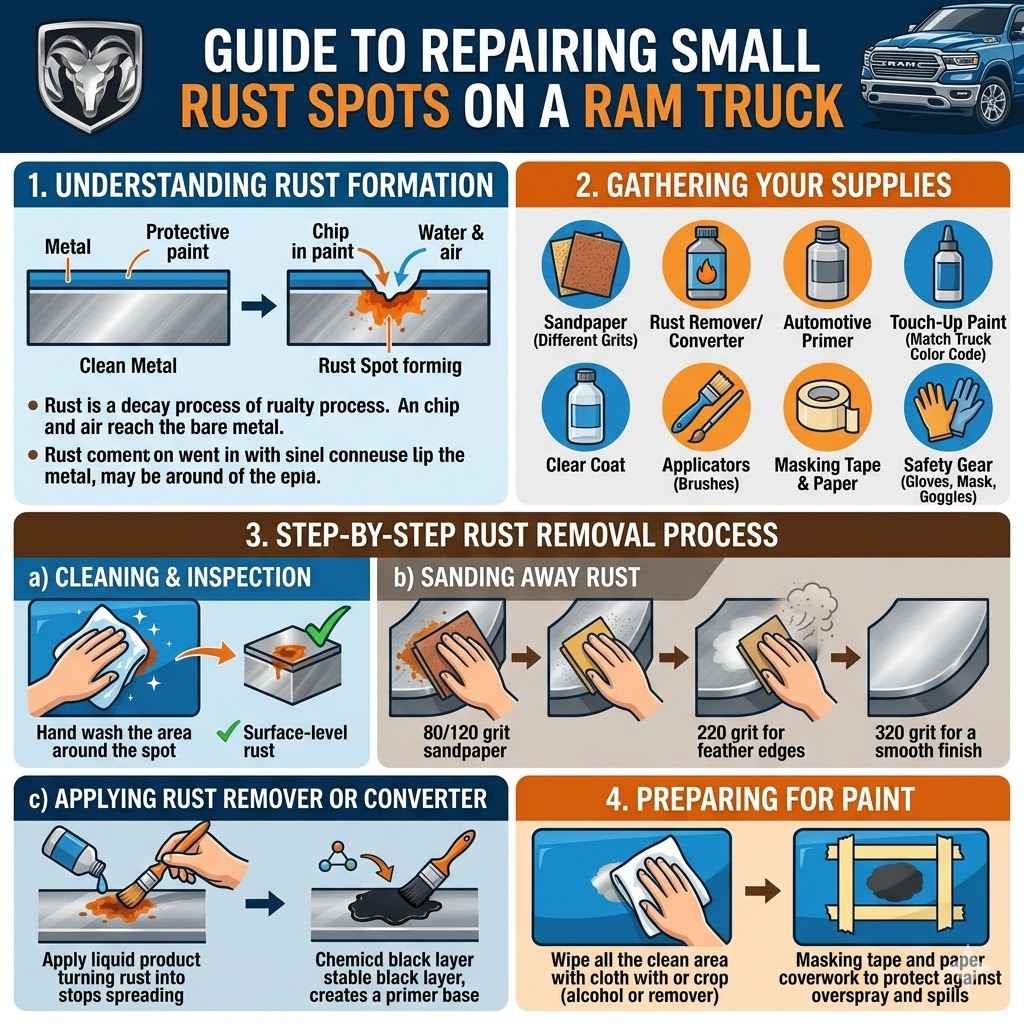
Rust, or iron oxide, forms when iron or steel reacts with oxygen and moisture. It’s a natural process, but on vehicles, it can quickly degrade metal and compromise paint. This happens when the protective paint layer is scratched or chipped, exposing the bare metal underneath.
- Rust is essentially metal that has corroded. It happens when iron, oxygen, and water get together. Think of it like a slow decay process for metal.
- The paint on your Ram truck is like a shield. When that shield gets a tiny crack or a scratch, water and air can reach the metal. This is where rust begins to form, usually as a small orange or reddish spot.
- Over time, if left untreated, rust can spread. It eats away at the metal, making the affected area weak. This can lead to bigger problems down the road, like holes in the body panels.
Gathering Your Rust Repair Supplies
Before you start fixing rust, you need the right tools and materials. Having everything ready makes the job much smoother. This list covers the basics you’ll need to remove rust and get the area ready for paint.
- Sandpaper: You’ll need a few different grits. Start with a coarser grit, like 80 or 120, to remove the bulk of the rust. Then, move to finer grits, like 220 or 320, to smooth the area.
- Rust Remover or Converter: A chemical product can help neutralize remaining rust or convert it into a paintable surface. Some people use phosphoric acid-based removers. Others prefer converters that turn rust into a stable, black primer layer.
- Primer: A good quality automotive primer is essential. It helps the new paint stick well and adds another layer of protection against future rust. Look for a primer that is compatible with your truck’s paint.
- Touch-Up Paint: Get paint that matches your Ram truck’s color code. You can usually find this code on a sticker inside the driver’s side doorjamb.
- Clear Coat: This is the final protective layer that matches your truck’s factory finish and adds gloss.
- Applicators: This might include small brushes for applying primer and paint, or even a small spray can if you’re comfortable with that.
- Masking Tape and Paper: To protect the surrounding paintwork from sanding dust and overspray.
- Safety Gear: Always wear gloves, eye protection, and a dust mask when working with chemicals and sanding.
Step-By-Step Rust Removal Process
This section details the actual removal of rust. We will go from removing the loose rust to preparing the metal for repair.
Initial Cleaning and Inspection
First, wash the area around the rust spot thoroughly with soap and water. Dry it completely. This removes dirt and grime that could interfere with the repair.
Next, inspect the rust spot closely. How big is it? Is the metal bubbled or soft?
Small, surface-level rust is much easier to fix than deep rust that has eaten through the metal.
Sanding Away The Rust
Start with a coarser grit sandpaper, like 80 or 120. Gently sand the rusted area. The goal is to remove all visible rust.
You should see clean metal appear.
Be careful not to sand too aggressively, which could damage the surrounding good paint. If the rust is under a paint bubble, you’ll need to sand until you reach the solid metal.
Once the rust is gone, switch to a finer grit sandpaper, like 220. Sand the edges of the sanded area. This helps to feather the edges and create a smooth transition between the repaired spot and the original paint.
Finally, use an even finer grit, like 320, to smooth the entire area. This prepares the surface for primer. Wipe away all dust with a clean cloth.
Applying Rust Remover Or Converter
After sanding, there might be tiny rust particles left behind, or the metal might still look a bit dull. This is where a rust remover or converter comes in handy.
Follow the product instructions carefully. Usually, you’ll apply it to the sanded area and let it work. Some removers need to be wiped off after a certain time, while converters often dry to a protective black layer.
If you use a rust converter, it chemically changes the remaining rust into a stable, inert compound. This prevents it from spreading further and provides a good base for primer. Always allow the product to dry completely as directed.
Preparing For Paint
Once the rust is gone and any chemical treatments are dry, it’s time to prepare for painting. Wipe the area down with a clean, lint-free cloth. You can use a little rubbing alcohol or a wax and grease remover to ensure the surface is perfectly clean and free of any contaminants.
Now, use masking tape and paper to protect the areas around the repair. This is very important to prevent primer and paint from getting on your truck’s good paint. Make sure the tape line is straight and sealed down.
Applying Primer Touch-Up Paint And Clear Coat
This section guides you through the crucial steps of applying primer, touch-up paint, and clear coat. It’s about building up the layers to match your Ram truck’s original finish and protect the repair.
Applying Primer
Primer is the foundation for your new paint. It helps the paint adhere to the metal and provides a uniform color base.
If you’re using a spray can primer, shake it well. Hold the can about 8-10 inches away from the surface. Apply thin, even coats.
It’s better to apply several light coats than one heavy coat, which can drip.
Allow each coat of primer to dry for the time recommended on the can, usually 10-15 minutes. After applying a few thin coats and letting them dry, lightly wet-sand the primed area with very fine grit sandpaper (around 600 grit). This smooths out any imperfections and creates a slick surface for the paint.
Wipe away the dust with a tack cloth. The primed area should feel smooth to the touch.
Applying Touch-Up Paint
Now it’s time to apply the color. Ensure your touch-up paint matches your truck’s color code perfectly. Shake the paint can thoroughly.
Apply the touch-up paint in thin, light coats, just like the primer. Hold the can the same distance away and move it smoothly across the area. Overlap your strokes slightly.
Allow each coat to dry for at least 30 minutes before applying the next. You may need several thin coats to achieve full coverage. It’s crucial to be patient here.
If you notice any runs or drips, you can try to fix them by gently sanding the imperfection once the paint is dry, and then reapplying a thin coat.
Adding The Clear Coat
The clear coat is what gives your Ram truck its shine and protects the paint. Once the touch-up paint is dry (usually after a few hours, but check the paint’s drying time), you can apply the clear coat.
Shake the clear coat can well. Apply it in thin, even coats, using the same technique as with the primer and color paint. This layer should provide a glossy finish.
Allow the clear coat to dry completely. This can take 24 hours or more, depending on humidity and temperature. Avoid touching or washing the area until it’s fully cured.
Once dry, you can gently polish the area to blend it with the surrounding paint. Use a polishing compound and a soft cloth.
Advanced Techniques And Considerations
This section explores more detailed aspects of rust repair, including when to seek professional help and how to maintain your truck to prevent future rust. It offers insights beyond the basic steps.
When To Call A Professional
While small rust spots are DIY-friendly, some situations are best left to the experts. If the rust has spread extensively, creating large holes or weak spots in the metal, it’s a job for a professional auto body shop.
Deep rust can be tricky to remove completely. Professionals have specialized tools and techniques to address these issues effectively. They can also ensure the structural integrity of the vehicle is maintained.
If you’re dealing with rust on complex body lines or areas that require significant metal work, a professional can achieve a seamless repair. They also have access to a wider range of color-matched paints and can ensure a perfect factory finish.
For those uncertain about the extent of the rust or the repair process, consulting a professional is always a wise decision. They can provide an assessment and estimate for the repair costs.
Preventing Future Rust On Your Ram Truck
Prevention is always better than cure. Regular washing and waxing are key to protecting your Ram truck’s paint.
Wash your truck regularly, especially after driving in rain, snow, or on salty roads. Road salt is a major contributor to rust. Make sure to rinse the undercarriage well.
Applying a good quality wax or sealant creates a barrier against moisture and contaminants. This adds an extra layer of protection for your paint.
Inspect your truck for any new scratches or chips in the paint regularly. Address these minor paint damages promptly before they have a chance to rust. Touch-up paint kits are great for this.
Consider undercoating or rustproofing treatments, especially if you live in an area with harsh weather conditions. These treatments provide long-term protection for the vehicle’s underside.
Understanding Paint Codes and Matching
Getting the exact paint color match for your Ram truck is crucial for a seamless repair. Every vehicle has a unique paint code.
This code is usually found on a sticker in the driver’s side doorjamb. It’s a series of letters and numbers. You can use this code to purchase the correct touch-up paint from auto parts stores or online retailers.
Even with the correct code, slight variations can occur due to age, sun fading, or repainting. However, a good match will be very close and will blend well after application and polishing.
If you are unsure about finding or using the paint code, your local dealership’s parts department or a reputable auto paint supplier can assist you. They can often look up your truck’s code based on the VIN.
Sanding Techniques For A Smooth Finish
The type of sandpaper and how you use it makes a big difference in the final look. For rust removal, start with coarser grits to quickly get through the rust.
Once the rust is gone, you need to smooth the area. Start with a medium grit (like 220) to blend the edges of the sanded area into the surrounding paint. This is called “featheredging.”
Then, move to finer grits (like 320 for primer, and potentially 600 grit for wet sanding after primer). Wet sanding with very fine grit sandpaper is a technique used to get an ultra-smooth surface. It involves using sandpaper with water, which lubricates the surface and prevents the paper from clogging.
Always sand in a consistent direction. After sanding, wipe the area clean with a tack cloth to remove all dust particles. A smooth surface is essential for the primer and paint to adhere properly and look good.
Example Scenarios And Results
Let’s look at a couple of real-life situations to see how these rust repair steps work.
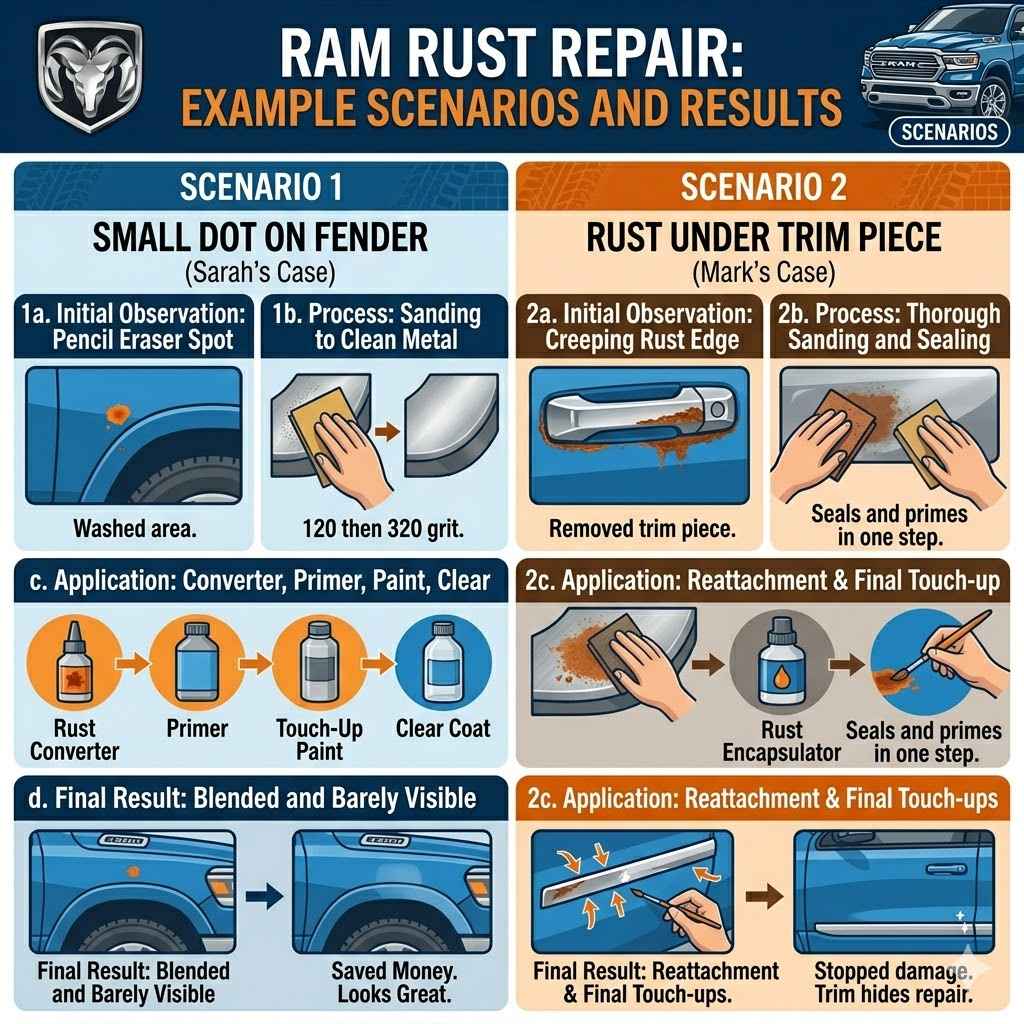
Scenario 1 A Small Dot Of Rust On A Fender
Sarah noticed a tiny orange spot on the rear fender of her Ram 1500, right above the wheel well. It was about the size of a pencil eraser. She followed the steps: washed the area, used 120-grit sandpaper to remove the rust until clean metal showed, then 320-grit to smooth.
She applied a rust converter, let it dry, then put on a few thin coats of primer, followed by matching touch-up paint, and finally, clear coat.
Result: After drying and a light polish, the spot was barely visible. The new paint blended well with the old. Sarah saved money and her truck looked great.
Scenario 2 Rust Under A Trim Piece
Mark found rust forming along the edge of a chrome trim piece on his Ram 2500 door. The rust had started to creep under the trim. He carefully removed the trim piece.
The rust was a bit more widespread than a simple spot.
He sanded the affected area thoroughly, removing all rust. He then used a rust encapsulator, which seals the rust and primes the metal in one step. After it dried, he carefully reattached the trim.
He then used a small brush to touch up any paint chips that occurred near the trim.
Result: The rust stopped spreading. Reattaching the trim made the repair less noticeable. Mark felt good knowing he stopped the rust before it caused serious damage.
Frequently Asked Questions
Question: How long does it take to repair a small rust spot
Answer: It usually takes a few hours of active work, spread over one to two days to allow for drying times between coats of primer, paint, and clear coat.
Question: Can I use regular household paint for rust repair
Answer: No, it’s best to use automotive-specific primer, touch-up paint, and clear coat that match your Ram truck’s factory finish for durability and appearance.
Question: What grit sandpaper is best for rust removal
Answer: Start with a coarser grit like 80 or 120 to remove the bulk of the rust, then move to finer grits like 220 and 320 to smooth the surface.
Question: How do I find my Ram truck’s paint code
Answer: The paint code is typically found on a sticker in the driver’s side doorjamb. It’s a series of letters and numbers specific to your truck’s color.
Question: Should I worry about deep rust
Answer: Yes, deep rust that has caused holes or weakened the metal is a serious issue. It’s often best to consult a professional auto body shop for these types of repairs.
Wrap Up
Fixing small rust spots on your Ram truck is a rewarding DIY task. You’ve learned how to identify rust, gather supplies, sand it away, apply primer, paint, and clear coat. Even deep rust can be managed with the right approach.
Keep your truck clean and address minor chips quickly. Your Ram truck will look better and last longer with this simple care.