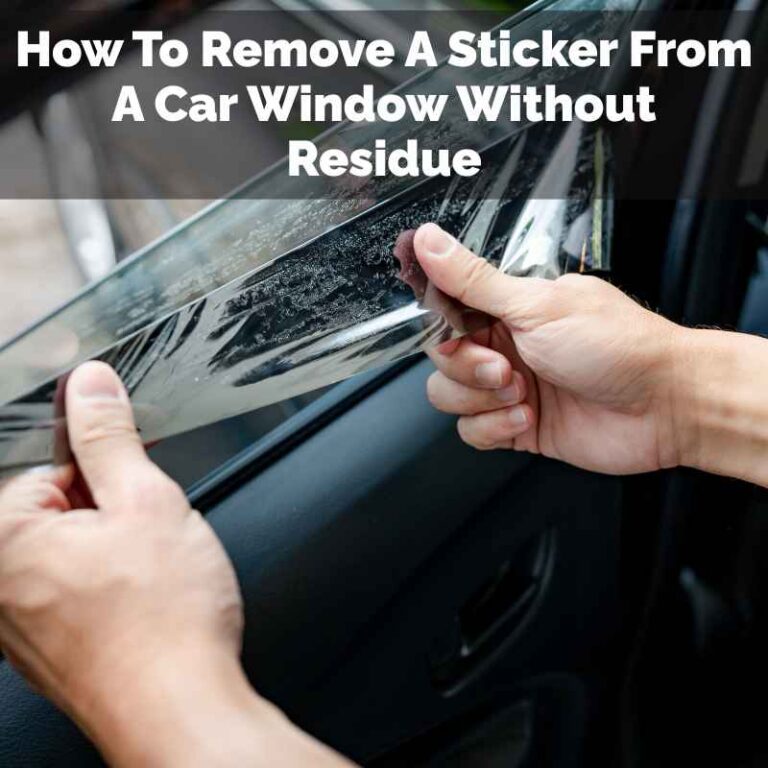
How To Get Window Paint Off A Car Without Scratching It
Safely removing window paint from your car involves using gentle methods and specific products to lift the paint without damaging the glass or surrounding paintwork. Common approaches include using a razor blade scraper with lubrication, specialized automotive glass cleaners, or household items like rubbing alcohol or vinegar, applied carefully.
Understanding Window Paint and Car Surfaces
Window paint is designed to stick to glass. It’s usually water-based for easy cleanup on actual windows. But cars have more than just glass.
They have paint, rubber seals, and plastic trim. These parts can be sensitive. Regular paint is tough, but it can scratch.
Some window paints might have strong pigments. These can sometimes stain or leave a faint mark. Knowing what you’re dealing with helps you pick the right way to clean it.
Car paint is a complex system. It has layers like primer, base coat, and clear coat. The clear coat is the protective top layer.
It’s what gives your car its shine. Scratches here are visible. They can also let water and dirt reach lower layers.
This can lead to rust over time. So, protecting this layer is key. Glass is much harder than car paint.
But it can still get scratched by abrasive materials. Think sand or rough scrubbing pads.
Rubber seals around windows can dry out or get damaged. Harsh chemicals can break them down. This could lead to leaks later.
Plastic trim can also discolor or become foggy with the wrong cleaners. So, the goal is to remove the paint from the glass. We want to avoid any damage to the car’s other parts.
It requires a gentle touch and the right tools. It’s all about choosing products that target the paint without harming the car.
My Own Paint-Removal Panic
I remember one Christmas. My kids went a little wild with those glittery window paints. They loved drawing snowmen and Santa on our big living room window.
Then, they got excited about the cars. Before I knew it, my trusty old sedan had a surprisingly artistic reindeer on the back window. It was cute for about five minutes.
Then I realized I had to drive my daughter to her ballet class. I grabbed a kitchen sponge and some dish soap. Big mistake.
The soap just smeared it. The sponge started to feel a bit rough. I imagined tiny, almost invisible lines all over my glass.
Panic set in. I pictured having to pay a fortune for a professional detailer. My heart sank thinking about permanent damage.
It was a moment of pure “What have I done?!”
I rushed inside, frantically Googling “how to get paint off car window.” I scrolled through endless forum posts. Some suggested harsh solvents. Others warned about razor blades.
I felt overwhelmed. My fingers were crossed, hoping for a simple, safe solution. I was picturing myself standing in the driveway, covered in paint and frustration.
My kids, meanwhile, were happily drawing another reindeer on the inside of the glass. That’s when I decided I needed a plan. A good plan.
One that wouldn’t ruin my car. I needed something that worked, but was gentle. It felt like a mission critical to my morning.
I finally found a few tips that seemed promising and less risky. The relief was immense.
I started with the mildest option I found: rubbing alcohol. I put some on a soft cloth and gently rubbed. It started to lift the paint!
It wasn’t instant, and it took some elbow grease. But it worked. Then, for the stubborn bits, I carefully used a plastic scraper.
I made sure to keep the glass wet. This whole experience taught me a lot. It showed me that patience and the right approach are everything.
You don’t always need strong chemicals or risky tools. Sometimes, simple household items save the day. And the car.
It also taught me to supervise arts and crafts projects a little more closely!
Understanding Paint Types
Water-Based Window Paint: Most common for crafts. Often cleans up with water when wet. Can be harder to remove when dry.
Oil-Based Paint: Less common for window art. Requires solvents to remove.
Permanent Markers: Can mimic paint. Need specific removers.
Gathering Your Cleaning Supplies
Before you start, make sure you have everything. This makes the process smooth. You don’t want to stop halfway to find a missing item.
Think of it like preparing for a cooking recipe. All your ingredients need to be ready.
First, get some clean, soft cloths. Microfiber cloths are best. They don’t scratch.
You’ll need several of them. Some for applying cleaners, some for wiping, and some for drying. Avoid paper towels if you can.
They can leave lint. Also, have a bucket of clean water handy. This is for rinsing cloths.
Next, choose your paint remover. For most window paints, rubbing alcohol (isopropyl alcohol) works well. It’s usually found in drugstores.
Denatured alcohol is also an option. Some people have success with white vinegar. If the paint is really stubborn, you might consider a specialized automotive glass cleaner.
Always test a small, hidden spot first.
A plastic razor blade scraper or a plastic putty knife is very useful. These are much safer than metal blades. They are less likely to scratch the glass.
Make sure the edge is smooth. If using a metal razor blade, be extra, extra careful. Always use it at a very shallow angle.
Never force it.
Some lubrication is crucial. Water is okay. Soapy water is even better.
It helps the scraper glide. It prevents scratches. A spray bottle is handy for applying your cleaner or soapy water.
Finally, have some car wax or glass sealant. You might want to apply this after cleaning. It protects the glass.
It also makes future cleaning easier.
Essential Tools Checklist
- Soft microfiber cloths (several)
- Bucket of clean water
- Rubbing alcohol or specialized glass cleaner
- Plastic razor blade scraper or putty knife
- Spray bottle
- Optional: Car wax or glass sealant
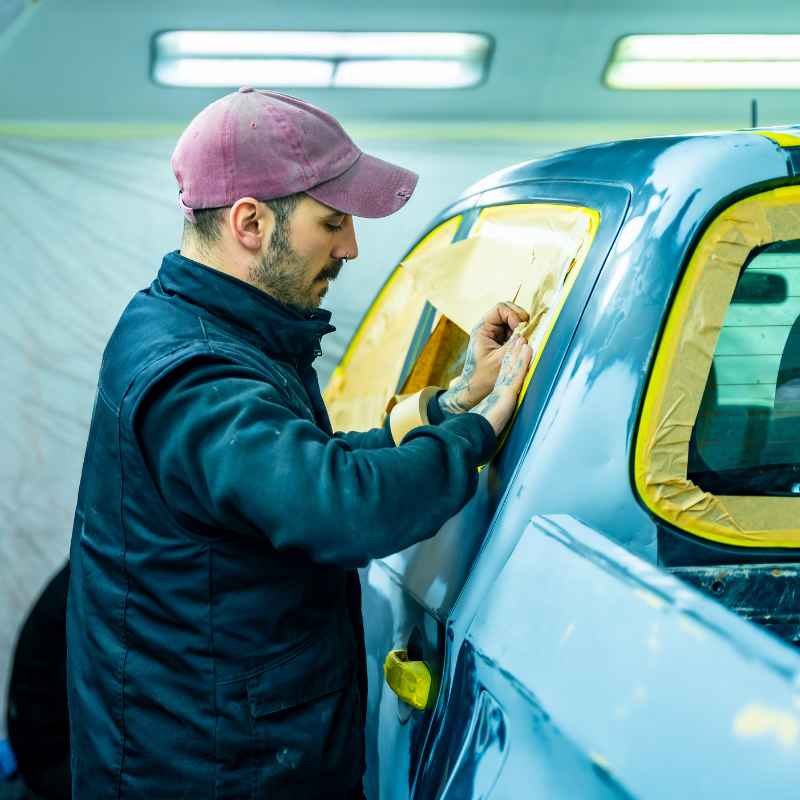
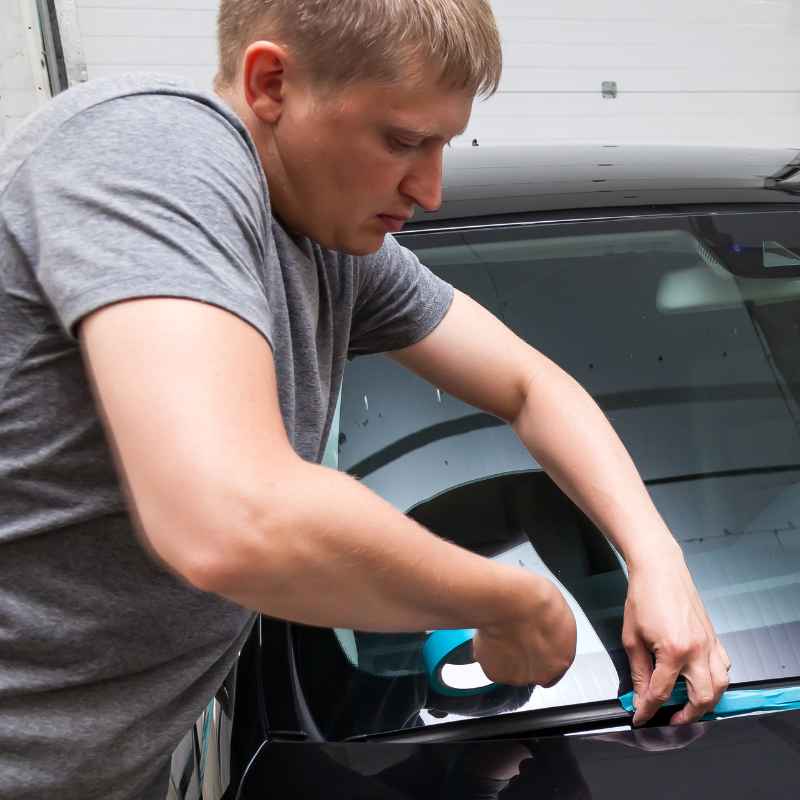
The Gentle Scraping Method
This is often the most effective way for dried-on window paint. The key is lubrication and a gentle touch. Metal razor blades can work, but plastic ones are safer for your car’s glass.
You want to avoid any damage.
Start by spraying the painted area generously with water or soapy water. You want the glass to be very wet. This is your lubricant.
Then, take your plastic scraper. Hold it at a very low angle to the glass. Think almost flat.
Gently push the edge under the paint. Use slow, even strokes. Work in one direction.
As you scrape, keep the glass wet. If the paint starts to dry out, spray more water. If you see any resistance, stop.
Don’t force the scraper. This could cause scratches. Instead, apply more lubricant.
Or try a different angle. You might need to reapply your cleaner. Let it soak for a minute or two.
This method takes patience. It’s not a quick wipe-off. You’ll likely see small paint chips coming off.
That’s a good sign! You can wipe these away with a clean cloth as you go. This prevents them from getting scraped under the blade.
Once most of the paint is off, you might have some thin lines or smudges left. These are usually easier to clean with a cloth and your chosen cleaner. Remember, the goal is to lift the paint.
You’re not trying to scrub it off. Treat the glass like a delicate surface. Slow and steady wins the race here.
Using Household Cleaners Effectively
Sometimes, you don’t need fancy products. Common items can work wonders. They are often gentler too.
This is great for saving money and your car’s finish.
Rubbing Alcohol: This is a go-to for many. Isopropyl alcohol breaks down many types of paint. Spray it directly onto the paint.
Let it sit for a few minutes. This gives the alcohol time to work. Then, try wiping with a soft cloth.
For tougher spots, you might need to use the plastic scraper after applying the alcohol. It helps loosen the paint’s grip on the glass.
White Vinegar: Vinegar is acidic. This acidity can help dissolve paint. Mix equal parts white vinegar and water in a spray bottle.
Spray it on the paint. Let it soak. Then, wipe with a cloth.
Like alcohol, it might need the help of a plastic scraper for dried paint. Vinegar has a strong smell, but it dissipates quickly.
Dish Soap and Water: For fresh paint, this might be enough. Mix a few drops of mild dish soap with warm water. Use a soft cloth to apply.
Gently rub the painted area. It might not remove hardened paint. But it’s a good first step.
It can also help remove residue after scraping.
Always test these cleaners on a small, less visible area of your window first. This is to ensure they don’t cause any unintended issues. After using any cleaner, rinse the area with clean water.
Then, dry it thoroughly with a microfiber cloth. You don’t want cleaner residue left behind.
Quick Cleaner Guide
For Fresh Paint: Mild dish soap and water.
For Dried Paint: Rubbing alcohol or white vinegar.
Stubborn Spots: Specialized automotive glass cleaner (test first).
Specialized Automotive Glass Cleaners
When household items don’t quite cut it, specialty products are designed for the job. These are formulated to be effective on glass. They also aim to be safe for your car’s surfaces.
Automotive glass cleaners often contain mild solvents. These solvents are effective at dissolving paint. They work by breaking down the binders in the paint.
This makes it easier to wipe or scrape away. Look for cleaners specifically labeled for removing overspray or stubborn marks from glass.
When using these products, follow the instructions on the bottle. Usually, you spray the cleaner on the painted area. Then, let it dwell for a short time.
The dwell time allows the chemicals to loosen the paint. After the dwell time, use a clean microfiber cloth to wipe away the paint. For really tough spots, you might still need to use a plastic scraper.
It’s important to use these cleaners in a well-ventilated area. This is because they might have stronger fumes. Avoid getting them on your car’s paintwork.
If some gets on the car’s body, wipe it off immediately with a damp cloth. Then, rinse the area. This prevents potential damage to your car’s clear coat.
After cleaning the glass with a specialized cleaner, it’s a good idea to give the entire window a final clean with a standard automotive glass cleaner. This removes any residue from the heavy-duty cleaner. It also ensures a streak-free finish.
Always use a separate, clean cloth for the final wipe-down.
Protecting Your Car’s Paint and Trim
Your car’s body paint is delicate. The rubber seals and plastic trim are also important. You need to be careful not to damage them during the cleaning process.
This is where prevention and careful technique come in.
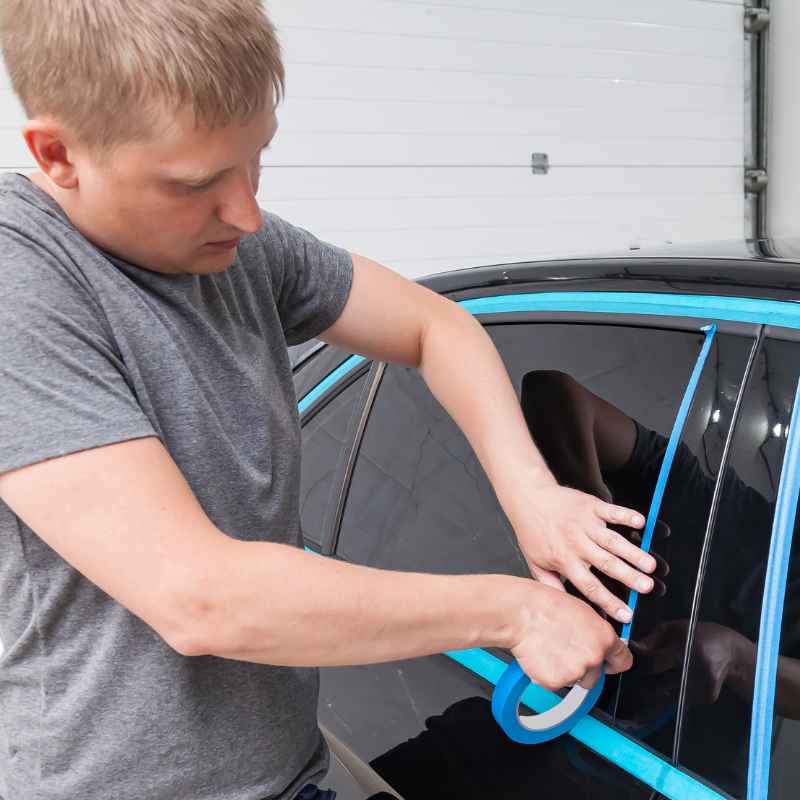
When you’re working on the windows, consider covering the surrounding car paint. You can use painter’s tape or masking tape. This creates a barrier.
It protects the paint from accidental drips or splashes of cleaner. If you don’t have tape, be extra careful with your movements. Keep your cloths and tools away from the body.
Rubber seals are prone to drying out and cracking. Harsh chemicals can strip the natural oils from them. This makes them brittle.
If you get any cleaner on the rubber, wipe it off immediately with a damp cloth. You can even use a dedicated rubber protectant product afterward. This helps keep them soft and supple.
Plastic trim can also be affected by strong cleaners. Some cleaners can cause plastic to fade or become cloudy. If you notice any cleaner has gotten on plastic trim, rinse it thoroughly.
Then dry it well. Using a plastic protectant can help restore its look.
After you’ve removed all the paint from the windows, take a moment to inspect the area. Look for any accidental marks or smudges on the car’s body. If you find any, clean them gently.
Once everything is clean and dry, you might want to apply a coat of car wax. This adds a protective layer to your car’s paint. It helps prevent future damage.
It also gives your car a nice shine.
Protecting Other Car Parts
Car Paint: Use painter’s tape as a barrier. Wipe spills immediately.
Rubber Seals: Avoid harsh chemicals. Rinse and use a protectant afterward.
Plastic Trim: Rinse spills. A plastic protectant can help.
Dealing with Stubborn Residue and Smudges
Sometimes, after the main paint is gone, you’re left with faint marks. These can be sticky residues or ghost images of the paint. Don’t get discouraged.
There are ways to tackle these.
For sticky residue, rubbing alcohol is often your best friend. Apply it to a microfiber cloth. Rub the residue in a circular motion.
It should start to ball up and lift away. You might need to apply more alcohol. Keep wiping with a clean part of the cloth.
If alcohol doesn’t work, try a bit of Goo Gone or a similar citrus-based cleaner. These are designed to break down sticky adhesives. Spray a small amount onto a cloth.
Gently rub the residue. Avoid spraying directly onto the glass. Then, wipe clean with a damp cloth.
Ghost images or faint stains can be trickier. They might mean the pigment in the paint has slightly adhered to the glass surface. Try a good quality automotive glass cleaner.
Spray it on. Let it sit for a few minutes. Then, use a clean microfiber cloth to wipe vigorously.
You might need to repeat this a few times.
Another trick for tough spots is using a clay bar. This is usually used for removing contaminants from car paint. However, a fine-grade clay bar can also be used on glass.
Make sure to use plenty of lubricant (soapy water or glass cleaner) when using a clay bar on glass. Rub it gently over the stain. It should help lift the discoloration.
After you’ve removed all residue and smudges, give the entire window a final clean. Use your favorite streak-free automotive glass cleaner. Buff with a clean, dry microfiber cloth.
This makes sure the glass is perfectly clear. It also removes any cleaner marks.
Residue Removal Steps
Sticky Stuff: Rubbing alcohol or citrus-based cleaner.
Faint Stains: Automotive glass cleaner, repeat applications.
Last Resort: Clay bar with plenty of lubricant on glass.
What to Avoid When Removing Paint
There are certain things you should absolutely steer clear of. These can cause more harm than good. They can lead to permanent damage to your car’s windows or paint.
Avoid Abrasive Cleaners: Steel wool, scouring pads, or abrasive powders can easily scratch glass. Even tough window paint isn’t worth damaging your windshield or side windows.
Don’t Use Metal Blades Carelessly: While metal razor blades can remove paint, they are sharp. If used incorrectly, at the wrong angle, or with too much force, they will scratch the glass. Always use them with extreme caution, lots of lubrication, and at a very low angle.
Plastic is much safer.
Harsh Solvents: Things like paint thinner, acetone, or harsh industrial cleaners can damage rubber seals, plastic trim, and even the car’s paint. They can strip wax and clear coat. Only use them as a last resort and with extreme care, avoiding contact with anything but the glass itself.
Scrubbing Too Hard: Even with a soft cloth, applying too much pressure can sometimes create micro-scratches. Be firm but gentle. Let the cleaner or lubricant do most of the work.
Ignoring the Surrounding Area: Always be mindful of where your cleaning solutions are going. Protect your car’s paint and trim. A few minutes of taping can save you hours of repair work.
Not Testing First: Before you dive in with any cleaner or method, test it on a small, inconspicuous area. This is especially true for specialized cleaners or if you’re unsure about the paint type. It’s a small step that can prevent big problems.
Things to Absolutely Avoid
- Steel wool or abrasive scrubbers
- Careless use of metal razor blades
- Harsh industrial solvents (e.g., paint thinner)
- Excessive scrubbing pressure
- Ignoring car paint and trim protection
- Skipping a patch test for cleaners
When is it Time to Call a Professional?
For most window paint situations, you can handle it yourself. But there are times when it’s better to let a pro take over. This is especially true if you’re worried about damage or if the paint is extremely stubborn.
If you have tried multiple gentle methods and the paint just won’t budge, it might be time. Some window paints can be surprisingly tough. A professional detailer has access to specialized tools and cleaners.
They also have experience. They know the safest ways to tackle difficult jobs.
If you notice that you’ve accidentally scratched the glass, even a little bit, it’s worth calling someone. Small scratches can sometimes be polished out. But if they are deep, the only fix might be replacing the window.
A professional can assess the damage. They can tell you your options.
Also, if the paint has gotten onto your car’s actual body paint and you’re hesitant to try removing it yourself, get professional help. Car paint repair is a delicate art. A mistake here can be very costly.
A detailer can remove overspray from car paint without damaging the clear coat.
If your car is a classic, luxury, or has a special paint finish, you might want to be extra cautious. The risk of damage might be higher. A professional detailer will have the expertise to handle these situations with care.
They understand the value of your vehicle. They will use the most appropriate methods to protect it.
Professional Help Scenarios
Paint Won’t Budge: After multiple DIY attempts.
Accidental Scratches: If you’ve already damaged the glass.
Paint on Car Body: If you’re unsure about removing it from the paintwork.
Valuable/Classic Cars: For extra caution and expertise.
Final Thoughts on Keeping Your Windows Clear
Removing window paint from your car might seem like a daunting task. It’s easy to worry about making things worse. But by using the right approach, you can achieve a great result.
Remember to be patient.
Start with the gentlest methods. Use soft cloths. Keep the glass well-lubricated.
Always protect your car’s paint and trim. Most importantly, avoid abrasive materials and harsh chemicals. A little bit of care and the right supplies will get your windows looking crystal clear again.
Enjoy the view!
Frequently Asked Questions About Window Paint Removal
What is the safest way to remove window paint from a car?
The safest way involves using gentle methods. Start with mild cleaners like rubbing alcohol or vinegar. Always use a plastic razor blade scraper or putty knife.
Keep the glass well lubricated with soapy water. Test any cleaner on a small area first.
Can I use a regular razor blade to remove window paint?
A regular metal razor blade can remove paint, but it’s risky. It can easily scratch the glass if not used perfectly. Always use it at a very low angle and with plenty of lubrication.
A plastic scraper is a much safer alternative.
How long does it take to remove window paint?
It depends on the type of paint and how long it has been on the window. Fresh, water-based paint might come off easily. Dried, thick paint can take more time and effort.
Patience is key. It could take anywhere from 15 minutes to an hour or more for all the paint and residue to be removed.
Will window paint damage my car’s paint if it gets on it?
Some window paints, especially those with strong dyes or additives, can potentially stain or damage your car’s clear coat if left on for too long. It’s best to avoid getting paint on the car’s body. If it does happen, clean it off immediately with a soft cloth and mild soap and water.
What if the paint leaves a hazy mark on the glass?
A hazy mark or ghost image might mean the pigment has bonded slightly to the glass. Try using a good automotive glass cleaner and rubbing with a clean microfiber cloth. For very stubborn marks, a fine-grade clay bar used on glass with plenty of lubricant might help.
Can I use a power washer to remove window paint?
Using a power washer is generally not recommended for removing paint from car windows. The high pressure can potentially damage the window seals or even the glass itself, especially if the paint has created weak spots. Stick to manual, gentle methods.
Is it safe to use nail polish remover on car windows?
Nail polish remover often contains acetone, which is a strong solvent. While it might remove paint, it can also damage rubber seals, plastic trim, and potentially harm the car’s paint. It’s best to avoid it and use safer alternatives like rubbing alcohol or specialized glass cleaners.