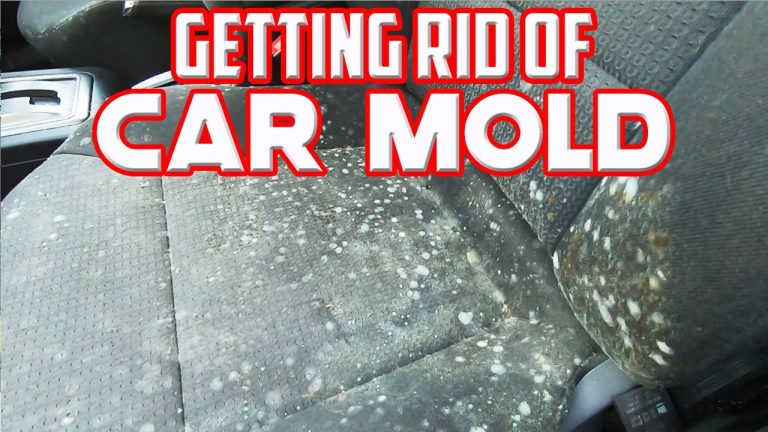
How to Wash Car Carpets: Effortless Shine
Learn how to wash car carpets effectively with simple steps! Remove stains, dirt, and odors for a fresh, clean interior. This guide offers easy-to-follow instructions and tips for a sparkling car floor, making DIY car care achievable and rewarding.
Hey there, fellow car enthusiasts! Md Meraj here. Ever hop into your car and notice that lingering smell or see those stubborn stains on your carpets? It’s a common frustration for many drivers. Spills, muddy shoes, and everyday wear can really take a toll on your car’s interior. But don’t worry! Getting your car carpets looking and smelling fresh doesn’t require a trip to the detailer or a huge budget. With a few common household items and some easy-to-follow steps, you can bring back that effortless shine.
In this guide, I’ll walk you through everything you need to know. We’ll cover the best tools, simple cleaning solutions, and a step-by-step process that anyone can master. By the end, you’ll feel confident tackling this task and enjoy a noticeably cleaner car interior. Let’s get started on making your car’s floors look brand new!
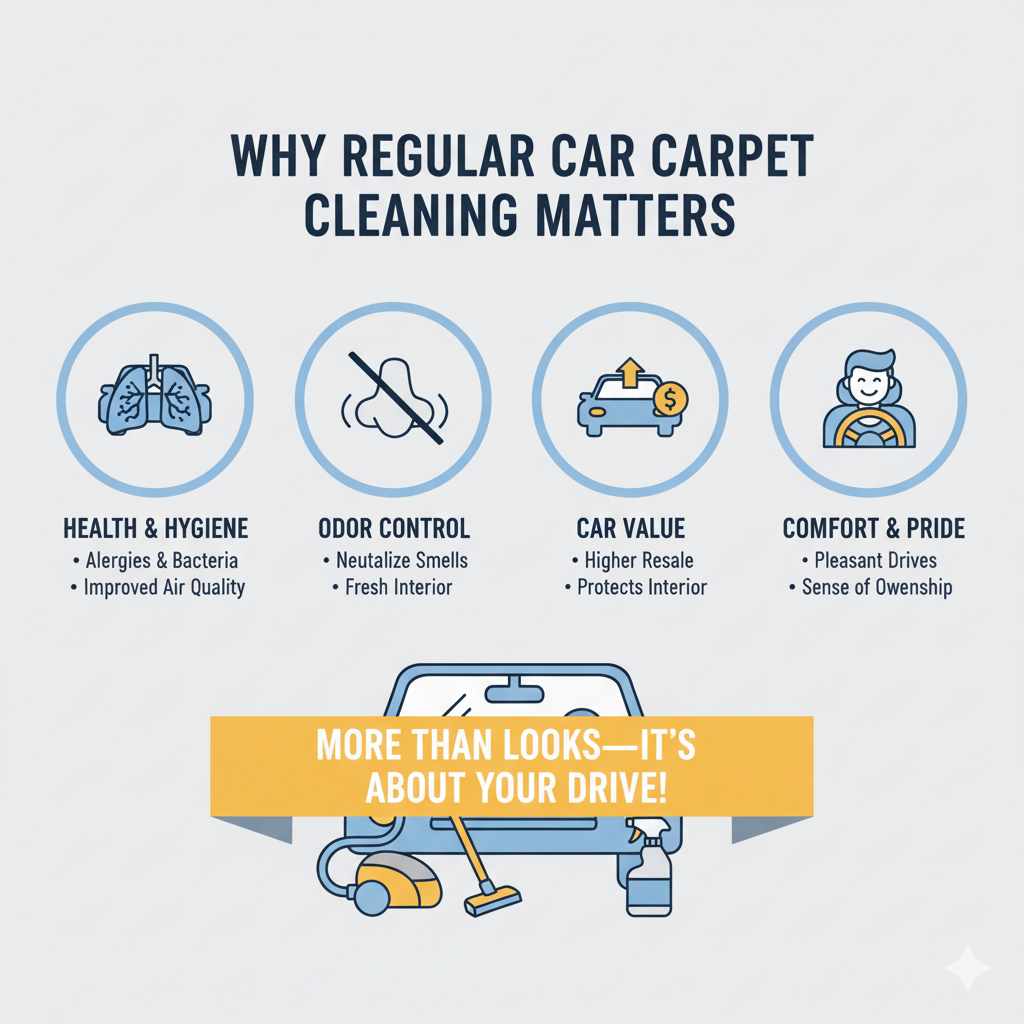
Why Regular Car Carpet Cleaning Matters
Keeping your car carpets clean is more than just about aesthetics; it’s about maintaining your vehicle’s overall condition and your driving experience. Over time, car carpets become a magnet for dirt, dust, spills, and odors. These elements can not only make your car look unappealing but also contribute to a less healthy environment inside your vehicle.
- Health and Hygiene: Trapped dirt, dust mites, and bacteria in your carpets can affect the air quality inside your car, potentially triggering allergies or respiratory issues.
- Odor Control: Spills from drinks, food, or pet accidents can leave behind persistent odors that are hard to ignore. Regular cleaning helps neutralize these smells.
- Car Value: A clean and well-maintained interior significantly contributes to your car’s resale value. Protecting your carpets means preserving the interior’s condition.
- Comfort and Pride: Driving a clean car feels better! It enhances your comfort during journeys and instills a sense of pride in your vehicle.
Essential Tools and Supplies for Washing Car Carpets
Before we dive into the cleaning process, let’s gather what you’ll need. Having the right tools handy makes the job much smoother and more effective. You might already have most of these items around your home!
| Category | Items | Why You Need Them |
|---|---|---|
| Cleaning Solutions |
|
These are your workhorses for lifting dirt, tackling stains, and neutralizing odors. White vinegar and baking soda are natural, affordable, and effective. |
| Tools for Cleaning |
|
Essential for removing loose debris, agitating cleaning solutions into the carpet fibers, and wiping away residue. |
| Stain Specific Treatments |
|
These are for those specific, tough stains that require targeted solutions. Always test in an inconspicuous area first. |
| Drying Aids |
|
Proper drying prevents mildew and musty smells, ensuring your carpets stay fresh. |
If you’re looking for a good all-around carpet cleaner, many reputable brands offer automotive-specific products. For example, products from Chemical Guys or Meguiar’s are often well-regarded in the car care community for their effectiveness and safety on automotive interiors. Always follow the product’s instructions carefully.
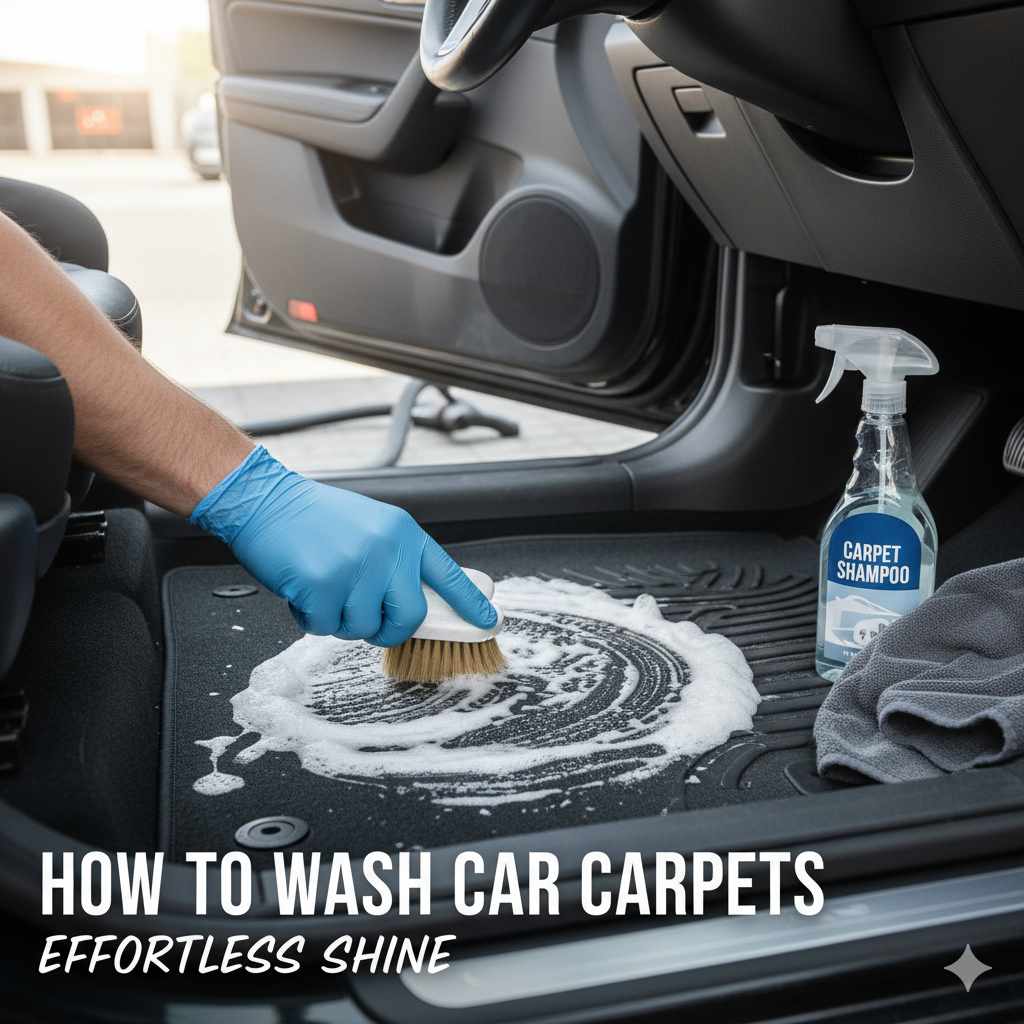
Step-by-Step Guide: How to Wash Car Carpets
Now that you have your supplies ready, let’s get down to business! This process is designed to be straightforward. We’ll break it down into manageable steps to ensure you get the best results.
Step 1: Thoroughly Vacuum Your Carpets
This is the most critical first step. Removing all loose dirt, crumbs, and debris prevents them from turning into mud when you introduce moisture. Don’t rush this part!
- Remove Everything: Take out floor mats, personal items, trash, and anything else sitting on the carpets.
- Start with Loose Debris: Use the crevice tool attachment to get into tight corners, along the seat rails, and under the pedals.
- Agitate and Vacuum: Use the stiff brush to loosen dirt embedded in the carpet fibers, then vacuum again. Pay extra attention to high-traffic areas.
- Don’t Forget the Trunk: The cargo area often collects just as much (if not more!) dirt. Treat it the same way.
Step 2: Pre-Treat Stains
Before you start a general wash, tackle any noticeable stains. Spot treating saves you from having to scrub an entire area unnecessarily.
- Identify the Stain: Knowing what caused the stain helps choose the right treatment.
- Blot, Don’t Rub: For fresh spills, blot gently with a clean cloth or paper towel to absorb as much liquid as possible. Rubbing can spread the stain and damage fibers.
-
DIY Stain Removers:
- Grease/Oil: Sprinkle baking soda or cornstarch on the stain. Let it sit for a few hours to absorb the oil, then vacuum.
- Coffee/Soda: Mix one part white vinegar with two parts water in a spray bottle. Spray lightly, let it sit for a few minutes, then blot.
- Mud: Let mud dry completely. Then, break it up and vacuum as much as possible before cleaning the remaining stain.
- Test First: Always test any cleaning solution on an inconspicuous area of the carpet to ensure it doesn’t cause discoloration or damage.
Step 3: Prepare Your Cleaning Solution
For general cleaning, a simple and effective solution can be made with common household items.
- Mild Soap Solution: In a bucket, mix about a tablespoon of mild dish soap with a quart of warm water. Stir gently to create suds without too much foam.
- Vinegar Solution: In a separate spray bottle, mix equal parts white vinegar and water. This is great for deodorizing and lifting grime.
- Commercial Cleaner: If using a store-bought carpet cleaner, follow the instructions on the bottle precisely.
Step 4: Gently Scrub the Carpets
Now it’s time to apply your cleaning solution and work it into the carpet fibers.
- Apply Sparingly: Lightly spray or dab your chosen cleaning solution onto a section of the carpet. Avoid over-saturating, as this can prolong drying time and lead to mold issues.
- Scrub In: Use your stiff bristle brush to gently scrub the area. Work in different directions to lift dirt from the base of the fibers. Don’t scrub so hard that you damage the carpet.
- Work in Sections: Clean one section at a time. This ensures you don’t miss spots and makes the process more manageable.
- Focus on Heavily Soiled Areas: You may need to apply a little more effort or a targeted cleaner to areas with stubborn dirt or old stains.
Step 5: Rinse and Extract the Dirt
This is where you lift the loosened dirt and cleaning solution out of the carpet. Less water is better!
- Blotting Method: Dampen a clean microfiber cloth with plain water. Blot the scrubbed area to rinse. You’ll see dirt transferring to the cloth. Rinse the cloth frequently or use multiple cloths.
- Squeegee Method (Optional): A clean window squeegee can help pull up excess moisture and dirt after you’ve rinsed with a cloth.
- Extracting Water: The absolute best way, if you have one, is a wet/dry vacuum or a carpet extractor. These machines suck up moisture and dirt efficiently, leaving the carpet much drier. If you don’t have one, use a dry microfiber cloth to absorb as much moisture as possible by pressing down firmly.
Step 6: Deodorize (If Needed)
If your car still has a lingering odor after cleaning, baking soda is your best friend.
- Sprinkle Generously: Lightly sprinkle a thin layer of baking soda over the entire carpet surface.
- Let it Sit: Leave it for at least 30 minutes, but for best results, let it sit for several hours or even overnight. Baking soda absorbs odors effectively.
- Vacuum Thoroughly: Once the baking soda has done its work, vacuum it up completely. Ensure no residue is left behind.
Step 7: Dry the Carpets Completely
Drying is crucial to prevent mold, mildew, and unpleasant musty smells. This is the most important part for long-term freshness.
- Ventilation is Key: Open all car doors and windows. This allows for maximum airflow, which is the most natural and effective way to dry your carpets.
- Use a Fan: If possible, place a fan inside the car, aimed at the carpets. This will significantly speed up the drying process.
- Absorb Excess Moisture: Go over the carpets with dry microfiber cloths, pressing down firmly to absorb as much remaining moisture as you can. Some people even use a clean chamois cloth for its superior absorbency.
- Be Patient: Depending on humidity and temperature, drying can take anywhere from a few hours to a full day. Resist the urge to close up the car until they are truly dry to the touch.
Tips for Maintaining Clean Car Carpets
Keeping your car carpets looking great doesn’t have to be an uphill battle once they’re clean. A little bit of regular care goes a long way!
- Immediate Spill Cleanup: Address spills as soon as they happen. Keep a small cleaning kit with wipes or a spray bottle in your car for quick attention.
- Use All-Weather Floor Mats: Invest in durable rubber or all-weather floor mats, especially for the driver’s side and any areas prone to heavy foot traffic or wet weather. These catch the bulk of the dirt and moisture, protecting your carpet underneath. You can easily remove and clean these mats separately. Check out resources from places like TRAFFIC SAFETY for general vehicle safety and upkeep, which includes interior maintenance for a better driving environment.
- Regular Vacuuming: A quick vacuum once a week can prevent dirt from becoming deeply embedded.
- Shake Out Floor Mats: Even if you don’t do a full wash, regularly remove your floor mats and give them a good shake to release accumulated dirt and debris.
- Avoid Eating in the Car (When Possible): This significantly reduces the chances of spills and crumbs.
- Use a Litter Box Liner for Pets: If you transport pets, consider placing a washable liner or towel under their carrier or on the seat to catch any accidents or shedding.
Understanding Different Carpet Types
While most car carpets are similar, knowing about them can help. Most are made of nylon or polypropylene and are treated with stain-resistant coatings. However, the way they are constructed can affect how they hold dirt and how you should clean them.
- Cut Pile: These fibers are cut at the top, creating a softer, plusher feel. They can be more prone to showing dirt and wear.
- Loop Pile: The fibers are left as loops, making them more durable and resistant to matting. They can be trickier to clean as dirt can get trapped in the loops.
- Thread Count/Density: Higher density carpets hold more dirt but also show it less readily than lower density ones.
For most modern cars, the cleaning methods described will work well. The key is to use appropriate pressure and avoid over-wetting, which can damage the backing of the carpet and lead to mold. For very delicate or older carpeting, always test cleaning solutions and methods on a hidden spot first.

Troubleshooting Common Car Carpet Issues
Even with the best intentions, you might run into a few snags. Here’s how to deal with common problems:
| Problem | Cause | Solution |
|---|---|---|
| Lingering Musty Odor | Moisture trapped in the carpet or underlying padding. | Ensure carpets are bone dry. Use baking soda extensively. Consider a moisture absorber like DampRid if the issue persists in humid climates. If it’s extreme, you might need to air out the car for days with fans. |
| Stubborn Stains (e.g., ink, grease) | Incomplete pre-treatment or wrong cleaning agent. | Wipe with rubbing alcohol for ink. For grease, try a dedicated automotive degreaser or a strong detergent on a cloth, then blot. Always test first. If DIY fails, a professional auto detailer might be needed. |
| Carpet Material Fraying/Matting | Overly aggressive scrubbing or heavy wear. | Use a softer brush or a microfiber cloth. Avoid excessive pressure. If matting is severe, a carpet rake designed for automotive interiors might help lift fibers, but be gentle. |
| Water Stains or Rings | Incomplete drying or mineral content in water used. | Re-dampen the entire section lightly with distilled water, apply your chosen cleaner, and then blot thoroughly. Ensure full drying with good ventilation. Using distilled water for rinsing can prevent mineral deposits. |
Frequently Asked Questions (FAQs)
Q1: How often should I wash my car carpets?
It’s a good idea to vacuum them thoroughly at least once a month. A deep wash, like the one described, is recommended every 3-6 months, or immediately after a significant spill.
Q2: Can I use home carpet cleaners in my car?
Yes, mild solutions like dish soap and water or vinegar and water are safe and effective. However, always avoid harsh household cleaners or bleach, as they can damage carpet fibers and fade colors. If using commercial carpet cleaners, opt for those specifically designed for automotive interiors.
Q3: Is it okay to soak my car carpets?
No, avoid over-saturating your car carpets. Excessive moisture can seep into the padding, leading to mold, mildew, and damage to the car’s floor pan. Gentle cleaning and thorough drying are key.
Q4: What’s the best way to get rid of pet odors?
For pet odors, use the baking soda method outlined in Step 6 generously. You can also use a specialized pet odor eliminator designed for cars. Ensure you clean any visible pet accidents thoroughly first.
Q5: How long does it take for car carpets to dry after washing?
It varies, but typically it can take anywhere from a few hours to a full day. Factors include how much water was used, humidity, temperature, and airflow. Always ensure they are completely dry before closing windows and doors.
Q6: My carpets are dark colored, will cleaning make them look faded?
It’s possible with harsh chemicals or excessive scrubbing. Using mild, pH-neutral cleaners and gentle techniques will minimize this risk. Always test solutions in an inconspicuous area first. The slight darkening from a good clean is usually a sign of restored color and depth, not fading.
Conclusion
There you have it! Washing your car carpets doesn’t have to be a daunting task. By following these simple steps and using common household items, you can effectively remove dirt, stains, and odors, restoring that pleasant, fresh feeling to your car’s interior. Remember, regular vacuuming and prompt attention to spills are your best allies in keeping your car’s carpets looking their best between deep cleans.
You’ve got this! Taking care of your car’s interior yourself can be incredibly satisfying and saves you money. Enjoy the confidence and comfort that comes with a sparkling clean car. So, gather your supplies, put on some music, and get ready to enjoy a refreshingly clean driving experience. Happy cleaning!