
Universal Spoiler for Car: Types, Fit, and Installation Guide
Byline: Reviewed and updated by the editorial team for fitment, materials, and installation accuracy.
Choose a universal spoiler only if its length fits your trunk lid, its bracket spacing matches mounting points or adhesive zones, and its base follows the lid’s curvature; most sedans and coupes fit best with 48- to 60-inch spoilers. Ignoring those dimensions can increase the risk of rattles, paint damage, water leaks, and a spoiler that may look undersized or overhang the body. This guide explains spoiler types, material tradeoffs, fit measurements, and installation steps so you can buy the right part the first time.
Methodology: Fit thresholds below are based on OEM-style body mounting practice, service-manual sealing norms, and common aftermarket bracket layouts from major retailers and manufacturers. The worksheet uses conservative pass/fail ranges intended to avoid edge loading, seam interference, and trunk-lid flex. When a product lists dimensions, those values should be treated as published specifications, not guarantees of fit, and checked against the actual lid geometry before drilling or bonding.
Author note: This page synthesizes manufacturer spec sheets, body hardware guidance, and trunk-lid installation practices. It does not claim vehicle-by-vehicle testing data that is not shown here.
Universal spoiler fit basics



A universal rear spoiler or GT wing is a rear-trunk mounting part with adjustable bracket angles and a broad fit range, but “universal” still demands dimension checks. The wing has to suit the trunk lid width, the available flat mounting area, and the body shape. Appearance and airflow are different goals, and the difference matters when comparing GT wing vs spoiler differences.
What “universal” really means
Universal spoilers are built to fit a range of sedans and coupes, and some hatchbacks with large, flatter rear panels. They still depend on bracket spacing, overhang, and the trunk lid’s curvature. A spoiler can sit on the car and still be wrong if the brackets land on weak metal or the ends hang too far past the lid.
For street use, the visual effect usually matters more than measurable aerodynamic change. Adjustable angle can change the stance and how the rear of the car reads in profile, while real-world downforce at daily-driving speeds is usually modest unless the wing is sized, mounted, and angled for that job.
Aerodynamic lift reduction and downforce are speed-dependent and influenced by angle of attack, endplate design, mounting height, and rear-body wake shape; SAE and OEM aero references consistently show that spoiler performance is highly vehicle-specific rather than universal in effect. That is why a part that “fits” physically may still be ineffective aerodynamically.
GT wing versus PRO style spoiler
A GT wing usually uses taller uprights, wider stance, and more obvious angle adjustability. A PRO style spoiler tends to look lower and more integrated. Both can be universal, but the fit targets differ: the GT wing needs enough trunk width and reinforcement for its brackets, while the PRO style often suits a cleaner visual line.
Two listed examples show the spread. The Seeutek GT wing is listed at 43.3 inches with aluminum alloy construction and 19-inch bracket spacing. The MTBNO PRO style spoiler is listed at 54 inches and uses ABS plastic. Those numbers matter more than the nameplate when you are checking fit.
Published dimensions should be verified against the vehicle, because manufacturers and retailers commonly list overall width, bracket spacing, and leg count differently across product pages. Bracket spacing is the most important field measurement for installation, while overall width is mostly a visual and edge-clearance check.
Sedan, coupe, and hatchback fit limits
The guide says universal spoilers are for most sedans and coupes, and that is where fit is usually simplest. Coupes often have shorter trunks and steeper rear glass, while sedans may have longer lids and more usable mounting area. Hatchbacks can be trickier because roofline and hatch curvature change where the spoiler can sit.
Picture a sedan with a long, flat trunk lid and clean rear corners. A spoiler can sit centered and look balanced. Now picture a hatchback with a short, curved top edge. The same wing may overhang the sides or force the brackets onto an unflat section, which can lead to movement and leaks.
Service-manual body repair guidance generally favors mounting through flat, reinforced sheet metal or approved adhesive pads with adequate surface prep, because curved panels and seam edges concentrate stress. That principle applies directly to spoiler fitment.
Which size will fit your trunk?
Start with trunk lid width, then compare overall spoiler length and bracket spacing to the actual mounting space. A spoiler that is too long can overhang the body and look heavy. One that is too short can look like an afterthought and may leave the mounting points too close together for stability.
Measure trunk lid width
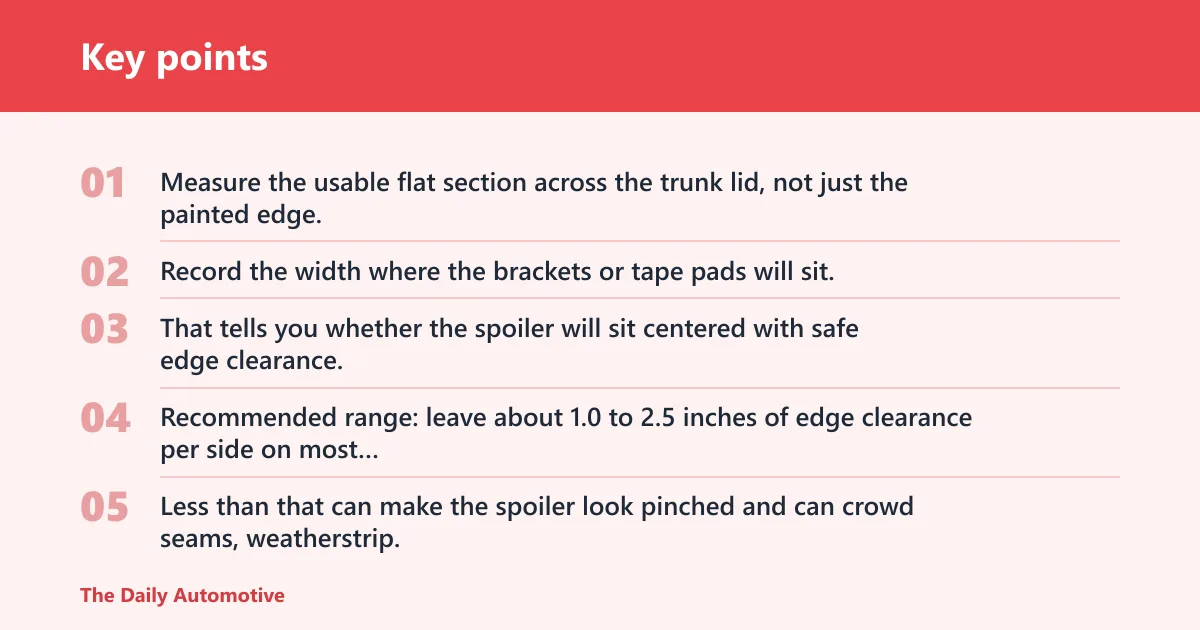
Measure the usable flat section across the trunk lid, not just the painted edge. Record the width where the brackets or tape pads will sit, plus the distance from each outer edge to the nearest body seam. That tells you whether the spoiler will sit centered with safe edge clearance.
Recommended range: leave about 1.0 to 2.5 inches of edge clearance per side on most sedans and coupes, with at least 0.5 inch as a practical minimum if the lid shape is tight. Less than that can make the spoiler look pinched and can crowd seams, weatherstrip, or curvature transitions.
Check overall spoiler length
Listed lengths include 46.3 inches, 43.3 inches, 54 inches, and 57 inches. Those figures are not universal fit guarantees; they are starting points. A 46.3-inch spoiler may suit a compact sedan trunk better than a 57-inch unit, while a larger trunk lid can carry a longer wing without looking crowded.
Use overall length to judge visual scale first, then use bracket spacing to judge structural fit. A spoiler can be the right length and still fail if its legs land outside the flat mounting zone.
Typical banding: 43 to 46 inches often suits compact and midsize sedans; 48 to 54 inches is a common target for midsize sedans and coupes; 55 to 60 inches is more likely to suit larger sedans and wider deck lids. These are fit bands, not performance claims.
Match bracket spacing to mounting points
Bracket spacing is the distance between the mounting legs, and it has to match the trunk lid’s usable area and reinforcement points. Examples from listed products include 34.8 inches, 21.7 inches, and 19 inches. That spread shows how differently universal spoilers can sit on the same class of vehicle.
Recommended range: bracket spacing should generally land within the lid’s flat pad width with about 0.5 to 1.5 inches of clearance from bends, seams, or embossed edges on each side. A wider spacing can improve stability only if the panel remains flat and reinforced under both feet.
| Spec | Example value | Fit check |
|---|---|---|
| Overall spoiler length | 43.3 in | Should suit the trunk lid without excessive overhang |
| Overall spoiler length | 46.3 in | Good starting point for many sedans with moderate trunk width |
| Bracket spacing | 34.8 in | Needs a wide flat area and matching support points |
| Bracket spacing | 21.7 in | Fits narrower mounting zones if the lid remains flat enough |
| Bracket spacing | 19 in | Useful where rear panel width is limited, but check support first |
Watch overhang and edge clearance
Overhang should stay modest on both sides of the trunk lid. Too much overhang makes the car look top-heavy and can expose the wing to side contact in tight parking. Too little width can make the spoiler appear small even when the brackets fit. Keep clearance from the trunk edges and the rear glass line.
Recommended range: a clean visual fit usually keeps overhang to roughly 0 to 2 inches per side. Beyond that, the spoiler starts to read as oversized unless the car has an especially wide deck lid or a deliberate motorsport look.
Spoiler fit worksheet
Use this worksheet before buying. It turns product specs into a pass/fail check so you can rule out a poor fit before drilling, sealing, or spending on paint correction. If one of the main dimensions fails, do not assume the rest will work out on install day.
This worksheet is designed to be conservative: if the spoiler barely clears the lid, the mounting zone is not flat, or the brackets land near a seam, the fit should be treated as a fail. That keeps the decision aligned with body-shop practice, where margin matters more than forcing a near-match.
Measurement checklist
- Measure trunk lid width at the planned mounting line.
- Measure the flat mounting area where each bracket or tape pad will sit.
- Check bracket spacing against the actual usable width.
- Measure edge clearance from each end of the spoiler to the trunk edge.
- Confirm hole clearance if the spoiler needs drilled mounting.
- Check for trunk flex by pressing the lid near the planned mounting points.
Universal spoiler table
| Check | Pass | Fail |
|---|---|---|
| Trunk width | Spoiler length stays within the lid with usable edge clearance | Ends hang far past the trunk or sit too far inward |
| Mounting flatness | Bracket feet or tape pads sit on a flat, stable section | Mounting area curves sharply or flexes under hand pressure |
| Bracket spacing | Spacing lines up with the lid and support points | Legs land on weak areas or uneven contour |
| Hole clearance | Drilled holes avoid seams, braces, and hardware interference | Holes conflict with internal structure or edge metal |
| Spoiler overhang | Both ends sit visually balanced with modest overhang | One side sticks out, or the wing looks undersized |
Red-flag fit mistakes
A common first-timer mistake is buying by style photo alone, then finding the brackets land on a curved lid edge. Another is picking a wing that looks fine from the rear but forces the hardware too close to the trunk seam. Those two errors often lead to rattles, chip marks, and water entry.
Another failure pattern is using adhesive on paint that was not cleaned, degreased, or lightly abraded per the product instructions. Manufacturers and service manuals generally require full cure time, temperature control, and dry surfaces for sealants and bonding tapes to reach their rated hold.
Are ABS or aluminum spoiler wings better?
Neither material is automatically better. ABS plastic suits budget builds, lighter visual upgrades, and many weather-exposed installs. Aluminum alloy suits buyers who want lighter hardware feel, more rigidity in the bracket structure, and a matte finish option. The right choice depends on mounting method, finish, and how much adjustment you need.
ABS plastic for budget builds
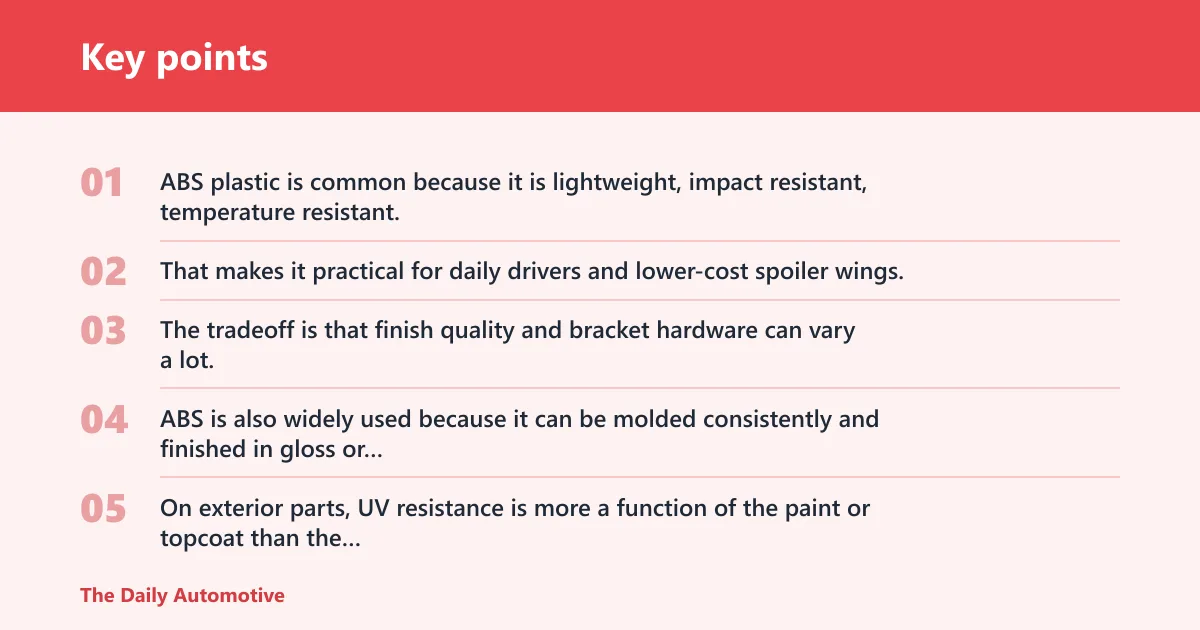
ABS plastic is common because it is lightweight, impact resistant, temperature resistant, and weather resistant. That makes it practical for daily drivers and lower-cost spoiler wings. The tradeoff is that finish quality and bracket hardware can vary a lot, so a cheap ABS part with weak mounts can still rattle or flex.
ABS is also widely used because it can be molded consistently and finished in gloss or matte coatings, but the coating system matters. On exterior parts, UV resistance is more a function of the paint or topcoat than the base polymer alone.
One listed ABS example is the VEVOR 46.3-inch spoiler, which uses ABS material and has 34.8-inch bracket spacing. Another is the JMTBNO universal rear spoiler, listed at 57 inches and also using ABS plastic. Those two sizes can suit different trunk layouts, but each still needs a fit check.
Aluminum alloy for lighter hardware
Aluminum alloy is often chosen for a cleaner hardware look and sturdy bracket construction. It is lighter than many ABS builds in the right hardware setup and can wear a matte finish well. The 43.3-inch VEVOR spoiler uses aluminum alloy with 21.7-inch bracket spacing, and the Seeutek GT wing uses aluminum alloy with 19-inch bracket spacing.
Aluminum does not remove the need for proper sealing or reinforcement. If the trunk lid flexes, a lighter bracket still moves with it. Material choice should support the mounting plan, not replace it.
For corrosion control, service-body guidance favors isolating dissimilar metals, using proper washers and corrosion-resistant fasteners, and sealing drilled edges so moisture cannot sit in the hole. That matters on both ABS and aluminum kits because the hardware is usually the first point of failure.
Finish, coating, and fade resistance
Glossy black usually gives the strongest visual contrast and a cleaner factory-style look. Matte texture reads more technical and can hide minor dust or print-through better. A sprayed coating can look good, but a baked paint process generally holds color and finish more consistently over time when the part is prepared properly.
Fade resistance depends on the coating system, sun exposure, and maintenance. A coated spoiler that lives outdoors still needs care, and low-cost spray finishes can chalk or dull faster than baked finishes if the prep work is weak.
Coating durability is especially important around mounting points because sealant squeeze-out, fastener heads, and hand contact can mark thin finishes. Products with clear finish instructions generally last better when those instructions are followed exactly.
Will it fit a sedan or coupe?
Most universal spoilers are aimed at sedans and coupes, but body style changes more than the badge on the trunk. Roofline, lid length, rear glass angle, and the width of the upper deck all affect fit. A spoiler that sits well on one coupe may look too long on another with a shorter deck lid.
Roofline and trunk shape
Sedans often give you a longer, flatter lid and easier bracket placement. Coupes may offer a tighter rear profile and shorter mounting space. Hatchbacks can need a different approach because the rear opening and roofline can put the mounting zone on a steeper curve or on trim that is not meant to carry hardware.
Trunk flex and reinforcement
Check for flex before you drill. Press gently on the mounting area with the trunk open and then with it closed. If the metal feels springy, you may need reinforcement plates, better hardware, or a different mounting point. A wing on flexing sheet metal can loosen over time and start making noise.
When a hatchback needs a different approach
Some hatchbacks can use a spoiler, but the mounting plan often differs from a traditional trunk lid. The curve may be tighter, the usable flat area smaller, and the internal access more limited. If the brackets cannot sit square without stressing the panel, do not force a universal wing onto the hatch just because the length looks close.
Install a universal rear spoiler
Plan the install as a measured job, not a cosmetic shortcut. A careful installation often starts with a tape mockup, then moves to centering, marking, drilling only if needed, sealing, tightening, and a final torque check. This is where most hidden problems show up, especially on trunk lids that have limited flat area.
When the kit calls for drilling, use the manufacturer’s hardware and sealant instructions first. Service-manual style body practice favors deburring, sealing bare metal, and torquing fasteners evenly so the load is shared across the bracket instead of concentrated at one corner.
Tape mockup and centering
- Clean the trunk lid where the spoiler will sit.
- Place painter’s tape along the planned centerline.
- Set the spoiler on the lid without fastening it.
- Measure equal distance from each end to the trunk edges.
- Adjust until the wing sits level and centered.
Marking, drilling, and hole clearance
- Mark the bracket holes only after final centering.
- Open the trunk and check the underside for braces, wires, and trim.
- Verify that each hole location has safe clearance from seams and reinforcement.
- Drill carefully at the marked points if the design requires drilled mounting.
- Deburr the holes before any sealant goes in.
Sealing, hardware, and final torque check
- Apply sealant around each drilled opening and under the bracket contact area.
- Install the mounting hardware and align the spoiler before tightening fully.
- Tighten the fasteners evenly so the wing sits square on the lid.
- Wipe away excess sealant before it cures.
- Close the trunk gently, then recheck alignment and torque after the first drive, as is commonly recommended.
Sealant should fully bridge the drilled edge and the fastener shank without leaving voids. If the kit uses foam tape, the surface must be oil-free and dry before application; if it uses sealant plus bolts, the sealant should be compatible with painted exterior metal and plastic contact points.
Suppose a trunk lid measures wide enough for a 46.3-inch spoiler, but the flat mounting area ends just before the outer edges. In that case, a part can still fit by length and fail by bracket placement. The fix is not to force the hardware outward; the fix is to choose a narrower bracket layout or a different wing.
Trunk-width matrix:
| Trunk width band | Typical body fit | Suggested spoiler size band | Notes |
|---|---|---|---|
| Under 50 in | Compact sedan, small coupe, tighter hatch lid | 43 to 46 in | Favor narrower bracket spacing and minimal overhang |
| 50 to 56 in | Midsize sedan, many coupes | 46 to 54 in | Most universal kits land here if the lid is flat enough |
| 56 to 62 in | Large sedan, wider deck lid | 54 to 60 in | Check edge clearance carefully so the spoiler does not look stretched |
What can go wrong?
The most common failures are simple: the spoiler is too wide, too narrow, or mounted on the wrong contour. Add trunk flex, poor sealing, and weak hardware, and the result is noise, leaks, and paint damage. A universal wing should be treated as a fit project, not a bolt-on assumption.
Too wide or too narrow
A spoiler that is too wide can overhang the trunk and make the rear of the car look clumsy. One that is too narrow can look lost on a broad trunk lid and may place the brackets too close together for stability. Either mismatch can hurt both appearance and mounting confidence.
Leaks and rattles
Water leaks usually come from poor sealing around drilled holes or from hardware that has pulled against thin metal. Rattles often start when the bracket spacing is wrong or the lid flexes under load. If noise appears after a few drives, stop and check the hardware before the holes enlarge.
Hidden costs after purchase
Budget for more than the spoiler itself. Sealant, replacement hardware, paint touch-up, reinforcement plates, and professional installation can add to the final cost. If the trunk lid needs drilling and you want the paint preserved, paying for proper bodywork may be cheaper than repairing leaks later.
Frequently asked questions
What size universal spoiler fits my car?
Start with trunk lid width, then compare it with overall length and bracket spacing. Common listed lengths include 43.3 inches, 46.3 inches, 54 inches, and 57 inches. A spoiler fits only if it sits centered, clears the edges, and lands on a stable mounting area.
How do I measure spoiler bracket spacing?
Measure the distance between the centers of the two mounting legs, not the outer edges of the spoiler body. Then compare that number to the flat area on the trunk lid and any internal support points. If the spacing lands on a curve or seam, it is the wrong fit.
Will a universal spoiler fit a sedan or coupe?
Usually yes, but not every sedan or coupe. The guide says universal spoilers are for most sedans and coupes, yet roofline shape, trunk length, and edge clearance still matter. A coupe with a short deck or a sedan with a curved lid may need a different size.
How do I install a universal rear spoiler on a trunk lid?
Use tape to mock up the position, center the spoiler, mark the holes, drill only after checking the underside, seal every opening, and tighten the hardware evenly. Finish with a torque check after the first drive. That sequence reduces leaks, misalignment, and bracket noise.
Do universal spoilers improve downforce or mostly appearance?
On daily drivers, appearance is usually the bigger effect. Street-speed aerodynamic gains are often modest unless the wing is sized and angled for real airflow work. Adjustable brackets help change the look and mounting angle, but they do not guarantee meaningful downforce by themselves.
What tools do I need to mount a universal spoiler safely?
Have painter’s tape, a tape measure, a marker, a drill with the right bit, deburring tool or file, sealant, socket or wrench set, and cleaning supplies. Add a helper for centering if possible. A careful install depends more on measurement and sealing than on speed.
Products related to this article
Sponsored / affiliate links. As an Amazon Associate I earn from qualifying purchases. I may earn additional commission from eligible campaigns.