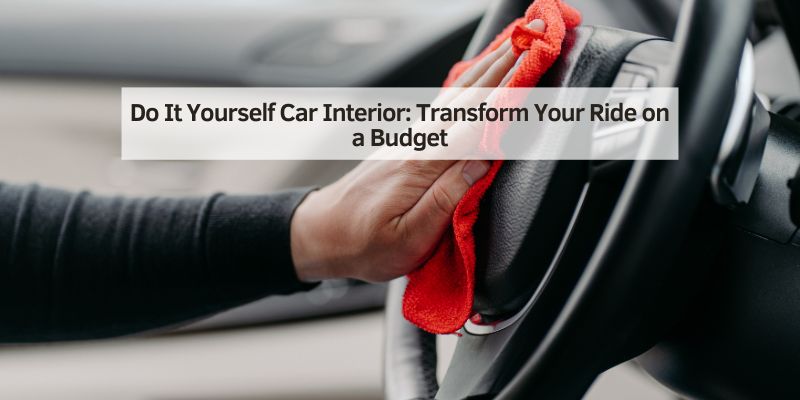
DIY Car Interior: Budget Upgrades, Ideas & Safety Tips
You can upgrade nearly every part of your car interior yourself for $50-$300: seat covers, dashboard trim, ambient lighting, floor mats, steering wheel wraps, and basic audio swaps all fall within reach of a screwdriver and a free afternoon. The exceptions are electrical work and seat belts, where a mistake is a real safety risk. Below is everything I have actually done to my own cars, plus the safety and legal limits most guides skip.
I’ve spent countless weekends tinkering with my own car’s interior, from swapping out seat covers to adding custom lighting. What started as a simple seat cover swap turned into a full-blown passion for customizing my ride. Here’s everything I’ve learned along the way.
Why I Love DIY Car Interior Projects
Picture this: you’re cruising down the highway, and your car’s interior feels like it was made just for you. That’s the magic of DIY. I started messing with my car’s interior a few years ago when my old sedan’s seats looked tired, and the dashboard was scuffed. I didn’t want to pay a shop thousands of dollars, so I decided to try it myself. What started as a simple seat cover swap turned into a full-blown passion for customizing my ride.
DIY car interior projects are awesome because they save money, let you express your style, and teach you new skills. Plus, there’s a thrill in saying, “I did that!” Whether you’re refreshing an old clunker or personalizing a new ride, these projects make your car feel like home. Let’s explore why this is such a great idea and how you can get started.
The Benefits of Upgrading Your Car’s Interior Yourself
When I first considered DIY, I was nervous. What if I mess it up? But the benefits far outweigh the risks. First, you save a ton of cash. Professional detailing or custom interiors can cost $500 to $5,000, depending on the job. With DIY, you’re looking at a fraction of that—sometimes as low as $50 for materials.
Second, you get total control. Want a red leather vibe? Go for it. Love neon accents? You’re the boss. I once added blue LED strips under my seats for less than $20, and it completely changed the vibe of my car at night. Third, it’s a chance to learn. I had no idea how to reupholster a seat when I started, but YouTube tutorials and a little patience turned me into a pro. Finally, it’s eco-friendly. By reusing and refreshing parts, you’re keeping stuff out of landfills.
Tools and Supplies You’ll Need
Before you start, let’s talk tools. You don’t need a fancy garage—just some basics. I keep a toolkit with screwdrivers, pliers, a utility knife, and a socket wrench for most projects. A sewing kit comes in handy for upholstery work. You’ll also want cleaning supplies like microfiber cloths, all-purpose cleaner, and a vacuum.
For specific projects, you might need:
- Seat Covers: Pre-made or custom fabric, thread, and a heavy-duty needle.
- Dashboard Repair: Vinyl repair kits or spray paint designed for automotive use.
- Lighting: LED strips, wire cutters, and electrical tape.
- Floor Mats: Scissors for trimming universal mats to fit.
I usually shop at places like AutoZone or Amazon for affordable supplies. My go-to tip? Make a list before you start so you’re not running to the store mid-project. Here’s a quick table of essentials:
| Item | Estimated Cost | Where to Buy |
|---|---|---|
| Basic Tool Kit | $20–$50 | Hardware stores |
| Upholstery Fabric | $10–$30/yard | Fabric stores, online |
| LED Lighting Strips | $15–$40 | Auto parts stores |
| Vinyl Repair Kit | $10–$25 | AutoZone, Walmart |
| All-Purpose Cleaner | $5–$15 | Any auto retailer |

Our Pick: Best Starter Products for a DIY Interior Refresh
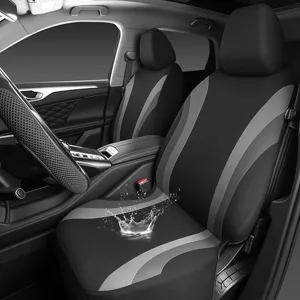
CAR PASS Waterproof Front Seat Covers (Airbag Compatible)
The single easiest upgrade in this whole guide — fits over your existing front seats in about 10 minutes with no tools, and is explicitly airbag-compatible so it won’t interfere with side airbags.
View Our Pick on Amazon
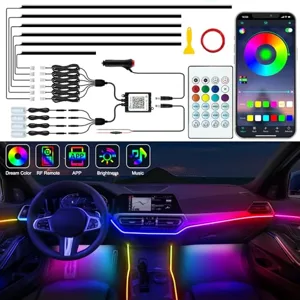 LED Ambient Lighting Strip Best for: adding under-seat or dash ambiance in one afternoon. |
 All-Weather Floor Mats Best for: an instant, no-skill visual refresh. |
 Vinyl & Leather Repair Kit Best for: fixing cracks or tears before adding new covers. |
Cleaning Your Car’s Interior Like a Pro
The first step in any DIY interior project is a deep clean. Trust me, you don’t want to install new seat covers over crumbs and stains. I learned this the hard way when I skipped cleaning and ended up with a funky smell under my new mats.
Start by vacuuming every inch—seats, floors, and even the headliner. Use a brush attachment for tight spots. Next, tackle stains. I mix a solution of water, dish soap, and vinegar for fabric seats. For leather, I use a dedicated cleaner to avoid cracking. Don’t forget the dashboard and console; a damp microfiber cloth with a bit of cleaner works wonders. Pro tip: use a toothbrush to get into crevices like air vents. A clean interior is like a blank canvas—it makes every upgrade look better.
Upgrading Your Seats on a Budget
Seats are the heart of your car’s interior. They’re where you spend most of your time, so they need to look and feel good. I started with universal seat covers because they’re affordable (around $30–$60) and easy to install. You just slip them over your existing seats and secure them with straps. I found a set with a cool carbon-fiber look that made my old Honda feel sporty.
If you’re feeling adventurous, try reupholstering. I did this on my truck’s bench seat, and it took a weekend but saved me hundreds. You’ll need fabric, a staple gun, and patience. Remove the seat (usually just a few bolts), strip the old fabric, and use it as a template to cut new material. Sew or staple it in place, then reassemble. It’s not perfect the first time, but it’s so rewarding.
Revamping Your Dashboard and Console
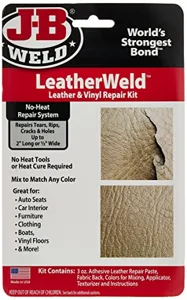
A scratched or faded dashboard can make your car feel dated. I had this issue with my old SUV, so I decided to fix it myself. Vinyl repair kits are a lifesaver for small cracks or tears. You apply a compound, smooth it out, and match the color with paint. It’s like magic for $15.
For a bigger upgrade, consider painting your dashboard. I used automotive spray paint to give my console a matte black finish. Sand the surface lightly, apply primer, and then paint in thin layers. Let it dry fully to avoid tackiness. If you want a high-end look, add decals or carbon-fiber wraps. I found peel-and-stick wraps online for $20, and they transformed my dashboard in an hour.
Adding Custom Lighting for Ambiance
Lighting is my favorite way to make a car interior pop. I installed LED strips under my seats and along the dashboard, and it’s like driving a spaceship at night. You can get RGB LED kits for $15–$40 that connect to your car’s power via a USB or cigarette lighter. Choose colors to match your vibe—blue for calm, red for bold.
Installation is simple: clean the surface, stick the LED strips with adhesive backing, and connect the wires. I tucked mine behind panels to hide the wiring. Some kits come with a remote or app to change colors. Just be sure to check your state’s laws—some places restrict certain colors like blue or red for interior lighting to avoid distracting other drivers.
Replacing or Customizing Floor Mats
Floor mats take a beating, so replacing them is an easy win. I swapped out my worn-out mats for universal ones that cost $25. You can trim them with scissors to fit your car perfectly. For a custom touch, I embroidered my initials on a set using a cheap sewing kit. It’s a small detail, but it makes my car feel personal.
If you want all-weather mats, brands like WeatherTech are pricier ($60–$100) but worth it for durability. They’re easy to clean and protect your car’s floor from mud or spills. I live in a rainy part of the USA, so these were a game-changer for keeping my interior pristine.
Upgrading Your Steering Wheel and Shifter
A worn steering wheel can ruin the driving experience. I upgraded mine with a leather wrap kit for $20. You wrap the leather around the wheel and stitch it tight with a needle and thread. It takes about an hour, but it feels so much better to grip. Plus, it looks sleek.
Safety note: A rim-only leather wrap like this is safe because it never touches the airbag cover in the center of the wheel. That distinction matters — swapping the entire steering wheel is a different job. In the US, any replacement wheel must meet FMVSS 208, which requires it to retain full airbag deployment capability. A wheel that isn’t airbag-compatible can prevent the airbag from working correctly in a crash, so full wheel swaps (not just rim wraps) are a job for a shop, not a DIY afternoon.
For the gear shifter, I added a custom knob. You can find metal or carbon-fiber knobs online for $10–$30. Just unscrew the old one and screw on the new one. It’s a small change, but it makes shifting feel more premium. I went with a weighted knob for a sportier feel, and it’s one of my favorite upgrades.
Sound System Tweaks for Audio Lovers
If you love music, upgrading your car’s audio is a must. I’m no audiophile, but swapping out my old speakers made a huge difference. You can find decent aftermarket speakers for $50–$100 a pair. Check your car’s speaker size (usually in the manual), and use a screwdriver to swap them out. I did this in an afternoon, and the sound quality blew me away.
For a bigger project, consider adding a subwoofer. I installed a compact one under my seat for $80, and it added deep bass without taking up trunk space. If you’re not ready for new speakers, clean your existing ones. Dust and grime can muffle sound, so a quick wipe-down can help.
Personalizing with Small Details
The little things make a big difference. I added custom air vent clips with a subtle scent to keep my car smelling fresh. You can also swap out old buttons or knobs with chrome or colored ones for a few bucks. I found a set of aluminum pedal covers for $15 that gave my car a race-inspired look.
Another fun idea is decals or stickers for the glovebox or console. I added a small vintage car logo to my center console, and it’s a conversation starter. Just make sure any decals are removable so they don’t damage surfaces if you change your mind.
Tips for Staying Safe and Legal
DIY is fun, but safety comes first. Always disconnect your car’s battery before working on electrical components like lighting or speakers. I learned this after a small spark scared the heck out of me! Also, use gloves and safety glasses when cutting or sanding materials.
Check local laws, too. Some states, like California, have strict rules about interior lighting colors or window tinting. If you’re modifying seats or seat belts, make sure they meet safety standards. I always double-check my work to ensure everything is secure before hitting the road.
Budgeting and Planning Your Project
One of the best parts of DIY is saving money, but it’s easy to overspend if you’re not careful. I set a budget of $100 for my first project and stuck to it by shopping sales and comparing prices. Plan your project in steps—clean first, then tackle one area at a time, like seats or lighting.
Keep a notebook or phone app to track your spending and ideas. I also take photos before and after each project to see the progress. It’s motivating to look back and see how far your car has come.
Where to Find Inspiration and Resources
Not sure where to start? I get ideas from car shows, Instagram, and YouTube. Search for “DIY car interior” online, and you’ll find tutorials for everything from upholstery to lighting. I also love browsing forums like Reddit’s r/AutoDIY for tips from other enthusiasts.
Local auto parts stores are great for supplies and advice. I’ve had employees at O’Reilly Auto Parts walk me through picking the right spray paint or adhesive. If you’re stuck, don’t be shy—ask for help. The car community is full of people happy to share their knowledge.
The Joy of Driving Your Upgraded Ride
There’s nothing like sliding into a car you’ve customized yourself. After I finished my first big project—a full interior refresh with new mats, seat covers, and lighting—I took my car for a spin and couldn’t stop smiling. It felt like a brand-new vehicle, but I’d spent less than $200. Every time I drive, I’m reminded of the work I put in, and it makes every trip more enjoyable.
Conclusion
So, is do-it-yourself car interior work worth it? Absolutely. It’s a chance to save money, unleash your creativity, and make your car truly yours. From cleaning and upgrading seats to adding lighting and personal touches, every project is a step toward a ride that reflects your personality. I’ve loved every minute of transforming my cars, and I know you will too. Whether you’re starting small with new mats or going all-in with custom upholstery, the process is rewarding, fun, and totally doable. Grab some tools, pick a project, and hit the garage. Your dream car interior is waiting, and you’ve got everything you need to make it happen. Happy tinkering!
FAQs
What’s the easiest DIY car interior project for beginners?
Start with cleaning or new floor mats. They’re simple, affordable, and make a big difference. Seat covers are also easy—just slip them on and secure them.
How much does a DIY car interior upgrade cost?
It depends, but you can do a lot for $50–$200. Basic projects like seat covers or lighting are under $100, while upholstery or audio upgrades might cost more.
Do I need special tools for DIY car interior projects?
Not really. A basic toolkit with screwdrivers, pliers, and a utility knife covers most projects. For upholstery, a sewing kit or staple gun helps.
Can I mess up my car with a DIY project?
It’s possible, but unlikely if you follow tutorials and work carefully. Always double-check your work, especially with electrical components, and disconnect the battery for safety.
Where can I buy affordable supplies for my car interior?
Check AutoZone, Walmart, or Amazon for budget-friendly options. Fabric stores are great for upholstery materials, and eBay has deals on lighting or decals.
How long does a DIY car interior project take?
Simple projects like cleaning or installing seat covers take 1–2 hours. Bigger ones, like reupholstering seats, might take a weekend. Plan ahead to avoid rushing.