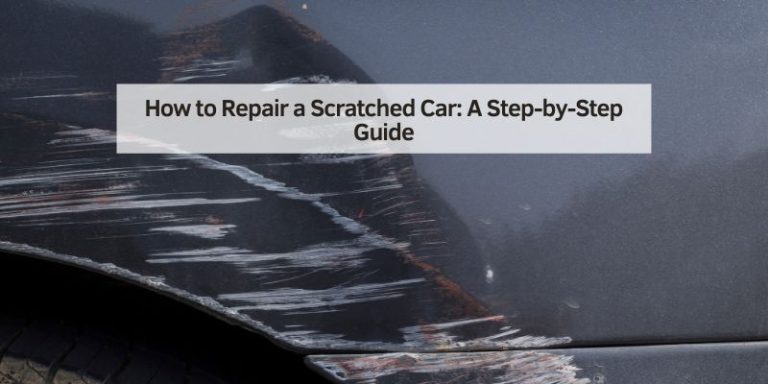
Do You Sand Primer Before Painting A Car? Yes, Here’S Why
It’s a question many DIY auto painters ponder. You’ve prepped your car, sprayed the primer, and it looks… okay. But should you really sand it down again before the actual paint goes on?
It feels like an extra step, and who doesn’t want to save time, right? Yet, if you skip this, your shiny new paint job might end up looking less than professional. This guide will clear up all the confusion about sanding primer on your car.
Yes, you absolutely should sand primer before painting a car. This step is vital for creating a perfectly smooth surface. It helps the topcoat adhere better, prevents imperfections from showing through, and ensures a professional-looking, long-lasting finish on your vehicle.
Why Sanding Primer Is Your Car’s Best Friend
Primer is a foundational layer. Think of it like the drywall mud in your house. You don’t just paint over the drywall mud, do you? You sand it smooth first. The same idea applies to your car’s primer. It’s not just about filling tiny scratches; it’s about creating a uniform canvas for your paint.
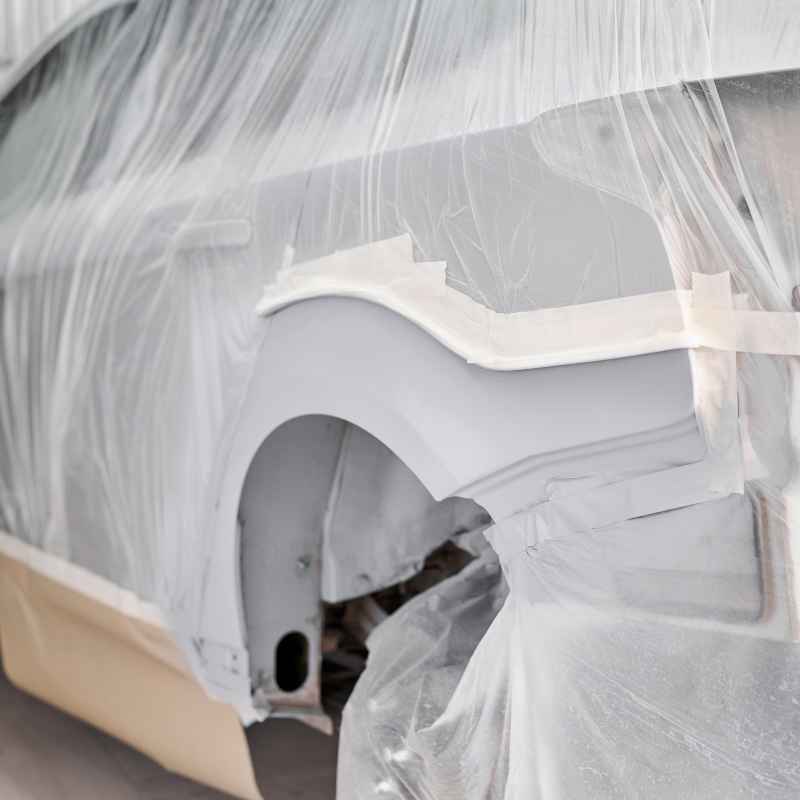
Primer helps your car paint stick better. It also covers up small imperfections. But primer itself isn’t always perfectly smooth. Sometimes, dust lands on it. Or maybe the spray pattern wasn’t perfectly even. Sanding fixes these issues. It makes the surface ready for the color coat.
You might wonder why such a thin layer of paint needs so much care. Cars are large, seen items. Any flaw really stands out. A smooth surface is key. It’s what makes a paint job look factory-new versus amateur. Sanding primer is a small effort for a big reward.
My First Car Painting Disaster: A Primer on What Not To Do
I remember my first real car painting project. I was young, full of confidence, and watched a lot of YouTube videos. I prepped my old pickup truck. I even managed to spray the primer without too many drips. I thought, “Great! Ready for paint!” I skipped the sanding step. I figured, “It looks good enough.”
The next day, I sprayed the color. It went on okay. But then, as it dried, I saw it. Little bumps. Tiny bits of dust. A slightly uneven sheen in places. It looked like I had sprayed it in a sandstorm, even though I had a pretty clean garage. The paint seemed to cling to these little rough spots.
I was so disappointed. I had spent weeks on prep work. All that effort, and the final paint job looked… bumpy. It was a harsh lesson. That truck served me well, but every time I looked at the paint, I cringed a little. It taught me that every step matters, especially the ones you might be tempted to skip.
Understanding the Primer Coat
Primer acts like glue. It helps the paint bond to the metal or old paint. It also fills in tiny scratches. These scratches happen during sanding or repair. Primer makes the surface more even. This means your paint color will look more uniform.
There are different kinds of primers. Some are for filling. Others are for adhesion. Most primers need to be sanded. This makes the surface super smooth. It’s like preparing a wall for wallpaper. You want it flat and clean.
Primer also helps with color. It gives the color coat a good base to lay on. This can affect the final color. A gray primer is common. It works well for most colors. Some bright colors might need a white primer. This helps them pop.
The Science Behind the Smoothness: How Sanding Primer Works
Sanding primer isn’t about removing paint. It’s about refining the surface. Think of it like polishing a gem. You’re not taking away the gem. You’re making it shine.
When you spray primer, tiny particles can settle on it. Or the spray might not be perfectly uniform. These create little high spots and low spots. When you sand, you gently knock down the high spots. You also smooth out any rough texture.
This creates a level playing field. The next coat of paint can then lay down evenly. It sticks to a uniformly smooth surface. This prevents the paint from pooling in low spots or beading up on high spots. It’s all about creating that perfect, flat surface.
Primer Perfection Checklist
What to Look For:
- Tiny dust specks
- Orange peel texture
- Uneven sheen
- Slight runs or sags
- Any grit or debris
Real-World Scenarios: When Primer Becomes a Problem
Imagine you’ve just finished priming your car door. You let it cure for the recommended time. Then you run your hand over it. It feels a bit rough. That roughness is the problem. It’s the dust that settled. It’s the slight texture from the spray.
If you paint over this, those little bumps will show. They might even feel gritty under your fingers. The paint might not adhere as well to these rough patches. This can lead to paint lifting later. Or it can just look bad. It’s like trying to write on sandpaper. The pen won’t glide.
In a professional shop, the paint booth has filtered air. This keeps dust out. But even then, slight imperfections can happen. For a DIY job at home, dust is a bigger enemy. That’s why sanding is your best defense.
The Grit Guide: Choosing the Right Sandpaper
This is where many people get confused. What grit sandpaper do you use? It’s not about heavy-duty sanding. It’s about light, gentle smoothing.
Most often, you’ll want a fine-grit sandpaper. Think 320-grit, 400-grit, or even 600-grit. The exact grit depends on the primer and what imperfections you need to fix. A general rule is to start with a medium grit and move to a finer one.
For most primers, 400-grit is a good starting point. If the surface is pretty smooth already, 600-grit might be all you need. The goal is to lightly scuff the surface. You don’t want to sand through the primer. If you do, you’ll have to re-prime that spot.
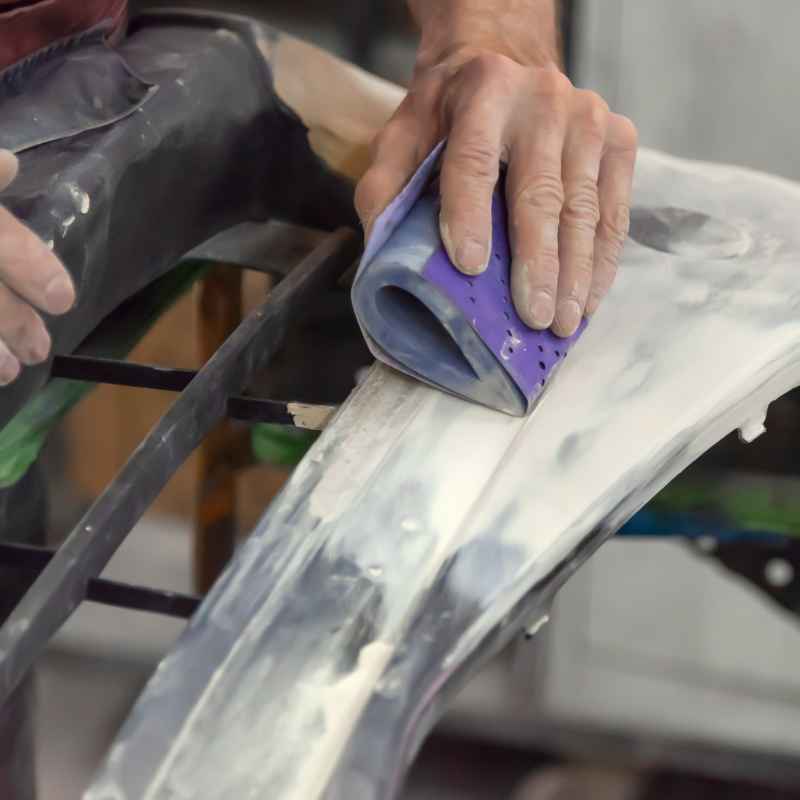
Wet sanding is often recommended. This means using sandpaper with water. The water lubricates the paper. It also washes away the primer dust. This makes for a much smoother finish. It also prevents the sandpaper from clogging up too fast.
How to Wet Sand Primer: A Step-by-Step Walkthrough
Wet sanding might sound tricky, but it’s quite straightforward. Grab some automotive-grade wet/dry sandpaper. Start with 400-grit. Get a bucket of clean water. A small sponge can help too.
First, dip the sandpaper in the water. Keep it wet as you sand. Use gentle, even pressure. Sand in one direction or in a back-and-forth motion. Work in small sections. Rinse the sandpaper often. This clears away the primer dust.
As you sand, you’ll see a milky residue. That’s the primer dust mixing with water. Keep an eye on the surface. You want to achieve a dull, uniform finish. This means all the shiny spots are gone.
Once you’ve sanded an area with 400-grit, rinse the surface thoroughly. Let it dry. Inspect it. If it looks smooth and feels good, you can move to a finer grit, like 600-grit. Repeat the process. This second pass refines the surface even more.
After the final sanding, wash the car panel again. Make sure all residue is gone. Let it dry completely. You should have a surface that feels like smooth glass.
Wet Sanding Tips for Beginners
- Keep it Wet: Always use water.
- Gentle Pressure: Don’t push too hard.
- Work in Sections: Don’t try to do it all at once.
- Rinse Often: Keep sandpaper clean.
- Check Your Work: Look for a dull, even finish.
Mistakes to Avoid: Common Sanding Pitfalls
One big mistake is using the wrong grit. If you use sandpaper that’s too coarse, you can scratch the primer too deeply. You might even sand through it. This means you’ll need to re-prime.
Another error is not sanding enough. If you’re still seeing shiny spots or feeling bumps, you haven’t achieved a uniform matte finish. The paint won’t lay down right.
Skipping the final rinse and wipe-down is also a common mistake. Any primer dust left on the surface will end up in your paint job. This defeats the whole purpose.
And of course, the biggest mistake is skipping the sanding altogether. As I learned the hard way, it’s a step you really can’t afford to miss for a quality finish.
When Is Primer Good Enough? Signs You Can Move On
You’re done sanding primer. How do you know it’s ready for paint? The surface should look and feel uniform. It should have a dull, matte appearance. All shiny spots should be gone.
Run your hand over the surface. It should feel smooth, like fine-grit sandpaper. If you feel any roughness or grit, you need to sand a bit more in that spot.
Another test is to wipe the surface with a tack cloth after drying. A tack cloth picks up any lingering dust. If the tack cloth picks up a lot of material, you may have sanded too aggressively or didn’t rinse well enough. Ideally, it picks up very little.
The key is that the primer surface should feel like a smooth wall ready for paint. It’s not about making it perfect like glass, but about making it uniformly smooth and receptive to the next layer.
The Role of Tack Cloths and Final Prep
After sanding and rinsing, the surface needs to be completely dry. Then, you use a tack cloth. A tack cloth is a sticky material. It’s designed to pick up fine dust particles. You gently wipe down the entire primed surface with it.
This is a critical step. Even after rinsing and drying, microscopic dust can settle. The tack cloth is your final barrier against these tiny imperfections. Use light pressure. Don’t scrub. You want to lift the dust, not smear it.
Once you’ve tacked the surface, try not to touch it with your bare hands. Your skin oils can leave marks. These can affect paint adhesion and appearance. Wear clean gloves if possible.
This thorough prep ensures the primer is as clean and smooth as possible. It sets the stage for the color coat to go on beautifully.
What This Means for Your Car’s Paint Job
Sanding primer isn’t just about making it look good now. It’s about making it last. A properly prepped surface means the paint will adhere better. This reduces the chances of peeling or chipping down the road.
A smooth primer layer also helps the paint coat lay down more evenly. This means you get a more uniform color and sheen. It’s what gives that deep, glossy look that professionals achieve.
If you skip sanding, you risk seeing every little flaw. Dust specks, orange peel texture, and unevenness will be visible. It can make your car look like it was painted in a garage, not a professional booth.
It’s the difference between a car that looks great for years and one that starts to look tired and worn quickly. The investment in sanding pays off in the long run.
Primer Sanding Myth vs. Reality
Myth: Sanding primer is only for show. Reality: It’s crucial for paint adhesion and a smooth finish.
Myth: You can skip sanding if the primer looks okay. Reality: Microscopic imperfections are always present.
Myth: Any sandpaper will do. Reality: Fine grits (320-600) are essential for a smooth finish.
Myth: Wet sanding is too complicated. Reality: It’s simple and provides a better result.
Can You Paint Over Un-sanded Primer?
Technically, yes. Paint will stick to un-sanded primer. But the quality of that adhesion and the final look will suffer. Primer is designed to be sanded. Its texture and slight porosity benefit from a light sanding.
If you paint over un-sanded primer, you might encounter issues like:
Poor adhesion
Uneven color
Visible imperfections (dust, texture)
A less durable paint job
So, while it’s possible, it’s strongly advised against if you want a professional-quality result. It’s like building a house on a shaky foundation. It might stand, but it won’t be its best.
What if You Sand Through the Primer?
This is a common concern. If you sand too aggressively, you might see the original surface underneath. This could be bare metal, filler, or old paint. Don’t panic!
If this happens, you just need to spot repair. Clean the area thoroughly. Then, re-apply primer to just that spot. Let it dry completely. Then, lightly sand that new primer patch until it’s smooth and flush with the surrounding primer.
Once that spot is smooth, you might want to give the entire panel a very light scuff with your final grit sandpaper. This ensures everything is uniform. Then, clean and tack the entire panel again before painting. It’s a bit of extra work, but it’s fixable.
Spot Repairing Sanded-Through Primer
1. Clean: Wash the area. 2.
Re-prime: Apply a light coat to the spot. 3. Dry: Let it cure fully.
4. Sand: Smooth the spot gently. 5.
Inspect: Ensure it’s level. 6. Re-tack: Prepare for paint.
The Link Between Primer Sanding and Paint Adhesion
Paint adhesion is all about creating a surface that the new paint can grab onto. Primer itself helps with this. But the sanding of the primer creates a microscopically rougher surface. This roughness gives the topcoat more tiny points to bond with.
Think of it like a Velcro strip. One side is smooth, the other is fuzzy. The fuzzy side is what the other part of the Velcro sticks to. Sanding primer makes its surface a little bit “fuzzier” at a microscopic level. This helps the paint latch on more securely.
Without this light mechanical adhesion, the paint relies mostly on chemical adhesion. While primer provides chemical adhesion, the mechanical aspect from sanding significantly boosts the overall bond strength. This leads to a more durable and long-lasting paint finish.
Final Thoughts: The Value of a Little Extra Effort
So, to answer the question directly: Yes, you absolutely should sand primer before painting a car. It’s not an optional step if you’re aiming for a professional, durable finish. It might seem like an annoyance, an extra bit of work when you’re eager to see the final color.
But this small effort makes a huge difference. It’s the foundation of a great paint job. It ensures your paint sticks well. It means the finish will be smooth and free of imperfections. It’s about quality and longevity.
Don’t let that little bit of extra sanding time deter you. The results will speak for themselves. Your car will look better, and the paint job will last longer. It’s a classic case of “measure twice, cut once” or, in this case, “sand twice, paint once” for the best outcome.
Frequently Asked Questions About Sanding Primer Before Painting a Car
What grit sandpaper is best for sanding primer on a car?
For most automotive primers, fine-grit sandpaper like 320-grit, 400-grit, or 600-grit is recommended. You want to lightly scuff and smooth the surface, not remove a lot of material. Starting with 400-grit and moving to 600-grit is a common and effective approach.
Do I need to wet sand or dry sand primer?
Wet sanding is generally preferred for automotive primers. Using water as a lubricant helps keep the sandpaper from clogging, provides a smoother finish, and reduces dust. It makes the process cleaner and more effective for achieving a flawless surface.
How long should I wait before sanding primer?
You should wait until the primer is fully cured. Check the primer manufacturer’s instructions for specific drying and curing times. This can range from a few hours to 24 hours or more, depending on the type of primer, temperature, and humidity.
Sanding too early can pull up the primer and cause issues.
What happens if I don’t sand primer before painting?
If you don’t sand primer, your paint job may have a rough texture, visible dust specks, or an uneven sheen. The paint might not adhere as well, potentially leading to premature chipping or peeling. It significantly compromises the final look and durability of the paint job.
How do I know if I’ve sanded the primer enough?
The primer surface should look and feel uniformly dull or matte. All shiny spots should be gone. When you run your hand over it, it should feel smooth, like fine-grit sandpaper, not gritty or rough.
If you see any glossy areas, you need to continue sanding.
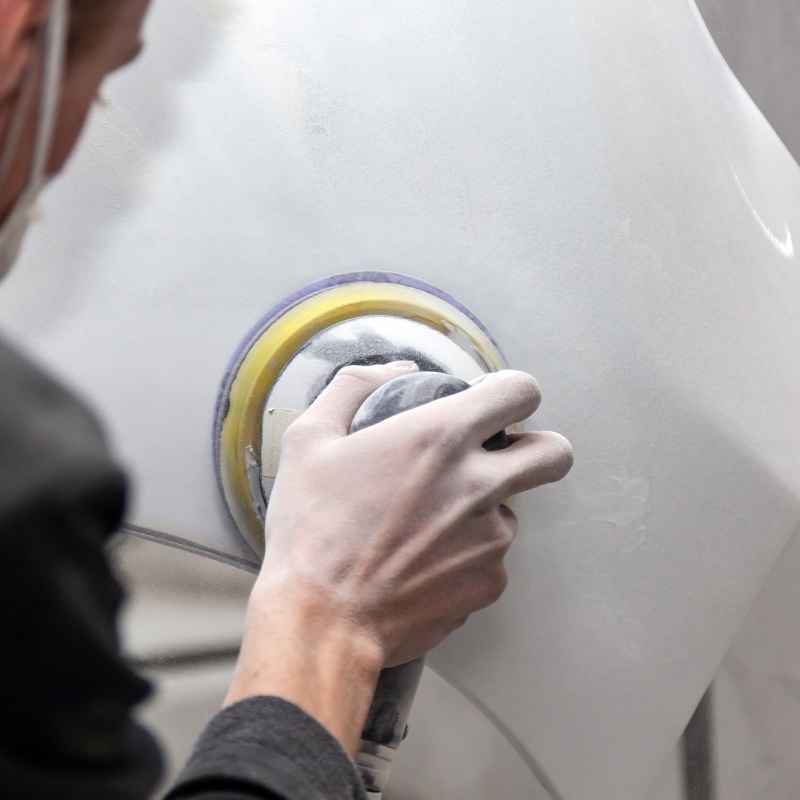
Can I use an orbital sander on primer?
Yes, an orbital sander can be used, but with extreme caution and the right pads. It’s essential to use a very light touch and a fine-grit sanding pad (e.g., 400-600 grit) to avoid sanding through the primer. Hand sanding or using a sanding block often provides more control for beginners.
What is a “tack cloth” and why is it important after sanding?
A tack cloth is a lightly sticky cloth used to pick up fine dust and particles from a surface. After sanding primer and cleaning the area, a tack cloth is used to remove any remaining microscopic dust before painting. This ensures no debris is trapped in the paint layer.