How Long Does It Take To Change Brakes On A Car?
Changing car brakes typically takes between 1 to 3 hours per axle for a DIYer with basic tools and experience. Professional mechanics can often complete the job in 45 minutes to 1.5 hours per axle. The exact time depends on the vehicle, the mechanic’s skill, and unexpected issues.
Understanding Brake Job Timing
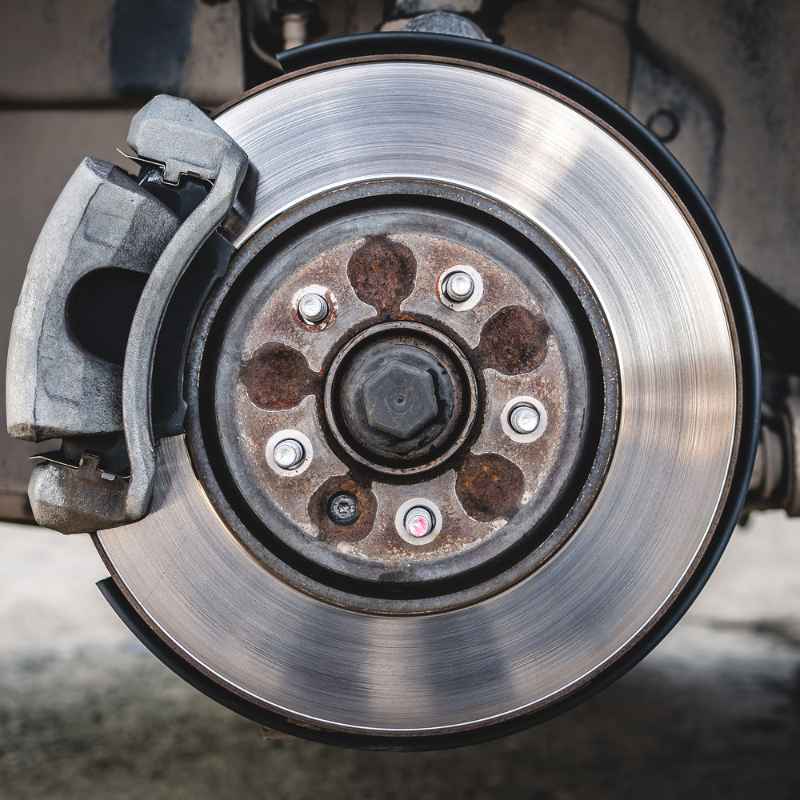
When we talk about changing brakes, we usually mean replacing the brake pads. Sometimes, you might also need to replace the brake rotors. These are the metal discs your brake pads clamp onto.
If they’re worn down or warped, new pads won’t work as well. This is a very important part of keeping your car safe.
So, what goes into the time it takes? A few key things are involved. First, you need to get the car up and secure.
Then, you have to take off the wheel. After that, you remove the old brake parts. You then clean up the area.
Next, you install the new parts. Finally, you put the wheel back on and lower the car. It sounds straightforward, but each step has its own little challenges.
My Own Brake Change Adventure
I remember the first time I decided to tackle changing my own brake pads. It was on my old sedan, a fairly simple car. I’d watched a dozen YouTube videos.
I had all the tools laid out. I thought, “This will take me maybe two hours, tops.” I was so wrong.
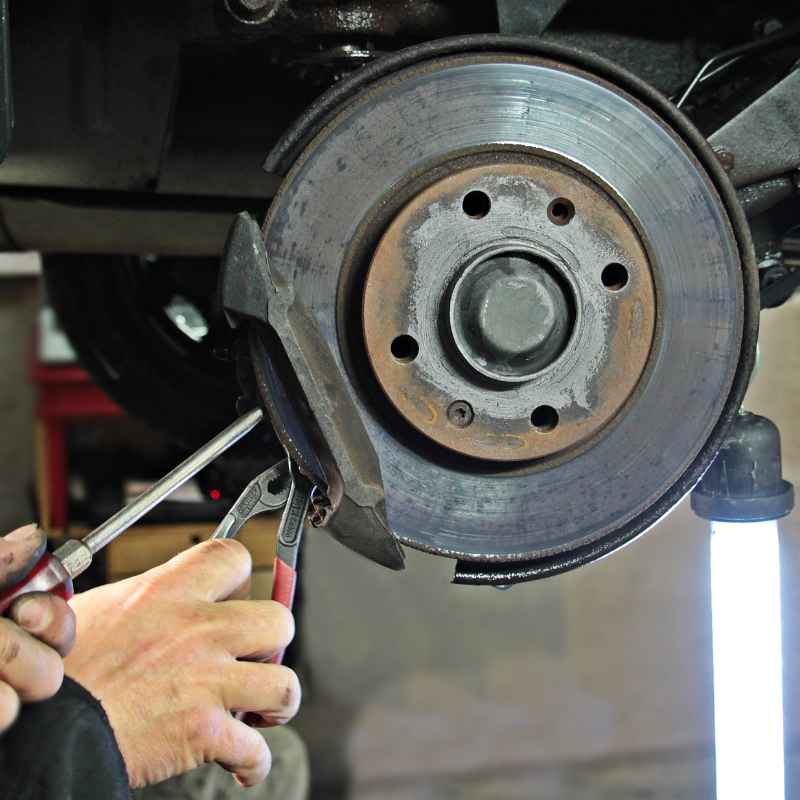
I had the car jacked up, and one wheel was off. That part was fine. Then came removing the caliper.
It has these bolts that seemed like they were fused on with super glue. I tried my ratchet. No luck.
I grabbed a breaker bar. Still, they wouldn’t budge easily. After about twenty minutes of sweating and grunting, I finally got one loose.
Then, the other one decided to be difficult. It felt like my whole afternoon was already gone, and I hadn’t even touched the old pads. That’s when I learned that some bolts just don’t want to cooperate.
It took me a solid three hours just for one side of the front axle. The other side went a bit faster, but I was much more careful. In the end, it took me most of a Saturday.
It taught me a lot about patience and having the right tools for stubborn bolts!
Factors Affecting Brake Change Time
Vehicle Make and Model: Some cars have easier access to brake components. Others hide them behind complex wheel designs or have specific bracket setups.
Condition of Parts: Rusted bolts or stuck components add significant time. If rotors need replacing, that’s another step.
Tool Availability: Having the right sockets, wrenches, and a good jack makes a huge difference. Specialty tools might be needed.
Experience Level: A first-timer will always take longer than someone who’s done it many times.
Unexpected Issues: Things like seized caliper bolts, damaged brake lines, or needing to replace other related parts can extend the job.
What Goes Into a Typical Brake Job
Let’s break down the actual steps a mechanic or an experienced DIYer follows. This helps explain why it takes the time it does.
Preparation and Access
First, the car needs to be lifted. This is crucial for safety. A hydraulic jack is used to raise the vehicle.
Then, jack stands are placed under the frame. This ensures the car stays up securely. You can’t work on brakes with the car bouncing!
Next, the wheel needs to come off. This involves loosening lug nuts while the car is on the ground. Then, you finish removing them with the car in the air.
The wheel is then pulled off. This gives you access to the brake rotor and caliper. This whole setup process is important for safety.
Removing Old Brake Components
Once the wheel is off, you see the brake caliper. This part holds the brake pads. It usually bolts onto a bracket.
You need to remove these caliper bolts. Often, these bolts are tight. Some can be tricky to reach.
After the caliper bolts are out, you can often pivot the caliper up or slide it off. Sometimes, you need to unbolt the caliper bracket too. This bracket holds the caliper in place.
It might also need to be removed to get the rotor off.
If the rotors need changing, you’ll need to remove the rotor. It usually has a couple of small screws holding it in place. Sometimes, it’s just stuck on by rust.
A few taps with a hammer can loosen it. Then, you pull the rotor off the hub. This step can be surprisingly tough if rust has set in.
Cleaning and Inspection
Before putting on new parts, cleaning is key. Mechanics often clean the caliper bracket and the hub where the rotor sits. This removes rust and old grease.
A wire brush is useful here.
They also inspect the brake lines. These are the hoses that carry brake fluid. You want to make sure they aren’t cracked or leaking.
The caliper itself is checked for any damage. This is also the time to look at the wheel studs and the lug nuts.
Installing New Brake Components
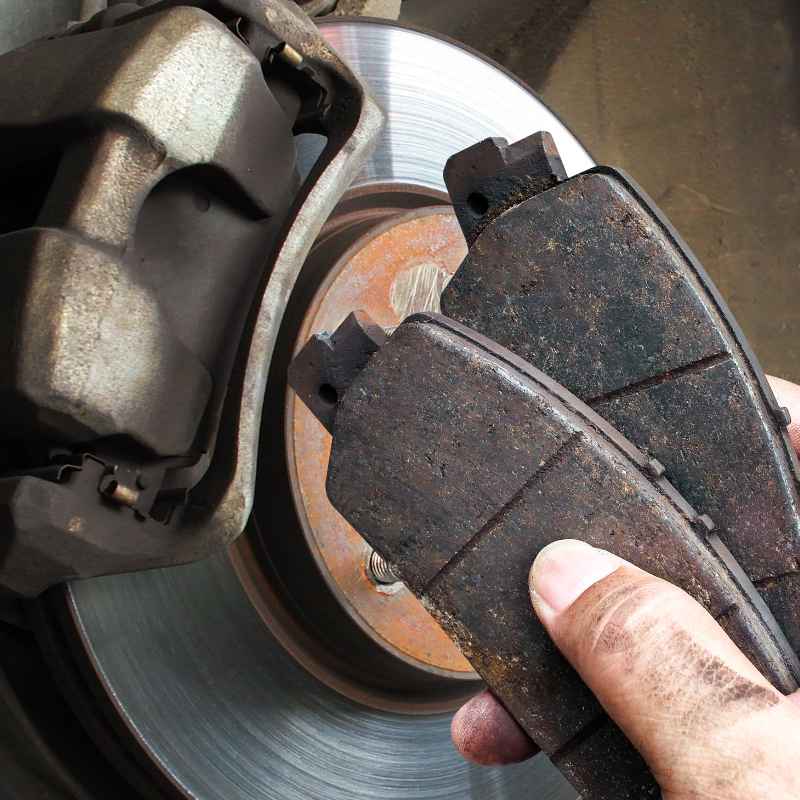
Putting on new brake pads is usually straightforward. They often just slide into the caliper bracket. Some pads have small clips or shims.
These need to be installed correctly. The caliper then gets put back over the new pads. The caliper bolts are reinstalled and tightened.
If new rotors were needed, they slide onto the hub. New screws might be used to hold them in place. Then the caliper goes back on.
It’s a bit like putting puzzle pieces together. Making sure everything sits right is important for braking performance.
Finishing Up
Once the new pads and rotors are in place, and the caliper is secured, it’s time to put the wheel back on. The lug nuts are hand-tightened first. Then, the car is lowered back to the ground.
The lug nuts are then tightened in a star pattern. This ensures the wheel is seated evenly.
After the wheels are on and the car is on the ground, there’s one final, crucial step. You need to pump the brake pedal several times. This pushes the caliper pistons back out and seats the new brake pads against the rotors.
If you don’t do this, you’ll have no brakes the first time you press the pedal!
Quick Scan: Brake Pad Replacement Timeline (per axle)
| Task | Estimated Time (DIYer) | Estimated Time (Pro) |
| Vehicle Lift & Wheel Removal | 10-15 min | 5-10 min |
| Caliper & Pad Removal | 20-40 min | 10-20 min |
| Rotor Removal (if needed) | 10-20 min | 5-10 min |
| Cleaning & Inspection | 10-15 min | 5-10 min |
| New Pad & Rotor Install | 20-30 min | 10-15 min |
| Caliper Reinstall & Torque | 10-15 min | 5-10 min |
| Wheel Reinstall & Lower | 10-15 min | 5-10 min |
| Total (Per Axle, no major issues) | 1 hr 10 min – 2 hr 30 min | 45 min – 1 hr 20 min |
Why DIY vs. Professional Time Differs
You might wonder why a mechanic can do it so much faster. It’s not just about speed. They have specialized tools.
They have lifts that get the car up quickly and safely. They also have years of practice.
Mechanics often work in bays with all their tools within reach. They know exactly which socket to grab. They’re used to applying the right amount of force.
They also have a system. They follow a routine that’s efficient. For them, a brake job is a common task.
It’s like an experienced chef chopping vegetables.
For a DIYer, it’s different. You might be working in your driveway. You might not have every specialized tool.
You might have to stop and look up a step. You might be fighting rust on bolts that a pro has seen a hundred times. Even just getting the car safely on jack stands takes time for a beginner.
And let’s not forget the clean-up afterward.
Real-World Context: When Brakes Need Changing
Brake jobs aren’t just about time; they’re about safety. Your brakes are arguably the most critical safety system on your car. They are what stop you from crashing.
So, when do you know they need changing?
Signs Your Brakes Need Attention
There are several signals your car sends you. The most common is a squealing noise. This usually comes from the wear indicator on the brake pad.
It’s a small metal tab designed to screech when the pad is getting thin.
Another sign is a grinding sound. This is more serious. It means the brake pad material is gone.
The metal backing of the pad is grinding against the metal rotor. This can damage the rotor, costing more to fix. You might also notice your brake pedal feels spongy or goes lower than usual when you press it.
This could mean air in the brake lines or a leak.
A vibrating steering wheel or pedal when braking is another warning. This often means the brake rotors are warped. They aren’t a flat surface anymore.
This leads to uneven braking and a bad feeling.
Normal vs. Concerning Brake Behavior
Normal:
- Slight brake dust on wheels.
- Smooth, firm brake pedal response.
- Quiet braking under normal conditions.
Concerning:
- High-pitched squealing when braking.
- Deep grinding sounds.
- Brake pedal feels soft, spongy, or sinks to the floor.
- Vibrations in the steering wheel or pedal when braking.
- Car pulls to one side when braking.
Factors Influencing Brake Wear
How often you need new brakes depends on a few things. Your driving habits are a big one. If you do a lot of city driving, you’ll stop and start more.
This wears out brakes faster. Highway driving is easier on them.
Terrain also plays a role. Driving in hilly areas means you’ll use your brakes more on downhills. The weight of your vehicle and how much you carry inside it matters too.
A heavier car needs more force to stop.
The quality of the brake parts you use is another factor. Cheaper pads might wear out faster. High-performance pads might last longer but can be more expensive.
Finally, environmental factors like road salt in winter can cause rust. This can lead to premature wear or damage to rotors and other components.
What This Means for Your Wallet and Schedule
Knowing how long a brake job takes helps you plan. For DIYers, it means setting aside a good chunk of your weekend. You need to be prepared for the unexpected.
Having some extra time is always a good idea. It’s better to finish a job safely than rush it.
For those going to a shop, it affects the cost. Labor is a big part of the bill. A faster job means less labor cost.
However, don’t choose a shop just because they are the cheapest or fastest. Quality work is important for your safety.
A typical brake job at a shop can cost anywhere from $300 to $600 or more per axle. This includes parts and labor. Replacing pads only is usually less than replacing pads and rotors.
If you need all four wheels done, the cost doubles.
Cost Breakdown: What You Pay For
Parts:
- Brake Pads: These are the friction material.
- Brake Rotors: The metal discs that pads press against.
- Hardware Kit: Small springs and clips that hold pads in place.
Labor:
- Mechanic’s time to diagnose the issue.
- Time to safely lift the vehicle and remove wheels.
- Time to remove old parts and install new ones.
- Time to clean components and check other brake parts.
- Time to torque fasteners and lower the vehicle.
Quick Fixes and Tips for Brake Maintenance
While you can’t really “fix” worn brakes without replacing them, you can do things to make them last longer and ensure they work well.
Best Practices for Brake Longevity
Smooth Braking: Avoid sudden, hard braking whenever possible. Anticipate stops. Let your car slow down gradually.
This puts less stress on the pads and rotors.
Avoid Overloading: Don’t consistently carry excessive weight in your car. This makes your brakes work harder.
Regular Checks: Get your brakes inspected regularly, especially during oil changes. Catching issues early can prevent more expensive repairs down the line. A mechanic can tell you the remaining life on your pads.
Cleanliness: While you can’t actively clean your brakes, avoid driving through deep puddles or mud unnecessarily, which can splash debris onto components.
Use Quality Parts: When it’s time to replace, opt for reputable brands. They tend to last longer and perform better.
Simple Checks You Can Do
Visual Inspection: Look through your wheel spokes. Can you see the brake pad material? It should be at least a quarter-inch thick.
If it looks very thin, they need changing.
Listen Carefully: Pay attention to any new sounds when you brake. Squealing or grinding are red flags.
Feel the Pedal: Notice if your brake pedal feels different. Spongy, low, or pulsating feelings need checking.
Frequent Questions About Brake Change Time
How long does it take to change all four brakes on a car?
Changing all four brakes means doing both the front and rear axles. If one axle takes 1-2 hours for a DIYer, then all four could take 2-4 hours. For a professional, it might be 1.5 to 3 hours for all four wheels.
Can I change my own car brakes if I’m not a mechanic?
Yes, many people with basic tools and some mechanical aptitude can change their own brakes. It requires patience, following instructions carefully, and prioritizing safety. Watching tutorials and reading guides is highly recommended.
What is the biggest time-consuming part of changing brakes?
Often, the most time-consuming part is dealing with seized or rusted bolts. This includes caliper bolts or lug nuts. If the rotors are stuck due to rust, that can also add significant time and effort.
How long does it take to bed in new brake pads?
Bedding in new brake pads is a process, not a time duration. It involves a series of moderate stops followed by periods of cooling. This usually takes about 15-30 minutes of driving.
It ensures the pad material transfers evenly to the rotor surface.
Should I change front and rear brakes at the same time?
No, not necessarily. Front brakes typically wear out faster than rear brakes because they handle most of the stopping force. You can change them independently as needed.
However, it’s good practice to replace both pads on the same axle at the same time for even braking.
What are the risks of not changing brakes when needed?
Not changing worn brakes is very dangerous. You risk significantly longer stopping distances, which can lead to accidents. You can also cause more damage to other brake components like rotors, leading to more expensive repairs.
In severe cases, brake failure can occur.
Conclusion
So, how long does it take to change brakes on a car? It’s a question with many answers. For a DIYer, expect a few hours for one axle, possibly more if you hit snags.
For a pro, it’s much quicker, but still a significant job. Understanding the steps involved and the potential issues can help you appreciate the time and expertise required for this vital car maintenance. Always prioritize safety and don’t rush the job, whether you do it yourself or take it to a shop.
Products related to this article
Sponsored / affiliate links. As an Amazon Associate I earn from qualifying purchases. I may earn additional commission from eligible campaigns.