How To Change Carpet in Car: Essential Guide
Changing your car’s carpet is a rewarding DIY project that revitalizes your interior. With careful preparation, patience, and our step-by-step guide, you can successfully remove old, worn-out carpeting and install a fresh, like-new replacement, enhancing your car’s comfort and value without needing professional help. Let’s get started!
Hey there, fellow car lovers! Md Meraj here. Ever look down at your car’s floor and wish it looked a little… better? Maybe the carpet is faded, torn, or just plain smelly. We’ve all been there! It’s easy to feel discouraged, thinking this is a job for a professional mechanic. But guess what? You absolutely can tackle this yourself!
Replacing your car’s carpet might seem like a big undertaking, but it’s actually a fantastic way to give your car an affordable makeover. It’s surprisingly achievable for DIY beginners, and the results are incredibly satisfying. Imagine driving around in a car that feels fresh and clean, all because you gave it a little TLC yourself!
In this guide, I’ll walk you through every single step, breaking it down into simple, easy-to-follow instructions. We’ll cover everything from gathering your tools to laying down that brand-new carpet. You’ll gain the confidence to transform your car’s interior, saving money and feeling proud of your work. Ready to make your car’s interior shine again? Let’s dive in!
Why Change Your Car’s Carpet?
Your car’s carpet is more than just a floor covering; it’s a key component of your vehicle’s interior comfort and aesthetics. Over time, it’s subjected to a lot of wear and tear. Think about it: muddy boots, spilled drinks, pet paws, the general grime of daily life – it all takes a toll.
Here are some common reasons drivers decide to replace their car’s carpet:
- Wear and Tear: Fraying edges, worn-out patches, and holes are common signs that the carpet has reached the end of its lifespan.
- Stains and Odors: Deep-set stains from spills or persistent odors from pets, smoke, or mold can be impossible to remove completely, making replacement the best option.
- Water Damage: Leaks from windows, doors, or sunroofs can lead to mold and mildew growth beneath the carpet, compromising air quality and structural integrity. If you notice a persistent musty smell or dampness, it’s a good indicator of potential water damage.
- Aesthetic Upgrade: Sometimes, you just want a fresh look! A new carpet can completely change the feel of your car’s interior, making it look newer and more appealing.
- Selling Your Vehicle: Replacing worn carpets can significantly boost your car’s appeal and perceived value if you’re planning to sell it.
Addressing these issues not only improves the look and feel of your car but also contributes to a healthier environment inside your vehicle.
Before You Begin: Planning and Preparation
Taking the time for good preparation is half the battle. It ensures the job goes smoothly and prevents frustrating roadblocks. Think of it as laying the foundation for a successful project!
Step 1: Assess Your Needs and Order Your Carpet
The first and most crucial step is getting the right carpet for your specific vehicle. Car interiors are not one-size-fits-all. You’ll need carpet that is precision-cut for your car’s make, model, and year.
- Identify Your Vehicle: Make sure you know your car’s exact year, make, and model.
- Choose Your Carpet Type: Most replacement carpets come in different materials (like cut-pile or loop-pile) and colors. Consider durability, ease of cleaning, and how it matches your car’s interior. Cut-pile generally feels plusher and looks more luxurious, while loop-pile is often more durable and resistant to crushing.
- Consider Sound Deadening: Many carpet kits come with an integrated jute backing or can be ordered with an optional mass-backed, sound-deadening underlayment. This is highly recommended for a quieter, more upscale ride.
- Where to Buy: Many online automotive upholstery specialists offer custom-fit carpet kits. Websites like Auto Custom Carpets are well-regarded sources. You can also find universal carpet rolls, but these require significant cutting and shaping, making them less ideal for beginners.
Tip: When ordering, check if the kit includes pieces for the trunk or cargo area, as these are sometimes sold separately.
Step 2: Gather Your Tools and Supplies
Having everything you need at hand will make the process much faster and more enjoyable. Don’t worry; most of these are common household tools or easily accessible from an auto parts store.
Here’s a list of what you’ll likely need:
- New Carpet Kit: The custom-fit carpet you ordered.
- Screwdrivers: A set of Phillips and flathead screwdrivers, including some longer ones for hard-to-reach bolts.
- Socket Wrench Set: For removing seat bolts and other hardware.
- Pliers: Various types (needle-nose, regular) can be helpful for clips and connectors.
- Trim Removal Tools: These plastic tools are essential for safely prying off interior plastic panels without scratching or breaking them. They are inexpensive and widely available at auto parts stores or online. You can learn more about their importance on resources like Popular Mechanics.
- Utility Knife or Heavy-Duty Scissors: For trimming any excess carpet or modifying it if necessary.
- Shop Vacuum: For thorough cleaning of the old carpet and the car’s floor pan.
- Gloves: To protect your hands from dirt and sharp edges.
- Safety Glasses: Always a good idea when working on your car to protect your eyes.
- Putty Knife or Scraper: For removing stubborn adhesive or debris.
- Optional: Heat Gun or Hair Dryer: Can be helpful for molding the new carpet, especially around curves and consoles.
Pro Tip: Invest in a good set of trim removal tools. They are specifically designed to get under plastic clips without causing damage, saving you potential headaches and repair costs down the line.
Step 3: Prepare Your Workspace
You’ll be working inside your car, so ensure you have adequate space and ventilation. If you’re doing this at home, a garage or a driveway is ideal. Make sure the car is parked on a level surface.
- Ventilation: Open your car doors to ensure good airflow, especially if it’s been sitting for a while.
- Lighting: Good lighting is essential for seeing those stubborn bolts and clips. If you’re working in a garage, consider using extra work lights.
- Temperature: Avoid working in extreme heat or cold. A moderate temperature makes the materials (and you!) easier to work with.

Step-by-Step Guide to Changing Your Car Carpet
Now that you’re prepped and ready, let’s get down to business. Follow these steps carefully, and you’ll have that new carpet installed in no time!
Step 1: Remove Seats and Other Obstructions
This is often the most time-consuming part, but it’s critical for accessing all areas of the old carpet and ensuring a clean installation of the new. Take your time and be methodical.
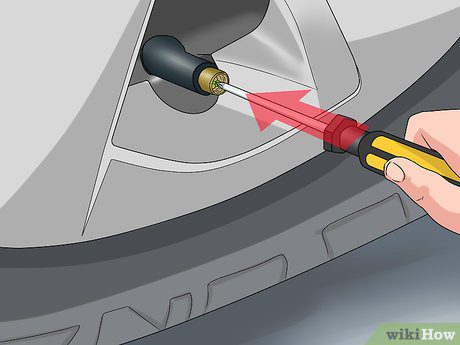
- Remove Seat Belts: Unbolt the lower anchor points of your seat belts. They are usually found near the base of the seat or on the floor tunnel. Keep the hardware organized.
- Remove Seats: Most car seats are held in place by four bolts at the base. Slide the seat all the way forward to access the rear bolts, and all the way back to access the front bolts. Use your socket wrench to remove them. For power seats, you might need to be careful not to disconnect any electrical harnesses unless absolutely necessary. If you disconnect them, ensure you know how to reconnect them properly.
- Remove Center Console: This varies greatly by vehicle. Some consoles lift out easily after removing a few screws, while others might be more integrated and require careful prying or disconnection of shifters or other components. Consult your car’s manual or an online forum specific to your vehicle if you’re unsure.
- Remove Door Sill Plates (Scuff Plates): These are usually plastic or metal strips that cover the edge of the carpet where the door opens. They are typically held in by clips or small screws. Use your trim removal tools to gently pry them upwards or out.
- Remove Kick Panels and Interior Trim: Remove any plastic trim panels near the pedals or dashboard that might be covering the carpet edge.
Safety First: If you’re removing heavy seats alone, ask for help to avoid injury. Always disconnect the battery’s negative terminal before working with any electrical components to prevent short circuits.
Step 2: Remove the Old Carpet
With all obstructions out of the way, the old carpet should be relatively loose. You might need to cut it into smaller, more manageable pieces to make removal easier.
- Lift and Pull: Start at an edge and begin lifting the old carpet. It might be glued down in some areas, especially around the edges or under the console.
- Cut if Necessary: If the carpet pieces are too large or stuck, use your utility knife or heavy-duty scissors to cut them into smaller sections. Be careful not to cut into the car’s floor pan!
- Peel Away: Work your way around the car, peeling up and removing the old carpet. Pay attention to the areas around the transmission tunnel, pedals, and seat mounts, as these can be trickier.
- Remove Underlayment: If there’s a separate foam or jute underlayment beneath the carpet, remove that as well.
Step 3: Clean the Floor Pan Thoroughly
This is your chance to make the foundation for your new carpet spotless, which is essential for a good fit and to prevent odors.
- Vacuum: Use your shop vacuum to remove all loose dirt, debris, and dust from the floor pan, crevices, and corners.
- Scrape and Scrape Again: Use a putty knife or scraper to remove any old adhesive, tar, or hardened gunk.
- Wipe Down: Wipe down the entire floor pan with a damp cloth. For any stubborn spots or grease, you can use a mild degreaser or all-purpose cleaner, but ensure the area is completely dry afterward. Check for any rust spots and address them appropriately. For minor surface rust, a wire brush and rust converter can be effective.
- Check for Leaks: While the floor is exposed, inspect the floor pan, firewall, and around windows/doors for any signs of corrosion or damage. Fix any issues before installing the new carpet.
Important: A clean and dry floor pan is crucial. Any remaining moisture or debris can lead to new odors or damage the new carpet’s backing.
Step 4: Test Fit the New Carpet
Your new carpet kit is designed to fit your car, but it’s still a good idea to test fit it before any permanent placement or gluing.
- Unpack Carefully: Unroll the new carpet and place it loosely into the car.
- Align Key Areas: Start by aligning the carpet around the transmission tunnel, pedal area, and seat mounting points.
- Check for Fit: Ensure the carpet lies relatively flat and covers the entire floor area. Some areas might be a little tight or need gentle coaxing.
- Identify Trim Areas: Note exactly where the carpet needs to be trimmed or adjusted, especially around the seat rails, pedals, and any obstructions. Your kit might have pre-cut holes for seat bolts, but you might need to slightly enlarge or adjust them.
Step 5: Trim and Adjust the New Carpet (If Necessary)
Most custom-fit kits require minimal trimming, but it’s better to be safe than sorry.
- Mark Trimming Areas: If the carpet is slightly too large in certain areas, use chalk or a light-colored marker to lightly indicate where it needs trimming.
- Cut Carefully: With a sharp utility knife, make small, precise cuts. It’s often better to trim too little and re-cut than to trim too much.
- Focus on Edges: Pay close attention to the edges that tuck under door sill plates or around console components. Ensure a clean, smooth fit.
- Trim Bolt Holes: If the pre-formed holes for seat bolts are too small, carefully enlarge them using your utility knife.
Helpful Tip: If your carpet is a bit stiff or needs to conform to a curve, a heat gun or hair dryer on a low setting can make it more pliable. Just don’t overheat it!
Step 6: Install the New Carpet
Now for the satisfying part – laying down your beautiful new carpet!
- Start Positioning: Begin by positioning the carpet, ensuring it’s aligned correctly.
- Secure Initially: If your carpet has a jute or rubber backing, it might stay in place reasonably well initially. Some kits might come with adhesive strips or recommend carpet adhesive for certain areas, especially around the transmission tunnel or edges. If adhesive is recommended, follow the manufacturer’s instructions carefully. A spray adhesive designed for automotive upholstery is a common choice.
- Work from Center Out: Gently press the carpet down, working from the center out towards the edges. This helps to avoid trapping air bubbles.
- Install Sound Deadening (if separate): If you purchased a separate sound-deadening material, install it before the main carpet. You can find excellent automotive sound deadening products from brands like Dynamat for a quieter cabin. Resources like Sound Deadener Showdown offer in-depth information on this topic.
Note: Many modern carpet kits are designed to “friction fit” without extensive adhesive, relying on molded shapes and pressure from reinstalled components. Check the instructions that came with your specific carpet kit.
Step 7: Reinstall Seats and Trim
Reassembly is the reverse of disassembly. Take your time to ensure everything is put back correctly and securely.
- Reinstall Trim Panels: Put back your door sill plates, kick panels, and any other trim pieces you removed. Ensure they snap or screw in securely.
- Bolt Down Seats: Carefully place the seats back into their original positions. Reinstall the four seat bolts for each seat. Make sure they are tightened properly for safety. If you have power seats, reconnect any electrical harnesses before bolting the seats down.
- Reattach Seat Belts: Bolt the seat belt anchor points back securely.
- Reattach Console: Reinstall your center console and any associated components.
- Final Check: Double-check all bolts, screws, and clips. Ensure everything is snug and in its correct place.
Step 8: Final Inspection and Clean-Up
You’re in the home stretch!
- Vacuum Again: Give the new carpet a thorough vacuuming to remove any dust or debris from the installation process.
- Inspect Fit: Look over the entire interior. Does the carpet lie flat? Are there any unsightly gaps? Are the seat belts easily accessible and functioning smoothly?
- Test Drive: Take your car for a short test drive. Listen for any unusual noises (like rattling trim) and check that all seats and seat belts function correctly.
Congratulations! You’ve successfully changed your car’s carpet!
What Are the Benefits of a New Car Carpet?
Replacing your car’s carpet offers a surprisingly wide range of advantages that go beyond just looks.
Here’s a breakdown of the key benefits:
| Benefit | Description | Impact |
|---|---|---|
| Improved Aesthetics | A new, clean carpet instantly refreshes the entire interior, making your car feel newer and more inviting. | Boosts visual appeal and owner satisfaction. |
| Enhanced Comfort | Fresh carpeting can feel softer underfoot and contribute to a more pleasant driving experience. | More enjoyable commutes and road trips. |
| Better Air Quality | Removes old, potentially moldy, or odor-trapping materials, leading to a cleaner cabin environment. | Healthier for you and your passengers. |
| Increased Vehicle Value | A well-maintained interior, especially with new carpets, can significantly increase a car’s resale value. | Potential for a higher return when selling. |
| Sound Insulation Boost | New carpet, especially with enhanced backing, can help dampen road noise and vibrations. | A quieter and more refined driving experience. |
| Easier Maintenance | Newer carpets are often treated to be more stain-resistant and easier to clean going forward. | Less worry about spills and future cleaning. |

Frequently Asked Questions (FAQ)
Q1: How long does it typically take to change car carpet?
A: For a beginner, realistically, expect to spend anywhere from 4 to 8 hours. This can vary based on your vehicle’s complexity (e.g., number of seats, console design) and your DIY experience. Taking your time is key!
Q2: Can I install car carpet myself without removing the seats?
A: It’s highly not recommended. Removing seats, especially the front ones, is essential to properly access and install the carpet, particularly around the seat mounting points and the transmission tunnel. Trying to work around them will result in a poor fit.
Q3: What if my new carpet doesn’t fit perfectly?
A: Custom-fit carpets are designed for your vehicle, but minor adjustments are sometimes needed. Check if the carpet needs trimming, or if it requires a bit of stretching or heat (using a hair dryer carefully) to conform to certain areas. If the fit is drastically wrong, contact your supplier.
Q4: Do I need special glue or adhesive?
A: Many modern custom-fit carpet kits are designed to friction-fit or use factory mounting points and don’t require extensive gluing. However, some kits might suggest adhesive for the transmission tunnel or edges. Always check the instructions that came with your carpet kit. If you do use adhesive, opt for a high-quality automotive carpet adhesive.
Q5: Is it worth spending extra on sound-deadening underlayment?
A: Absolutely! If your budget allows, an upgraded sound-deadening underlayment (also known as mass-backed or jute backing) can dramatically reduce road noise, heat, and vibrations entering the cabin, making your car significantly quieter and more comfortable. It’s a worthwhile investment for a premium feel.
Q6: What’s the difference between cut-pile and loop-pile carpet?
A: Cut-pile carpet has its loops cut at the top, giving it a plush, luxurious feel similar to household carpet. Loop-pile carpet has its loops intact, which makes it generally more durable, resistant to crushing, and easier to clean. The choice depends on the look and durability you prefer for your car.
Conclusion
Changing your car’s carpet might seem daunting at first, but as you’ve seen, it’s a completely manageable DIY project that can dramatically enhance your vehicle’s interior. By carefully planning, gathering the right tools, and following these step-by-step instructions, you can successfully transform your car’s cabin.
Imagine the satisfaction of sliding into a fresh, clean car, knowing you were the one who made it happen! Not only have you added value to your vehicle and improved your driving experience, but you’ve also gained valuable DIY skills and saved yourself some money. Remember to take your time, be patient, and enjoy the process. Your car (and your wallet) will thank you for it!