How To Detail Your Car Interior Like A Professional
This guide is here to help. We’ll break down exactly how to make your car’s inside look and feel amazing. You don’t need fancy tools or a huge budget.
We’ll cover everything from tough stains to keeping things sparkling. Get ready to learn how to detail your car interior and feel proud every time you open the door.
Detailing your car’s interior involves a thorough cleaning and protection process for all surfaces. This includes vacuuming, wiping down, and conditioning materials like leather, plastic, and fabric to restore their look and prevent damage, leading to a fresh, like-new feel.
The Deep Dive Into a Clean Car Interior
So, what does it really mean to detail your car’s interior? It’s more than just a quick wipe down. It’s a careful, step-by-step process.
We want to get into every nook and cranny. The goal is to make every surface look its best. We also want to protect it for the future.
Think about all the different parts inside your car. There’s the dashboard, the seats, the carpets, the headliner, and all the little door pockets. Each one needs a bit of special care.
We need to understand what materials they are made of. This helps us choose the right cleaning methods.
My First Attempt at Interior Detailing
I remember the first time I decided to really clean my car’s interior. It was a Saturday morning. The sun was shining, but inside my trusty old sedan, it was a different story.
Coffee spills from weeks ago had left faint rings on the center console. My daughter’s muddy footprints seemed permanently etched into the passenger-side floor mat. A fine layer of dust coated everything, making the black plastic look dull and gray.
I felt a wave of overwhelm. Where do I even start?
I grabbed a few paper towels and some household cleaner. Big mistake. The cleaner left streaks on the windows and made the plastic feel greasy.
The dust just seemed to move around. Frustration started to bubble up. I looked around at the chaos and thought, “This is hopeless.” That’s when I realized I needed a plan, not just random scrubbing.
I needed to learn how to do it right.
Getting Ready: Your Interior Detailing Toolkit
Before you start, gather your supplies. This makes the whole job much smoother. You don’t need a lot of fancy gadgets.
Most of these items are easy to find.
- Microfiber Towels: Lots of them! They are soft and won’t scratch.
- Vacuum Cleaner: A shop vac is great, but a good home one with attachments works too.
- All-Purpose Cleaner: Choose one safe for car interiors.
- Glass Cleaner: For crystal-clear windows.
- Interior Protectant: To shine and shield plastic and vinyl.
- Leather Cleaner & Conditioner: If you have leather seats.
- Carpet & Upholstery Cleaner: For fabric seats and floor mats.
- Detailing Brushes: Small brushes for vents and tight spots.
- Bucket: For water or diluted cleaners.
Step 1: Clear Out the Clutter
This is the first, and maybe the easiest, step. Look through your car. Take out everything that doesn’t belong.
This includes trash, loose change, receipts, and any personal items. Check all the door pockets, the glove box, and under the seats. Getting rid of clutter makes the rest of the job much faster and easier.
It also lets you see the real mess.
Don’t forget to check the trunk too. It often collects a lot of forgotten items. A clean car starts with a clear space.
This simple act sets the stage for a thorough clean. You can really focus on the surfaces then.
Step 2: The Mighty Vacuum
Now, it’s time for the vacuum. This is where a lot of the loose dirt disappears. Start from the top and work your way down.
Use the brush attachment for the headliner and seats. This helps lift dust and hair without damaging the fabric. Then, move to the carpets and floor mats.
Use the crevice tool for those hard-to-reach spots between seats and along the edges.
Pay close attention to the seams and stitching on your seats. Dirt loves to hide there. If you have a powerful vacuum, you can really suck up a lot of the embedded grime.
Don’t rush this step. The more dirt you remove now, the less you’ll have to deal with later. This is a key part of getting that professional look.
Vacuuming Tips for a Deeper Clean
- Work in Sections: Vacuum one area completely before moving on.
- Lift Floor Mats: Vacuum them separately, then clean the car floor underneath.
- Use Attachments Wisely: Brush for fabric, crevice for tight spaces.
- Don’t Forget the Trunk: It needs vacuuming too!
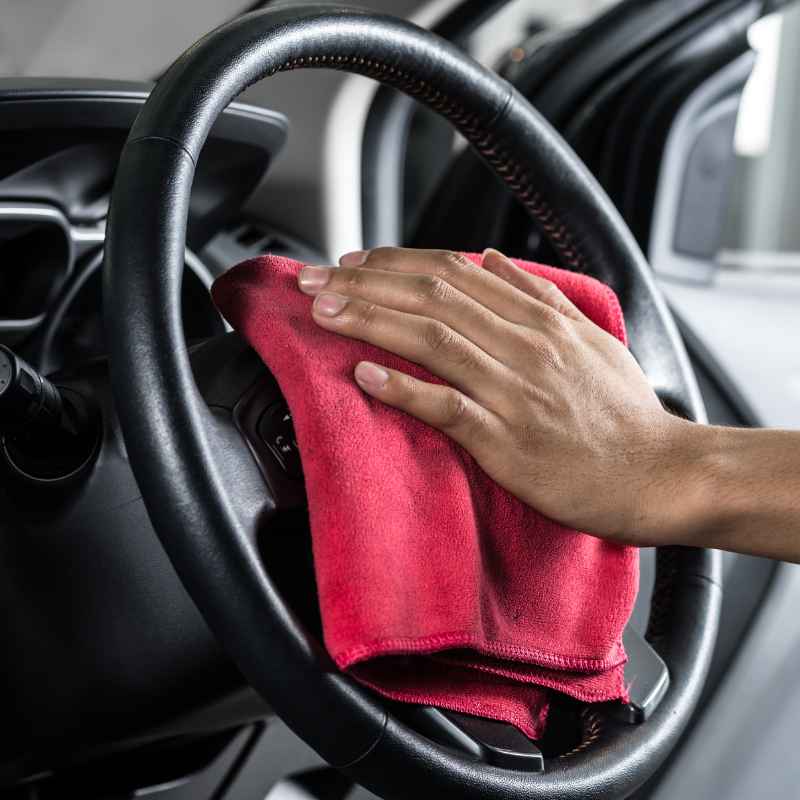
Step 3: Tackling the Dashboard and Hard Surfaces
This is where your all-purpose cleaner and microfiber towels come in. Lightly spray your cleaner onto a microfiber towel, not directly onto the dashboard. This prevents overspray onto electronics or windows.
Gently wipe down the dashboard, center console, door panels, and steering wheel. You’ll be amazed at how much dust and grime comes off.
For stubborn spots, like dried-on spills or fingerprints, you might need a little more effort. Use a detailing brush to get into the vents and around buttons. A soft brush can gently lift dirt from textured surfaces without scratching.
Wipe down all these areas until they are clean and streak-free.
Remember to clean your instrument cluster and infotainment screen with a cleaner safe for these surfaces. Often, a slightly damp microfiber cloth is best. Always be gentle here.
Step 4: Cleaning Your Car Seats
The method here depends on your seat material. For fabric seats, use your carpet and upholstery cleaner. Follow the product instructions.
Usually, you’ll spray it on, let it sit for a moment, and then gently agitate with a brush or a clean microfiber towel. Blot the area to lift the dirt and moisture.
If you have leather seats, you’ll need a dedicated leather cleaner. Apply it to a microfiber cloth and gently wipe the leather. Avoid soaking the leather.
After cleaning, it’s time for conditioner. Leather conditioner keeps the leather soft and prevents it from drying out and cracking. Apply it evenly with a clean cloth.
Buff off any excess.
For vinyl or faux leather seats, your all-purpose cleaner should work well. Just like with fabric, clean and then consider a protectant product. This keeps them looking new.
Leather Care: Keep it Supple
- Clean First: Always clean leather before conditioning.
- Gentle Application: Use a soft cloth and light pressure.
- Condition Regularly: This prevents drying and cracking.
- Buff Off Excess: Avoid a greasy feel.
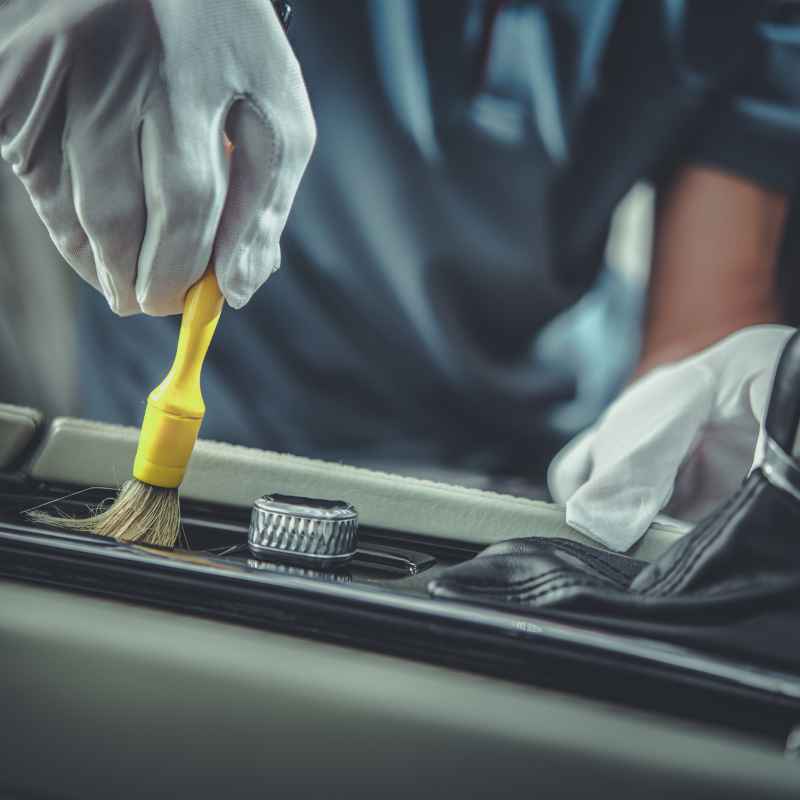
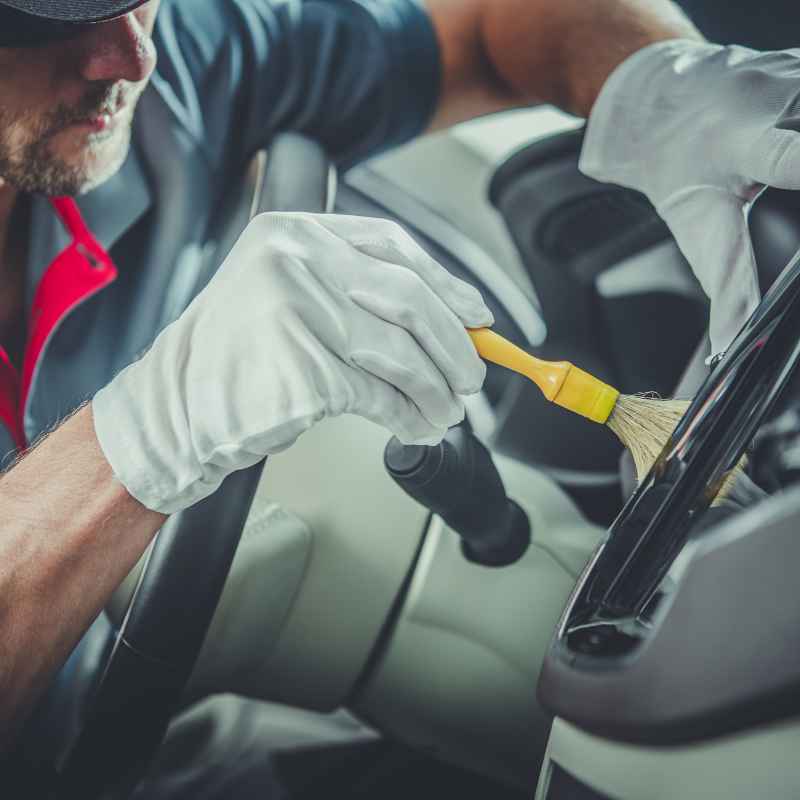
Step 5: Don’t Forget the Details (Brushes Are Your Friends!)
This is where those small detailing brushes really shine. They are perfect for cleaning air vents, around the gear shift, cup holders, and the edges of trim pieces. Use a brush to loosen dust and grime.
Then, you can easily wipe it away with a microfiber towel or vacuum it up.
Think about the seams on your seats and the pockets on the doors. These areas often collect crumbs and small bits of debris. A small brush can help dislodge them so you can remove them.
A clean interior is all about the details. This is what separates a good clean from a great one.
Step 6: Cleaning Your Car’s Glass
Clean windows make a huge difference. They improve visibility and make the interior feel brighter. Use a good quality glass cleaner.
Spray it onto a clean microfiber towel, not directly onto the glass. This helps prevent drips and streaks. Wipe the inside of the windows in one direction (e.g., side to side).
Then, wipe the outside in the opposite direction (e.g., up and down).
This technique helps you see which side has streaks if any appear. Don’t forget the rear-view mirror and the vanity mirrors. Clean them thoroughly.
Smudges on glass can make the whole interior look dirty, even if it’s not. Sparkling glass makes everything else pop.
Step 7: Protecting Your Surfaces
After cleaning, you want to protect your car’s interior. This is where interior protectants come in. These products often contain UV blockers.
This helps prevent fading and cracking of plastic and vinyl from sun exposure. They also leave a nice, clean finish. Avoid products that leave a greasy or overly shiny look, as these can attract dust.
Apply the protectant to a microfiber applicator pad or cloth. Wipe it onto the dashboard, door panels, and other plastic or vinyl surfaces. Buff off any excess.
This step not only protects your interior but also makes it look fresh and new again. It’s like giving your car’s skin a healthy glow.
Interior Protectant: Why Use It?
- UV Protection: Stops sun damage and fading.
- Restores Shine: Makes dull surfaces look new.
- Prevents Cracking: Keeps plastics and vinyl supple.
- Easy to Apply: A quick spray and wipe.
Step 8: Dealing with Odors
Sometimes, even after cleaning, odors linger. This is common in cars. Food spills, wet shoes, or old gym clothes can leave their mark.
Vacuuming and cleaning are the first steps. You might need a dedicated odor eliminator. Look for products that neutralize odors, not just mask them.
Some work by fogging the car’s interior.
Check your cabin air filter too. If it’s old or dirty, it can contribute to bad smells. Replacing it is a simple maintenance task that can make a big difference.
Ensure all spills are completely dried. Moisture can lead to mold and mildew, causing persistent odors. Sometimes, a simple open window for a few hours on a dry day helps air things out.
Step 9: The Floor Mats – A Special Treat
Your floor mats take a beating. If they are carpeted, you can often treat them like your car’s carpets. Vacuum them thoroughly.
If they are very dirty, you might need to take them out and give them a good scrub with carpet cleaner and a stiff brush. Rinse them well and let them dry completely before putting them back. This prevents mold.
Rubber or all-weather mats are easier to clean. You can often just hose them off and scrub them with soap and water. Ensure they are completely dry before placing them back in the car.
Clean floor mats make a big visual impact. They are the foundation of your car’s interior cleanliness.
Floor Mat Refresh
- Remove & Shake: Get rid of loose debris first.
- Vacuum Deeply: Especially for carpeted mats.
- Scrub & Rinse: Use appropriate cleaners for the material.
- Dry Thoroughly: Prevent mildew and smells.
Step 10: Don’t Forget the Headliner!
The headliner is often overlooked. It’s usually a delicate fabric. You don’t want to soak it or scrub it too hard.
For light spots, you can use a microfiber towel lightly dampened with a gentle upholstery cleaner. Blot the stain gently. Avoid rubbing, which can damage the fibers or the adhesive.
If you have a lot of grime or smoke residue on the headliner, it might require more effort. Some detailers use a special headliner cleaner. Always test in an inconspicuous area first.
A clean headliner can make the whole car feel much fresher. It’s part of that overall polished look.
Real-World Scenarios: When Things Get Tricky
We all face different interior challenges. Maybe you have kids who love to spill juice. Or perhaps you live in a dusty area, and your car interior seems to get dirty just by sitting there.
What about pet hair? That can be a nightmare.
For juice spills, act fast. Blot it up immediately. Then, use a cleaner safe for your seat material.
For dust, regular wiping with a microfiber cloth is key. For pet hair, a rubber brush or a specific pet hair vacuum attachment can be a lifesaver. Sometimes, static electricity makes hair cling.
A lint roller can help here too.
Common Interior Issues and Quick Fixes
- Sticky Spills: Blot immediately, then use an appropriate cleaner.
- Dust Buildup: Regular wiping with a microfiber towel.
- Pet Hair: Rubber brush, pet hair vacuum attachment, or lint roller.
- Greasy Smudges (on plastic): Gentle cleaner and a soft cloth.
- Water Spots: Clean with glass cleaner or a mild all-purpose cleaner.
What This Means For Your Car’s Interior
A clean car interior isn’t just about looks. It’s about comfort and hygiene. When your car is clean, you feel more relaxed and focused when you drive.
It can even improve your mood. Think about how good it feels to sit in a fresh-smelling, dust-free car.
Regular cleaning also helps preserve your car’s value. Upholstery and plastics that are well-maintained will last longer and look better. This means you get more out of your car for longer.
It’s an investment in your driving experience and your vehicle.
Quick Tips for Maintaining a Clean Interior
Keeping your car’s interior clean doesn’t have to be a huge chore. A few small habits can make a big difference. Keep a small trash bag in your car for wrappers and tickets.
Wipe down the dashboard and door panels with a microfiber cloth once a week. This takes just a few minutes.
Shake out your floor mats regularly. If you eat in your car, try to be tidy. For spills, keep a small bottle of interior cleaner and some wipes in your glove box for quick cleanups.
These little actions prevent big messes.
Daily Habits for a Cleaner Car
- Keep a Trash Bag: For easy disposal of rubbish.
- Weekly Wipes: Quick clean of main surfaces.
- Mat Check: Shake out or clean mats as needed.
- Spill Kits: Keep small cleaning supplies handy.
Frequently Asked Questions About Car Interior Detailing
How often should I detail my car’s interior?
For most people, a thorough interior detail every 3-6 months is good. You can do quick cleanings more often, like weekly or bi-weekly, to maintain things between deep cleans.
Can I use household cleaners on my car’s interior?
It’s best to avoid most household cleaners. Many can be too harsh for car interior materials. They can cause damage, discoloration, or leave behind residues.
Always use products specifically made for automotive interiors.
What is the best way to remove stubborn stains from car seats?
For fabric seats, try a dedicated upholstery cleaner. Blot the stain, don’t rub. For tougher stains, a steam cleaner can be effective.
For leather, use a specialized leather stain remover. Always test cleaners in an unseen area first.
How do I get rid of the ‘new car smell‘ if I don’t like it?
The ‘new car smell’ comes from off-gassing of materials. To reduce it, air out your car frequently by opening windows on warm, dry days. Using an odor absorber like baking soda or activated charcoal can also help.
Thorough cleaning can also remove some of the sources of that smell.
Is it okay to clean the dashboard with Armor All?
Products like Armor All are often used for shine. However, some detailers prefer newer, water-based protectants. These can leave a more natural finish and may attract less dust.
If you use it, apply it sparingly and buff off any excess to avoid a greasy look.
My car smells musty. What could be the cause?
A musty smell usually means there is moisture. Check for leaks around windows or door seals. Spills under the carpet that didn’t dry properly can also cause this.
Your cabin air filter might also be damp or dirty. Ensure all areas are dry and consider replacing the cabin air filter.
Final Thoughts on a Fresh Interior
Detailing your car’s interior like a professional is totally achievable. It’s about taking your time, using the right tools, and being thorough. You don’t need a lot of fancy equipment.
Simple, consistent steps will give you that amazing, like-new car feeling.
Enjoy the process! A clean car is a pleasure to drive. It makes every trip a bit more enjoyable.
You’ll feel a sense of pride every time you get behind the wheel. Happy detailing!