How to Get Dried Concrete Off Car: Proven Essential
Yes, you can safely remove dried concrete from your car without damaging the paint! This guide offers easy-to-follow, step-by-step methods using common household items and specialized cleaners, ensuring your car looks as good as new.
Oh no! You backed out of the driveway, perhaps near a construction site or a home renovation project, and then you noticed it – those unwelcome white or grey splotches on your car’s paint. Dried concrete is a driver’s worst nightmare. It looks ugly, and many people worry it will permanently damage their car’s finish. Don’t panic! Getting dried concrete off your car is totally doable, even for beginners. We’ll walk you through exactly what you need to do, using simple steps and everyday items. Get ready to say goodbye to those concrete stains and hello to a clean, shiny car again.
Why Concrete is a Problem for Your Car
Concrete, while useful for building roads and sidewalks, isn’t so friendly to your car’s paint. When wet, it’s a paste-like substance. As it dries, it hardens and becomes a tough, abrasive material. Think of it like this: cement, a key ingredient in concrete, is alkaline. This alkalinity can start to eat away at your car’s clear coat and paint if left for too long. The longer it stays on, the harder it becomes to remove, and the higher the risk of permanent damage. Stubborn splotches can dull your paint, leave scratches, and just generally ruin the look of your beloved vehicle. But with the right approach, you can tackle it effectively.

What You’ll Need: Your Concrete-Removal Toolkit
Before we dive into the steps, let’s gather your supplies. Having everything ready makes the process smoother and less stressful. You don’t need fancy tools; most of these items are probably already in your garage or a quick trip to the hardware store away.
Essential Tools and Materials:
- Safety Gear: Nitrile gloves (to protect your hands from cleaners and concrete residue) and safety glasses (to protect your eyes from splashes).
- Water Source: A hose with a spray nozzle or a bucket of clean water.
- Soft Microfiber Towels: Several clean ones for washing, rinsing, and drying. Avoid abrasive cloths or paper towels, which can scratch the paint.
- Car Wash Soap: A pH-neutral car wash soap designed for automotive use.
- Bucket(s): Two buckets are ideal – one for soapy water and one for clean rinse water (this is the two-bucket wash method, which prevents dirt from going back onto your car and causing scratches).
- Plastic Scraper or Old Credit Card: For gently lifting stubborn, dried concrete.
- Clay Bar Kit (Optional but Recommended): A clay bar and lubricant can safely remove embedded contaminants.
- Concrete Remover Solution: This is where we have choices.
Choosing Your Concrete Remover: Options for Every Situation
There are several effective ways to break down dried concrete. Here are the most common and successful methods:
- Vinegar Solution: White vinegar is acidic enough to help loosen concrete’s bond.
- Specialized Concrete Remover: Products specifically designed for removing concrete from vehicles are available. These are often stronger and more effective but require careful use. Look for brands like Optimum No Rinse Wash & Shine (ONR, which can be used as a concrete remover diluted properly) or specific automotive concrete removers.
- Citrus-Based Cleaners: Some strong citrus degreasers can also help break down the concrete.
- WD-40: In some cases, WD-40 can help lubricate and loosen small concrete spots.
It’s crucial to use automotive-specific products or household items that are known not to harm car paint when used correctly. For instance, heavy-duty construction degreasers meant for concrete floors can be too harsh and damage your car’s paint. Always start with the gentlest method possible.
Step-by-Step Guide: Safely Removing Dried Concrete
Let’s get this concrete off your car! We’ll start with the basics and move to more intensive methods if needed. Patience is key here; don’t rush the process to avoid damaging your paint.
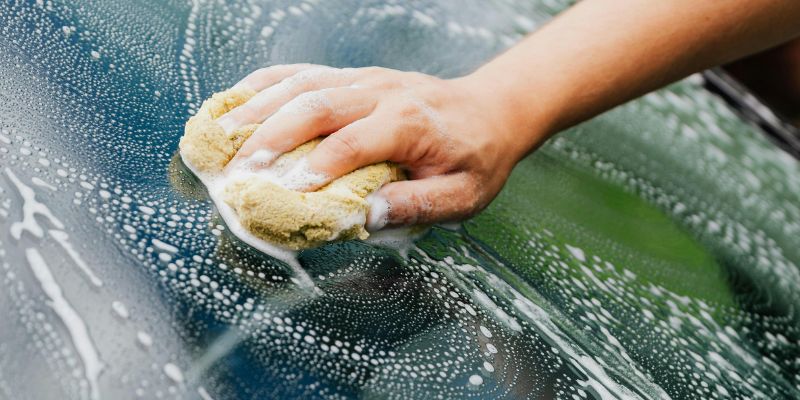
Step 1: Gentle Wash and Rinse
Before attempting any concrete removal, give the affected area a thorough wash. This removes loose dirt, grime, and any surface contaminants that might interfere with the removal process or cause scratching. Use your two-bucket method with a pH-neutral car wash soap.
- Fill one bucket with car wash soap and water.
- Fill the second bucket with clean water.
- Dip your wash mitt or microfiber towel into the soapy water.
- Gently wash the concrete-covered area, working from top to bottom.
- Rinse your wash mitt or towel in the clean water bucket before returning it to the soapy water. This prevents grit from being transferred back onto the paint.
- Once washed, rinse the entire car thoroughly with clean water from your hose. This step alone might loosen small or fresh concrete spots.
Step 2: Assess the Concrete and Choose Your Method
After washing, inspect the concrete spots. Are they small and flaky, or are they thick, hardened blobs? This will help you decide which removal agent to use. Always test any cleaner on an inconspicuous area of your car first (like a lower door panel or fender) to ensure it doesn’t harm the paint.
Step 3: Method A – The Vinegar Approach (For Lighter Stains)
White vinegar is a common household item that works because of its acetic acid content, which can help break down alkaline substances like dried cement. Ensure the area is wet from the initial wash before applying.
- Mix the Solution: In a spray bottle, mix a 50/50 solution of white vinegar and distilled water.
- Apply to Concrete: Generously spray the vinegar solution directly onto the dried concrete spots.
- Let it Dwell: Allow the vinegar solution to sit on the concrete for 5-10 minutes. You should see it start to bubble slightly as it reacts with the concrete. Keep the area damp with more solution if it starts to dry out.
- Gently Scrape: After the dwell time, try to gently lift the softened concrete with a plastic scraper or an old credit card. Be very careful not to scrape the paint.
- Wipe Away: Use a wet microfiber towel to wipe away the loosened concrete.
- Rinse and Repeat: Rinse the area thoroughly with water. If concrete remains, repeat the process. You might need several applications for tougher spots.
- Wash Again: Once the concrete is removed, wash the area again with car wash soap and water followed by a clean rinse.
Step 4: Method B – Specialized Concrete Remover (For Tougher Stains)
If vinegar doesn’t cut it, or you have thick, stubborn concrete, a dedicated concrete remover is your next best option. These products are formulated to tackle automotive concrete but always follow the manufacturer’s instructions precisely.
- Read the Label: Carefully read and understand the instructions on your chosen concrete remover product. Pay attention to dilution ratios, application methods, and recommended dwell times.
- Wear Safety Gear: Put on your gloves and safety glasses.
- Apply the Remover: Spray or brush the concrete remover directly onto the dried concrete spot.
- Dwell Time: Allow the product to work for the time specified by the manufacturer. This can range from a few minutes to longer periods, depending on the product’s strength. Do not let it dry on the paint.
- Gentle Agitation: Some removers may recommend gentle agitation with a soft bristle brush or a microfiber towel to help break down the concrete.
- Scrape Carefully: Using your plastic scraper or credit card, gently try to lift the now-softened concrete.
- Wash Thoroughly: This is critical. Wash the area immediately and thoroughly with plenty of car wash soap and water to neutralize and remove all traces of the cleaner and concrete residue. Rinse thoroughly.
- Repeat if Necessary: For very stubborn spots, you might need a second application, but always rinse extremely well between applications.
You can find excellent automotive-specific concrete removers at most auto parts stores and online retailers. For example, products like Iron-X (though primarily for iron fallout) can sometimes help with mineral-based deposits, and other dedicated concrete removers are available from brands like McKee’s 37 or Griot’s Garage.
For understanding chemical reactions in cleaning products, you can refer to resources like the American Chemical Society’s ChemMatters magazine, which often explores the science behind everyday cleaning agents.
Step 5: Clay Bar Treatment (Optional But Recommended)
After the concrete is removed and the car is washed and dried, you might notice the paint feels a bit rough or has some embedded residue. A clay bar treatment can safely remove these tiny remaining particles and restore a smooth finish.
- Prepare the Clay: Knead a small piece of clay from your clay bar kit until it’s pliable.
- Use Lubricant: Spray a generous amount of clay lubricant onto the area you’ll be working on. Keep the surface and the clay lubricated at all times.
- Clay the Surface: Gently glide the clay bar over the lubricated paint surface. You’ll feel it catch on any remaining contaminants.
- Wipe Clean: After claying, wipe the area with a clean microfiber towel.
- Inspect the Clay: Fold the clay onto itself to trap the contaminants you’ve removed. If it becomes too dirty, use a fresh piece.
- Final Wash and Dry: Wash the area again with car wash soap and water, then dry with a clean microfiber towel.
A clay bar kit typically includes the clay bar itself and a spray lubricant. Following instructions from reputable automotive detailing sources, such as those from Meguiar’s or Chemical Guys, will ensure you use the clay bar correctly and effectively.
Step 6: Polish and Protect (Optional)
If the paint shows any minor marring from the scraping (even with gentle use) or if you want to restore the shine, polishing is a great next step. After polishing, always apply a coat of wax or sealant to protect your newly cleaned paint.
Quick Table: Concrete Removal Methods Compared
| Method | Best For | Pros | Cons | Safety Caution |
|---|---|---|---|---|
| Vinegar Solution (50/50) | Light to moderate concrete spots, fresh concrete | Readily available, low cost, relatively safe if diluted | May require multiple applications, can be less effective on very hard concrete | Dilute with distilled water to reduce acidity; rinse thoroughly. |
| Specialized Concrete Remover | Tough, dried, thick concrete deposits | Specifically formulated for car paint, often very effective | Can be stronger, requires careful following of instructions, higher cost | Always wear gloves and eye protection, follow manufacturer’s dwell times, rinse immediately and thoroughly. |
| WD-40 | Very small, fresh concrete specks where other methods aren’t yet needed | Lubricates, can help loosen minimal buildup | Not a primary concrete remover, can leave an oily film | Wipe away residue completely with appropriate cleaners. |
What NOT to Do When Removing Concrete
It’s just as important to know what to avoid as it is to know what to do. Some common mistakes can cause much more damage than the concrete itself.
- Never use a razor blade or metal scraper: These will slice through your paintwork in a heartbeat.
- Avoid abrasive cleaners or polishes: Think Comet or steel wool – definite no-gos. They will scratch your paint badly.
- Don’t use harsh solvents if unspecified: Acetone, paint thinner, or strong industrial cleaners not intended for automotive use can strip paint, damage plastic trim, and dull your finish.
- Scrubbing vigorously without lubrication: Always ensure the surface and your tool are lubricated when scraping or rubbing.
- Letting chemical removers dry on the paint: This can cause etching or staining.
- Skipping the rinse and neutralization steps: Leftover chemicals, even vinegar, can continue to react with your paint over time.
FAQ: Youroline Concrete Removal Questions Answered
Q1: How quickly should I try to remove concrete from my car?
A1: As soon as you notice it! The fresher the concrete, the easier it is to remove, and the less chance it has to damage your car’s paint. Catching it early makes the whole process much simpler.
Q2: Can muriatic acid remove concrete from my car?
A2: Absolutely not! Muriatic acid is extremely corrosive and will severe damage your car’s paint, clear coat, and potentially metal parts. Never use muriatic acid or other strong construction acids on your vehicle.
Q3: Will washing my car remove dried concrete?
A3: A regular car wash might remove very light, fresh concrete drippings. However, for dried and hardened concrete, a standard wash is usually not enough. You’ll need specialized cleaners or methods to break down the hardened material.
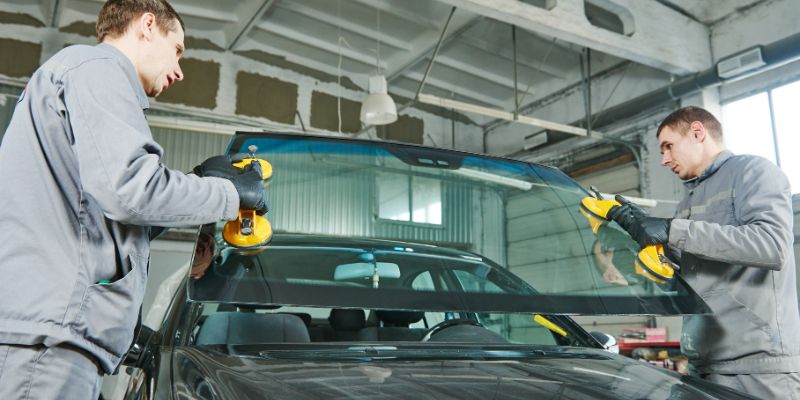
Q4: How do I deal with concrete splatter on windows?
A4: For car windows, you can often use a glass cleaner in conjunction with gentle scraping with a new, sharp razor blade held at a low angle, often with a glass cleaner or soapy water as lubrication. Be extremely careful not to scratch the glass itself.
Q5: is it possible that concrete has permanently damaged my car’s paint?
A5: If the concrete was left on for a very long time, especially in direct sunlight, or if harsh removal methods were used, it’s possible that some etching or staining has occurred. In such cases, a professional detailer might be able to help with more advanced polishing techniques.
Q6: Can I use a pressure washer to remove concrete?
A6: Use extreme caution with pressure washers. While a light spray might help loosen some debris, a high-pressure stream can force water into seals and gaskets, and can also damage paint if held too close or at too high a setting. It’s generally safer to stick to other methods for concrete removal.
Conclusion: Back to a Spotless Ride!
Seeing dried concrete on your car can be disheartening, but as you’ve seen, it’s a manageable problem. By following these steps, using the right tools, and a little patience, you can effectively remove those unsightly spots without causing damage. Remember to always prioritize safety by wearing gloves and eye protection, and always test your chosen cleaner on a small, inconspicuous area first. From a simple vinegar solution to specialized automotive cleaners, you have options to restore your car’s pristine finish. A clean, well-maintained car not only looks great but also helps protect its value, and tackles like these are part of that. Happy detailing!