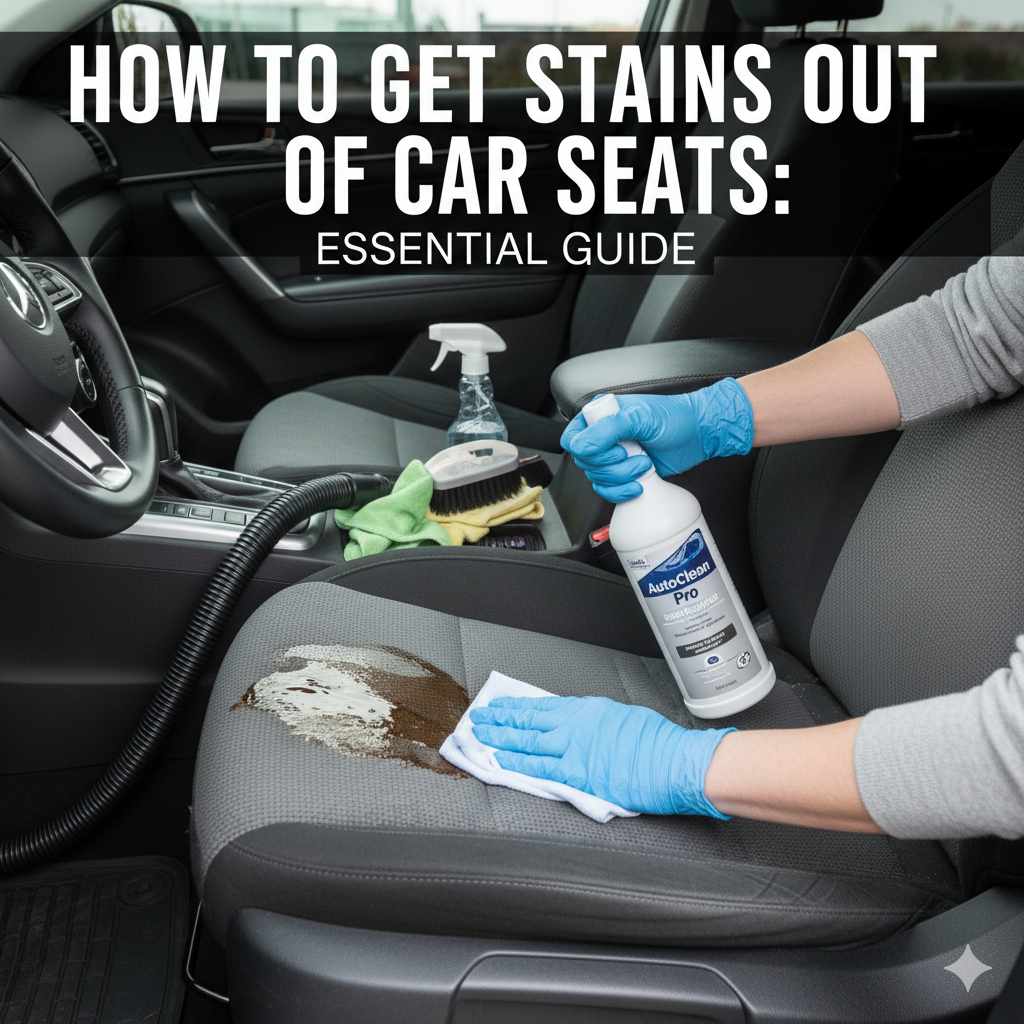
How To Get Stains Out of Car Seats: Essential Guide
Effectively remove most car seat stains with a simple DIY method using household cleaners and a bit of elbow grease. This guide provides easy steps for various stain types on fabric and leather, ensuring your car’s interior looks fresh and inviting again.
Car seats can get messy, right? Spills happen, kids make messes, and sometimes it feels like those stains are there forever. But don’t worry! Getting those stubborn stains out of your car seats is totally doable, even if you’re not a car pro. We’ll walk you through how to tackle everything from coffee spills to mystery smudges, making your car feel like new again. You’ll be surprised at how simple it can be!
Why Car Seat Stains Happen (And Why You Can Beat Them!)
Life in a car isn’t always neat and tidy. Between morning coffees, snacks on the go, pet adventures, and maybe even a leaky water bottle, stains are an almost inevitable part of owning a vehicle. These blemishes aren’t just unsightly; they can make your car feel less clean and welcoming. The good news is that with the right approach, most common car seat stains can be significantly lightened or completely removed. It just takes a little know-how and the right cleaning supplies. Let’s dive into making your car seats look their best!
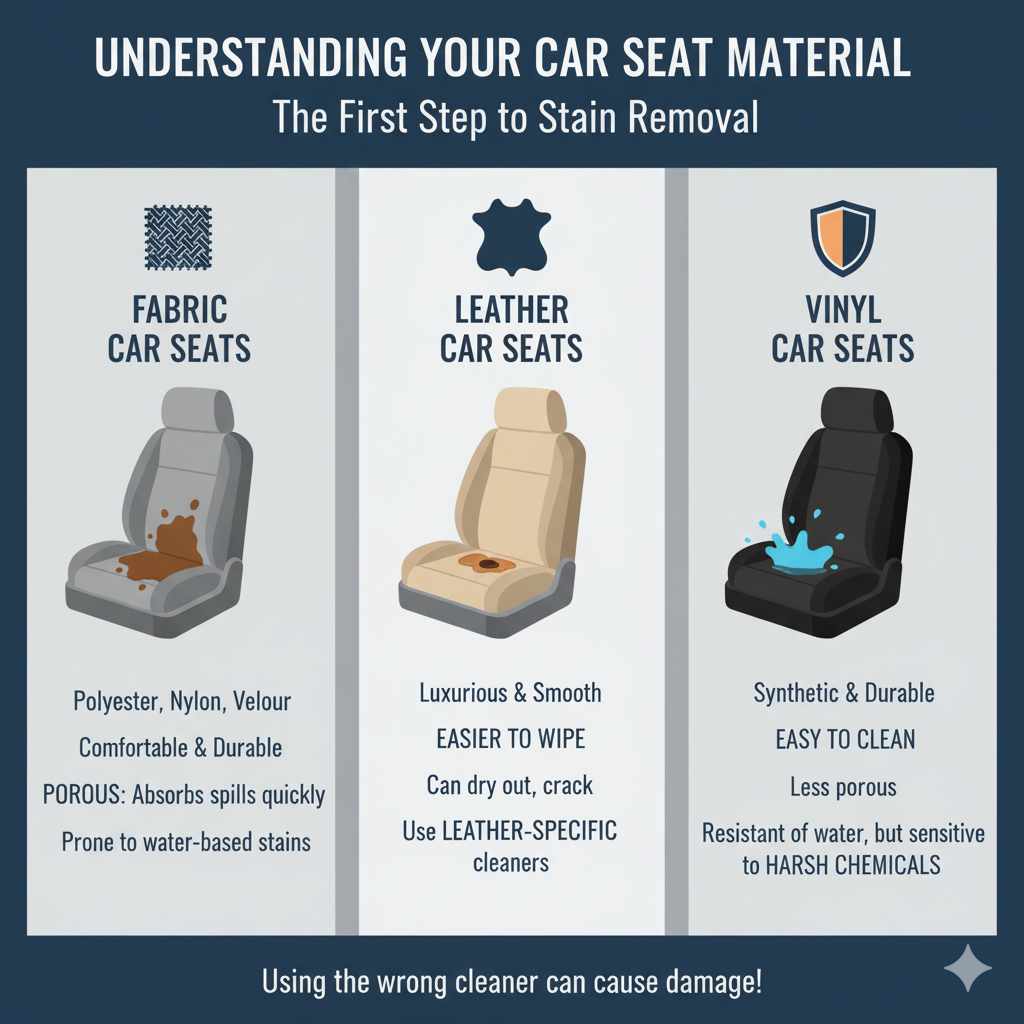
Understanding Your Car Seat Material: The First Step to Stain Removal
Before you grab any cleaning product, it’s important to know what your car seats are made of. Different materials require different cleaning methods and products to avoid damage. Cleaning fabric seats is different from cleaning leather seats. Using the wrong cleaner on the wrong material can sometimes make a stain worse or even damage the seat itself! So, let’s figure out what you’re working with.
Fabric Car Seats
Most cars come with fabric upholstery, often made from materials like polyester, nylon, or velour. These are popular because they’re comfortable and usually durable. However, they are also porous, meaning they can soak up spills quickly, leading to stains.
Leather Car Seats
Leather seats offer a touch of luxury and are generally easier to wipe clean of surface spills. However, they can be prone to drying out, cracking, or absorbing oily stains if not treated properly. It’s crucial to use cleaners specifically designed for leather.
Vinyl Car Seats
Vinyl is a synthetic material that’s very durable and easy to clean, making it a common choice for many vehicles. It’s less porous than fabric and generally resistant to water-based stains. However, it can be susceptible to damage from harsh chemicals or excessive heat.
Essential Tools and Supplies You’ll Need
Gathering the right supplies before you start will make the entire process smoother and more effective. You probably have many of these items already in your home!
- Microfiber cloths (several – they are great for gentle cleaning and drying)
- Spray bottles
- Small, soft-bristled brush (an old toothbrush works well for stubborn spots)
- Vacuum cleaner with crevice attachment
- Clean water
- Paper towels
- Optional: Small bucket
DIY Cleaning Solutions for Common Fabric Seat Stains
For fabric seats, we can create effective cleaning solutions using common household items. Always test any cleaner on an inconspicuous area first to ensure it doesn’t discolor or damage the fabric. A good spot to test is usually on the underside of a seat or along a seam.
The All-Purpose Fabric Cleaner (Vinegar & Water)
This is a fantastic, gentle cleaner for many everyday stains like dirt, mud, or light food spills. White vinegar is a natural deodorizer and mild disinfectant.
What You Need:
- 1 part white vinegar
- 1 part cool water
- Spray bottle
- Microfiber cloths
How to Use:
- Mix the white vinegar and water in the spray bottle.
- Lightly spray the stained area. Don’t oversaturate the fabric, as too much moisture can lead to mold or mildew.
- Let it sit for about 5-10 minutes.
- Gently blot the stain with a clean microfiber cloth. Work from the outside of the stain inward to prevent spreading.
- Rinse the area by blotting with a cloth dampened with plain water.
- Allow the seat to air dry completely. You can also use a fan to speed up drying.
Tackling Grease and Oil Stains (Baking Soda)
Grease and oil can be tricky, but baking soda is a fantastic absorbent that can lift these types of stains right out.
What You Need:
- Baking soda
- Vacuum cleaner
- Soft brush
- Mild dish soap (optional, for tougher stains)
- Water
How to Use:
- Sprinkle a generous amount of baking soda directly onto the fresh grease or oil stain.
- Let it sit for at least 30 minutes, or even a few hours for tougher stains. The baking soda will work to absorb the greasy residue.
- After the baking soda has done its job, vacuum it up thoroughly.
- If a stain remains, you can make a paste of baking soda and a little water. Apply the paste to the stain, let it dry, and then vacuum it up.
- For very stubborn grease stains, mix a drop of mild dish soap with a cup of water. Lightly dampen a cloth with this solution, blot the stain, then rinse by blotting with a water-dampened cloth. Let dry.
Dealing with Coffee, Soda, or Other Food Stains
These common culprits often leave colorful marks. A mild soap solution is usually effective.
What You Need:
- A few drops of mild dish soap (like Dawn) or laundry detergent
- Cool water
- Spray bottle or small bowl
- Microfiber cloths
How to Use:
- Mix about 1 teaspoon of mild dish soap with 1 cup of cool water in your spray bottle or bowl.
- Lightly dampen a microfiber cloth with the solution (don’t soak).
- Gently dab the stain, working from the outside edges towards the center.
- Continue dabbing until the stain begins to lift. You may need to use a clean section of the cloth or a fresh cloth as the stain transfers.
- Rinse the area by blotting with a separate cloth dampened with clean water. This removes any soap residue.
- Blot dry with a clean, dry microfiber cloth and let the seat air dry completely.
Removing Ink Stains
Ink can be one of the toughest stains. For fabric, rubbing alcohol can sometimes work, but this needs to be done with extreme care.
What You Need:
- Rubbing alcohol (isopropyl alcohol)
- Cotton swabs or balls
- Microfiber cloth
- Water
How to Use:
- Test first! Apply a tiny bit of rubbing alcohol to a hidden spot to check for color fastness.
- Dampen a cotton swab or cotton ball with rubbing alcohol.
- Gently dab the ink stain. Avoid rubbing, as this can spread the ink.
- You should see the ink transferring to the cotton swab. Switch to a clean swab as soon as one becomes saturated with ink.
- Continue dabbing until no more ink transfers.
- Once the ink is gone, rinse the area by blotting with a cloth dampened with water.
- Blot dry and allow to air dry.
Cleaning and Conditioning Leather Car Seats
Leather requires a gentler touch and specialized products to keep it looking its best and prevent cracking. Harsh chemicals can damage the leather’s finish.
Basic Leather Seat Cleaning
For everyday dirt and grime, a simple cleaning solution or a dedicated leather cleaner is best. You can find good leather cleaners at most auto parts stores. Here’s a DIY option for light cleaning:
What You Need:
- Mild, pH-neutral cleaner (like a diluted gentle soap or saddle soap) or a commercial leather cleaner
- Distilled water (if making your own solution)
- Two microfiber cloths
- Spray bottle (optional)
How to Use:
- If using a commercial cleaner, follow the product’s instructions.
- For DIY: Mix about 1 tablespoon of mild liquid soap (like a gentle hand soap, not dish soap) with 1 quart of distilled water. Or, use a product like Mothers Leather Cleaner which is a reputable product.
- Dampen one microfiber cloth with the cleaning solution. Wring it out so it’s not dripping wet.
- Gently wipe down the leather seats, section by section.
- Use the second, clean, damp microfiber cloth to wipe away any soap residue.
- Finally, use a dry microfiber cloth to buff the seats dry.
Leather Seat Conditioning
Cleaning leather can strip some of its natural oils. Conditioning replenishes these oils, keeping the leather supple and protected. This is especially important in dry or hot climates.
What You Need:
- A good quality leather conditioner (available at auto parts stores or online)
- Clean, soft microfiber cloths
How to Use:
- Ensure your leather seats are clean and dry.
- Apply a small amount of leather conditioner to a clean microfiber cloth.
- Work the conditioner into the leather using a circular motion. Apply evenly across the entire seat surface.
- Let the conditioner penetrate for the time recommended on the product label (usually 10-20 minutes).
- Use a clean, dry microfiber cloth to gently buff off any excess conditioner, leaving a smooth, non-greasy finish.
Dealing with Tough Leather Stains (Ink, Dye Transfer)
Tougher stains on leather, like ink or color transfer from clothing (e.g., dark denim), can be more challenging. Start with the gentlest method and escalate if needed. It’s often best to use a dedicated leather stain remover for these.
What You Need:
- Specialized leather cleaner or degreaser
- Leather conditioner
- Soft cloths
- Cotton swabs (for precision)
How to Use:
- Always test first! Use a product specifically designed for leather, like a dedicated leather degreaser or ink remover. Read the Manufacturer’s instructions carefully.
- Apply a small amount of the cleaner to a cotton swab or cloth.
- Gently dab the stain. For ink, often dabbing is better than rubbing. Work from the outside in.
- Allow the product to lift the stain as directed.
- Wipe away residue with a clean, damp cloth, followed by a dry cloth.
- Once the stain is removed and the area is dry, apply a good leather conditioner to rehydrate and protect the spot.
Special Considerations: Vinyl Car Seats
Vinyl seats are generally easy to maintain. Most common spills can be wiped away with a damp cloth. For tougher grime or sticky residues:
- Use a mixture of mild soap and water.
- Wipe clean with a damp cloth and then dry with a soft towel.
- Avoid abrasive cleaners or harsh solvents, which can dull or damage the vinyl finish over time.
Step-by-Step Guide for Deep Cleaning Car Seats
When your car seats need more than just a spot treatment, a deep clean can refresh the entire interior. This process is great for removing general grime, odors, and light, widespread staining.
Step 1: Vacuum Thoroughly
Start by removing all loose debris. Use your vacuum cleaner with the crevice tool to get into seams, between cushions, and under seats. This prevents dirt from being ground further into the fabric during cleaning.
Step 2: Pre-Treat Stains
Before proceeding with a general cleaning, address any prominent stains using the methods described earlier for your specific seat material. This gives the spot treatments time to work while you prepare for the main clean.
Step 3: Prepare Your Cleaning Solution
For fabric seats, a solution of 1 part white vinegar to 1 part water is excellent. For leather, use a pH-neutral leather cleaner or a very mild soap mixture as described above.
Step 4: Clean Section by Section
Work on small sections of the seat at a time. Dampen a microfiber cloth with your chosen cleaning solution (don’t soak!). Gently wipe or blot the area. For fabric seats, avoid harsh scrubbing, which can damage fibers. For leather, use gentle, circular motions.
Step 5: Rinse (Fabric Seats Only)
After cleaning a section of fabric seats, use a separate clean cloth dampened with plain water to wipe away any cleaning solution residue. This is crucial to prevent the cleaner from attracting more dirt later.
Step 6: Dry Thoroughly
For fabric seats, blot the area with a clean, dry microfiber towel. You want to remove as much moisture as possible. Allow seats to air dry completely. Open doors and windows to promote airflow. Using a fan can also speed up the drying process. For leather, a final buff with a dry cloth is usually sufficient.
Step 7: Condition Leather Seats (If Applicable)
If you have leather seats, apply leather conditioner after cleaning and drying, following the steps mentioned earlier.
Dealing with Odors in Car Seats
Sometimes, the issue isn’t just visible stains, but lingering odors from spills, pets, or smoke. Here are some tips:
- Baking Soda: Sprinkle a generous layer of baking soda over fabric seats, let it sit for several hours or overnight, then vacuum it up thoroughly. This is a fantastic natural odor absorbent.
- Vinegar Spray: The diluted vinegar and water solution mentioned earlier is also great for neutralizing odors. The vinegar smell dissipates as it dries, taking other odors with it.
- Activated Charcoal Bags: For ongoing odor control, place activated charcoal bags in your car. They naturally absorb smells without perfumes.
- Commercial Odor Eliminators: Look for enzyme-based odor eliminators, which break down the source of the smell rather than just masking it.
What NOT to Do When Removing Stains
To keep your car seats in great shape, it’s just as important to know what to avoid:
- Harsh Chemicals: Avoid bleach, ammonia, or strong solvents on fabric seats, as they can damage fibers and colors. For leather, avoid all household cleaners not specifically made for leather.
- Excessive Water: Soaking fabric seats can lead to mildew, mold, and damage to the seat foam. Always use cleaning solutions sparingly and blot dry.
- Abrasive Scrubbing: Vigorous scrubbing can fray or pill fabric upholstery and scratch leather or vinyl. Gentle blotting and dabbing are usually more effective and safer.
- Heat: Do not use high heat to dry seats, as it can set stains or damage certain materials.
- Unknown Products: Always test any cleaning product or DIY solution in an inconspicuous area first.
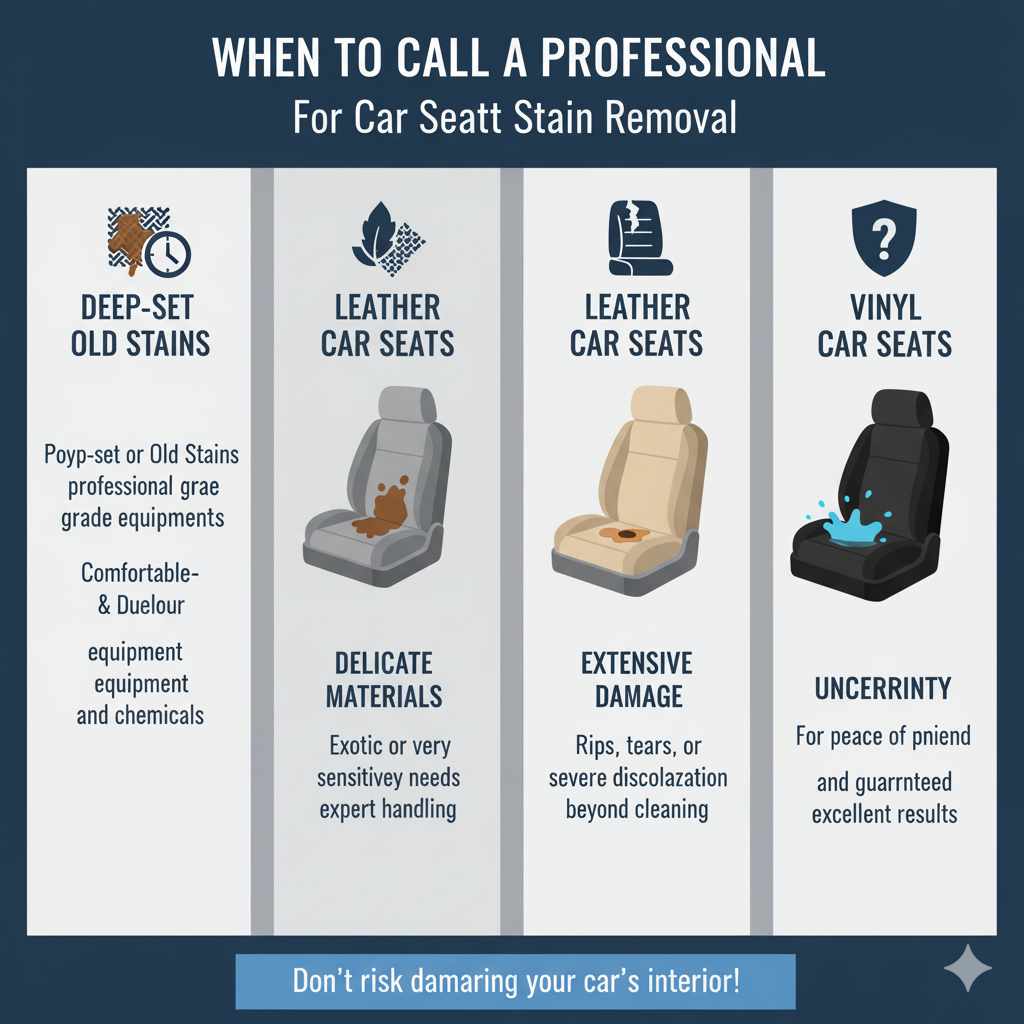
When to Call a Professional
While these DIY methods handle most common issues, there are times when professional help is the best route:
- Deep-set or Old Stains: Some very old or deeply ingrained stains might require professional-grade equipment and chemicals.
- Delicate Materials: If your car has exotic or very sensitive upholstery materials, a professional detailer will have the expertise.
- Extensive Damage: If the seat material is ripped, torn, or extensively discolored beyond what cleaning can fix.
- Uncertainty: If you’re nervous about damaging your seats, a professional can provide peace of mind and excellent results.
Frequently Asked Questions (FAQ)
Q1: How often should I clean my car seats?
A1: For fabric seats, a quick vacuum once a week and spot cleaning as needed is ideal. A deeper clean or conditioning for leather seats can be done every 3-6 months, or more often in harsh climates.
Q2: Can I use baby wipes to clean car seats?
A2: Baby wipes can be okay for very light, fresh spills on vinyl or leather, but they often contain chemicals that aren’t ideal for long-term use on car upholstery. It’s better to use products designed for the specific material.
Q3: My dog tracked mud all over my fabric seats. What’s the best way to clean it?
A3: Let the mud dry completely first. Once dry, vacuum up as much as possible. Then, use your all-purpose fabric cleaner (vinegar and water) or a mild dish soap solution to blot out the remaining stains.
Q4: Will a steam cleaner work on car seats?
A4: Yes, steam cleaners can be very effective for deep cleaning and sanitizing fabric car seats, especially for removing odors and embedded dirt. However, always use them carefully and follow the manufacturer’s instructions to avoid over-wetting.
Q5: How do I prevent stains on my car seats in the future?
A5: Using fabric protectant sprays (for cloth seats) or a good quality leather protectant can help repel liquids and make stains easier to clean. Addressing spills immediately is also key.
Q6: Can I use dish soap on leather car seats?
A6: It’s generally not recommended to use regular dish soap on leather. Most dish soaps are too harsh and can strip the natural oils from the leather. Opt for a dedicated leather cleaner or a very mild, pH-neutral soap at most.
Conclusion
Keeping your car seats looking clean and fresh doesn’t have to be a chore. By understanding your seat material and using the right techniques and simple DIY solutions, you can tackle most common stains with confidence. Remember to always test products in an inconspicuous area first, be gentle with your cleaning, and allow your seats to dry thoroughly. With a little regular care, your car’s interior will remain a comfortable and inviting space for all your journeys. Happy cleaning!