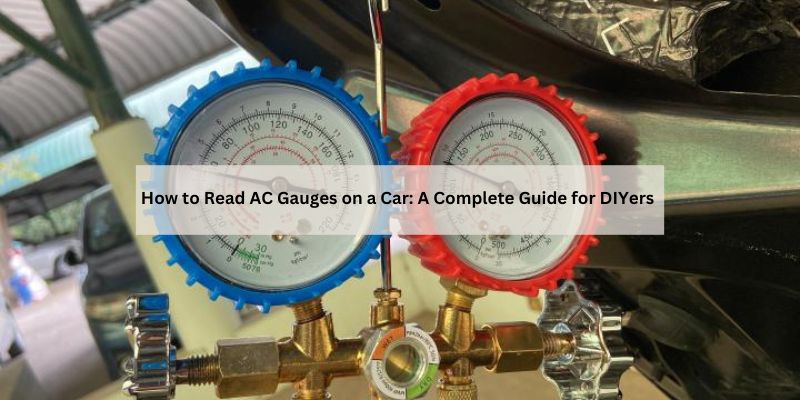
How to Read AC Gauges on a Car: A Complete Guide for DIYers
Hey there, car enthusiast! Is your car’s air conditioning blowing warm air, or are you just curious about keeping it in top shape? Either way, learning how to read AC gauges on a car is a skill that can save you money and keep you cool on those scorching summer drives.
I’ve spent countless hours in my garage tinkering with my car’s AC system, and I’ve learned the ins and outs of using AC gauges to diagnose problems. It’s not as complicated as it looks, and I’m excited to share my experience with you. Whether you’re a beginner or a seasoned DIYer, this guide will walk you through everything you need to know about reading AC gauges like a pro. Let’s get started!
What Are AC Gauges, and Why Are They Important?
AC gauges, also called manifold gauges, are tools used to measure the pressure in your car’s air conditioning system. They come with two gauges: one for the low-pressure side and one for the high-pressure side. These gauges connect to your car’s AC system with hoses and help you figure out if it’s working properly.
When I first got my hands on a set of gauges, I was intimidated. All those numbers and colors! But once I learned what they meant, it was like unlocking a secret code to my car’s AC. Gauges tell you if your system has the right amount of refrigerant, if there’s a leak, or if something else is wrong. Knowing how to read them can save you a trip to the mechanic and hundreds of dollars.
Understanding Your Car’s AC System
Before we dive into reading gauges, let’s talk about how your car’s AC works. The AC system is a closed loop that circulates refrigerant to cool the air. It has a few key parts:
- Compressor: This pumps refrigerant through the system.
- Condenser: It cools the hot refrigerant gas into a liquid.
- Evaporator: This absorbs heat from inside the car, making the air cold.
- Expansion Valve: It controls the flow of refrigerant.
- Refrigerant: The fluid that absorbs and releases heat.
The system has a high-pressure side (from the compressor to the expansion valve) and a low-pressure side (from the expansion valve back to the compressor). The gauges measure the pressure in these two sides, giving you clues about what’s going on. I learned this the hard way when my AC wasn’t cooling, and the gauges showed me I was low on refrigerant.
What You Need to Get Started
To read AC gauges, you’ll need a few things. Here’s what I keep in my toolbox:
- Manifold Gauge Set: Includes the gauges, hoses, and connectors.
- Safety Gear: Gloves and safety glasses to protect yourself from refrigerant.
- Refrigerant: Usually R-134a for most cars, but check your owner’s manual.
- Thermometer: To measure the air temperature coming from your vents.
- Service Manual: This has specific pressure ranges for your car.
I bought my first gauge set for about $50, and it’s been worth every penny. Make sure your gauges are compatible with your car’s refrigerant type. Older cars might use R-12, but most modern ones use R-134a or newer R-1234yf.
How AC Gauges Work
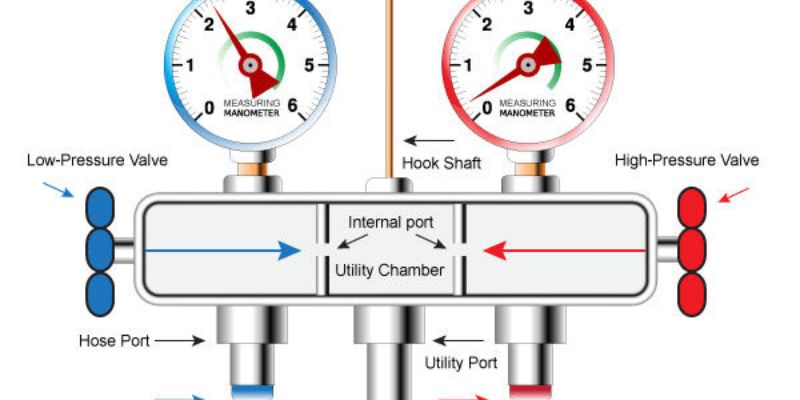
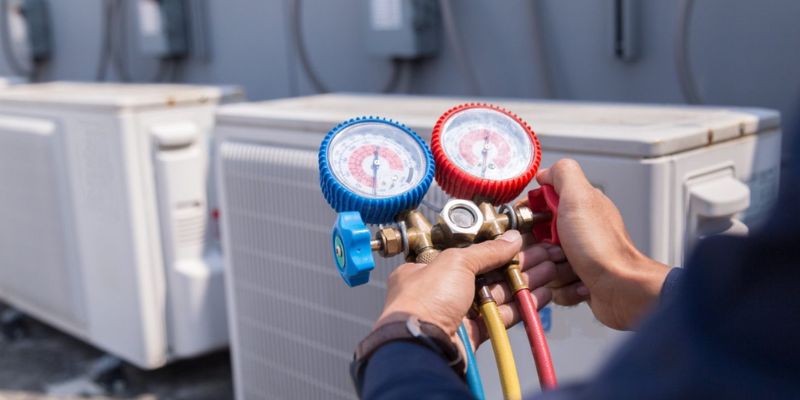
AC gauges have two dials: blue for the low-pressure side and red for the high-pressure side. Each gauge shows pressure in PSI (pounds per square inch) or bars. The blue gauge connects to the low-pressure port (usually near the evaporator), and the red gauge connects to the high-pressure port (near the condenser). The hoses have quick-connect fittings that snap onto your car’s AC ports.
When I first hooked up my gauges, I was confused by all the numbers. The gauges often have colored zones (green, yellow, red) to show safe, warning, or danger pressure levels. Some also have temperature scales to estimate refrigerant levels based on outside air temperature. It takes a little practice, but you’ll get the hang of it.
Step-by-Step Guide to Using AC Gauges
Here’s how I use my AC gauges to check my car’s system. Follow these steps carefully:
- Prepare Your Car: Park on a level surface, turn off the engine, and let it cool down. Open the hood.
- Wear Safety Gear: Put on gloves and safety glasses. Refrigerant can cause frostbite or eye damage.
- Locate the AC Ports: Find the low-pressure (L) and high-pressure (H) ports. They’re usually marked and have different sizes to prevent mix-ups.
- Connect the Gauges: Attach the blue hose to the low-pressure port and the red hose to the high-pressure port. Make sure the gauge valves are closed.
- Start the Car: Turn on the engine and set the AC to max cool with the fan on high.
- Read the Gauges: Let the system run for a few minutes, then check the pressures. Compare them to your car’s service manual or a general chart.
- Check Vent Temperature: Use a thermometer to measure the air coming from the vents. It should be 35–45°F for a healthy system.
- Interpret the Readings: Look for signs of low refrigerant, overpressure, or other issues (more on this below).
- Disconnect Safely: Close the gauge valves, turn off the car, and carefully remove the hoses. Store your gauges properly.
My first time using gauges, I forgot to close the valves before disconnecting, and a little refrigerant sprayed out. Lesson learned—always double-check!
Reading AC Gauge Measurements
Now, let’s get to the fun part: understanding what the gauges tell you. The pressures depend on the outside temperature, so you’ll need a chart (often included with your gauges) to know what’s normal. Here’s a general guide for R-134a systems at 80°F ambient temperature:
| Condition | Low-Pressure (Blue Gauge) | High-Pressure (Red Gauge) |
|---|---|---|
| Normal | 25–35 PSI | 150–250 PSI |
| Low Refrigerant | Below 25 PSI | Below 150 PSI |
| Overpressurized | Above 50 PSI | Above 350 PSI |
| Compressor Failure | High (50+ PSI) | Low (below 100 PSI) |
| Blockage in System | High (50+ PSI) | Very High (400+ PSI) |
Normal Readings
When I checked my sedan’s AC last summer, the low side was around 30 PSI, and the high side was 200 PSI. The vents blew ice-cold air at 40°F. That’s a healthy system! Normal readings mean your refrigerant levels are good, and the compressor is working.
Low Refrigerant
If both gauges show low pressure (say, 15 PSI low and 100 PSI high), you might leak. I had this issue once and found a pinhole in a hose. Adding refrigerant fixed it temporarily, but I had to replace the hose to solve it for good.
Overpressurized System
High readings on both gauges (50 PSI low, 350 PSI high) could mean too much refrigerant or a blockage. I made the mistake of overfilling my AC once, and the gauges showed me I needed to release some refrigerant.
Compressor Issues
If the low side is high (50+ PSI) and the high side is low (below 100 PSI), your compressor might be failing. I had a friend with this problem, and he needed a new compressor. It’s a pricey fix, so check your gauges before it gets that far.
Blockages
A high low-side reading and an extremely high high-side reading (400+ PSI) suggest a clog, like in the expansion valve or condenser. This happened to my old truck, and cleaning the condenser fixed it.
Common AC Problems and What Gauges Tell You
Here are some issues I’ve diagnosed using gauges, along with what they mean:
- Weak Cooling: Low pressure on both sides usually means low refrigerant. Check for leaks before refilling.
- No Cooling: If pressures are normal but the air isn’t cold, the issue might be the blend door or evaporator.
- Cycling Compressor: Low pressure can cause the compressor to turn on and off rapidly. This happened to me when I had a small leak.
- Strange Noises: High pressure might indicate a blockage or a failing compressor. Listen for grinding or hissing sounds.
I always take notes when I read my gauges. It helps me track patterns and spot problems early. If you’re unsure, a professional can confirm your diagnosis.
Tips for Accurate AC Gauge Readings
To get reliable readings, here’s what I’ve learned:
- Check in the Right Conditions: Test when the outside temperature is 70–90°F. Extreme heat or cold can skew readings.
- Run the AC at Max: Set the AC to max cool and high fan speed for consistent pressure.
- Let the System Stabilize: Wait 2–3 minutes after starting the AC before reading the gauges.
- Use the Right Chart: Match your readings to a chart for your refrigerant type and ambient temperature.
- Avoid Overfilling: Adding too much refrigerant can damage the system. If you’re adding refrigerant, do it slowly and check the gauges often.
I once tested my AC on a freezing day and got weird readings. Now I wait for mild weather to ensure accuracy.
Safety Tips for Using AC Gauges
Working with AC systems can be risky if you’re not careful. Here’s how I stay safe:
- Wear Protective Gear: Gloves and safety glasses are a must. Refrigerant can burn your skin or eyes.
- Work in a Ventilated Area: Refrigerant fumes are harmful. I always open my garage door.
- Don’t Overpressurize: Adding too much refrigerant can cause hoses to burst. Go slow and check the gauges.
- Check for Leaks: Use a leak detector or soapy water to find leaks before adding refrigerant.
- Dispose of Refrigerant Properly: Don’t vent refrigerant into the air—it’s illegal and bad for the environment.
I learned the importance of safety gear the hard way when a small spray of refrigerant hit my hand. It stung like crazy! Be cautious, and you’ll be fine.
When to Call a Professional
While I love DIY fixes, some AC problems are best left to pros. If your gauges show a compressor failure, major leak, or blockage, it’s time to call a mechanic. Complex repairs like replacing a compressor or flushing the system require special tools and expertise. I tried fixing a bad compressor myself once and ended up making it worse. Save yourself the headache and know your limits.
Maintaining Your Car’s AC System
To keep your AC running smoothly, here’s what I do:
- Run the AC Regularly: Even in winter, run the AC for 10 minutes every month to keep the seals lubricated.
- Check for Leaks: Use your gauges every season to catch issues early.
- Clean the Condenser: Dirt can block airflow, causing high pressure. I hose down my condenser yearly.
- Replace Cabin Air Filters: A clogged filter reduces cooling. I swap mine every 12,000 miles.
- Store Gauges Properly: Keep them in a dry, cool place to prevent damage.
These habits have kept my AC ice-cold for years, even in my old beater truck.
My Personal Experience with AC Gauges
I’ve been using AC gauges for about five years now, and they’ve saved me a fortune. My first car, a 2005 Honda, had weak AC, and the gauges showed low refrigerant. I added some R-134a, and it was like magic—cold air again! Since then, I’ve used gauges on every car I own to catch problems early. One time, I found a high-pressure reading that led me to a clogged condenser. A quick cleaning, and I was back in business. Gauges are like a doctor’s stethoscope for your AC—they tell you exactly what’s wrong if you know how to listen.
Conclusion: Master Your AC Gauges and Stay Cool
Learning how to read AC gauges on a car has been a game-changer for me, and I hope this guide makes it one for you, too. With a little practice, you can diagnose AC problems, save money, and keep your car’s air conditioning blowing cold. From understanding normal pressure ranges to spotting issues like low refrigerant or compressor failure, gauges give you the power to take control of your car’s maintenance. I’ve shared my tips, mistakes, and lessons learned to help you avoid pitfalls and work safely. So, grab a set of gauges, follow my steps, and enjoy the satisfaction of a cool, comfortable ride. Happy tinkering, and stay cool out there!
FAQs
What are AC gauges, and why do I need them?
AC gauges measure the pressure in your car’s air conditioning system. They help you diagnose problems like low refrigerant or compressor issues, so you can fix your AC and avoid costly repairs.
How do I know if my car’s AC has the right pressure?
Check your gauges against a chart for your refrigerant type and outside temperature. For R-134a at 80°F, the low side should be 25–35 PSI, and the high side should be 150–250 PSI.
Can I use AC gauges on any car?
Yes, but make sure your gauges match your car’s refrigerant (like R-134a or R-1234yf). Check your owner’s manual to confirm the refrigerant type before connecting.
What does it mean if both AC gauges show low pressure?
Low pressure on both the high and low sides usually means your system is low on refrigerant. Check for leaks before adding more refrigerant.
Is it safe to use AC gauges myself?
Yes, if you follow safety precautions. Wear gloves and safety glasses, work in a ventilated area, and don’t overfill the system. Always handle refrigerant carefully.
How often should I check my car’s AC with gauges?
I check mine every spring or when the AC isn’t cooling well. Regular checks help catch leaks or issues early, keeping your system in top shape.