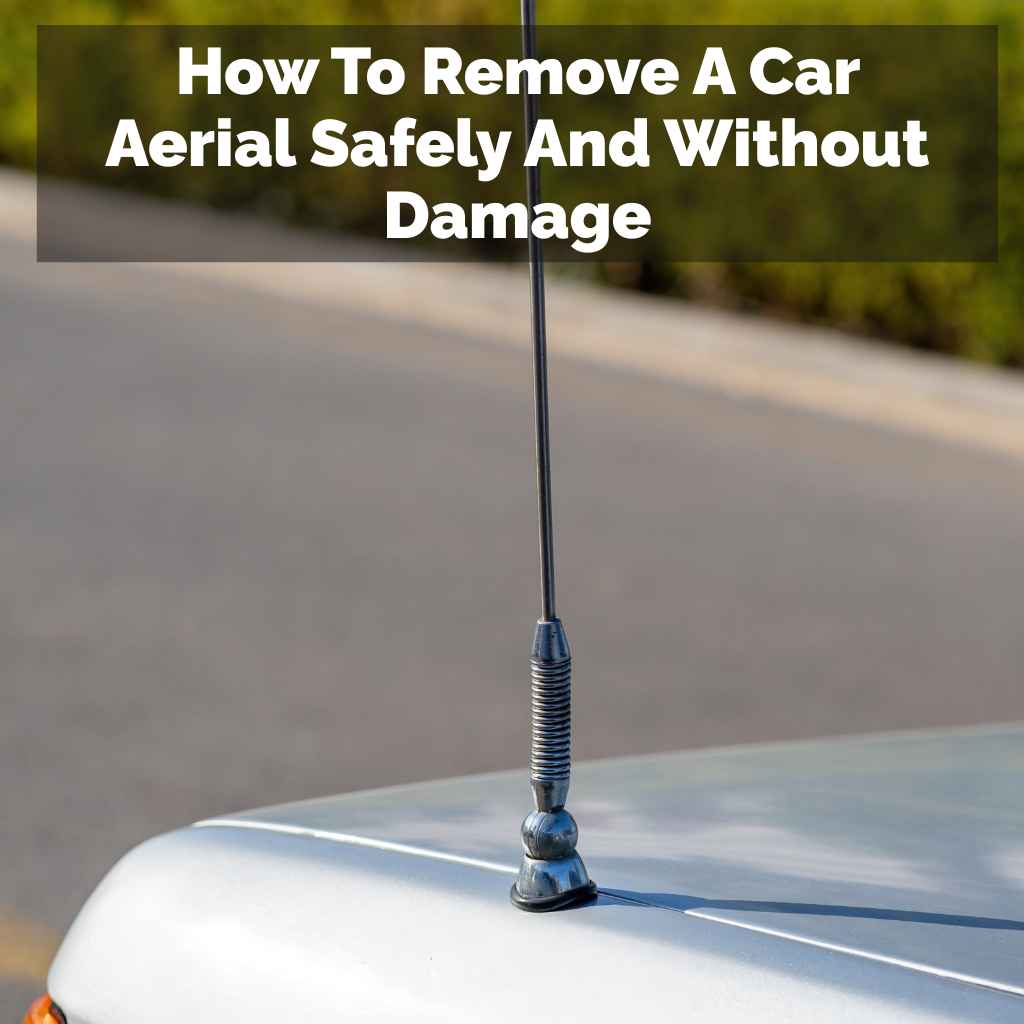
How To Remove A Car Aerial Safely And Without Damage
It sounds like you’re trying to remove your car’s aerial, and you’re worried about doing it wrong. Maybe it’s old and broken, or you’re upgrading to a shark fin. Whatever the reason, you want to get it off cleanly.
It’s a common task, but sometimes tricky. Let’s walk through it together. You’ll get it done right.
Removing a car aerial safely involves identifying its type, gathering the right tools, and carefully unscrewing or detaching it. Many aerials can be removed from the roof by unscrewing a nut from the inside or outside, while others may be glued or clipped. Always check your car’s manual or online resources for specific instructions to avoid damaging your car’s paint or interior.
Understanding Your Car Aerial
Car aerials, or antennas, are how your car listens for radio signals. They can look very different. Some are thin and whip-like.
Others are flat or built into the car’s body. Knowing what kind you have is the first step. This helps you pick the right way to take it off.
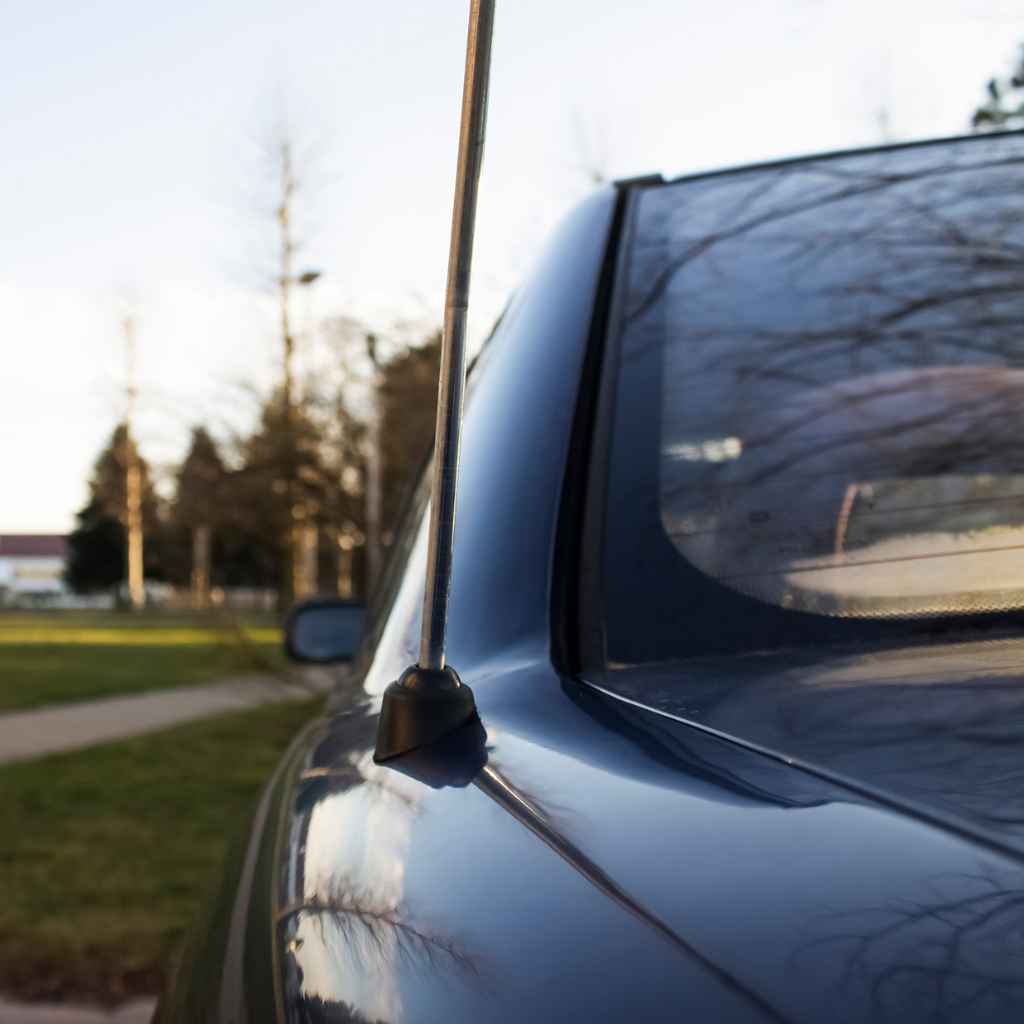
There are a few main kinds of car aerials you might see. The old-school ones are often called mast antennas. These are usually a metal rod.
They stick straight up from the roof or a fender. Sometimes they are flexible. Other times they are quite stiff.
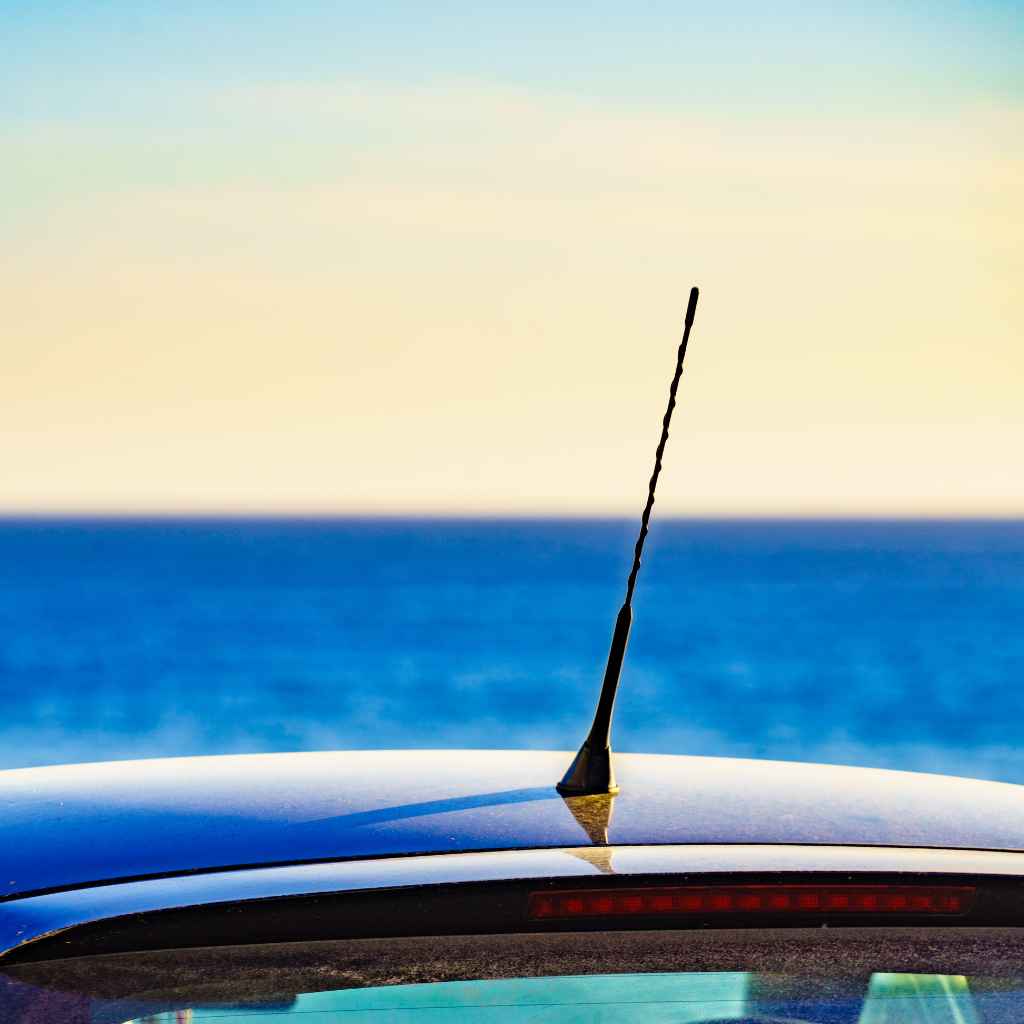
Then there are the smaller, more modern antennas. You might see something like a “shark fin” antenna. This is shaped like a shark’s fin.
It’s often mounted on the rear of the roof. These house more than just radio antennas. They can also hold GPS and satellite radio receivers.
Some cars have hidden antennas. These are built right into the windshield. You can’t see them easily.
They are like thin wires inside the glass. Others might be along the edges of the roof. These are designed to be less noticeable.
The way your aerial is attached depends on its design. Mast antennas often have a nut underneath. You’ll need to access this nut to loosen it.
Shark fins are usually screwed down. They might also be secured with strong adhesive tape. Hidden antennas are part of the car’s wiring and glass.
Why Would You Remove a Car Aerial?
People remove car aerials for many reasons. Sometimes, the old one is broken. It might be bent from an automatic car wash.
Or maybe it just stopped working. A new, better antenna might be installed. This could be for improved radio reception.
Some folks want a cleaner look for their car. A large mast antenna can be a bit old-fashioned. Swapping it for a shark fin or a stubby antenna can change the car’s appearance.
This is common for people who like a sleeker profile.
Occasionally, you might remove it to fix a leak. Water can sometimes get in around the base of an aerial. If you see drips inside your car, the seal might be bad.
Removing it lets you reseal the area properly. This stops the leak for good.
There are also situations where the aerial might be in the way. If you’re installing a roof rack, for example, it might need to come off. Or if you’re painting the roof.
You’ll want a smooth surface without anything sticking out.
Gathering Your Tools
Before you start, having the right tools makes a big difference. You don’t want to scratch your car’s paint. Or strip a screw head.
Having the right gear means a smoother job. And less chance of a costly mistake.
For most mast antennas, you’ll need a wrench. A socket wrench is often best. This fits snugly around the nut.
Make sure you have the right size socket. You don’t want it to be too loose. A standard adjustable wrench can work too.
But be careful not to overtighten or slip.
You might also need a screwdriver. Some aerial bases have small screws. These hold them in place.
A set of Phillips head and flathead screwdrivers is handy. Make sure they are clean and in good shape.
For aerials that are glued on, like some shark fins, you might need a plastic trim tool. Or a putty knife with a dull edge. These help gently pry things loose.
You should also have some masking tape. This protects your car’s paint. Especially around the edges.
If you’re dealing with an aerial that’s really stuck, a little penetrating oil can help. Spray it on the threads. Let it sit for a bit.
This can loosen rust or grime. Just be sure to wipe off any excess.
Don’t forget cleaning supplies. You’ll want a clean cloth. Maybe some car soap and water.
Or an interior cleaner. Having these ready means you can clean up as you go. And make sure everything looks good when you’re done.
Finally, have your car’s manual handy. Or search online for your car’s specific make and model. This can give you exact instructions.
And show you where things are located.
Step-by-Step: Removing a Mast Aerial
This is for the classic whip-style antennas. These are often the most straightforward. But they still need a careful touch.
The key is usually an access point from inside the car.
First, locate the aerial base. It’s usually on the roof or a fender. Open the car door.
Look up at the headliner near the aerial. Sometimes, you can gently pull down the headliner a little. Or you might see a small panel.
This panel covers the aerial’s mounting hardware.
If you can’t find an access panel, check the trunk. Some rear-mounted antennas have their nuts inside the trunk. Look for a plastic trim piece.
Carefully pry it open or remove screws. You should see the back of the antenna assembly.
Once you find the nut, try to loosen it. Use your socket wrench or adjustable wrench. Turn it counter-clockwise.
If it’s tight, don’t force it too hard. You don’t want to bend the metal rod. Or damage the roof.
Try a little penetrating oil if it’s really stuck. Let it soak in for a few minutes.
As you turn the nut, the aerial should start to lift. Keep unscrewing it. Once the nut is off, the aerial should be free.
You might need to wiggle it a bit. Be gentle. Pull it straight up.
Now, you’ll see the hole in the roof. There will be a rubber gasket. This seals the hole.
Make sure this gasket is in good shape. If it’s cracked or old, you might need to replace it. This is important to prevent leaks.
Clean the area around the hole. Remove any dirt or old sealant. If you’re not installing a new aerial right away, you might need a plug.
This covers the hole. It protects it from rain and debris. Some kits come with these plugs.
Or you can get a universal rubber plug.
Remember to clean the base of the old aerial too. And the nut. This makes them ready for storage or disposal.
The whole process should take about 15 to 30 minutes. If you have all your tools ready.
Step-by-Step: Removing a Shark Fin Aerial
Shark fin antennas are common on newer cars. They look sleek. But they can be a bit trickier to remove.
Often, they are secured with screws and strong adhesive.
Start by inspecting the base of the fin. Look for any visible screws. They are usually hidden.
Sometimes, you’ll find them on the underside. Or they might be accessed from inside the car, similar to a mast antenna.
If there are screws, remove them first. Use the correct screwdriver. Be careful not to lose them.
Keep them in a safe place. Especially if you plan to reinstall the fin.
Once screws are out, the fin might still be stuck. This is where the adhesive comes in. You’ll need to gently pry it loose.
Use a plastic trim tool or a dull putty knife. Insert it carefully between the fin and the roof. Work your way around the edge.
Apply gentle, even pressure. Don’t force it. You don’t want to bend the fin.
Or chip the car’s paint. Sometimes, a little heat can help soften the adhesive. A hairdryer on a low setting can work.
Heat the edges of the fin for a minute. Then try prying again.
Be patient. It might take some time for the adhesive to release. Once it starts to loosen, keep working around it.
Slowly lift the fin off the roof. There might be a wire connector. Disconnect it carefully.
It’s usually a simple plug-and-play connector.
After the fin is off, you’ll see the mounting base on the roof. There will likely be remnants of the adhesive tape. You’ll need to clean this off.
Use a plastic scraper. Or a goo remover product. Test the cleaner on an inconspicuous spot first.
Make sure it doesn’t damage the paint.
Clean the roof surface thoroughly. Make sure it’s dry and smooth. If you’re installing a new antenna, follow its instructions for mounting.
If you’re leaving the spot bare, you might need to cover the hole. Some cars have a blanking plate for this. Or you can use a waterproof sealant.
This process can take a bit longer. Maybe 30 to 60 minutes. It really depends on how strong the adhesive is.
And how well it was installed. Taking your time is key here.
Quick Aerial Removal Checklist
- Identify Aerial Type: Mast, shark fin, hidden, etc.
- Gather Tools: Wrenches, screwdrivers, trim tools, tape, cleaner.
- Consult Manual: Find specific instructions for your car.
- Access Point: Look inside car, trunk, or under trim.
- Unscrew/Unbolt: Turn counter-clockwise to loosen.
- Pry Gently: For glued antennas, use plastic tools.
- Clean Surface: Remove old adhesive and dirt.
- Inspect Seal: Check gasket for leaks.
- Cover Hole: If no new aerial, use a plug or plate.
Hidden and Windshield Antennas
These are the trickiest to deal with. Hidden antennas are often integrated into the car’s structure. They aren’t meant to be easily removed by the owner.
Windshield antennas are literally part of the glass. They are thin wires bonded to the glass. Removing these usually means replacing the windshield.
This is not a DIY job. It requires specialized equipment and expertise.
Other hidden antennas might be in the car’s body panels. Or behind the dashboard. If yours is like this, you’ll need to consult a professional.
Or your car’s service manual. They might be connected to complex wiring. Trying to pull them out could damage sensors or other electronics.
For these types of antennas, it’s best to leave them alone. Unless there’s a specific, documented repair procedure. For most people, these antennas will simply stay put.
They are designed for long-term use.
Common Pitfalls and How to Avoid Them
It’s easy to make a mistake when removing an aerial. But knowing what to watch for can save you trouble.
Scratching the Paint: This is a big one. Metal tools can easily scratch your car’s paint. Always use plastic tools for prying.
If you must use metal, like a wrench, be very careful. Put masking tape on the parts that might touch the paint.
Stripping Screw Heads: Use the right size screwdriver. Make sure it’s a good fit. If a screw is very tight, try a little penetrating oil.
Don’t keep turning if the screwdriver is slipping. You’ll just make the problem worse.
Damaging the Headliner: When accessing nuts from inside, be gentle. The headliner can tear or sag if you pull too hard. If there’s a panel, try to find clips or screws holding it.
Use a trim tool to release them slowly.
Forcing a Stuck Antenna: If an aerial won’t budge, don’t keep forcing it. You could bend the metal. Or crack the roof.
Reassess. Did you miss a screw? Is there adhesive you didn’t see?
Try a bit of penetrating oil or gentle heat.
Ignoring Leaks: The hole left by an aerial needs to be sealed. If you don’t seal it well, water will get into your car. This can cause rust.
It can also damage the electronics inside. Always check the gasket. And replace it if it looks worn.
Losing Parts: Small nuts and screws can be easy to lose. Especially when working on a car. Keep them in a small container.
Or a magnetic parts tray. This way, they won’t roll away.
Contrast: Aerial Types
Mast Aerial
Pros: Simple, often easy to replace.
Cons: Can break easily, looks dated.
Shark Fin Aerial
Pros: Sleek look, more durable.
Cons: Can be glued, harder to remove.
What to Do After Removal
Once the old aerial is off, you have a few options. The most common is to install a new one.
Installing a New Aerial: If you’re replacing the old one, follow the instructions for the new aerial. This usually involves connecting wires. And securing the base with a nut or adhesive.
Make sure the seal is good. Most new aerials come with a new gasket.
Using a Blanking Plate: If you don’t want any aerial at all, you can cover the hole. There are blanking plates available. These are small plastic or metal discs.
They fit into the aerial hole. They often have a rubber seal. This keeps water out.
They give a smooth look to the roof.
Sealing the Hole Temporarily: If you’re not sure what you want yet, you can plug the hole. A piece of sturdy tape might work for a short time. But it’s not a long-term solution.
A proper rubber plug is better. Make sure it fits snugly.
Checking for Leaks: After installing a new aerial or a blanking plate, check for leaks. Wait for some rain. Or use a hose to spray water on the roof.
Go inside the car. Look for any signs of water. If you see drips, you might need to reseal it.
Cleaning the area around the hole is also important. Remove any old adhesive residue. Polish the paint if needed.
This makes the area look neat and tidy. It shows you took care with the job.
Real-World Context: When Aerials Fail
I remember helping a friend with his old pickup truck. The radio reception was terrible. Static filled every station.
He thought the radio was broken. But when we looked at the antenna, it was bent. It had clearly hit something.
Probably low branches.
We figured out it was a mast antenna. It had a big nut underneath. Accessing it was the challenge.
We had to pull down the headliner quite a bit. It felt like we were going to rip it. But with some careful wiggling and using a socket wrench, we got the nut off.
The old aerial just pulled right out. It was corroded at the base. The rubber gasket was old and cracked.
We cleaned up the paint around the hole. Then we put on a new mast antenna. It came with a new gasket.
The radio worked perfectly after that. It was a small fix with a big impact on his daily commute.
Another time, I saw a car with a shark fin aerial. It was peeling off. The adhesive was coming undone.
It looked like it was about to fly off. The owner had probably tried to remove it himself and failed. Or maybe the installer didn’t use enough adhesive.
It looked really bad.
It’s a reminder that these parts are exposed. They take a beating from the weather. And from everyday use.
So, when they do fail, it’s usually pretty obvious. And usually requires some hands-on work to fix or remove.
Tips for a Smooth Finish
Masking Tape: Protect your paint before using tools near the aerial base.
Cleanliness: Keep tools and hands clean to avoid smudges.
Gentle Force: Never yank or force a stuck aerial. Work slowly.
Good Lighting: Make sure you can see clearly what you’re doing.
Proper Sealing: Use a new gasket or sealant to prevent leaks.
When to Call a Professional
While removing a car aerial is often a DIY job, there are times when it’s best to get expert help.
Complex Aerial Systems: If your car has a very advanced antenna system. This includes things like integrated GPS. Or satellite radio antennas.
These might be tied into other car electronics. Tampering could cause bigger issues.
Hidden Antennas: As mentioned, hidden antennas are usually not user-serviceable. Especially windshield antennas. These require specialized knowledge and equipment.
Lack of Confidence or Tools: If you’re not comfortable working on cars. Or if you don’t have the right tools. It’s safer to let a professional handle it.
A mistake could cost more to fix than the professional’s labor.
Damaged Paint or Bodywork: If the area around the aerial is already damaged. Or if you’re worried about causing more damage. A body shop can help.
They have the skills to repair paintwork. And ensure a perfect finish.
Leaking Issues: If you’ve removed an aerial and now have a persistent leak. And you can’t pinpoint the cause. A mechanic can diagnose and fix it.
They can also properly seal the opening.
Always consider your own skill level. And the potential risks. For most simple mast or shark fin antennas, you can do it yourself.
But if it feels too complicated, don’t hesitate to seek professional assistance. It’s always better to be safe.
Frequently Asked Questions
Can I remove my car’s aerial if it’s stuck with glue?
Yes, you can often remove a glued aerial. Use a plastic trim tool or a dull putty knife. Gently pry around the edges.
You can also use a hairdryer on low heat to soften the adhesive. Be patient and work slowly to avoid damaging the paint.
What if I lose the nut that holds the aerial in place?
If you lose the nut, you’ll need to get a
How do I prevent water leaks after removing an aerial?
The most important step is to ensure a good seal. Use a new rubber gasket that comes with a
Can I remove the aerial from my car’s windshield?
No, windshield antennas are integrated into the glass. They cannot be removed without replacing the entire windshield. This is a job for professional auto glass technicians.
What tools do I need for a basic aerial removal?
For a standard mast aerial, you’ll likely need a socket wrench or an adjustable wrench. A screwdriver might be needed for some base screws. For shark fin types, a plastic trim tool and possibly a hairdryer are helpful.
Always have cleaning cloths and possibly masking tape ready.
Will removing my aerial affect my car’s radio reception?
Yes, if you remove the only aerial on your car and don’t replace it, your radio reception will be significantly worse, if it works at all. Antennas are essential for picking up radio signals.
Conclusion
Removing a car aerial can seem daunting. But with the right approach, it’s a manageable task. Always start by knowing your aerial type.
Gather your tools. Work carefully. And remember to seal the opening properly.
Taking these steps ensures a clean job. And a car that stays dry and looking good. You’ve got this.