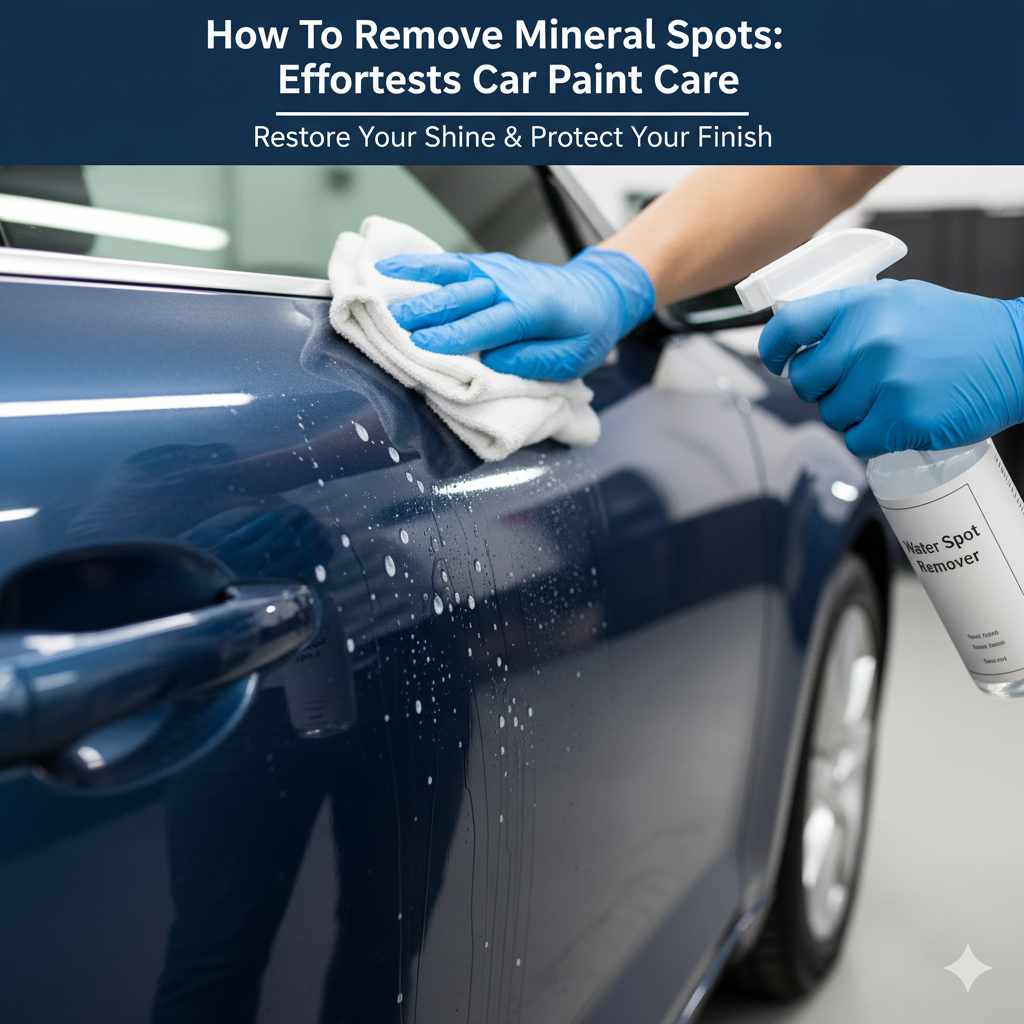
How To Remove Mineral Spots: Effortless Car Paint Care
Effortlessly remove stubborn mineral spots from your car’s paint using simple DIY methods. This guide provides easy-to-follow steps and trusted products to restore your car’s shine, making paint care manageable for any car owner.
Seeing those chalky white spots mar your car’s beautiful paint after it dries can be frustrating, especially after a good wash. These are often mineral deposits, left behind by hard water. Don’t worry, you don’t need to be a professional detailer to get rid of them! With a few common items and a little patience, you can make these spots disappear and bring back that showroom shine. This guide will walk you through the simplest and most effective ways to tackle mineral spots, ensuring your car looks its best.
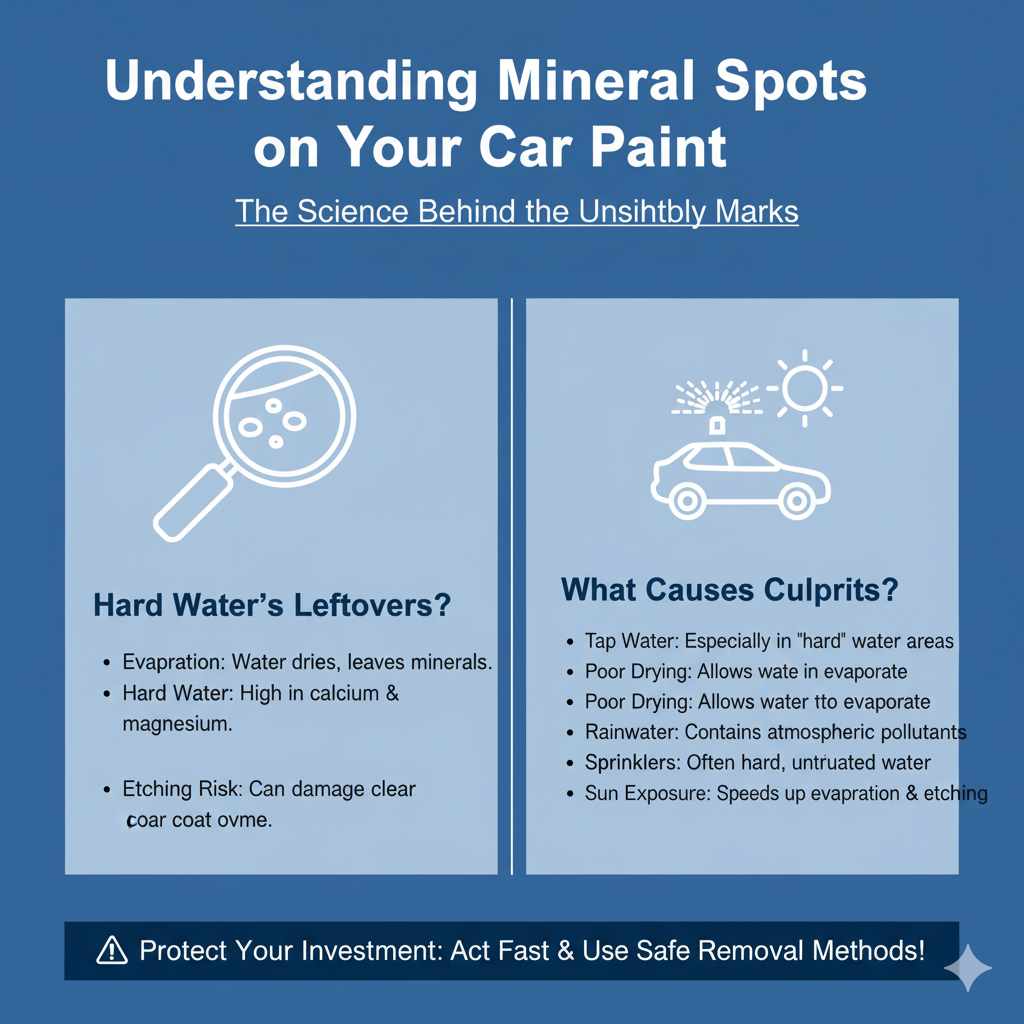
Understanding Mineral Spots on Your Car Paint
Mineral spots, often called water spots, are that annoying residue left behind when water evaporates from your car’s surface. The water itself might be clear, but as it dries, it leaves behind dissolved minerals. In many regions, tap water is “hard,” meaning it contains a high concentration of minerals like calcium and magnesium. When this hard water dries on your car, these minerals are left behind, clinging to the paintwork.
These spots aren’t just unsightly; if left untreated, especially in direct sunlight, they can etch into the clear coat of your car’s paint. This means they can become harder to remove over time and might require more aggressive methods, which can potentially damage the paint. Regular car washing using the right techniques can prevent them, but sometimes they just happen. The good news is that most mineral spots are surface-level and can be removed with simple, safe methods.
What Causes Mineral Spots?
- Hard Water: As mentioned, water with a high mineral content is the main culprit. When this water dries, the minerals are left behind.
- Improper Drying: Not drying your car thoroughly after washing allows water to sit and evaporate, leaving mineral deposits.
- Rainwater: Even rainwater can contain minerals and pollutants from the atmosphere, which can leave spots.
- Sprinklers: Water from garden sprinklers is often very hard and can spray onto your car, leaving stubborn spots.
- Evaporation: Any time water sits on your car and dries in the sun or air, there’s a risk of mineral deposits forming.
DIY Methods to Remove Mineral Spots: Step-by-Step
Getting rid of mineral spots doesn’t always require expensive products. Often, you can use items you already have at home. We’ll cover a few effective methods, starting with the gentlest.
Method 1: Gentle Wash and Dry
Sometimes, the spots are fresh and haven’t etched into the paint. A good wash might be all you need.
- Gather Supplies: You’ll need two buckets, car wash soap, a wash mitt (microfiber is best), a drying towel (also microfiber), and clean water.
- Prepare Buckets: Fill one bucket with your car wash soap and water mixture. Fill the second bucket with plain rinse water. This is the “two-bucket method,” which helps prevent scratching your paint by rinsing dirt off your mitt before it goes back into the soap bucket.
- Wash the Car: Start washing from the top of the car and work your way down. This way, dirty water flows down over unwashed areas, not over areas you’ve already cleaned.
- Rinse Regularly: Rinse your wash mitt frequently in the plain water bucket before dipping it back into the soap bucket.
- Rinse Car Thoroughly: Once the entire car is washed, rinse it off completely with a stream of water.
- Dry Immediately: This is crucial. Use a clean, dry microfiber towel to gently dry the car. Pat or blot the water, rather than rubbing aggressively. Work from top to bottom.
If this doesn’t remove the spots, they might be a little more stubborn.
Method 2: Using Vinegar Solution
Vinegar is a mild acid that can effectively break down mineral deposits. It’s a common household item that works wonders on water spots.
What You’ll Need:
- White distilled vinegar
- Clean water
- Spray bottle
- Microfiber towels (several – you’ll need to rinse them often)
- A wash mitt and soap (for after the vinegar treatment)
Steps:
- Prepare the Solution: Mix equal parts white vinegar and clean water in your spray bottle. For example, 1 cup of vinegar and 1 cup of water.
- Test in an Inconspicuous Area: Before spraying all over, test the solution on a small, hidden spot of your car’s paint to ensure it doesn’t cause any adverse reactions.
- Apply to Spots: Lightly spray the vinegar solution directly onto the mineral spots. Let it sit for about 30-60 seconds. You should see the spots start to dissolve or lift.
- Wipe Gently: Use a clean microfiber towel to gently wipe away the dissolved spots. You might need to use a slightly damp part of the towel to pick up the residue.
- Rinse the Area: Rinse the treated area thoroughly with clean water to remove any vinegar residue.
- Wash and Dry Again: Wash the entire car with car soap and water again, and dry it thoroughly to remove any remaining vinegar or loosened minerals. This step is important to neutralize the acid and prevent it from sitting on the paint.
Important Note: Never let the vinegar solution dry on your paint. Always follow up with a proper wash and rinse.
Method 3: Using Specialized Clay Bar
A clay bar is a detailing product designed to safely remove contaminants from your car’s paint surface, including mineral deposits, industrial fallout, and tar. It’s fantastic for a deeper clean.
What You’ll Need:
- Automotive clay bar
- Clay lubricant (often comes with the clay bar kit, or you can use a quick detailer spray)
- Microfiber towels
- Car wash soap and water
Steps:
- Wash and Dry the Car: Start by washing and drying your car thoroughly. The clay bar needs a clean surface to work on.
- Prepare the Clay Bar: Knead a small portion of the clay bar until it’s pliable. Keep the rest of the bar wrapped.
- Apply Lubricant: Generously spray the clay lubricant onto the section of the car you’re about to work on. Never use the clay bar on a dry surface.
- Decontaminate the Paint: Gently glide the clay bar over the lubricated surface in a back-and-forth motion. You should feel some resistance as it picks up contaminants like mineral spots. Don’t press too hard.
- Wipe Away Residue: After gliding the clay bar over the area, immediately wipe away any lubricant residue with a clean microfiber towel.
- Check and Fold Clay: As the clay bar picks up dirt, it will become dirty. Fold it over and knead it to expose a clean surface. If the clay bar drops on the ground, discard it immediately, as it will pick up grit that can scratch your paint.
- Continue Section by Section: Work on small sections of the car at a time, reapplying lubricant and working the clay bar until the entire surface feels smooth.
- Final Wash and Protection: Once you’ve clay-barred the whole car, give it another wash and dry. Consider applying a coat of wax or sealant for added protection.
Using a clay bar is a slightly more involved process but is incredibly effective for making your paint perfectly smooth and free of embedded contaminants. If you want to learn more about clay bar detailing, resources like AutoGeek’s guide offer more in-depth information.
Method 4: Using a Mild Polish
If mineral spots have been left on the paint for a while and have started to etch into the clear coat, a mild polishing compound might be necessary. This method should be used with caution and as a last resort for stubborn spots.
What You’ll Need:
- Mild automotive polishing compound
- Applicator pad (foam or microfiber)
- Microfiber towels
- Car wash soap and water
Steps:
- Wash and Dry Thoroughly: Ensure the car is perfectly clean and dry.
- Apply Polish to Pad: Put a small amount of the polishing compound onto your applicator pad.
- Work in Small Areas: Gently apply the polish to the affected area using light pressure and circular or back-and-forth motions. Work on one spot at a time.
- Buff Off: Use a clean microfiber towel to gently buff off the polishing residue.
- Inspect: Check the area to see if the spots have been removed. You may need to repeat the process a couple of times with very light pressure.
- Final Wash and Protection: Wash the car again to remove any residue and follow up with a wax or sealant. Polishing removes a microscopic layer of clear coat, so it’s crucial to re-protect the paint afterward.
It’s always best to err on the side of caution when polishing. If you’re unsure, it might be worth consulting a professional detailer. For tips on how to choose the right polishing product, you can check out recommendations from automotive enthusiast sites.
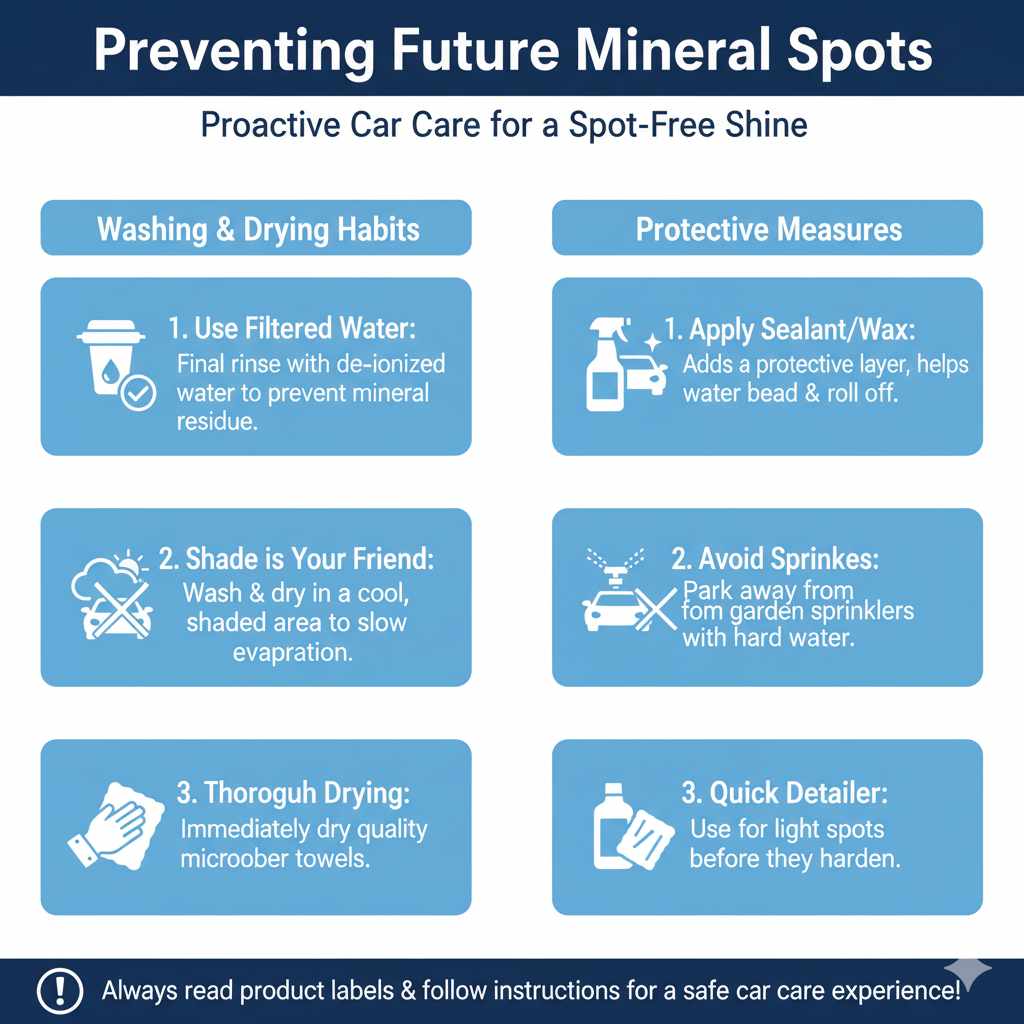
Preventing Future Mineral Spots
The best way to deal with mineral spots is to prevent them from forming in the first place. Here are some simple tips:
- Use Filtered or De-ionized Water: If possible, use filtered or de-ionized water for your car’s final rinse after washing. This water has had most of its minerals removed, so it won’t leave spots behind. You can buy filtered water in bulk or invest in a home filtration system specifically for car washing.
- Wash and Dry in the Shade: Always wash and dry your car in a cool, shaded area, away from direct sunlight. This prevents water from evaporating too quickly and leaving deposits.
- Thorough Drying: Never skip the drying step. Use high-quality microfiber drying towels and dry the car immediately after rinsing.
- Spray Wax or Sealant Maintenance: Regularly applying a spray wax or sealant can add a protective layer to your car’s paint, making it harder for water to adhere and minerals to stick. These products also make water bead up and roll off more easily. For a guide on car waxes and sealants, resources from organizations like the Consumer Product Safety Commission can be helpful.
- Address Sprinkler Rust: If your neighbor’s sprinklers are a recurring problem, consider talking to them or parking your car elsewhere during watering times.
- Quick Detailer for Light Contamination: Keep a bottle of quick detailer and a microfiber towel in your car. If you notice light water spots or bird droppings, you can often remove them quickly before they have a chance to harden.
Tools and Products for Mineral Spot Removal: A Quick Look
Here’s a quick comparison of common methods and what you’ll need:
| Method | Ease of Use | Effectiveness | Tools/Products Needed | Best For |
|---|---|---|---|---|
| Gentle Wash & Dry | Very Easy | Light/Fresh Spots | Buckets, Soap, Mitt, Microfiber Towels | Preventative, initial attempt |
| Vinegar Solution | Easy | Moderate Spots | Vinegar, Water, Spray Bottle, Microfiber Towels | Stubborn fresh spots, mild etching |
| Clay Bar | Moderate | Stubborn Embedded Spots | Clay Bar, Clay Lube, Microfiber Towels | Paint decontamination, deep cleaning |
| Mild Polish | Moderate to Difficult | Etched-in Spots | Polishing Compound, Applicator Pad, Microfiber Towels | Resistant etching, requires caution |
Frequently Asked Questions (FAQ)
Q1: How can I tell if a water spot has etched into my paint?
A: If a water spot feels rough or slightly sunken into the paint’s surface, even after cleaning, it has likely etched. You can often feel this by gently running your finger over the spot. A smooth surface indicates it’s just a residue.
Q2: Is it safe to use household cleaners on my car’s paint?
A: While some household items like diluted vinegar can be safe when used correctly and sparingly, it’s generally best to stick to products specifically designed for automotive paint. This ensures you don’t damage the finish.
Q3: How often should I wash my car to prevent mineral spots?
A: Washing your car every one to two weeks, or as needed depending on your environment (e.g., after rain or sprinkler exposure), is a good practice. Always drying thoroughly is key.
Q4: Can I use a power washer to remove water spots?
A: Power washers can be effective for rinsing, but they should be used with caution. High pressure too close to the paint can cause damage. Ensure you maintain a safe distance and use an appropriate nozzle setting.
Q5: What’s the difference between a water spot and a scratch?
A: A water spot is a residue left by evaporated water (minerals). A scratch is actual damage to the paint’s surface, a physical groove or line. Water spots can be removed; scratches usually require repair.
Q6: Should I wax my car after removing water spots?
A: Yes, absolutely! Especially if you used a method like a clay bar or mild polish, waxing or applying a sealant after removing spots is crucial. It restores the protective layer and adds shine.
Q7: My car is parked outside and gets hit by sprinklers constantly. What’s the best solution?
A: The best long-term solution is to prevent future spots. If possible, park elsewhere, or talk to your neighbor about sprinkler timing. For immediate care, wash and dry your car very thoroughly and frequently, using filtered water for the rinse if you can. Applying a good quality ceramic coating or sealant can also provide significant protection against water spotting.
Conclusion
Dealing with mineral spots on your car’s paint doesn’t have to be a headache. By understanding what causes them and employing the right techniques, you can easily restore your car’s flawless finish.
Remember, starting with the gentlest methods, like a thorough wash and dry, is always best. For more persistent spots, a simple vinegar solution or a more advanced product like a clay bar or mild polish can work wonders. Prevention is your greatest ally; always wash and dry in the shade, dry thoroughly, and consider protective coatings. With these steps and a little care, your car will continue to shine, looking its absolute best on every drive.