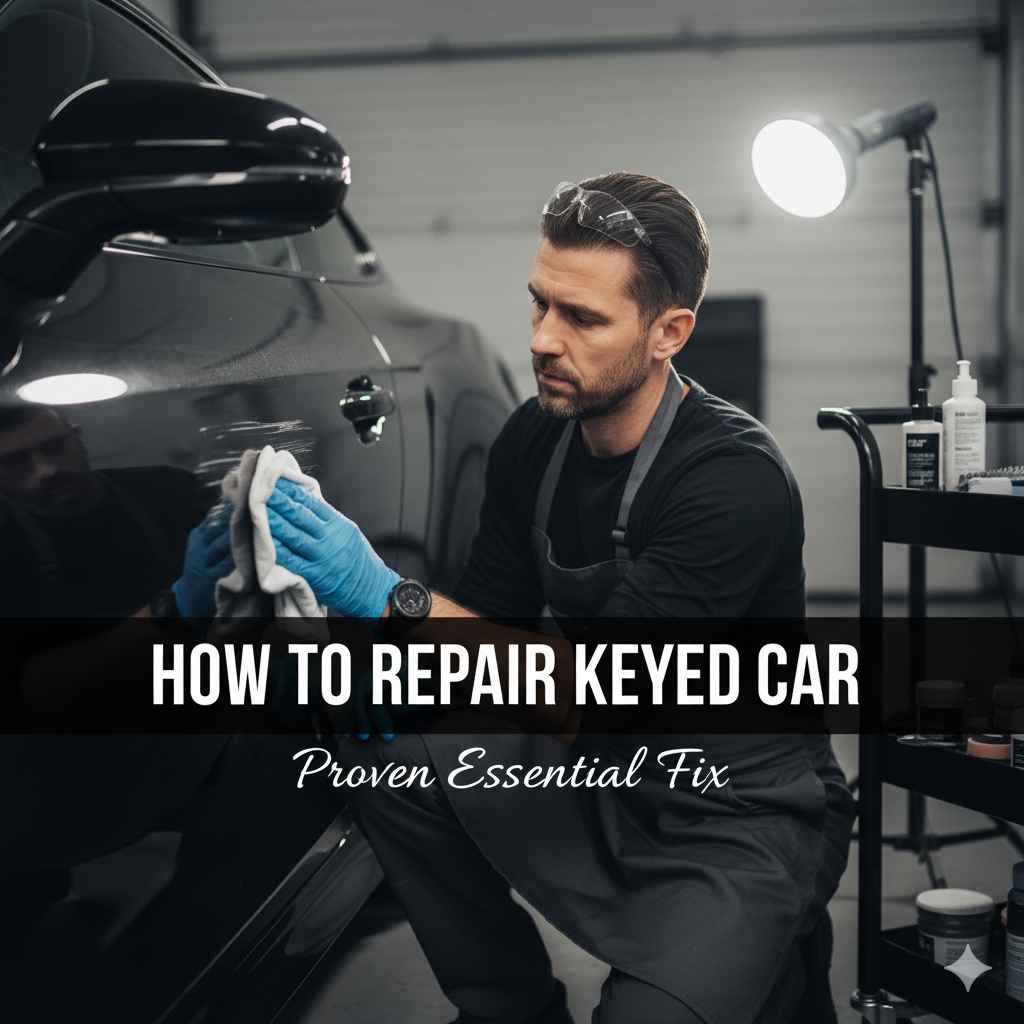
How to Repair Keyed Car: Proven Essential Fix
Repairing keyed car damage involves cleaning the area, assessing the scratch depth, and using specific products like touch-up paint or scratch removers to fill and blend the mark, restoring your car’s finish and protecting it from further harm.
It’s a sinking feeling. You walk out to your car and see it – a long, deep scratch marring your paintwork where there wasn’t one before. Vandalism or an accidental scrape can leave any car owner upset. But before you panic or call a pricey body shop, know that often, you can tackle “how to repair keyed car” damage yourself with the right approach and tools. This guide will walk you through effective, beginner-friendly methods to fix those unwanted marks and get your car looking its best again.
We’ll break down the different types of scratches, the best ways to tackle them safely, and what you’ll need to bring your car’s finish back to its former glory. Let’s make this frustrating problem manageable and give you the confidence to handle it!
Understanding Keyed Car Scratches: What You’re Dealing With
When your car is keyed, the damage can vary a lot. It’s not always the same deep gouge. Understanding the type of scratch you have is the first, most crucial step in figuring out how to repair it effectively. The depth of the scratch determines the repair method you’ll need. Imagine the layers of your car’s paintwork – they range from the protective clear coat on top to the primer and finally the metal body itself.
Paint Layers Explained:
- Clear Coat: This is the outermost, transparent layer. It protects the paint color from UV rays, rain, and minor abrasions. Most light scratches only affect the clear coat.
- Base Coat (Color Coat): This layer provides your car’s actual color. If a scratch reaches this layer, you’ll see the color of the paint disappearing.
- Primer: Located beneath the base coat, the primer acts as an adhesive and a protective barrier against rust. A scratch reaching the primer will expose a greyish or white layer.
- Metal (Body Panel): If the scratch goes this deep, you’ll see the bare metal of your car. This is the most severe type of damage and requires immediate attention to prevent rust.
How to Identify Scratch Depth:
You can often determine the depth by gently running your fingernail across the scratch.
- If your fingernail doesn’t catch: It’s likely a clear coat scratch. These are the easiest to fix.
- If your fingernail catches slightly or you see the color change: The scratch has probably gone through the clear coat into the base coat. This requires more careful attention.
- If your fingernail catches significantly and you see a grey or white layer: The scratch has reached the primer. This needs more involved repair.
- If you see shiny metal: The scratch has penetrated all layers to the metal. This kind of damage needs prompt repair to prevent rust.
Knowing this difference is key to choosing the right “how to repair keyed car” strategy and the products needed. A light polish might fix a clear coat scratch, but it won’t do anything for a scratch that goes down to the metal.

Essential Tools & Supplies for Repairing Keyed Car Damage
Gathering the right supplies before you start will make the whole “how to repair keyed car” process smoother and more effective. Don’t worry; most of these are readily available at auto parts stores or online and won’t break the bank. Think of it as an investment in keeping your car looking great.
What You’ll Need:
- Microfiber Towels: Essential for cleaning and buffing without scratching. Have several on hand.
- Car Wash Soap and Water: For thorough cleaning before any repair work.
- Rubbing Alcohol or Isopropyl Alcohol (IPA): To degrease the area and ensure good adhesion of repair products.
- Clay Bar Kit (Optional but Recommended for Deeper Scratches): Helps lift embedded contaminants that washing alone can’t remove.
- Scratch Remover or Rubbing Compound: For light clear coat scratches.
- Touch-Up Paint Pen/Bottle: Matched to your car’s paint code. This is a crucial item for deeper scratches that expose the base coat or primer.
- Clear Coat Pen/Bottle: To seal the touch-up paint.
- Polishing Compound (Fine Grit): To blend and smooth the repaired area after paint application.
- Wax or Sealant: For final protection of the repainted area.
- Masking Tape (Painter’s Tape): To protect surrounding areas if you’re painting a larger section.
- Gloves: To protect your hands.
- Good Lighting: Natural daylight is best.
Finding Your Car’s Paint Code
This is vital for getting the correct touch-up paint. Your paint code (also known as the color code) is usually found on a sticker inside your car’s door jam, in the glove compartment, or under the hood. Check your owner’s manual if you can’t find it.
Once you have this code, you can order touch-up paint from your car dealership’s parts department or specialized online automotive paint suppliers. Make sure the code you get matches exactly.
Step-by-Step Guide: How to Repair Keyed Car Scratches
Now that you have your supplies and understanding of the damage, let’s get to the hands-on part of learning how to repair a keyed car. We’ll go from the simplest fixes for light scratches to methods for more serious ones.
Step 1: Clean the Damaged Area Thoroughly
This is non-negotiable. Any dirt, dust, or debris left on the surface can cause more scratches during the repair process. Wash the affected area and a surrounding buffer zone with car wash soap and water. Rinse thoroughly and dry completely with a clean microfiber towel.
For a deeper clean, you can use rubbing alcohol (IPA) on a microfiber cloth to gently wipe down the scratch and the surrounding paint. This removes any wax, grease, or contaminants, ensuring the repair products will stick properly.
Step 2: Assess the Scratch Depth (Revisited)
Take another look at the keyed area. Are you dealing with a light clear coat scuff or a deep gouge?
- If it’s a light scratch (fingernail doesn’t catch): You might only need a scratch remover polish or a rubbing compound.
- If it’s a deeper scratch (fingernail catches, color is gone but no metal showing): You’ll need touch-up paint.
- If it’s down to the metal: You’ll need primer, touch-up paint, and clear coat.
Step 3: Repairing Light Scratches (Clear Coat Only)
This is the easiest fix. For minor scuffs that haven’t broken through the clear coat, a good quality scratch remover or a fine-grit rubbing compound can work wonders.
- Apply a small amount of scratch remover or compound to a clean microfiber applicator pad or cloth.
- Gently rub it into the scratch using a back-and-forth or circular motion. Don’t apply excessive force. Let the product do the work.
- Work in small sections.
- Wipe away the residue with a clean microfiber towel.
- Inspect the area. You may need to repeat the process a couple of times.
- Once satisfied, clean the area again and apply a coat of wax or sealant to protect the paint.
A helpful resource can be found on the Federal Trade Commission’s advice on car care, emphasizing gentle handling.
Step 4: Repairing Deeper Scratches (Base Coat or Primer Exposed)
This is where touch-up paint comes into play for “how to repair keyed car” damage.
For Scratches Exposing the Base Coat (Color Gone):
- Apply Primer (If Needed): If the scratch is very deep or you see the primer, you may need a small amount of primer first. Use a very fine brush or the tip of a toothpick to apply a thin layer of primer only within the scratch. Let it dry completely according to the product instructions (usually 30 minutes to an hour).
- Apply Base Coat (Touch-Up Paint): Using your paint pen or bottle, apply a thin, even layer of touch-up paint. The goal is to fill the scratch, not create a blob on top. It might take several thin coats to build up the color. Apply one coat, let it dry for at least 30 minutes, and then apply another. Try to stay within the lines of the scratch.
- Apply Clear Coat: Once the base coat has dried thoroughly (check product instructions, often 24 hours), apply a thin layer of clear coat using the clear coat pen. This protects the color and provides shine. Again, thin layers are better than one thick, messy one.
- Level and Polish: After the clear coat has cured (this can take a few days), the painted area might feel slightly raised. You can carefully level it using a very fine rubbing compound or a polishing compound on a microfiber cloth. Gently buff the area to blend it in.
- Wax and Protect: Finish by applying a quality car wax or sealant to the repaired area to protect it and enhance the gloss.
For Scratches Down to the Metal:
- Clean and Degrease: As always, start with a clean, dry surface. Use IPA to ensure no oils remain.
- Apply Anti-Rust Treatment (Optional but Recommended): If the metal is exposed, consider a rust inhibitor or converter specifically designed for automotive use. Let it dry as instructed.
- Apply Primer: Carefully apply a thin layer of primer directly into the scratch using a fine brush or toothpick. Allow it to dry completely. Multiple thin coats may be necessary, with drying time in between.
- Apply Base Coat: Once the primer is dry, apply your color-matched touch-up paint in thin, even layers. Allow each layer to dry thoroughly before applying the next until the scratch is filled and the color matches.
- Apply Clear Coat: After the base coat has cured, generously apply clear coat over the repaired area. This seals and protects the color.
- Cure and Polish: Allow the clear coat to cure fully, which can take several days. Once cured, use a fine-grit polishing compound to gently level the paint and blend it with the surrounding factory paint.
- Protect: Apply a good coat of wax or sealant to protect your work and give it a beautiful shine.
For precise application of touch-up paint, especially in narrow scratches, using a toothpick or a very fine detail brush can give you more control than the applicator that comes with the paint pen.
Important Note on Wet Sanding: For very deep scratches that are difficult to level, experienced DIYers might consider wet sanding with very fine grit sandpaper (2000-3000 grit). This is an advanced technique and should only be attempted if you are comfortable, as it can easily damage surrounding paint if done incorrectly. Always use plenty of water and a sanding block, and start with the finest grit. If you’re unsure, skip this step.
Preventative Measures: How to Avoid Future Keyed Car Scratches
Once you’ve successfully fixed your car, you’ll want to prevent future damage! Prevention is always easier (and cheaper) than repair when it comes to keeping “how to repair keyed car” issues at bay.
- Park in Safe Locations: Whenever possible, park in well-lit areas that are frequented by people or, ideally, in a garage. Avoid parking next to older vehicles that might have loose parts or sharp edges, or near areas where children might be playing unsupervised.
- Consider a Car Cover: For cars parked outdoors regularly, a quality car cover can offer protection against accidental scratches, bird droppings, and environmental fallout.
- Be Mindful of Surroundings: When parking or maneuvering in tight spaces, be aware of pillars, shopping carts, car doors that might swing open unexpectedly, and shrubbery with thorns.
- Install a Dash Cam with Parking Mode: While not a direct preventative measure, a dash cam with a parking mode can act as a deterrent and provide evidence if vandalism or an accident occurs.
- Ceramic Coatings or Paint Protection Film (PPF): For serious enthusiasts looking for robust protection, a professional ceramic coating or paint protection film can add a durable layer that acts as a sacrificial shield against minor abrasions and makes cleaning much easier. While an investment, they can save you from dealing with keyed car damage.
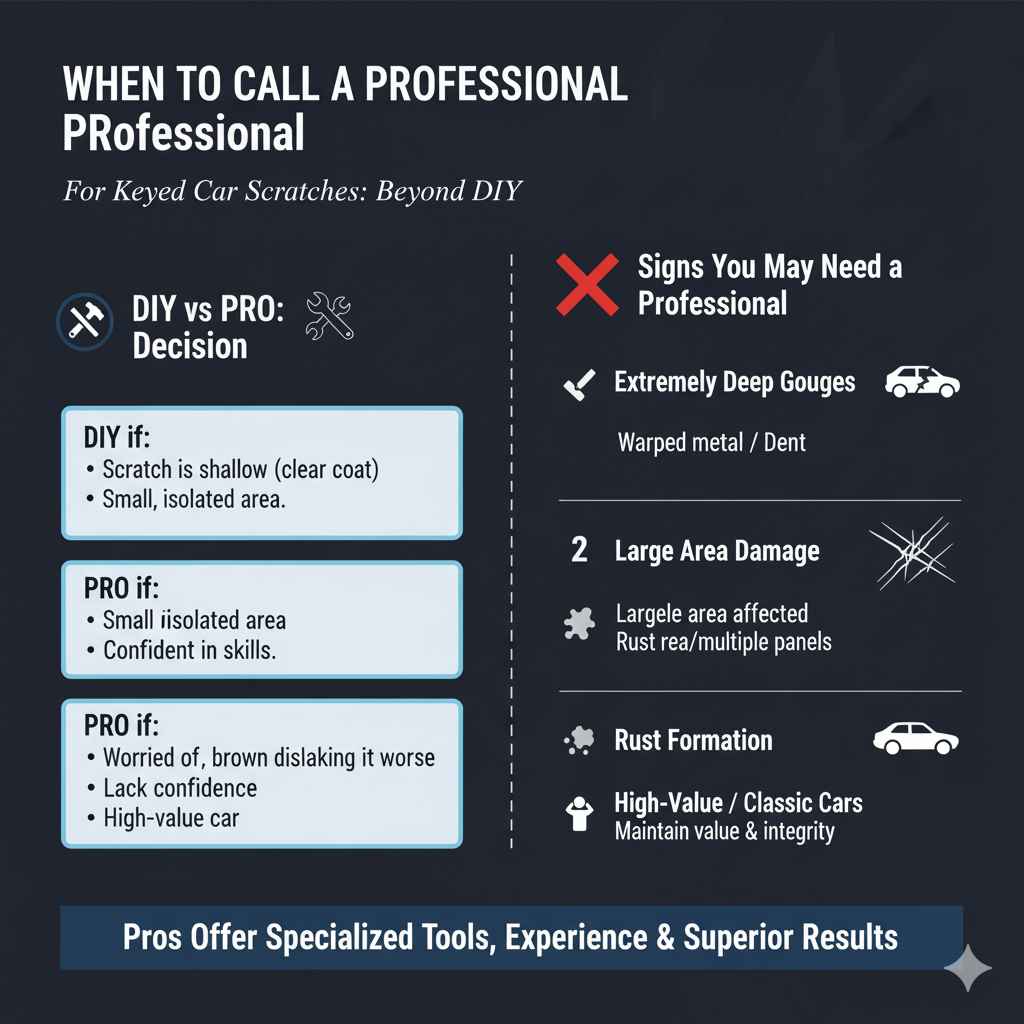
When to Call a Professional
While many keyed car scratches can be repaired at home, there are times when it’s best to seek professional help. If the scratch is extremely deep, spans a large area, or if you’re simply not comfortable attempting the repair yourself, a professional detailer or auto body shop is your best bet.
Signs You May Need a Professional:
- Extremely Deep Gouges: If a scratch is so deep that it has warped the metal panel or created a significant dent, professional bodywork is required.
- Large Area Damage: If the vandalism has affected a very large section of the car or multiple panels, professional techniques like repainting may be necessary.
- Rust Formation: If you discover rust already forming in the scratch, it needs immediate professional attention to prevent it from spreading and causing more structural damage.
- Lack of Confidence: If you’re worried about making the problem worse, it’s always safer and more cost-effective in the long run to let a pro handle it.
- High-Value or Classic Cars: For rare, expensive, or classic vehicles, professional restoration is often the only option to maintain their value and integrity.
Professionals have specialized tools, extensive experience, and access to factory-quality paint matching and application systems that can achieve results often superior to DIY methods, especially for severe damage. They can properly assess the damage and provide an estimate for repair.
FAQ: Your Top Questions About Repairing a Keyed Car Answered
Here are answers to some common beginner questions about dealing with keyed car damage.
Q1: Can a keyed car scratch be completely removed?
A: Light scratches in the clear coat can often be completely buffed out. Deeper scratches that reach the paint color or primer can be effectively repaired to be nearly invisible with touch-up paint, but they may not be 100% undetectable up close by an expert. Scratches to the metal can be repaired to prevent rust and look good, but pinpointing the exact repair might be possible for very discerning eyes.
Q2: How long does it take to repair a keyed car scratch?
A: For light scratches using compounds, it might take 30 minutes to an hour. For deeper scratches requiring touch-up paint, the actual application might take a couple of hours spread over a day or two due to drying times between coats. The full curing process for clear coat can take days or even weeks.
Q3: Is it better to use a touch-up paint pen or a bottle with a brush?
A: For very fine scratches, a touch-up paint pen offers precision and is easier for beginners. For slightly wider or deeper scratches, a bottle with a smaller brush tip can allow for better control and coverage. Always ensure the paint is an exact match for your car’s paint code.
Q4: Will washing the car help the scratch?
A: Washing will clean the area but won’t remove or repair the scratch itself. However, thorough cleaning is a vital first step in any repair process to ensure the repair product adheres properly.
Q5: How can I prevent my car from being keyed again?
A: Parking in safe, well-lit areas, using a car cover, and being mindful of your surroundings are the best preventative measures. A dash cam with parking mode might also deter potential vandals.
Q6: What is the “Polish” step and why is it important?
A: After applying touch-up paint and clear coat, the repaired area might feel slightly rough or raised. Polishing uses a mild abrasive to smooth the surface and blend the repaired paint with the original factory paint, making the repair less noticeable and restoring shine. It’s a crucial step for a seamless finish.
Q7: When should I consider a professional detailer versus a body shop?
A: A professional detailer is ideal for light to moderate scratches and paint correction. They excel at polishing, buffing, and applying coatings. A body shop is for significant damage like deep gouges, dents, rust, or if you need a full panel repainted, as they have the equipment for structural repair and collision work.