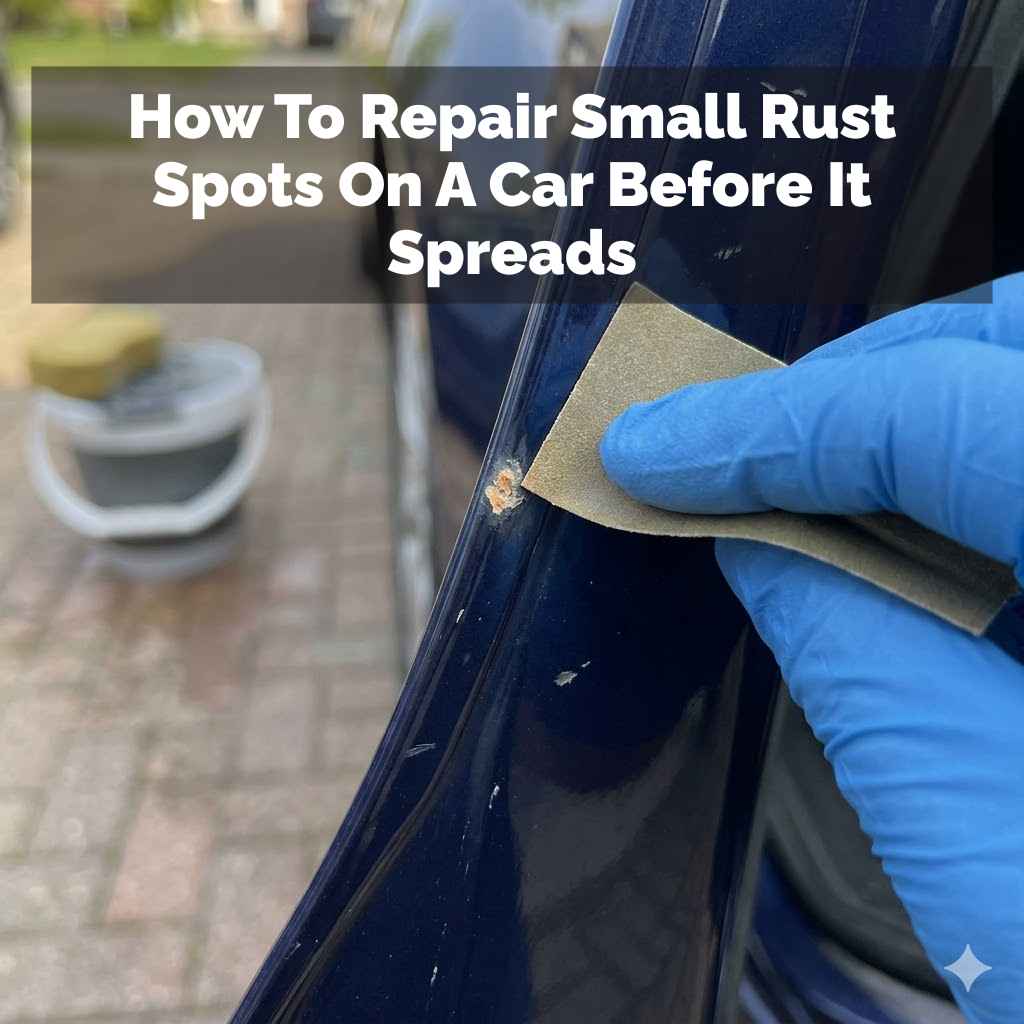
How To Repair Small Rust Spots On A Car Before It Spreads
Seeing a little orange spot on your car’s paint? It’s like a tiny warning flag. Most of us see it and think, “Oh, that’s just a bit of rust.
It’s small, it’s fine.” But here’s the thing: that small rust spot is like an open door. It lets more water and air in. This makes the rust grow bigger and deeper.
It can even eat through the metal. It’s super frustrating. You want your car to look good.
You don’t want to deal with big rust problems later. The good news is you can fix these little spots yourself. This guide will show you how.
We’ll cover what to look for, simple ways to fix it, and how to stop it from coming back. Let’s keep your car looking sharp and protected!
The best way to repair small rust spots on a car involves careful cleaning, rust removal, priming, and painting. Addressing rust early prevents it from spreading into larger, more costly issues, ensuring your car’s metal stays protected and looks good.
What is Car Rust and Why Does It Appear?
Car rust, also called corrosion, happens when metal reacts with oxygen and water. Think of it like iron getting a cold. The iron in your car’s steel is exposed.
Then, it teams up with oxygen. Water is like the messenger that brings them together. This team-up makes iron oxide.
That’s what we see as rust. It’s that rough, flaky, reddish-brown stuff.
Why does it start on cars? It’s usually because the paint is damaged. A tiny chip from a rock.
A scratch from a branch. Even a small ding from a shopping cart can break the paint. Once the metal is bare, rust can begin.
Salt on the roads in winter is a big culprit. It speeds up the rusting process. Also, water gets trapped in tiny spots.
This might be around door handles, wheel wells, or seams. These areas are harder to keep perfectly dry.
The metal used in cars isn’t pure iron. It’s usually steel, which is iron mixed with carbon. This makes it strong.
But steel can still rust. Modern cars have protective layers. They use galvanization or special coatings.
These help a lot. But if these layers are broken, rust can start from the inside out. It’s a slow process, but it’s always working when conditions are right.
My Own Rust Battle: A Tiny Spot That Grew
I remember when I first noticed a small rust spot on my old sedan. It was on the edge of the rear fender. It was no bigger than a dime.
I saw it after washing the car on a sunny Saturday. My first thought was, “It’s tiny. I’ll get to it later.” Famous last words, right?
I had a lot going on that week. Work was crazy. Family stuff popped up.
That tiny rust spot just stayed on my mental to-do list.
Fast forward maybe six months. I was giving the car a quick wash again. And oh boy.
That dime-sized spot had spread. It wasn’t just on the surface anymore. It had started to bubble the paint around it.
It looked so much worse. I could feel the rough texture. I felt a wave of regret.
And a little bit of panic. I knew this was going to be a bigger job now. I should have just fixed it when it was small.
That feeling of annoyance at myself was strong. It was a good lesson, though. A hard one, but good.
I ended up having to sand down a much larger area. I had to use more filler. And more primer.
It took way longer than it would have six months prior. The paint match wasn’t perfect either. All because I put off that small fix.
It’s a common story. We all get busy. But with rust, “later” often means “much worse.”
How to Spot Rust Early
Catching rust early is key. It saves you time, money, and effort. So, what should you look for?
Be observant when you wash your car or notice it parked outside.
Rust Watchlist: Where to Look
Common Spots:
- Wheel Wells: Rocks and road grime often chip paint here.
- Door Edges: Small dings and constant exposure to moisture.
- Fender Flares: Similar to wheel wells, they catch debris.
- Rocker Panels: The lower part of the car body, near the ground.
- Around Windows/Windshields: Seals can trap water.
- Trunk Lid/Hood Edges: Small chips or dings can hide here.
- Seams and Joints: Where different metal parts meet.
You might see a small discoloration. It can be a light orange or brown. Sometimes, the paint above the rust will bubble.
It looks like a small blister. If you run your hand over it, it will feel rough. Unlike smooth paint, rust has a gritty texture.
Check these areas regularly. Even a quick glance can make a difference.
Don’t ignore a small scratch either. If you see one, clean it up. You can even put a dab of clear nail polish on it.
This acts as a temporary seal. It’s a small step. But it can stop rust before it starts.
Think of it as a tiny bandage for your car’s paint. It’s better than a big surgery later.
Gathering Your Rust-Busting Tools
Before you start fixing, get your supplies ready. Having everything on hand makes the job smoother. You don’t want to stop midway.
It’s best to get it done in one go if possible.
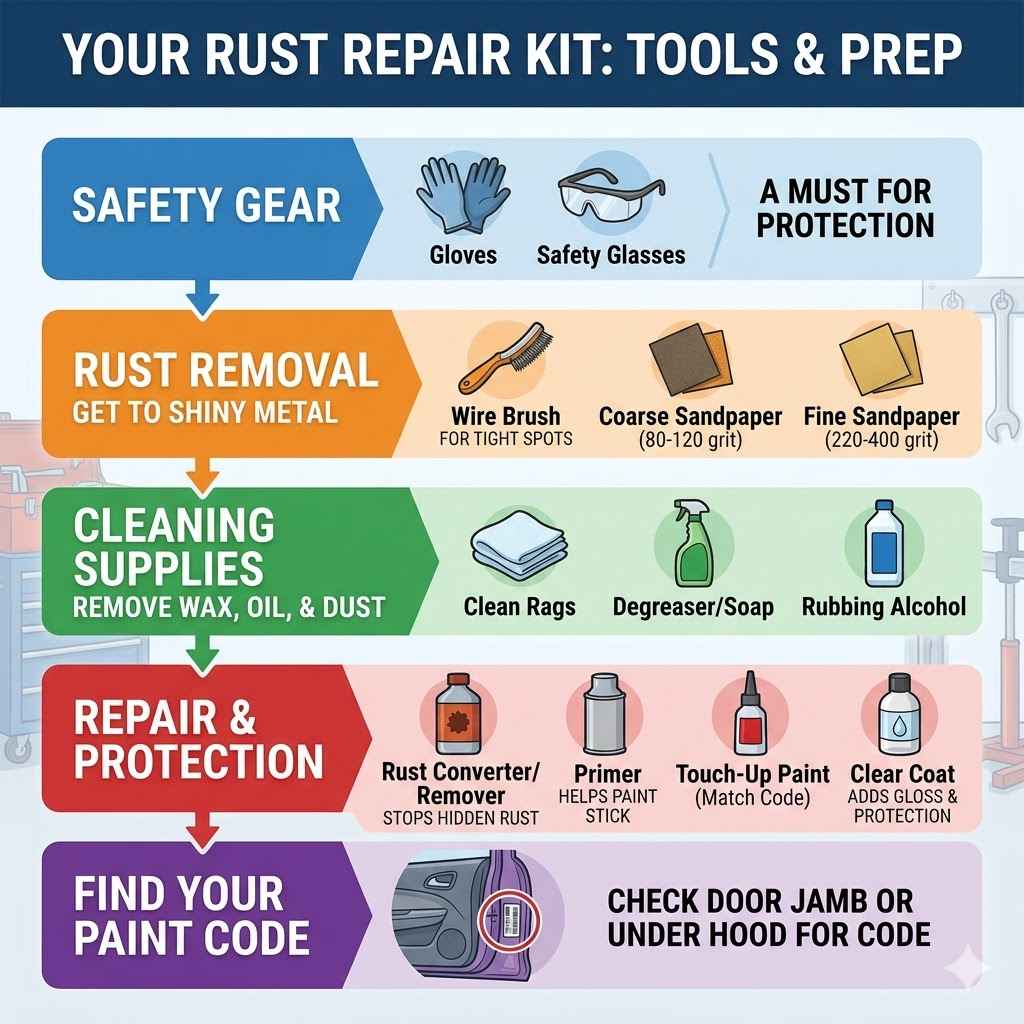
Your Rust Repair Kit
- Safety Gear: Gloves and safety glasses are a must.
- Sandpaper: Get a few grits. Start with rougher (like 80-120 grit) for rust removal. Then use finer grits (like 220-400 grit) for smoothing.
- Wire Brush: For getting into tight spots.
- Rust Remover/Converter: This chemical product can help stop rust.
- Clean Rags: Lots of them.
- Degreaser or Car Wash Soap: To clean the area.
- Rubbing Alcohol: For final surface prep.
- Primer: A small can of automotive primer.
- Touch-Up Paint: Match your car’s color code.
- Clear Coat: To protect the new paint.
- Optional: Bondo or auto body filler for deeper rust holes.
- Optional: Small putty knife or spreader for filler.
Make sure your touch-up paint matches your car. Most cars have a paint code. You can find it on a sticker in the door jamb or under the hood.
You can get this code matched at an auto parts store. Having the right tools makes a big difference. It turns a daunting task into a manageable project.
It’s like having the right tools for any job around the house.
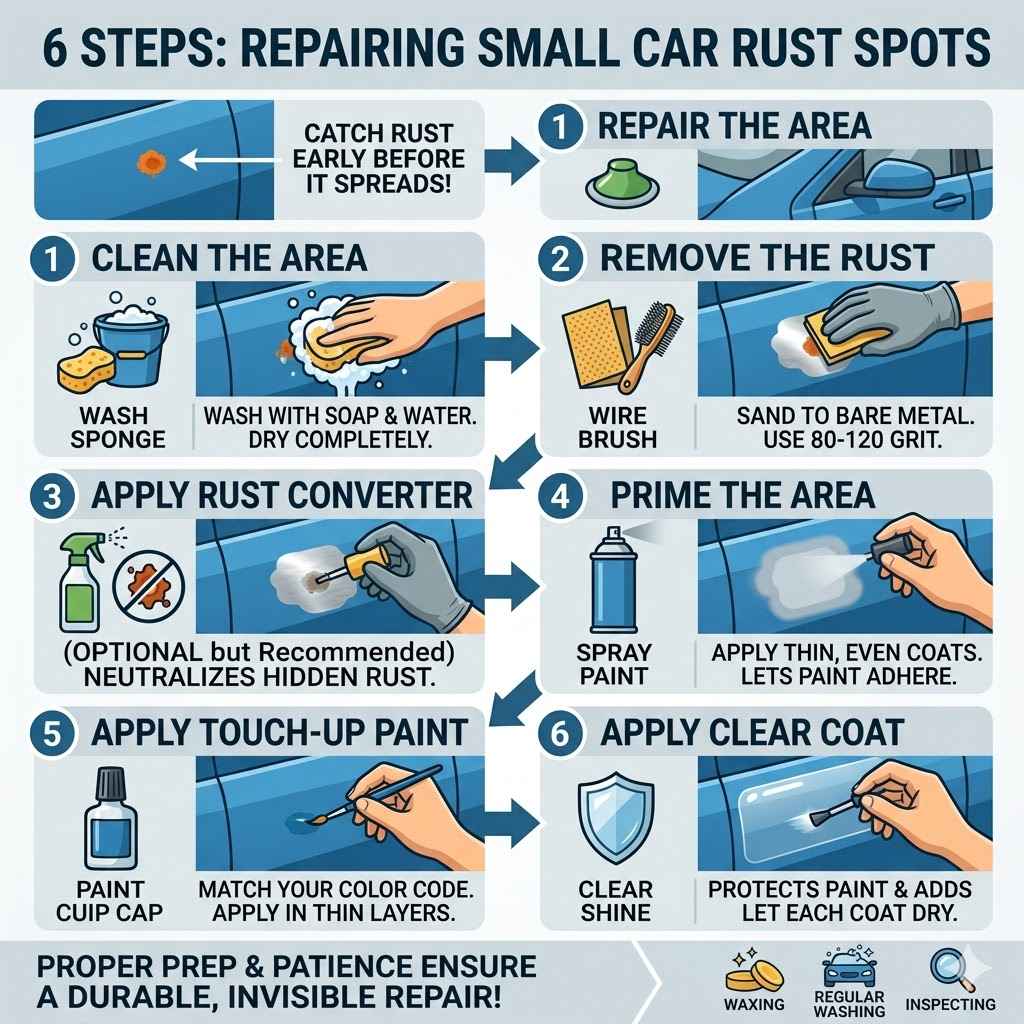
Step-by-Step: Fixing Small Rust Spots
Here’s how to tackle those small rust spots. This process works for rust that is just on the surface. If there’s a hole, it’s a bit more involved.
But for those tiny orange dots, this is your game plan.
Step 1: Clean the Area
First, wash the area around the rust spot. Use car soap and water. Rinse it well.
Then, use a degreaser or rubbing alcohol on a clean rag. This removes any wax or oil. A clean surface is vital.
It lets you see the true extent of the rust. It also helps the repair materials stick better. Dry the area completely.
Step 2: Remove the Rust
Now, it’s time for the rust itself. Put on your gloves and safety glasses. Take your sandpaper.
Start with the coarser grit (80-120). Gently sand the rusty spot. You want to remove all the visible rust.
You should see shiny metal underneath. If the rust is in a tight spot, use a wire brush.
Keep sanding until you can’t see any more orange. You might need to sand a bit beyond the rusty spot. This is to get down to clean metal.
Wipe away the dust often with a clean rag. This lets you see your progress. The goal here is to expose clean, bare metal.
This is the foundation for your repair.
If the rust is deeper, you might see a small hole. For a very small hole, you might be able to fill it with primer and paint. But for bigger holes, you’ll need auto body filler (like Bondo).
You’d apply that after sanding. Then sand it smooth. But for just surface rust, clean metal is enough.
Step 3: Apply Rust Converter or Remover (Optional but Recommended)
This step is a good idea for extra protection. You can buy rust removers or rust converters. A remover cleans away rust chemically.
A converter changes rust into a stable, paintable surface. Follow the product’s instructions. Often, you apply it.
Let it sit for a bit. Then wipe off any excess. This step helps ensure no rust remains.
This is where you can really add value. It’s like being a detective. You’re finding all the hidden rust.
You’re neutralizing it. So it can’t come back easily. This chemical treatment is a smart move.
It goes beyond just sanding. It tackles the problem at a molecular level.
Step 4: Prime the Area
Once the area is clean and dry, apply primer. Use a thin, even coat. Primer helps the paint stick.
It also adds another layer of protection. Let the primer dry completely. Check the product directions for drying times.
You might need two thin coats of primer. If you see any rough spots after priming, gently sand them with a fine-grit sandpaper (like 320-400 grit). Wipe clean.
Primer is like the base coat for a painting. It prepares the surface. It makes sure the colors will be true.
And that they will last. It also acts as a barrier. It stops the metal from reacting with the new paint.
This is important for long-term durability. It seals everything up nicely.
Step 5: Apply Touch-Up Paint
Now for the color! Shake your touch-up paint well. Apply thin coats.
Don’t try to cover it all in one thick layer. That often leads to drips. Let each coat dry before applying the next.
Build up the color slowly. You want to match the surrounding paint as closely as possible. This might take several thin coats.
Be patient here. It’s easy to rush. But slow and steady wins the race.
You want a smooth finish. Not a lumpy patch. Most touch-up paints come with a small brush.
Some are pen-style. Use light, even strokes. Try to blend it into the existing paint slightly.
This helps it look more natural.
Step 6: Apply Clear Coat
Once the color coat is dry, apply a clear coat. This protects the paint. It also gives it a glossy finish that matches the rest of your car.
Again, use thin, even coats. Let each coat dry before the next. Clear coat adds durability.
It’s like the protective shield for your repair. It seals in the color.
The clear coat is what gives your car that shine. It also protects the paint from UV rays and dirt. It’s the final layer of defense.
And it makes the repair blend in better. Once it’s dry, you’ll have a smooth, protected surface. It should look much better than that rusty spot.
Dealing with Deeper Rust and Small Holes
What if the rust has eaten through the metal? This is a bit more serious. But for small holes, it’s still often a DIY fix.
This is where auto body filler comes in.
When Rust Eats Through Metal
- Assess the Damage: How big is the hole? Is the surrounding metal still sound?
- Clean Thoroughly: Sand away all rust, both inside and outside the hole, until you reach bare metal.
- Apply Body Filler: Mix a small amount of auto body filler (like Bondo) with its hardener. Apply it to the hole with a putty knife. Overfill it slightly.
- Let it Cure: Allow the filler to harden completely, following the product instructions.
- Sand Smooth: Once hard, sand the filler down. Start with a medium grit sandpaper (like 120-180 grit). Then move to finer grits (220-400 grit). The goal is a perfectly smooth surface that is level with the car’s body.
- Prime and Paint: After sanding and cleaning, you’ll prime the filled area. Then proceed with touch-up paint and clear coat as described before.
This process takes patience. Sanding body filler is key. You want it to be perfectly smooth.
You can’t feel any bumps or edges. If you can feel it, others will see it. It’s all about achieving a seamless finish.
For very large rust-eaten areas, professional repair might be needed.
The trick with body filler is to use it for minor damage. If you have a baseball-sized hole, it might be beyond a simple DIY fix. But for nail-head sized holes or small patches of rust that went through, filler can work wonders.
It’s designed to fill voids and be sanded smooth.
Preventing Rust from Coming Back
You’ve fixed the rust. Great job! But now you need to stop it from returning.
Prevention is always better than repair. What can you do?
Rust Prevention Habits
Keep it Clean: Wash your car regularly. This removes salt, dirt, and road grime. Pay attention to the undercarriage.
Especially after driving in winter conditions.
Seal Scratches: Fix any paint chips or deep scratches promptly. Even a dab of clear nail polish can help temporarily.
Wax Your Car: A good coat of wax provides a protective barrier against the elements.
Check Seals: Ensure door and window seals are in good condition. Cracked or damaged seals can trap moisture.
Park Smart: If possible, avoid parking in damp areas or under dripping trees. Moisture is rust’s best friend.
Inspect Regularly: Make it a habit to check your car for new rust spots or paint damage.
Think of your car’s paint as its skin. It needs to be kept healthy and intact. Regular washing is like a good shower.
Waxing is like lotion. Fixing cuts and scrapes is like applying a bandage. These simple habits make a huge difference.
They protect your investment. They keep your car looking good for years.
Consider rustproofing treatments if you live in an area with harsh winters or lots of road salt. These are often applied by professionals. They add an extra layer of protection.
Especially to the undercarriage and hidden areas. It’s an extra step, but it can be worth it in the long run.
When to Call a Professional
While you can fix small rust spots yourself, there are times to seek expert help. If the rust covers a large area, it might be too much for a DIY job. If there are deep holes that weaken the car’s structure, it’s best left to pros.
Also, if you’re not comfortable with the process, that’s okay!
A professional auto body shop has the tools and expertise. They can handle more complex rust damage. They can ensure a perfect paint match.
And a durable repair. For significant rust issues, their work will last longer. It can also prevent safety concerns.
Don’t be afraid to get a quote. It’s worth knowing your options.
Sometimes, the damage is just too extensive. Or the rust has compromised structural integrity. In these cases, a professional repair is the only safe option.
They have specialized equipment. They understand metalwork. They can often patch or replace rusted sections.
This ensures the car is safe to drive. And the repair looks factory-new.
Frequently Asked Questions About Car Rust Repair
How long does it take to repair a small rust spot?
For a small rust spot, the actual repair work might take 1-2 hours. However, you need to factor in drying times for primer, paint, and clear coat. This can extend the total time to a full day or even spread it over two days. Rushing the drying process can ruin the finish.
Will sandpaper alone remove all the rust?
Sandpaper is crucial for removing the visible rust. However, to ensure all microscopic rust particles are neutralized and to prevent future spread, using a rust converter or remover after sanding is highly recommended. This chemical step provides extra insurance against recurring rust.
Can I use regular house paint for car rust repair?
No, you should never use regular house paint on a car. Automotive paints are specifically designed for cars. They need to withstand extreme temperatures, UV rays, road salt, and physical impacts. Always use automotive-grade primer, touch-up paint, and clear coat that match your car’s finish.
What’s the difference between rust converter and rust remover?
A rust remover uses chemicals to dissolve and clean away existing rust, leaving bare metal. A rust converter, on the other hand, chemically reacts with the rust. It transforms it into a stable, inert black layer that can be painted over. Both are useful, but converters can be easier for hard-to-reach areas.
How do I find my car’s paint code?
Your car’s paint code is usually on a sticker. Look in the driver’s side door jamb, under the hood, or in the glove compartment. It’s often a series of letters and numbers. This code ensures you get the exact color match for your touch-up paint.
Is it worth fixing small rust spots on an old car?
Yes, it is often worth it. Even on an older car, fixing small rust spots preserves the vehicle’s structural integrity. It also improves its appearance and can prevent a minor issue from becoming a major, costly problem that significantly lowers the car’s value or makes it unsafe.
Final Thoughts on Rust
Seeing rust on your car can feel like a setback. But those little orange spots don’t have to spell disaster. By being observant and taking action early, you can easily fix them.
It might take a little time and patience. But the feeling of accomplishment is great. Plus, you’re protecting your car.
Remember, the key is to catch it soon. Sand it away. Protect the spot.
And then keep an eye on it. Small steps now prevent big headaches later. Keep your car looking its best.
And running smoothly. You’ve got this!