
Side Decals for Cars: Transform Your Ride with Stylish Graphics
Side decals are often sized with about 10% to 15% extra length for trimming. Simple solid graphics suit first-timers, while layered or textured films need more patience. Poor fit leads to bubbling, peeling edges, and wasted material. This guide compares styles, sizes, materials, and install difficulty so you can pick the right decal for a car, truck, SUV, or boat.
Side decal types and fitment


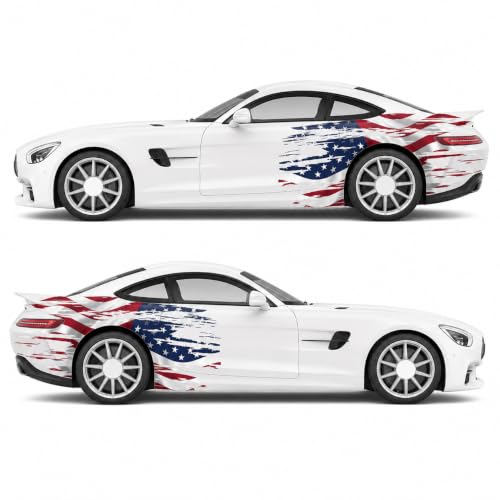
Start with the panel, not the graphic. A small accent decal works on a clean door skin or rear quarter panel, while a full side graphic needs more open space and a steadier hand. Stripe sets sit between those extremes, and a half wrap gives the biggest visual change with more surface prep and alignment work.
Accent decal vs. full side graphic
A small accent decal covers a narrow area, such as the lower door section, front fender, or rear quarter. It is the easiest choice when paint is in good shape and you want a modest change. Full side graphics stretch farther across the body and suit trucks, SUVs, and larger doors where the panel can carry the design without crowding handles or seams.
Vehicle-specific side decals are available for cars and trucks from Xtreme Digital GraphiX, and DecalsByCoy offers large format side panel graphics for SUVs, trucks, or cars. Those formats matter because a door-length graphic that looks balanced on a sedan may feel cramped on a short cab panel or a heavily curved SUV flank.
Stripe set vs. half wrap
Stripe sets are useful when you want a long, clean line that follows the body without covering everything. They are easier to center and repeat across both sides. A half wrap covers more of the body and can hide more plain paint, but it usually raises install risk because the film must bridge more seams, recesses, and curved sections.
A half wrap also asks more from the installer on heat control and panel prep. If the side has a sharp crease or a compound curve near the wheel arch, a graphic that looked perfect on paper can distort once it meets the body line.
Vinyl cut decal vs. printed graphic
A vinyl cut decal uses pre-cut solid-color film for text, stripes, logos, or simple shapes. A printed graphic carries full-color artwork and can show gradients, shadows, or photo-style imagery. Cut vinyl usually looks cleaner at the edges and is easier to place on narrow panels, while printed graphics suit larger side coverage where the artwork needs more detail.
If your goal is a crisp logo or race-style stripe, cut vinyl is often the simpler pick. If you want flames, flags, or a complex side scene, printed film gives more visual range, but it needs more careful alignment and panel coverage planning.
How do you choose the right size?
Measure the usable panel, not the whole door. You need enough flat or gently curved space for the graphic, plus room for handles, gaps, trim, and fuel doors. The best size depends on where the decal ends, how much the panel bends, and whether the design must match the other side exactly.
Measure door length and height
Use a tape measure to record the longest flat span on the door or body side where the decal will sit. Measure height at both the front and rear ends, because many doors taper. Then subtract anything the graphic must avoid, such as door handles, body moldings, and panel gaps.
A common first-timer mistake is ordering based on total door size, then discovering the usable area is much smaller because the handle and lower crease break up the surface. That leaves the decal too wide, or forces a trim line through a critical part of the design.
Check quarter-panel space
Quarter panels often offer more open space than a door, but the shape can change quickly near the wheel opening and rear window line. Check the straight run first, then note where the curvature starts. If the graphic must continue across a door seam and onto the quarter panel, confirm that both surfaces can accept the same layout without a visual jump.
Leave room for handles, seams, and fuel doors
Leave clear space around moving parts and service points. Handles, door edges, fuel doors, antenna bases, and trim strips can break a decal into awkward pieces. If the design must pass near a seam, plan for a cut line where the film can be tucked or trimmed cleanly instead of stretched over the gap.
What material should you buy?
Material choice affects install ease, durability, and removal. Orafol Orajet vinyl is commonly described with air-release technology in some film lines for bubble-free application, and Xtreme Digital GraphiX says it uses Orafol Orajet vinyl. The same seller also lists premium Oracal 651 and Orajet materials. Those names matter, because not every side decal behaves the same during install or removal, and Oracal 651 is an intermediate calendared film that is not the best choice for many curved vehicle panels.
Orafol Orajet vinyl
Orafol Orajet vinyl is a practical choice when you want easier bubble control. Xtreme Digital GraphiX says its decals use Orafol Orajet vinyl and claims air-release technology for bubble-free application. That type of film is often favored for larger side pieces because the release channels help air move out during squeegee work.
It is a strong pick for car, truck, and boat decals when the installer wants a cleaner laydown and fewer trapped pockets under the film. For boats, constant moisture, salt exposure, and frequent washing make surface prep and material selection even more important than on a dry garage-kept vehicle.
Oracal 651
Oracal 651 is a premium vinyl material named by Xtreme Digital GraphiX as a material option. It is commonly used for vehicle decals and other cut-vinyl jobs where clean edges matter. For simple side stripes and lettering, it can be a practical option if the panel is smooth and the graphic does not need printed artwork.
Removal, durability, and care by vinyl type
DecalsByCoy says its side decal graphics last 5-7 years with proper care, and it recommends applying above 50°F, although the exact minimum application temperature varies by film and adhesive line. That gives a useful reference point for buyers who want a midterm visual change rather than a permanent body modification. Long life still depends on sun, washing habits, and whether the film was installed flat.
Removal is usually easier from sound factory paint than from damaged paint, repainted panels, or failing clear coat. Heat helps, but only within reason. If a decal is dragged off too quickly or the surface was weak to begin with, residue and paint lift become more likely.
How do you install side decals?
Clean the panel, position the film carefully, and apply it in a warm, dry space. Most install failures come from rushed prep, cold surfaces, or trying to force the vinyl over a curve. The job is straightforward on a flat panel, but large side graphics need patience and a plan before the backing paper comes off.
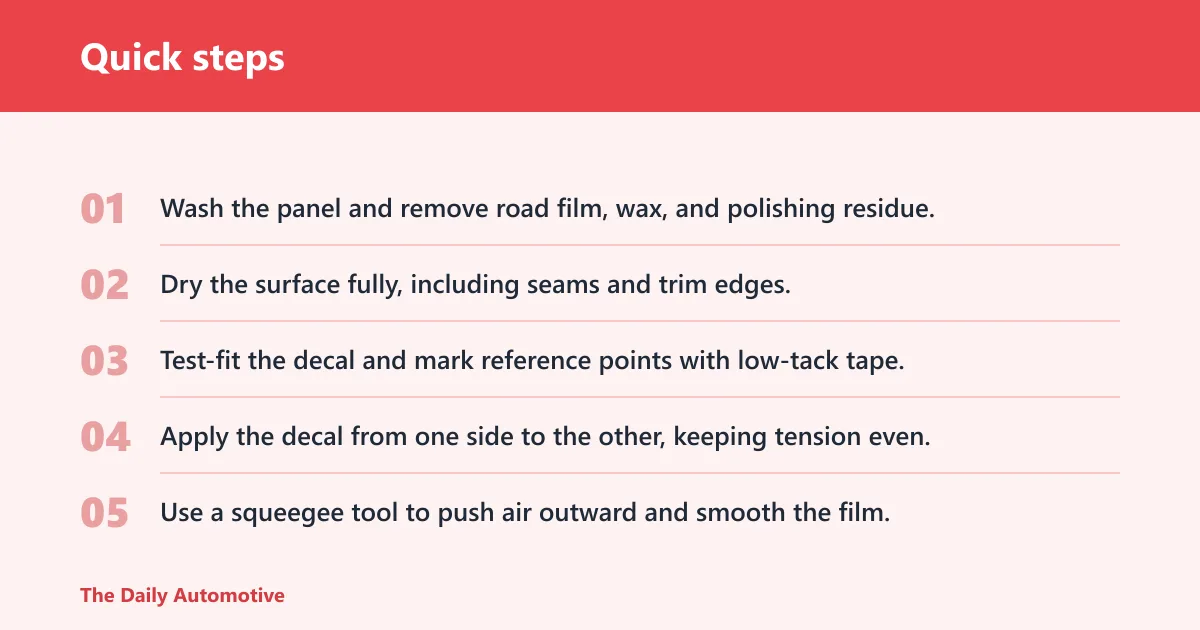
- Wash the panel and remove road film, wax, and polishing residue.
- Dry the surface fully, including seams and trim edges.
- Test-fit the decal and mark reference points with low-tack tape.
- Apply the decal from one side to the other, keeping tension even.
- Use a squeegee tool to push air outward and smooth the film.
- Check edges, then press them again if they need extra bonding.
Clean the panel and dry it fully
Installation instructions usually start with surface cleaning, and for good reason. Dust, silicone dressing, wax, and water trapped under the film can weaken adhesion. A dry panel matters just as much as a clean one, especially near body seams where moisture hides.
Use the squeegee and follow the included steps
Some decals include installation instructions and a squeegee tool. That matters for first-timers, because the squeegee controls pressure and helps move air away from the adhesive side. Follow the included steps in the order given, since many designs rely on a backing paper peel and a center-out smoothing pattern.
Apply above 50°F and work out bubbles
The same source recommends applying above 50°F. That temperature point is practical because vinyl and adhesive behave better when they are not stiff from cold. Below that range, the film can resist shaping, and edge bonding may suffer. If bubbles appear, lift only the affected section and smooth it again rather than forcing them toward the edge.
Suppose a 20-inch accent stripe lands a little high on a door. If the panel is warm and the film is still movable, the stripe can be reset before final pressure goes on. If the same install happens on a cold morning, the material may fight every correction and leave a faint wrinkle near the handle cutout.
Side decal decision matrix
Use this table to match coverage, install effort, and likely failure points to your project. It turns the style choice into a practical buying decision. The goal is not the biggest graphic. It is the graphic that fits your panel, your paint, and your skill level.
| Option | Coverage | Install difficulty | Typical use case | Common failure points |
|---|---|---|---|---|
| Small accent decal | One panel or a narrow section | Low | Daily driver styling, simple logo, light trim line | Bad centering, dust under edges, rushed alignment |
| Stripe set | Long narrow run across door or quarter panel | Low to moderate | Sport look, repeatable side layout, budget refresh | Uneven spacing, crooked line, bubbles at panel breaks |
| Full side graphic | Large section of the side panel | Moderate to high | Show vehicle, themed build, brand graphic | Stretch marks, trapped air, edge lift on curves |
| Half wrap | Broad side coverage with adjacent panels | High | Maximum visual impact, fleet branding, big-body SUV or truck | Misalignment across seams, heat-curve distortion, removal complexity |
Coverage and visual impact
Higher coverage changes the whole side profile, but it also increases the chance that a seam, crease, or curve will interrupt the artwork. If your goal is a subtle change, a small accent or stripe set is often enough. If the goal is a big visual reset, a full side graphic or half wrap makes more sense, provided the panel can support it.
Install difficulty and skill level
Skill level should match the film size. Small decals tolerate minor correction better. Large graphics demand cleaner prep, careful hinge placement, and a steady hand around edges. Half wraps belong with more experienced installers or with a clear set of instructions and extra time.
Typical use case and failure points
Daily drivers usually do best with smaller graphics that are easy to wash and replace. Fleet branding often benefits from bold, readable side layouts. Off-road builds can handle larger designs, but mud, texture, and washing pressure raise the care burden. Show vehicles can justify broader coverage because the body is cleaned and displayed more carefully.
Will side decals damage paint?
Side decals do not usually damage sound factory paint when they are installed and removed correctly, but they can create problems on weak surfaces. Fresh paint, failing clear coat, and repainted panels are the main risks. The key question is not whether the decal is paint-safe, but whether the paint underneath is stable enough for adhesive film.
Paint condition before install
Check for peeling clear coat, chips, rust, and recent repaint work before applying any decal. A decal can bond too well to weak paint and pull it during removal. If the panel already has surface damage, the film may make that damage worse when it comes off.
Heat, cure time, and removability
Heat can help removal, but it should be used gently. Fresh paint needs full cure time before vinyl goes on, and that window depends on the paint system, so follow painter or film-manufacturer guidance before installing. If the panel is still outgassing or soft, the decal can trap that condition and make later removal harder.
Picture a Jeep door with a fresh repaint and a large side graphic. The graphic may look fine at first, but removal later can expose weak clear coat edges if the panel was not fully cured before install. The risk is tied to paint condition, not the decal alone.
When to avoid fresh paint or failing clear coat
Avoid applying large decals over fresh paint, damaged clear coat, or flaking finish. If the surface is uncertain, start with a smaller panel or wait until the coating is stable. That approach protects both the graphic and the bodywork.
Model-specific options and galleries
Model-targeted graphics can simplify fitment because they follow known panel shapes. Many vehicle-specific side decals are made for popular makes. That does not remove the need to measure, but it does reduce guesswork around door lines, quarter panels, and wheel-arch spacing.
Ford, honda, toyota, jeep, and mazda fitment
When a decal is made for a specific model family, the artwork is usually sized around typical body dimensions and trim locations. That is useful for buyers who want a graphic that sits in the right part of the side without covering handles or molding. It is still worth checking whether the design is for a sedan, hatchback, SUV, or truck bed side.
Why customer galleries matter
Customer gallery photos give proof of finished appearance. They show how the decal lands on real paint, under real body lines, and across real panel curves. They also reveal whether the graphic reads too large, too short, or too close to a seam once it is installed.
How to compare finished placement photos
Compare the gallery image to your own vehicle at the same angle. Look at the distance from the front edge of the door, the bottom rocker line, and the rear seam. If the photo shows a balanced fit on a similar model, that is a better sign than a studio render with no body context.
Frequently asked questions
What are the best side decals for cars?
The best side decals are the ones that match your panel space, paint condition, and install skill. Small accent decals work well for a clean, low-risk change. Stripe sets suit simple styling. Full side graphics and half wraps make sense when you want more coverage and have the patience for alignment and surface prep.
How do you install side decals on a car?
Clean and dry the panel first, then position the decal with tape or light marks before removing the backing. Use the included instructions if the seller provides them, and smooth the film with a squeegee tool as you go. Apply in warm conditions, ideally above 50°F, so the vinyl lays down more predictably.
Will side decals damage car paint?
Side decals are usually paint-safe on sound factory finish, but they are not safe for every surface. Fresh paint, failing clear coat, and damaged panels raise the risk of lift or residue. If the paint is in poor condition, remove the risk by waiting or choosing a smaller graphic on a better panel.
What size side decals fit my car or SUV?
Measure the usable door or quarter-panel area, not just the full panel size. Leave room for handles, seams, trim, and fuel doors. A graphic should usually have a little extra length for trimming, but the real fit depends on how much flat space remains after you account for panel curvature.
How long do vinyl side decals last?
Longevity depends on the material and care. The same source says its side decal graphics last 5-7 years with proper care. Sun exposure, washing methods, and install quality can shorten or lengthen that span. A well-installed decal on stable paint will usually outlast one placed over a cold or dirty surface.
What material is best for car side decals?
Orafol Orajet vinyl is a strong choice when you want air-release technology and easier bubble control. Oracal 651 is a premium vinyl material often used for cut-vinyl vehicle graphics. The better choice depends on whether you need a printed full graphic, a simple stripe, or a clean vinyl cut decal.
Can I get side decals for specific vehicle models?
Yes. Model-specific options exist for Ford, Honda, Toyota, Jeep, and Mazda, among others. These graphics are sized around typical body shapes so the artwork lands in the right area more predictably. Even then, you should confirm the actual panel space on your exact trim level before ordering.
How much do car side decals cost?
Cost varies with coverage, material, and whether the graphic is model-specific or fully custom. Small accent decals are usually less expensive than full side graphics or half wraps because they use less material and take less time to prepare. Larger, printed, or vehicle-specific pieces generally cost more, and prices can range from low-cost accent pieces to much higher-priced custom side graphics.
Do side decals come with installation instructions?
Many do, but not all. Some decals include step-by-step guidance and a squeegee tool, while others assume the buyer already knows the process. Check the product listing carefully. If the decal is large or the panel is curved, instructions are worth having even for experienced installers.
Products related to this article
Sponsored / affiliate links. As an Amazon Associate I earn from qualifying purchases. I may earn additional commission from eligible campaigns.