Where To Remove Scratches From Car Windows
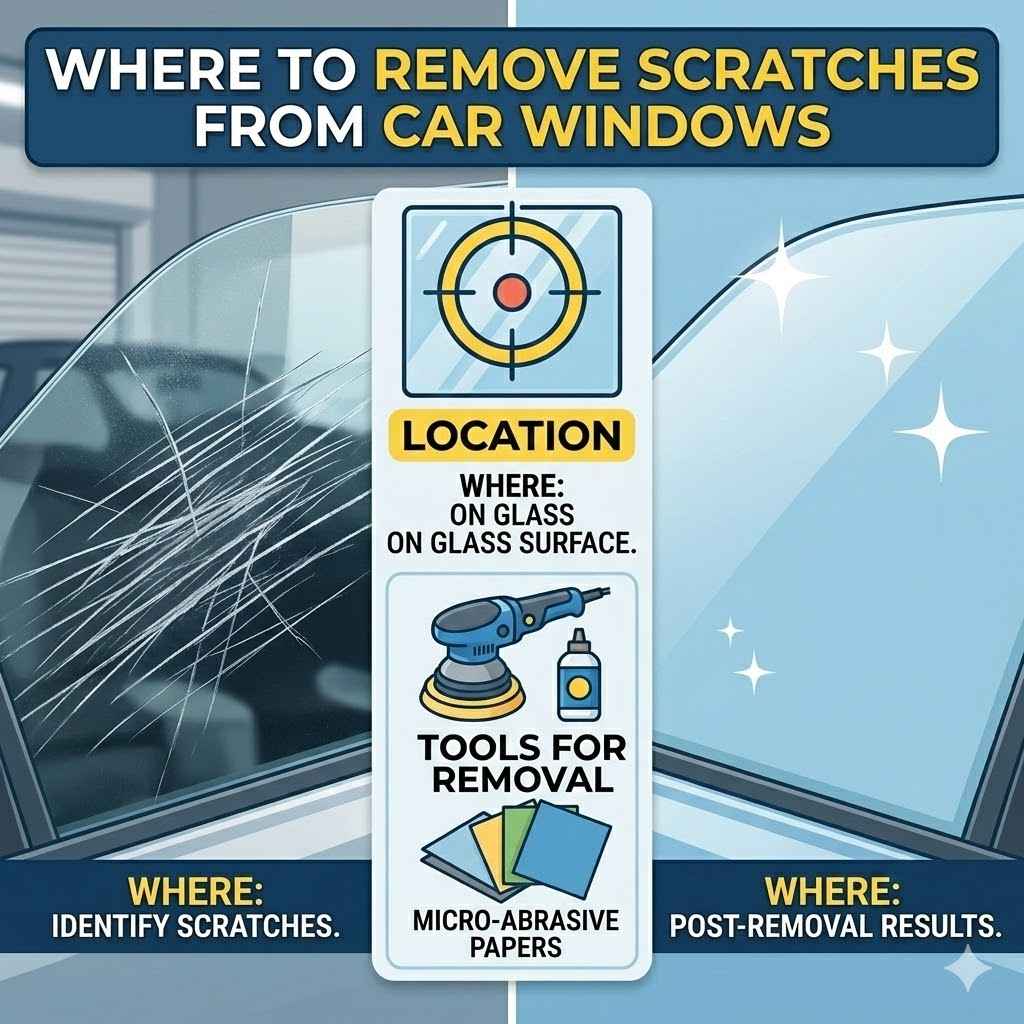
Figuring out where to remove scratches from car windows can feel a bit tricky at first. You see those little marks on your windshield or side glass and wonder if you can fix them yourself or if you need a pro. It’s a common worry for car owners, especially when you’re not sure what methods are safe and effective.
Don’t sweat it though. We’ve got a straightforward, step-by-step guide coming up that will make the process much simpler. Get ready to learn the best ways to get your car windows looking clear again.
Understanding Car Window Scratches
This section looks at why scratches happen and what makes them visible. We’ll cover the different types of damage your car windows can get. Knowing the cause helps a lot in finding the right fix.
We’ll talk about what makes a scratch a small issue or a big problem.
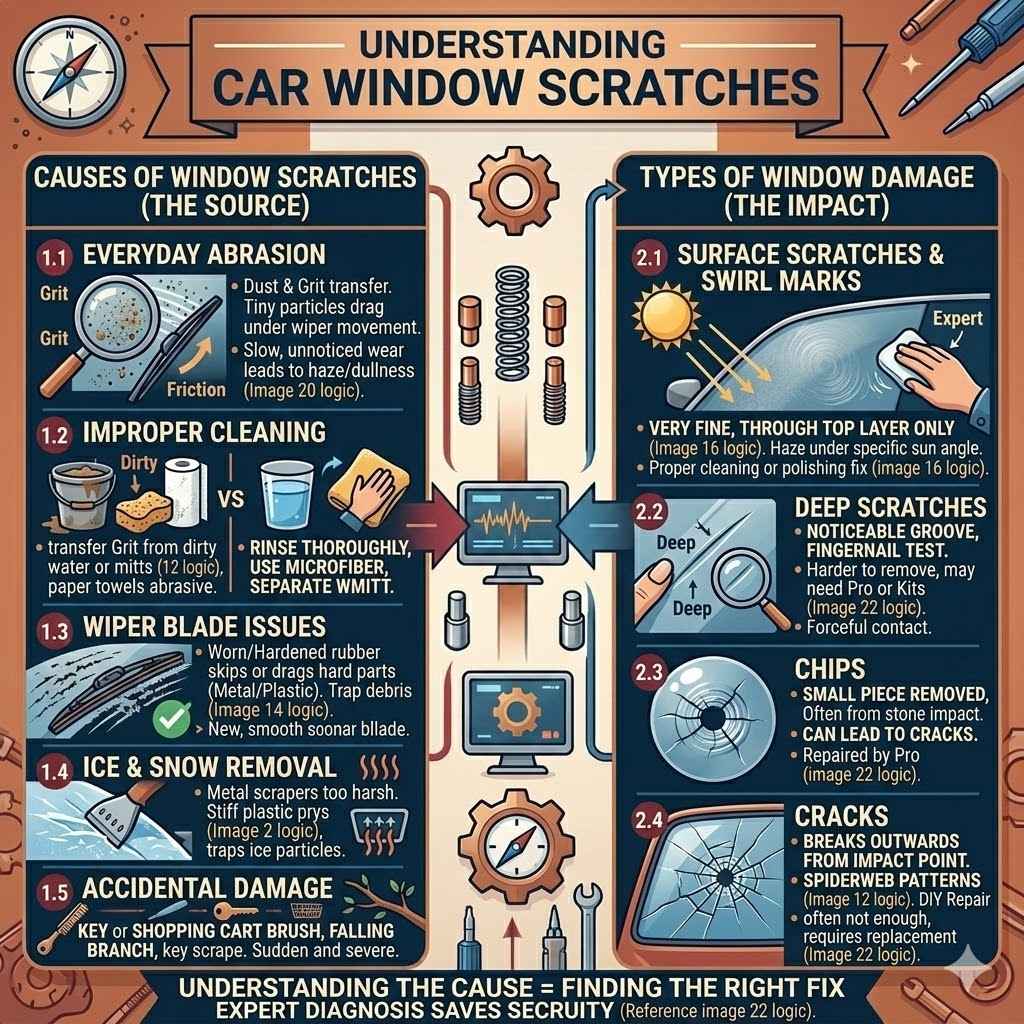
Causes of Car Window Scratches
Most car window scratches come from everyday use. Things like dirt, sand, and even tiny road debris can act like sandpaper when your wipers move. When you wash your car, if there’s still grit on the glass and you rub too hard, you can create new scratches.
Even automatic car washes with their brushes can sometimes cause light surface scratches. Sometimes, ice scrapers, especially those made of hard plastic or metal, can leave marks if used roughly. Even a small stone flicked up from another car can cause a chip or a deep scratch.
Everyday Abrasion: This refers to the tiny bits of grit and dust that stick to your car. When your windshield wipers sweep across the glass, these particles get dragged, slowly wearing down the surface. Over time, this builds up into a dull haze or fine scratches. Think of it like rubbing a piece of paper with a pencil eraser – small, repeated motions can change the surface. This is the most common cause of those light, widespread scratches that make your window look less clear, especially when the sun hits it at an angle. It’s often a slow, unnoticed process until the damage becomes more obvious.
Improper Cleaning Methods: How you wash and dry your car matters a lot. Using dirty water, old sponges, or paper towels can transfer grit. Paper towels, in particular, can be surprisingly abrasive. If you don’t rinse your car thoroughly before washing, you’re just grinding the dirt into the paint and glass. A common mistake is using the same dirty wash mitt on the windows as you do on the car body. The body of the car collects a lot more grime, so this can transfer nasty bits right onto your clear glass.
Wiper Blade Issues: Worn-out or damaged wiper blades are a major culprit. If the rubber edge is torn or hardened, the blade can’t wipe smoothly. It might skip, chatter, or even drag hard plastic or metal parts across the glass. Sometimes, debris gets caught under the wiper blade. When the wiper moves, this trapped item acts like a tiny scraper, creating a deep, distinct scratch along the path of the blade. Regularly inspecting and replacing your wiper blades is a simple way to prevent this type of damage.
Ice and Snow Removal Tools: Using the wrong tools in winter can be very damaging. While essential, metal ice scrapers or even stiff plastic ones can scratch glass if you apply too much force or if there are frozen particles trapped between the scraper and the glass. Prying at ice with a sharp edge is a recipe for disaster. A better approach is to let the defroster do its work or use a specialized plastic scraper with a soft edge.
Accidental Damage: This covers a range of incidents, from a careless brush with a key or a shopping cart to a falling branch. Even a small chip from a rock can sometimes spread into a crack or a deeper scratch over time if it’s not addressed. These types of scratches can be more sudden and sometimes more severe than the slow wear from everyday driving.
Types of Window Damage
Not all marks on your car window are the same. Some are just light surface issues, while others are deeper and harder to fix. Knowing the difference helps you decide how to tackle them.
It’s important to identify if it’s a simple scratch, a swirl mark, a chip, or a crack.
Surface Scratches and Swirl Marks: These are the most common. They are typically very fine and only go through the top layer of the glass. You often see them when the sun is at a specific angle or when you’re looking closely. They usually happen from improper cleaning or minor abrasions. These are generally the easiest to repair, often with polishing compounds.
Deep Scratches: These go deeper into the glass. They can feel like a noticeable groove when you run your fingernail over them. Deep scratches are harder to remove completely and might require professional attention or specialized repair kits. They often happen from more forceful contact, like a sharp object dragging across the glass.
Chips: A chip is a small piece of glass that has been removed, often caused by a stone impact. While not a scratch, chips can sometimes lead to cracks spreading from the impact point. Many auto glass repair shops can repair chips before they become larger issues.
Cracks: Cracks are breaks in the glass that spread outwards from a chip or impact point. They can range from short lines to long, spiderweb-like patterns. Cracks are usually too severe for DIY repair and require professional replacement of the entire glass.
DIY Scratch Removal Methods
This section explores things you can try at home to fix those annoying window scratches. We’ll cover common household items and simple kits you can buy. The goal is to offer solutions that are easy for beginners.
Using Toothpaste
Believe it or not, toothpaste can be a surprisingly effective tool for minor car window scratches. The key is to use a non-gel, white paste toothpaste that contains mild abrasives. These abrasives gently polish the glass surface.
You don’t want a gel kind because it doesn’t have the necessary grit. Also, avoid toothpastes with harsh whitening agents or those meant for sensitive teeth, as they might be too gentle or contain ingredients that could cause cloudiness. The action of rubbing the toothpaste on the scratch mimics a very light buffing process.
How It Works: Toothpaste contains fine abrasive particles. When you rub it into a scratch, these particles gently wear down the edges of the scratch and the surrounding glass. This process smooths out the surface. Think of it like using very fine sandpaper, but on a microscopic level. The goal isn’t to remove glass, but to make the scratch less deep by leveling the surface. This is why it works best on shallow, surface-level scratches.
Step-by-Step Guide:
Clean the window thoroughly. Make sure the area around the scratch is spotless.
Apply a small amount of non-gel white toothpaste directly onto the scratch.
Using a soft, clean cloth (like microfiber), gently rub the toothpaste into the scratch using a circular motion.
Continue rubbing for about 30 seconds to a minute. Don’t apply too much pressure; let the toothpaste do the work.
Wipe away the toothpaste with a clean, damp cloth.
Inspect the scratch. If it’s still visible, you can repeat the process a couple of times.
Once satisfied, clean the entire window again to remove any residue.
When It’s Best Used: Toothpaste is ideal for very light, superficial scratches that you can barely feel with your fingernail. It won’t work on deep gouges or chips. If the scratch is deep enough that your fingernail catches on it, toothpaste is unlikely to be sufficient. It’s a good first attempt for minor imperfections.
Potential Drawbacks: While generally safe, if you rub too aggressively or use the wrong type of toothpaste, you could potentially create more micro-scratches or a hazy spot on the glass. It’s always best to test in an inconspicuous area first if you’re concerned. Also, it takes patience and might require several applications for noticeable results.
Using Baking Soda Paste
Similar to toothpaste, baking soda offers a gentle abrasive solution for light window scratches. Baking soda is a mild alkali and its fine granules can help polish away minor imperfections. The trick is to create a paste with water.
This paste acts as a mild abrasive that can gently buff out shallow marks. It’s a cost-effective and readily available option for many households, making it a popular DIY choice for minor glass blemishes.
How It Works: Baking soda forms a paste when mixed with water. This paste contains small, crystalline particles. When you rub this paste onto a scratched surface, these particles gently abrade the glass. This polishing action helps to smooth out the edges of shallow scratches, making them less visible. It’s a process of very light surface refinement. The paste also helps to lift away grime that might be sitting in the scratch, making it appear worse than it is.
Step-by-Step Guide:
First, thoroughly clean the window to remove all dirt and debris.
In a small bowl, mix baking soda with just enough water to form a thick paste. It should be like toothpaste consistency.
Apply a generous amount of the paste onto the scratched area.
Using a soft cloth, gently rub the paste into the scratch using a circular motion. Apply light pressure.
Rub for about 1 minute.
Wipe the paste off with a clean, damp cloth.
Rinse the area and then dry with a clean microfiber towel.
Check the scratch. If needed, you can repeat the process a few times.
When It’s Best Used: Baking soda paste is best suited for extremely light scratches. Think of those tiny lines that appear after washing your car improperly or from general wear. It’s not effective for deep scratches where you can feel a distinct groove with your fingernail. It’s a gentle approach for the mildest imperfections on your car’s glass.
Potential Drawbacks: Like toothpaste, over-scrubbing or using too much force can potentially create more fine scratches. It’s important to be gentle. If you don’t rinse it off thoroughly, it can leave a white residue that might be visible. It’s not a miracle cure for significant damage.
Glass Polishing Compounds and Kits
For scratches that are a bit more stubborn than what toothpaste or baking soda can handle, glass polishing compounds are the next step. These are specifically designed products made to remove scratches from glass. They typically contain finer abrasives than household items, allowing for a more controlled and effective polishing action.
You can find them in auto parts stores or online. Many come as a kit that includes the polishing compound and applicator pads or cloths.
How They Work: These compounds are formulated with specific abrasive particles, often cerium oxide or aluminum oxide, suspended in a liquid or paste. When used with a polishing tool or by hand, they gently grind down the glass surface around the scratch. This process levels the glass, effectively removing or minimizing the appearance of the scratch. The grade of the abrasive determines how much material is removed and how fine the finish will be. Higher grades are for deeper scratches, while finer grades are for finishing.
Types of Products:
Cerium Oxide Compounds: This is a very popular abrasive for glass polishing. It’s effective at removing light to medium scratches. It often comes as a powder you mix with water to form a slurry, or as a pre-mixed paste.
DIY Scratch Repair Kits: These kits usually contain a polishing compound (often cerium oxide based), applicator pads, and instructions. Some more advanced kits might include a small rotary tool attachment for faster polishing.
Glass Repair Fluids: These are less common for scratches but more for chips and cracks. They typically involve a resin that fills the damaged area.
Application Process:
Clean the glass thoroughly.
Apply a small amount of the polishing compound to an applicator pad or a clean microfiber cloth.
For hand application, rub the compound onto the scratch using firm, circular motions or back-and-forth strokes.
If using a power tool with a polishing attachment, keep the speed low to moderate and avoid overheating the glass.
Work in small sections, continuously moving the applicator to prevent concentrated heat.
Wipe away residue and inspect your work frequently.
Repeat the process if necessary, gradually increasing the working time or pressure slightly if the scratch persists.
Once the scratch is gone or significantly reduced, clean the glass thoroughly.
Safety and Precautions: Always wear safety glasses to protect your eyes from dust and debris. Work in a well-ventilated area. Avoid letting the glass get too hot, as this can cause thermal stress and potentially crack it. Start with the least aggressive method and gradually increase intensity if needed. Always follow the manufacturer’s instructions for the specific product you are using.
Professional Scratch Removal and Repair
Sometimes, DIY methods just won’t cut it. This section talks about when you should call in the pros and what they can do. We’ll cover professional services that can fix your windows.
When to Seek Professional Help
Deciding if a scratch is too much for you to handle is key. If your fingernail catches on the scratch, it’s usually a sign that it’s too deep for simple DIY fixes like toothpaste or baking soda. Also, if you have multiple deep scratches or a complex pattern of fine scratches across a large area, a professional will be more efficient and effective.
Furthermore, if the scratch is near the edge of the window, it can be more prone to cracking, making professional attention a safer bet. It’s also important to consider the type of glass. Some vehicles have specialized glass (like acoustic glass for noise reduction) that requires specialized repair techniques.
Deep Scratches: As mentioned, if you can feel a definite groove with your fingernail, the scratch has penetrated deeper into the glass. These often require professional tools and compounds to level the glass surface effectively. Trying to fix them with mild abrasives can sometimes make them look worse or just not remove them at all.
Widespread or Severe Damage: If your entire windshield or side window has a multitude of fine scratches, often called “hazing” or “swirling,” attempting to fix each one individually is impractical. Professional detailers have specialized machines and compounds to restore clarity to large areas of glass much more quickly and effectively.
Edge or Corner Scratches: Scratches that are located very close to the edges or corners of a car window are more problematic. The glass is thinner and more structurally weak in these areas, increasing the risk of the scratch causing the glass to crack or break further during a repair attempt. Professionals can assess this risk and use appropriate techniques.
Chips and Cracks: While this article focuses on scratches, it’s worth noting that professional auto glass repair services are also equipped to handle chips and cracks. These issues often require different methods than scratch removal and can affect the structural integrity of the window. Ignoring a chip can lead to a spreading crack.
Tempered vs. Laminated Glass: Car windows are made of different types of glass. Side and rear windows are typically tempered, which shatters into small pieces for safety. Windshields are usually laminated, consisting of two layers of glass with a plastic layer in between. Professionals know how to work with each type to ensure a safe and effective repair without compromising the glass’s integrity.
Professional Auto Glass Repair Services
Auto glass repair shops are the experts when it comes to fixing car windows. They have specialized tools and materials that go far beyond what you can buy at a regular store. Their technicians are trained to assess the damage accurately and choose the best method.
This often involves using machines that can polish glass much more evenly and efficiently than manual methods. They can handle everything from minor scratches to more significant damage like chips and cracks.
Tools and Techniques:
Rotary Polishers and Grinders: Professionals use high-powered tools that can precisely remove small amounts of glass to level out scratches. These machines allow for consistent pressure and speed, which is hard to achieve by hand.
Specialized Polishing Compounds: They use industrial-grade cerium oxide compounds or other advanced abrasives that are more potent and consistent than consumer products.
UV Curing Resins: For chips and small cracks, they use specialized resins that are injected into the damage and then cured with UV light. This strengthens the glass and makes the damage nearly invisible.
Edge Grinding and Sealing: For scratches near the edge, they might use specialized grinding techniques to remove the scratch while preserving the glass’s strength.
The Repair Process: A professional repair typically starts with a thorough cleaning of the affected area. The technician will then inspect the scratch to determine its depth and type. Based on this, they will select the appropriate compound and polishing method. For deeper scratches, they might use a multi-stage polishing process. If it’s a chip or crack, they’ll use specialized resins. The goal is always to restore clarity and structural integrity to the glass.
Benefits of Professional Repair:
Effectiveness: Professionals have the expertise and equipment to remove scratches that DIY methods can’t.
Speed: They can often complete repairs much faster than an individual attempting them at home.
Durability: Professional repairs are typically more durable and longer-lasting.
Safety: They ensure the structural integrity of the glass is maintained, which is crucial for driver safety.
Cost-Effectiveness: For many scratches, professional repair can be more cost-effective than replacing the entire window.
Finding a Reputable Service: Look for certified auto glass technicians. Read online reviews and ask for recommendations from friends or family. Get a clear quote before the work begins.
Cost Considerations
The cost of professional scratch removal can vary greatly depending on the severity of the scratches, the size of the area to be repaired, and your location. For very light scratches that can be buffed out with a compound, you might be looking at anywhere from $50 to $150. If the scratches are more moderate and require more intensive polishing, the cost could go up to $200 or more.
For severe damage that requires specialized attention, especially near the edges, or if the glass needs significant reshaping, costs can climb even higher.
It’s important to compare quotes from different auto glass repair shops. Some shops might offer package deals for multiple scratches or if you’re getting other auto glass services done. If the scratch is so deep that it risks the structural integrity of the window, or if it’s widespread hazing, the cost might approach that of a full window replacement.
In such cases, replacement might be the more economical long-term solution. Always get a written estimate that details the work to be done and the total cost.
| Type of Scratch | Typical DIY Cost | Typical Professional Cost |
|---|---|---|
| Very Light Surface Scratches | $5 – $20 (for toothpaste/baking soda or basic kit) | $50 – $100 |
| Moderate Scratches (visible, but not deep grooves) | $20 – $50 (for better quality compounds/kits) | $100 – $200 |
| Deep Scratches (fingernail catches) | Limited effectiveness, potential to worsen | $150 – $300+ (may require significant work or lead to replacement) |
| Widespread Hazing/Swirling | Impractical for DIY | $200 – $400+ (depending on severity) |
Preventing Future Scratches
The best way to deal with scratches is to stop them before they happen. This section gives tips on how to keep your car windows clear and scratch-free. These are simple habits that make a big difference.
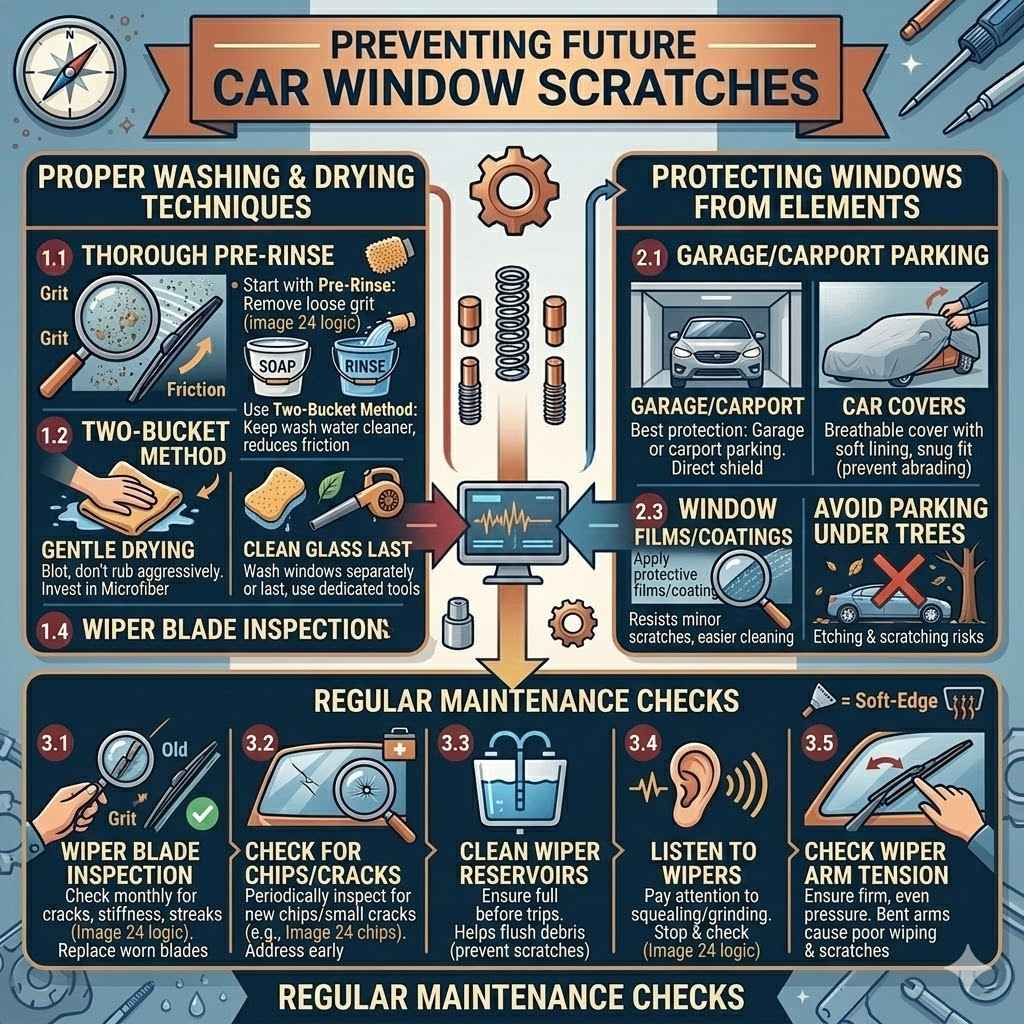
Proper Washing and Drying Techniques
Washing your car correctly is the first line of defense against scratches. Always start by rinsing your car thoroughly with water to remove loose dirt and grit. This is crucial.
Never wash a dry car. Use a dedicated car wash soap, not dish soap, as dish soap can strip protective waxes. Use a clean wash mitt, ideally a microfiber one, and keep it clean.
Wash from top to bottom. When washing the glass, use a separate, clean mitt or sponge to avoid transferring dirt from the car body to the windows.
Pre-Rinse is Key: Before you even touch a wash mitt to the car, give it a good spray down with water. This loosens and washes away a significant amount of dirt, dust, and debris that could otherwise be ground into the paint and glass during the washing process.
Use the Two-Bucket Method: One bucket should contain your car wash soap solution, and the other should contain clean rinse water. After washing a section of the car, rinse your wash mitt in the clean water bucket before dipping it back into the soap solution. This keeps your wash water cleaner, reducing the risk of carrying abrasive particles across the paint and glass.
Microfiber is Your Friend: Invest in good quality microfiber wash mitts, drying towels, and glass towels. Microfiber is soft, highly absorbent, and much less likely to scratch surfaces compared to cotton rags or paper towels. Always wash your microfiber towels separately from other laundry to prevent lint and debris transfer.
Gentle Drying: After washing, use a clean, high-quality microfiber drying towel. Blot the water rather than rubbing aggressively. You can also use a car dryer or a leaf blower to blow water out of crevices and off large surfaces, reducing the need for extensive towel drying.
Clean Glass Last: When washing, it’s often best to wash the glass as the final step or even separately. This ensures any dirt from the body washing doesn’t get transferred to the clean glass. Use a dedicated glass cleaner and a separate, clean microfiber towel for drying the windows.
Protecting Windows from the Elements
Beyond washing, there are other ways to shield your windows from damage. Parking your car in a garage or under a carport can significantly reduce exposure to harsh weather, dust, and debris. When that’s not an option, consider using a car cover, especially for longer periods of parking.
This physically blocks elements from settling on your windows.
Garage or Carport Parking: The most effective protection is simply keeping your car covered. Garages and carports shield your vehicle from direct sunlight (which can degrade window coatings over time), dust storms, tree sap, bird droppings, and other environmental contaminants that can scratch or etch glass.
Car Covers: If garage parking isn’t available, a good quality car cover can be a worthwhile investment. Choose a cover designed for outdoor use that is breathable and has a soft inner lining to prevent scratching. Ensure it fits your vehicle snugly to prevent wind from causing it to flap and abrade the paint or glass.
Window Films and Coatings: You can apply specialized protective films or ceramic coatings to your car windows. These create a barrier that resists minor scratches and makes the glass easier to clean. Ceramic coatings, for example, create a hard, hydrophobic layer that repels water and dirt. Window films can also offer UV protection.
Avoid Parking Under Trees: While convenient, parking under trees can expose your car to falling leaves, twigs, sap, and bird droppings, all of which can etch or scratch the glass if left untreated.
Winter Protection: In winter, avoid scraping ice directly off the windshield with metal scrapers. Use a plastic ice scraper with a soft edge, or better yet, let the defroster heat the glass first. Parking indoors or covering the windshield overnight can prevent heavy ice buildup.
Regular Maintenance Checks
Making it a habit to regularly check your car’s windows and wiper blades can save you a lot of trouble down the line. It’s a simple part of car care that often gets overlooked. These checks help you spot small issues before they become big problems.
Wiper Blade Inspection: Check your wiper blades monthly. Look for cracks, tears, or stiffness in the rubber. If the blades leave streaks, skip, or chatter across the glass, it’s time to replace them. Worn blades can scratch your windshield.
Check for Small Chips or Cracks: Periodically inspect your windshield for any new chips or small cracks, especially after driving on rough roads or in areas with a lot of construction. Addressing these early can prevent them from spreading and becoming more serious or costly repairs. Many shops offer free chip inspections.
Clean Wiper Reservoirs: Ensure your windshield washer fluid reservoir is full, especially before long trips. Using washer fluid helps keep your windshield clean during driving and can flush away debris that might otherwise scratch the glass when wipers are used.
Listen to Your Wipers: Pay attention to the sound your wipers make when they are on. A squealing or grinding sound can indicate that the blades are worn out or that there is debris stuck under them. Stopping to check can prevent potential scratches.
Check Wiper Arm Tension: Ensure the wiper arms are applying firm, even pressure to the windshield. If an arm is bent or weakened, it might not hold the blade tightly against the glass, leading to poor wiping and potential scratches.
Frequently Asked Questions
Question: Can I remove deep scratches from my car windows myself
Answer: For very deep scratches, where you can feel a distinct groove with your fingernail, DIY methods like toothpaste or baking soda are usually not effective. These methods are best for very light surface scratches. Deep scratches often require professional tools and expertise to properly level the glass.
Question: How long does professional window scratch removal take
Answer: The time it takes for professional scratch removal can vary. For light to moderate scratches, it might take anywhere from 30 minutes to a couple of hours per window. More extensive damage or multiple scratches could take longer, possibly half a day or more.
Question: Will polishing my car windows make them weaker
Answer: When done correctly by professionals or using appropriate DIY methods, polishing car windows to remove scratches does not significantly weaken them. A small amount of glass is removed to level the surface, but this is usually negligible and does not compromise the structural integrity, especially for minor scratches.
Question: How often should I replace my car’s wiper blades
Answer: It’s generally recommended to replace your car’s wiper blades every 6 to 12 months, depending on your climate and usage. If you notice them streaking, skipping, or making noise, it’s a good indicator that they need replacing sooner to prevent scratching your windshield.
Question: Is it safe to use a household glass cleaner on car windows
Answer: While many household glass cleaners can be used, it’s best to opt for cleaners specifically designed for automotive glass. Some household cleaners can contain ammonia, which can damage window tinting or certain coatings on car windows. Always check the product label.
Conclusion
When looking where to remove scratches from car windows, you now know your options. For minor marks, simple things like toothpaste or baking soda might do the trick. If the scratches are deeper, specialized compounds or professional services are the way to go.
Remember that prevention through proper washing and regular checks is always the best approach. Keep your windows clear for better visibility and a nicer-looking car.