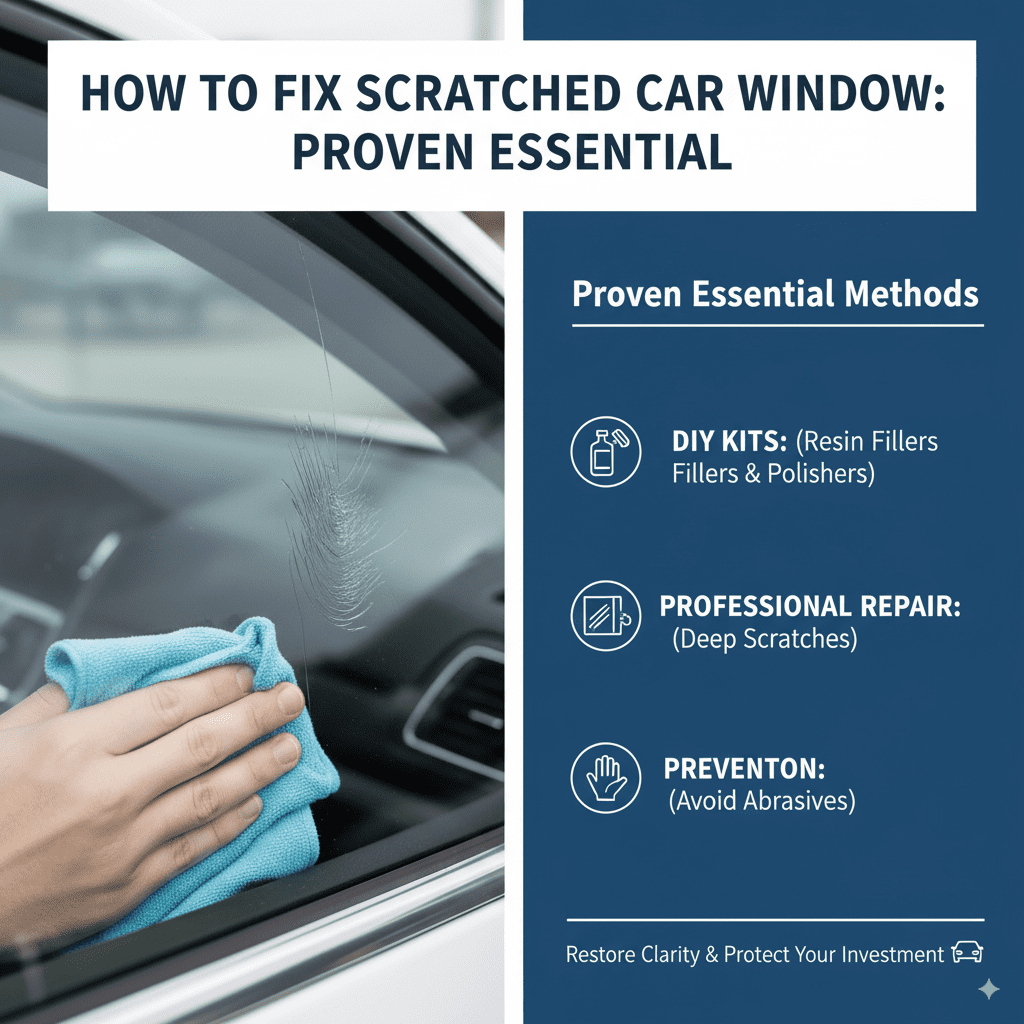
How to Fix a Scratched Car Window: 4 DIY Methods Compared
Toothpaste, baking soda, and cerium oxide polishing kits can buff out light surface scratches on a car window — but the fix depends on which glass you’re treating. Rubbing an abrasive into a scratch deeper than your fingernail test allows just spreads haze across more glass, and a professional resin repair only works on laminated windshields, not tempered side or rear windows. This guide compares four DIY methods, the fingernail depth test, and when only replacement will do.
Quick Answer
Light surface scratches on a car window that don’t catch a fingernail can usually be buffed out with white toothpaste, a baking soda paste, or a cerium oxide glass polishing kit. Deeper scratches need a professional: resin injection works only on laminated windshields, while tempered side and rear windows must be replaced if damage goes past the surface.
Understanding Car Window Scratches
Before you grab any tools, it helps to know what you’re working with. Car windows use two different types of safety glass — tempered glass in the side and rear windows, and laminated glass in the windshield — both stronger than a home window’s annealed glass, but neither scratch-proof. Scratches range from faint surface marks you can barely see to deeper gouges that compromise the glass. Scratch depth determines the repair method: superficial marks often buff out with a mild abrasive, while deeper grooves need a specialized polish or professional help — and which repair option is even available depends on which type of glass is scratched.
Windshield vs. Side Window: Why the Glass Type Changes Your Repair Options
A car’s windshield is laminated glass — two glass layers bonded around a plastic interlayer — which is why a chipped or scratched windshield can often be saved with a resin injection that bonds right into that layer. Side and rear windows are tempered glass instead: heat-treated for strength, but built to shatter into small, dull pieces if it ever fails structurally. That same safety design is also why tempered glass cannot be resin-repaired — a technician can’t inject resin into a scratch or chip on a side window the way they can on a windshield. If a tempered side window has a scratch too deep to buff out, replacement is the only real option; the DIY buffing methods below are your best shot no matter which glass is scratched, since none of them repair a crack either way.
Assessing the Scratch: The First Crucial Step
The most important initial step is to accurately assess the scratch. This will guide your choice of repair method. A scratch that you can feel with your fingernail is likely too deep for most DIY solutions and might need professional attention. However, if your fingernail glides smoothly over the surface, there’s a good chance you can fix it yourself!
How to Test for Scratch Depth
- Clean the window thoroughly with a glass cleaner.
- Dry the area completely with a lint-free cloth.
- Gently run your fingernail across the scratch.
- If your nail catches, it’s a deeper scratch.
- If your nail glides over it, it’s likely a superficial scratch that you can repair.
How to Decide Which Repair Method to Use
Use this quick process to match your scratch to the right fix before you touch any polish or resin.
- Test the scratch depth: Run a clean fingernail across the mark — if it glides smoothly, it’s a surface scratch you can likely buff out yourself; if it catches, treat it as deep damage.
- Identify the glass type: Check whether the scratch is on the windshield (laminated) or a side/rear window (tempered) — this determines whether resin repair is even an option later.
- Match the method to the depth: Choose toothpaste or baking soda for the faintest marks, a cerium oxide kit for moderate haze or wider scratches, and clear nail polish only as a temporary seal on tiny nicks.
- Clean and apply: Wash the glass with a lint-free cloth and glass cleaner, then apply your chosen method in light, circular passes rather than one aggressive pass.
- Inspect and repeat, or call a professional: Check the scratch in good light from multiple angles; if it’s still visible after two or three gentle applications, or if your fingernail ever catches, stop and get a professional opinion.
Best Glass Scratch Repair Kit Pick
Cerium Oxide Glass Polishing Kit for Car Windows & Headlights
A purpose-built automotive glass kit with pre-measured cerium oxide and applicator pads for buffing out moderate scratches and haze.
- Best for: Buffing out moderate scratches and haze on windshields or side windows in one kit
- Why we picked it: Made for automotive glass specifically, not a general-purpose glass polish
- Main drawback: Best results need a variable-speed drill — hand polishing alone is slower and may not fully clear wider scratches
Compare more glass scratch repair kit options
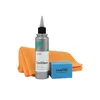 Option 1 CARPRO CeriGlass Glass Polish 150mL Kit
|
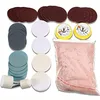 Option 2 34-Piece Glass Scratch Remover Tool Kit
|
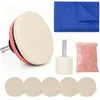 Option 3 100g Cerium Oxide Scratch Remover Kit
|
As an Amazon Associate we earn from qualifying purchases.
DIY Methods for Fixing Light Scratches
For those superficial scratches that don’t catch your fingernail, four effective DIY methods can restore clarity. These involve common household items or easily accessible products designed for glass polishing.
Method 1: The Toothpaste Trick
This is a classic DIY solution for minor glass imperfections. The mild abrasive nature of toothpaste can gently buff out very light scratches. It’s important to use non-gel, white toothpaste for this method, as colored or gel varieties can leave residue.
What You’ll Need
- White, non-gel toothpaste (avoid whitening or gritty types)
- A clean, soft microfiber cloth or cotton ball
- Water
Steps
- Clean the Window: Start by thoroughly cleaning the area around the scratch with glass cleaner and a soft cloth. Ensure the glass is dry and free of dirt or debris.
- Apply Toothpaste: Squeeze a small amount of toothpaste onto your clean cloth or cotton ball. Don’t use too much – a dab is sufficient.
- Buff the Scratch: Gently rub the toothpaste into the scratched area using small, circular motions. Apply light pressure. Continue for about 30 seconds to a minute.
- Wipe Clean: Dampen a separate clean cloth with water and wipe away the toothpaste residue.
- Inspect and Repeat: Inspect the window. If the scratch is less visible but still present, you can repeat the process a couple more times. Be patient; multiple light applications are better than aggressive scrubbing.
- Final Polish: Once you’re satisfied, clean and polish the entire window with a standard glass cleaner and a fresh microfiber cloth for a streak-free finish.
Method 2: Baking Soda Paste
Similar to toothpaste, baking soda is a mild abrasive that can help polish away light glass scratches. It’s another safe and affordable option for DIY repair.
What You’ll Need
- Baking soda
- Water
- A clean, soft microfiber cloth or sponge
Steps
- Prepare the Paste: In a small bowl, mix baking soda with water. Create a paste with a consistency similar to toothpaste – not too runny, not too dry. A good ratio is roughly 1 part water to 1 part baking soda.
- Clean the Window: As with the toothpaste method, ensure the window is clean and dry where the scratch is located.
- Apply the Paste: Apply a small amount of the baking soda paste to your clean cloth or sponge.
- Gentle Buffing: Gently rub the paste onto the scratch using circular motions. Apply light, consistent pressure for about 30 seconds.
- Rinse and Dry: Use a damp cloth to wipe away the paste. Ensure all residue is removed. Dry the area with a clean, lint-free cloth.
- Assess and Repeat: Check the scratch. If needed, repeat the application and buffing process.
- Final Clean: Finish by cleaning the entire window with glass cleaner for clarity.
Method 3: Clear Nail Polish (for Very Tiny Nicks)
This method is best for extremely fine hairline scratches or tiny chips that might be prone to getting worse. It acts more as a sealant to prevent the scratch from expanding rather than a true polish.
What You’ll Need
- Clear nail polish
- Rubbing alcohol (or glass cleaner)
- A very fine-grit sandpaper (e.g., 2000-grit, optional for smoothing)
- A clean, soft cloth
Steps
- Clean the Area: Thoroughly clean the window and the scratch with glass cleaner or rubbing alcohol. Dry it completely.
- Apply Nail Polish: Carefully apply a thin layer of clear nail polish directly into the scratch. Be precise to avoid getting it on the surrounding glass.
- Let it Dry: Allow the nail polish to dry completely. This may take 15-30 minutes.
- Smooth (Optional but Recommended): Once dry, you can very gently use a piece of 2000-grit or higher sandpaper (wet it first!) to lightly buff over the dried nail polish. This helps to level it with the glass surface. Alternatively, you can gently buff with a microfiber cloth. Be extremely careful not to scratch the surrounding glass.
- Clean and Polish: Clean the entire window with glass cleaner and polish to achieve a clear finish.
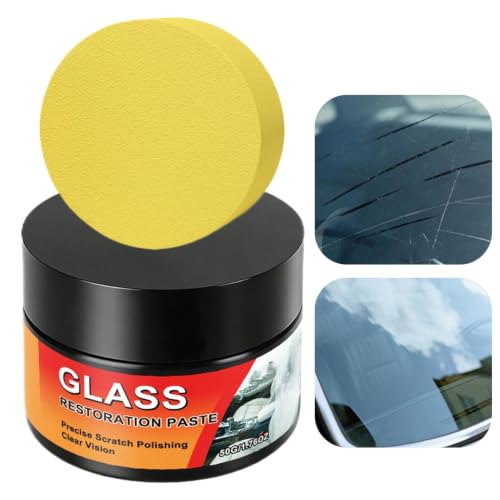
Method 4: Cerium Oxide Polishing Kit (Best for Moderate Scratches)
For scratches a bit more stubborn than toothpaste or baking soda can handle, or if you’d rather use a dedicated product, glass polishing kits are the step up. These kits use cerium oxide, a fine mineral powder that’s the industry-standard polishing compound for glass — the same active ingredient professional auto glass shops use for haze and light scratch removal.
Mixed with water into a slurry and worked in with friction, cerium oxide gradually smooths and levels the glass surface around a scratch rather than just filling it in, which is why it handles a wider range of light-to-moderate scratches, hazing, and swirl marks than toothpaste or baking soda can.
What You’ll Need
- A glass polishing kit (containing cerium oxide powder and possibly applicator pads)
- Water
- A drill with variable speed settings (optional, but recommended for efficiency)
- A felt polishing pad or applicator pad
- A spray bottle
- Microfiber cloths
Steps
- Read Kit Instructions: Always begin by carefully reading and following the specific instructions provided with your chosen glass polishing kit.
- Prepare the Area: Clean the scratched area thoroughly.
- Mix the Slurry: If your kit uses cerium oxide powder, mix roughly 4 parts powder to 1 part water in a container to create a slurry with the consistency of thin pancake batter. You can also use a pre-mixed cerium oxide solution.
- Apply the Slurry: Apply the slurry to the scratched area or directly to your polishing pad.
-
Start Polishing:
- By Hand: If polishing by hand, use a felt pad or a soft cloth and rub the slurry into the scratch using firm, circular motions.
- With a Drill: If using a variable-speed drill, attach the felt polishing pad and set the speed to roughly 1,000–1,500 RPM to start — enough to cut into the scratch without generating excess heat. Never exceed about 2,200 RPM; cerium oxide polishing generates friction heat fast, and an overheated spot can crack or discolor the glass.
- Use moderate, consistent pressure regardless of method. Avoid overheating the glass by not staying in one spot for too long. Move the pad continuously in a cross-hatch pattern (side-to-side, then up-and-down).
- Keep it Wet: Periodically spray the area with water to keep the slurry moist and prevent the pad from overheating the glass.
- Wipe and Inspect: Wipe away the slurry with a damp cloth and inspect your progress. You may need to repeat the polishing process multiple times for deeper scratches.
- Final Cleaning: Once the scratch is gone, thoroughly clean the window with glass cleaner and polish with a clean microfiber cloth to remove any residue and achieve a perfect finish.
When Standard DIY Methods Aren’t Enough
While toothpaste, baking soda, and polishing kits are great for superficial scratches, some damage is simply too severe for DIY fixes. If your fingernail catches deeply in the glass, or if the scratch is a significant crack or chip, it’s time to consider professional help.
Deep Scratches and Cracks
- Professional Glass Repair (Windshields Only): For a deep scratch or chip on a laminated windshield, an auto glass technician can inject a clear resin into the damaged area under vacuum pressure. Once cured, it restores much of the glass’s original strength at that spot, and the repair is generally recommended only for damage smaller than about 1 inch across.
- Window Replacement: Tempered side and rear windows can’t be resin-repaired at all — if a scratch on one is too deep to buff out, or the glass is cracked or chipped, replacement is the only option. On a windshield, replacement typically becomes necessary once cracks exceed about the length of a dollar bill, spread across the driver’s direct line of sight, or run to the edge of the glass.
📊 A properly cured resin repair restores roughly 85–95% of a windshield’s original structural strength at the break point — but that repair method only applies to laminated windshield glass, not tempered side or rear windows. Source: Auto Glass Safety Council (AGSC)
“AGSC’s mission is to make every automotive glass replacement — and repair — a safe one, through ANSI-accredited standards, technician accreditation, and consumer education.”
Consulting a reputable auto glass professional is the best move once DIY methods fall short. The Auto Glass Safety Council (AGSC) — the ANSI-accredited standards body for the U.S. auto glass industry — publishes repairability guidelines and can help you verify a shop’s credentials before booking a repair.
Preventing Future Scratches
The best way to deal with scratches is to avoid them in the first place. Here are some tips to keep your car windows in pristine condition — the same routine that goes into a full car detailing service.
Your Window Care Checklist
- Wiper Blade Maintenance: Regularly inspect your wiper blades for wear and tear. Replace them every 6-12 months or when they start to streak, chatter, or leave debris. Avoid using them to scrape ice or snow forcefully.
- Careful Car Washing: When washing your car, rinse off loose dirt and debris before scrubbing the windows. Use a clean wash mitt and plenty of soapy water. Avoid automatic car washes with abrasive brushes — see our guide on how often you should wash your car for more on picking a wash method that won’t haze your glass.
- Environment Awareness: Be mindful of your surroundings. Park away from trees that shed leaves or debris, and avoid parking under structures where materials might fall onto your car.
- Sticker Removal: When removing stickers or decals, use a plastic scraper or a dedicated adhesive remover, and work gently to avoid scratching the glass — our guide to removing sticker residue without damage covers the safest tools for this.
- Keep the Interior Clean: Dust and grit on the inside of the window can also cause scratches, especially when interacting with window tinting or during repeated cleaning — see our tips on cleaning the inside of car windows without streaks.
Table: Comparing Scratch Repair Methods
Here’s a quick comparison to help you choose the right method for your scratched car window:
| Method | Best For | Pros | Cons | Difficulty Level | Cost |
|---|---|---|---|---|---|
| Toothpaste | Very light surface scratches | Cheap, readily available ingredients, easy to try | Limited effectiveness on deeper scratches, can be messy | Easy | $ |
| Baking Soda Paste | Light surface scratches | Inexpensive, effective mild abrasive, simple to make | Similar limitations to toothpaste, requires careful mixing | Easy | $ |
| Clear Nail Polish | Extremely fine hairline scratches, tiny nicks | Seals minor imperfections, inexpensive | Does not truly repair, can be tricky to apply cleanly, limited durability | Medium | $ |
| Glass Polishing Kit (Cerium Oxide) | Light to moderate scratches, hazy glass | Professional-grade results, effective for a wider range of scratches | Requires specific tools (e.g., drill, pads), more effort, can overheat glass if misused | Medium-Hard | $$ |
| Professional Repair/Replacement | Deep scratches, cracks, chips, severe damage | Effective for all levels of damage, restores structural integrity | Most expensive option, requires scheduling an appointment | Professional | $$$ |
Which Repair Methods Work on Which Glass?
Because resin injection only bonds with laminated glass, not every repair option on the table above is available on every window. Here’s the breakdown by glass type:
| Repair Method | Windshield (Laminated) | Side / Rear Window (Tempered) |
|---|---|---|
| Toothpaste / baking soda (surface scratch) | Yes | Yes |
| Cerium oxide polishing kit (moderate scratch) | Yes | Yes |
| Clear nail polish (tiny nick seal) | Yes | Yes |
| Professional resin injection (chip/crack) | Yes | No — replacement only |
| Full window replacement | Yes, for severe damage | Yes — the only option once cracked |
Frequently Asked Questions (FAQ)
Can I really fix a scratched car window with toothpaste?
Yes, for very light, superficial scratches. Toothpaste’s mild abrasives can gently buff out marks that don’t catch your fingernail. Use plain white, non-gel toothpaste — colored or whitening formulas can leave residue — and don’t expect it to fix a deep scratch.
How do I know if a scratch is too deep for DIY repair?
Run a clean fingernail across the scratch. If your nail glides smoothly over it, it’s shallow enough for toothpaste, baking soda, or a cerium oxide kit. If your nail catches or snags, the scratch has gone past the surface layer and DIY buffing won’t fix it — you’ll need a professional opinion.
Can a scratched side window be resin-repaired like a windshield?
No. Resin injection repair only works on laminated glass, which is what windshields are made of. Side and rear windows use tempered glass, which is designed to shatter into small pieces for safety if it fails — it cannot be filled with resin. A deep scratch or crack on a tempered side window means full window replacement, not repair.
Will these DIY methods damage my window tint?
They can. Toothpaste, baking soda, and cerium oxide are all mild abrasives, and abrasion is exactly what damages tint film. These methods are meant for the exterior glass surface — avoid using them on the interior, tinted side of a window, and if a tinted window is scratched, have a tint professional assess it instead.
How long does a DIY scratch repair last?
A light scratch buffed out with toothpaste or baking soda is gone for good once it’s removed — it won’t come back unless something scratches the glass again. Professional resin repairs on windshield chips are also permanent, restoring roughly 85–95% of the glass’s original strength at that spot, according to AGSC guidance.
How do I choose the right glass polishing compound?
For car windows, cerium oxide-based compounds are the industry standard. Look for a kit specifically labeled for automotive or windshield glass, that includes applicator pads, and that comes with clear mixing instructions — a roughly 4-parts-powder-to-1-part-water ratio is typical.
What drill speed should I use with a cerium oxide polishing kit?
Start around 1,000–1,500 RPM on a variable-speed drill, which is enough to cut into a scratch without building up excessive heat. Keep the pad moving in overlapping passes and spray water on the glass periodically. Don’t exceed roughly 2,200 RPM — cerium oxide polishing generates friction fast, and an overheated spot can crack the glass.
Conclusion
Most light scratches on a car window are fixable at home — the fingernail test tells you whether to reach for toothpaste, baking soda, or a cerium oxide kit, and the type of glass tells you what your options are if DIY doesn’t fully clear it. Windshield chips and scratches can often be saved with a professional resin repair; side and rear window damage that’s too deep to buff out means replacement, since tempered glass can’t be resin-filled. Prevent problems before they start by keeping wiper blades fresh and your glass clean, and if your scratch is a deep gouge or your fingernail catches, get a professional evaluation rather than risking more damage. For a full step-by-step walkthrough of the polishing process, see our companion guide, How to Remove Scratches from Car Windows.
Products related to this article
Sponsored / affiliate links. As an Amazon Associate I earn from qualifying purchases. I may earn additional commission from eligible campaigns.