Carburetor Rebuild Cost: What You’ll Pay and Save
Figuring out the Carburetor Rebuild Cost: What You’ll Pay can seem tough when your engine isn’t running right. Don’t worry, you’re not alone! Many people get confused by all the parts and prices. This post will break down everything you need to know in a simple way. You’ll explore the different factors affecting the cost. Follow along, and you’ll become more comfortable with this topic. Let’s start with a clear picture of what’s involved.
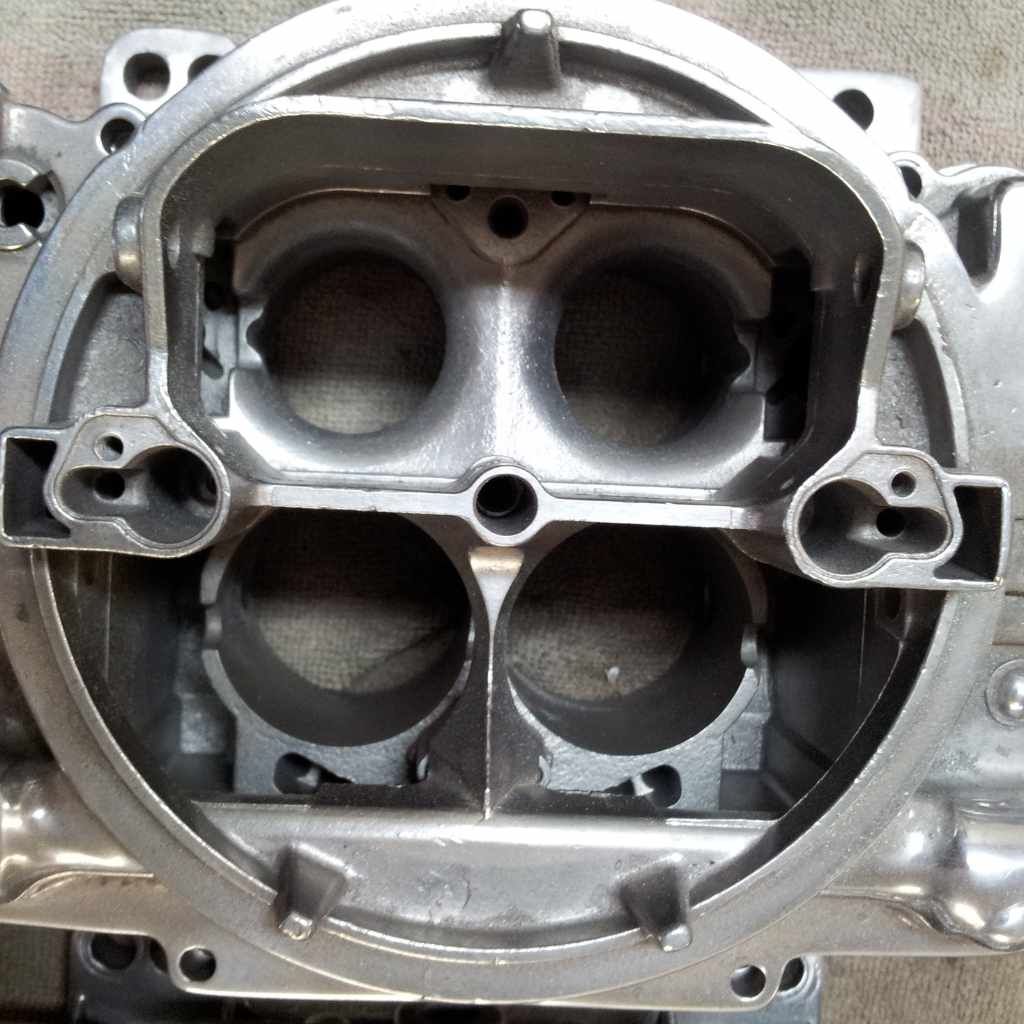
What is a Carburetor and Why Rebuild It?
A carburetor is a part of an engine that mixes air and fuel to make it run. It’s like the engine’s “breathing system”. Over time, carburetors can get clogged with dirt, have worn-out parts, or become damaged, leading to poor engine performance. This could mean your engine struggles to start, runs rough, or doesn’t have as much power as it should. Rebuilding the carburetor means taking it apart, cleaning it, replacing any worn-out components, and putting it back together so your engine can run like new. This process helps restore your engine’s efficiency and reliability. Addressing these issues promptly prevents more serious engine troubles down the line.
Knowing what carburetors do and why they fail is the initial step in realizing the Carburetor Rebuild Cost: What You’ll Pay. The carburetor is a precision instrument, responsible for mixing air and fuel in the correct ratio. The ratio changes based on engine speed and load. When the carburetor is working properly, the engine runs smoothly and efficiently. However, small dirt particles, fuel deposits, or component wear can disrupt this process. This results in the engine not starting, running poorly, or wasting fuel. Rebuilding a carburetor involves taking it apart, cleaning it thoroughly, replacing worn parts, and putting it back together. The goal is to restore the carburetor to its original working condition.
Types of Carburetors
There are different types of carburetors. Each design has its own unique features. The selection usually depends on the engine’s size, make, and intended use. The cost of rebuilding will often vary based on the carburetor type due to the complexity and availability of parts.
Down-Draft Carburetor: Down-draft carburetors are common in many vehicles. The air flows downwards through the carburetor. This design is usually good for general use. These are often easier to work on than other types, which can affect the rebuilding price.
An example of a down-draft carburetor would be found in many older cars like a Ford Mustang or a Chevrolet. These are usually simpler.
Side-Draft Carburetor: In a side-draft carburetor, the air flows horizontally. These carburetors are often found in performance applications. They can provide better performance but are often more complicated. That means a higher Carburetor Rebuild Cost: What You’ll Pay.
Classic examples of side-draft carburetors include those used in Porsche or vintage sports cars. These may require specialists.
Up-Draft Carburetor: This type of carburetor directs the air upwards. It is less common in modern vehicles. Up-draft carburetors can be less efficient than other types, leading to a possible increase in rebuilding expenses.
Older trucks and some industrial equipment sometimes used up-draft carburetors. Finding parts can be more difficult.
Signs Your Carburetor Needs Attention
Recognizing the symptoms of a faulty carburetor can help you decide when to rebuild. Several signs indicate that your carburetor may need service. Ignoring these issues can lead to poor performance and more costly repairs down the road.
Difficulty Starting: If your engine struggles to start, especially when cold, the carburetor might be the problem. This can be caused by a lack of fuel or an incorrect air-fuel mixture.
For example, if the choke doesn’t close properly, the engine might not get enough fuel when cold, leading to slow starts.
Rough Idling: An engine that runs unevenly or stalls at idle often has a carburetor issue. This happens because the fuel mixture isn’t balanced at low engine speeds.
If you see the engine’s RPM fluctuating erratically while the car is stopped, it may be time to get it checked.
Poor Fuel Economy: A damaged carburetor can cause your engine to use too much fuel. A bad carburetor can dump extra fuel into the engine, leading to lower gas mileage.
If your car has suddenly started to use much more fuel than before, the carburetor is likely causing the problem.
Backfiring or Sputtering: Backfiring through the intake or exhaust is a sign of an incorrect air-fuel mixture. The carburetor might not be delivering the right amount of fuel.
You may hear popping sounds coming from your engine. These sounds mean the fuel is not burning correctly.
Black Smoke from Exhaust: Excessive black smoke suggests the engine is getting too much fuel. This can be caused by a carburetor that is flooding the engine.
The smell of raw fuel, along with black smoke, means the carburetor may require work.
Factors That Influence Carburetor Rebuild Cost
Several factors affect the final Carburetor Rebuild Cost: What You’ll Pay. The specific type of carburetor, the necessary parts, and whether you do the job yourself or have a shop do it all play a role. Understanding these aspects helps you make informed decisions about your car’s maintenance.
The overall Carburetor Rebuild Cost: What You’ll Pay depends on several elements. These include the complexity of the carburetor, the cost of replacement parts, and whether you pay for professional labor. Each element contributes to the total price, so knowing what goes into the cost helps in creating a repair plan.
Carburetor Complexity
The design of your carburetor is a key factor. Some carburetors are more complex than others, with more parts and intricate designs. These usually require more time to take apart, clean, and reassemble. This added complexity affects the labor costs if you have a mechanic working on it.
Number of Barrels: Carburetors can have one, two, or even four barrels. Multi-barrel carburetors, like those used in performance cars, are more complicated.
A four-barrel carburetor will naturally have more parts, making the job more involved.
Special Features: Carburetors can have features like power valves and accelerator pumps. These parts can affect the rebuilding process and repair charges.
If the carburetor needs a rebuild that involves these special components, it might be more costly.
Availability of Parts: Finding parts for older or specialized carburetors can be difficult. This can increase the overall cost of the rebuild.
If parts are rare or hard to find, expect to pay more because of the extra effort to locate them.
Parts and Materials Needed
The cost of parts is a significant part of the overall rebuild price. The specific parts you need to replace will depend on the condition of your carburetor. The type of parts you use will influence how long your carburetor functions properly.
Gasket and Seal Kits: These kits usually include all the gaskets and seals needed. The price depends on the specific carburetor model.
A typical gasket kit might cost between $20 to $50.
Needle and Seat Assemblies: These are critical for controlling fuel flow. The cost can vary, but these are often inexpensive items.
Needle and seat replacements are typically in the range of $10 to $30.
Jets and Metering Rods: These parts control the fuel-air mixture. If damaged or corroded, they may need replacement.
A single jet might cost around $5 to $15.
Floats: Floats can wear out or become damaged over time. The price to replace these can be under $20.
These parts are critical for maintaining the correct fuel level in the float bowl.
Labor Costs (DIY vs. Professional)
The choice between doing the rebuild yourself or having a professional do it greatly impacts the total cost. Doing it yourself can save money, but it requires time, tools, and some mechanical experience. Hiring a professional costs more, but it guarantees expert work and saves you time.
DIY Rebuilds: Doing it yourself means you only pay for parts and any tools you may need. You save money on labor costs, but you must invest your time.
You can save a lot of money doing the labor yourself. This allows you to spend your money on replacement parts.
Professional Services: Having a mechanic rebuild your carburetor means paying for labor. This typically includes the mechanic’s time, expertise, and any shop fees.
A shop will likely charge an hourly rate that adds to the total cost, but you are also paying for the mechanic’s knowledge.
Hourly Rates: Labor rates vary depending on the area. Rates can range from $75 to $150 per hour.
The price will change depending on your location and the complexity of the job.
Steps to Rebuild Your Carburetor (DIY)
Rebuilding a carburetor yourself can be a rewarding project. It is not overly complex, but you must work carefully and follow the right steps. Here is a simplified guide that will help you. Always consult your vehicle’s service manual or watch tutorials for your specific carburetor model.
If you’re comfortable with basic mechanical tasks, rebuilding your carburetor is possible. This section breaks down the process. By following these instructions carefully, you can successfully restore your carburetor and save money. Be sure to keep parts organized, and take photos during disassembly.
Gather Your Tools and Materials
Before you begin, gather the necessary tools and materials. Having everything ready saves time and makes the process smoother. The right tools ensure you can take apart, clean, and reassemble the carburetor properly.
Carburetor Rebuild Kit: Purchase a kit designed for your carburetor model.
The kit will include gaskets, seals, and other parts you’ll need.
Tools: You’ll need screwdrivers, wrenches, pliers, a small parts cleaner, and possibly a torque wrench.
Make sure you have all the tools.
Cleaning Supplies: Get carburetor cleaner, a soft brush, and a container to hold the parts while cleaning.
A good cleaning can remove any stubborn build-up.
Gloves and Safety Glasses: Protect yourself from chemicals and debris.
Safety is the most important thing.
Remove the Carburetor from the Engine
Carefully remove the carburetor from the engine. This step requires disconnecting fuel lines, linkages, and vacuum hoses. Take your time to avoid damage to any components. Refer to your vehicle’s service manual for specific instructions.
Disconnect the Battery: Disconnect the negative battery cable for safety.
This prevents any accidental sparks.
-
Identify and Disconnect Lines: Label and disconnect fuel lines, throttle linkages, and vacuum hoses. Take pictures before you take it apart.
Labeling helps you put everything back correctly.
- Unbolt the Carburetor: Remove the bolts or studs holding the carburetor in place.
-
Use the correct tools to avoid damaging the components.
- Carefully Lift Off: Lift the carburetor off the intake manifold.
-
Make sure all parts are clear before removing it completely.
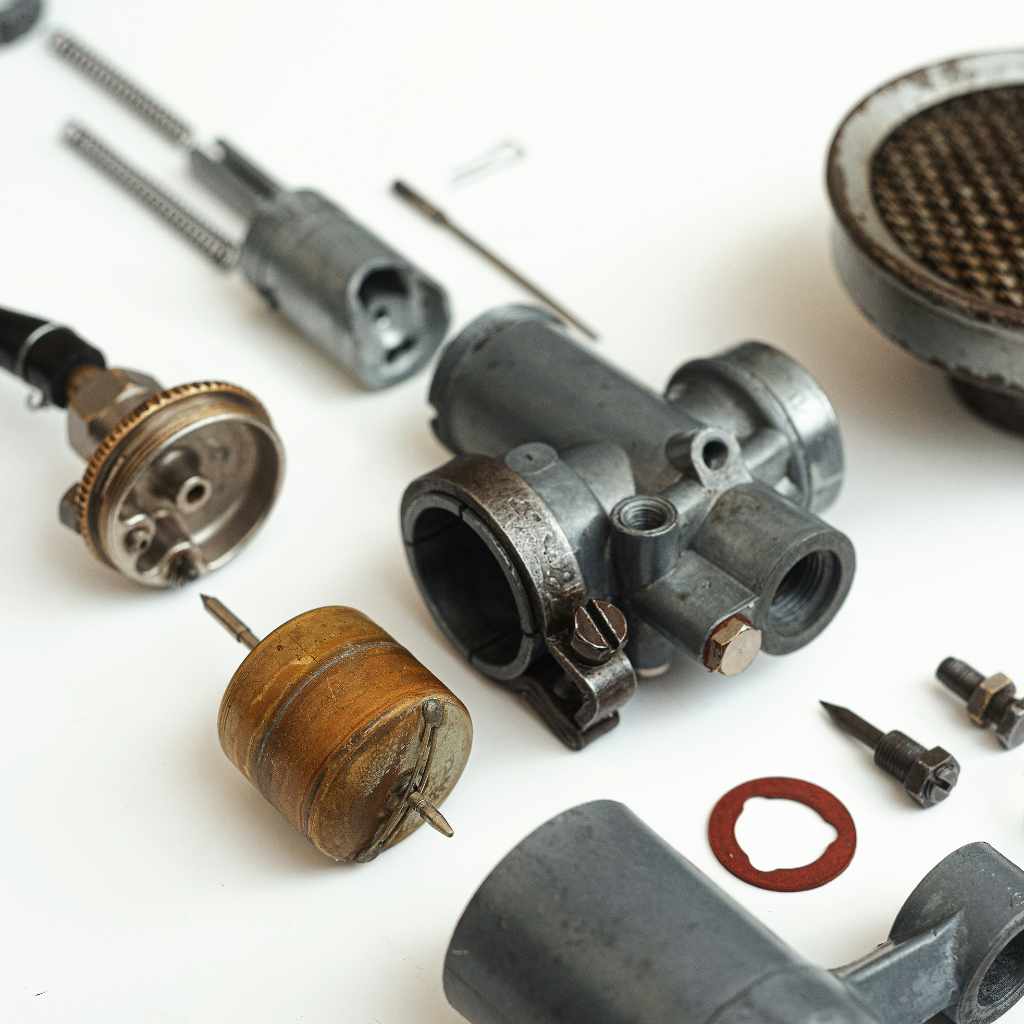
Disassemble the Carburetor
Carefully take the carburetor apart. It’s important to keep all the parts organized. Take pictures at each step. This process helps you remember how to put it back together. If you’ve never rebuilt a carburetor, take your time.
Work Surface: Lay out a clean workspace.
This keeps all the parts clean and easy to find.
Take Photos: Take pictures of each step as you disassemble the carburetor.
These will act as a helpful guide for reassembly.
Remove Top Cover: Remove the top cover and float bowl.
Do this with care, keeping everything organized.
Remove Internal Components: Carefully remove the float, needle and seat, jets, and other components.
Put each part in a separate container.
Clean and Inspect the Carburetor
Thoroughly clean all parts of the carburetor. Use carburetor cleaner to remove dirt, varnish, and any other build-up. Inspect all components for wear and damage. Proper cleaning is important to make sure the carburetor works correctly.
Use Carburetor Cleaner: Spray all parts with carburetor cleaner.
Make sure you do it in a well-ventilated area.
Use a Brush: Use a soft brush to remove stubborn deposits.
A soft brush prevents damaging the parts.
Inspect for Damage: Check all parts for wear, cracks, or other damage.
If parts are damaged,
Air Dry: Let the parts air dry or use compressed air to remove excess cleaner.
Make sure everything is completely dry before reassembling.
Reassemble the Carburetor
Reassemble the carburetor using your new parts. Follow the photos you took during disassembly to make sure everything goes back together correctly. Use the rebuild kit’s instructions as a guide. This step is critical for proper operation.
Install New Parts: Replace old gaskets, seals, and other parts from the rebuild kit.
Ensure that all parts fit snugly.
Install the Float: Put the float and needle and seat in place.
Adjust the float height according to your service manual.
Install Jets and Metering Rods: Put the jets and metering rods back in place.
Tighten everything to the correct specifications.
Reassemble the Carburetor Body: Put the top cover and float bowl back on.
Make sure all screws are tightened.
Reinstall and Adjust
Put the rebuilt carburetor back on the engine. Connect all fuel lines, linkages, and vacuum hoses. Once everything is connected, start the engine. You might need to make some adjustments to the idle and air-fuel mixture to get the engine running smoothly. The goal is a properly tuned engine.
Mount the Carburetor: Reinstall the carburetor on the intake manifold.
Tighten the bolts or studs to the manufacturer’s specs.
Connect All Lines: Reconnect the fuel lines, throttle linkages, and vacuum hoses.
Make sure everything is connected correctly.
Start the Engine: Start the engine and let it warm up.
Listen for any leaks or unusual noises.
Adjust Idle and Mixture: Adjust the idle speed and air-fuel mixture screws.
Follow the manufacturer’s specifications. If you are uncertain of how to do this, take the vehicle to a qualified mechanic.
Real-Life Examples of Carburetor Rebuild Costs
Examining real-world examples helps you understand what to expect. These examples show how different factors can affect the Carburetor Rebuild Cost: What You’ll Pay. The final price varies, but these examples provide insight into how various decisions affect the overall cost.
-
- Scenario 1: DIY Rebuild of a Single-Barrel Carburetor: A classic car owner decides to rebuild the single-barrel carburetor on their vintage vehicle. They purchase a rebuild kit for $30, spend $10 on carb cleaner, and use tools they already have. The total cost is $40, and the job takes them a Saturday afternoon. This DIY approach saves them significantly on labor costs. The engine now runs smoother.
The owner saved on the cost of labor.
-
- Scenario 2: Professional Rebuild of a Four-Barrel Carburetor: A truck owner with a four-barrel carburetor on their pickup truck takes it to a local mechanic. The rebuild kit costs $50, and the labor is $120 per hour. The mechanic spends about 4 hours on the job. The total cost is approximately $530 ($50 for the kit + $480 for labor). Although costly, the mechanic’s expertise ensures the engine runs efficiently.
The truck is running optimally after the rebuild.
These examples display the range of Carburetor Rebuild Cost: What You’ll Pay. The type of carburetor and who does the work directly affect the final price. Whether you do it yourself or hire a professional, understanding the factors involved helps you make a great choice based on your situation and budget.
| Factor | DIY Rebuild | Professional Rebuild |
|---|---|---|
| Parts Cost | $20 – $50 (rebuild kit) | $20 – $50 (rebuild kit), plus markup |
| Labor Cost | Your time (0 hours, approximately) | $75 – $150 per hour |
| Tools Needed | Basic tools, may need to buy a few | Shop has all the necessary tools |
| Skill Level | Requires basic mechanical ability | Expert mechanical knowledge |
Frequently Asked Questions
Question: How often should I rebuild my carburetor?
Answer: It depends on usage and maintenance. Many people rebuild every 5-10 years, or when experiencing engine performance issues. Regular fuel filter replacement and proper fuel storage can help extend the life of your carburetor.
Question: Can I use any carburetor cleaner for the rebuild?
Answer: Yes, but it’s important to select one designed for carburetors. These cleaners are specifically formulated to remove dirt, varnish, and deposits. Avoid using household cleaners, which may damage the carburetor components.
Question: What if I break a part during the rebuild?
Answer: If you break a part, it is often best to replace it. Contact your local auto parts store to get a replacement part. If you are uncertain about the part’s identity, a mechanic may assist you.
Question: Is it worth rebuilding a carburetor on an old car?
Answer: Yes, especially if the car is otherwise in good condition. Rebuilding the carburetor can restore performance and fuel efficiency. It is often a cost-effective way to keep an older vehicle running smoothly.
Question: How do I know if I have adjusted the carburetor correctly after a rebuild?
Answer: Once reassembled, start the engine. Use a tachometer to set idle speed. Then, adjust the mixture screws until the engine runs smoothly and responds well to throttle inputs. The engine should idle smoothly without stalling.
Final Thoughts
The Carburetor Rebuild Cost: What You’ll Pay depends on several variables. This includes the kind of carburetor, required parts, and labor. DIY projects can save money, but you must invest your time and effort. Professional service assures experience but comes with a higher price. It’s smart to compare the expected labor charges with the price of the parts you need. Think about your mechanical skills and the complexity of the job. By exploring the different elements involved, you can make the decision. Remember, a properly working carburetor enhances your engine’s performance. Consider the long-term benefits in terms of fuel efficiency and engine longevity. Approach the rebuilding process with care and attention, and your engine will reward you with reliable operation.