Do You Sand Primer Before Painting A Car? Yes, Here’S Why
It’s a question many DIY car painters grapple with. You’ve prepped the surface, sprayed the primer, and it looks pretty good. Now what?
Do you just go straight to the base coat? Or is there another step? Many home mechanics scratch their heads wondering if they should sand primer before painting a car.
It feels like an extra, maybe unnecessary, step when you’re eager to get to the color. But trust me, this is one of those moments where taking a little extra time can save you a lot of headaches and lead to a much better result. Let’s dive into why this crucial step matters and how to get it done right for that showroom shine.
Sand primer before painting a car to create a smooth, uniform surface for the topcoat. This step removes imperfections and ensures better adhesion, leading to a professional-looking and durable paint job. Skipping it often results in a rough finish and paint that peels or flakes prematurely.
Understanding Primer and Its Purpose
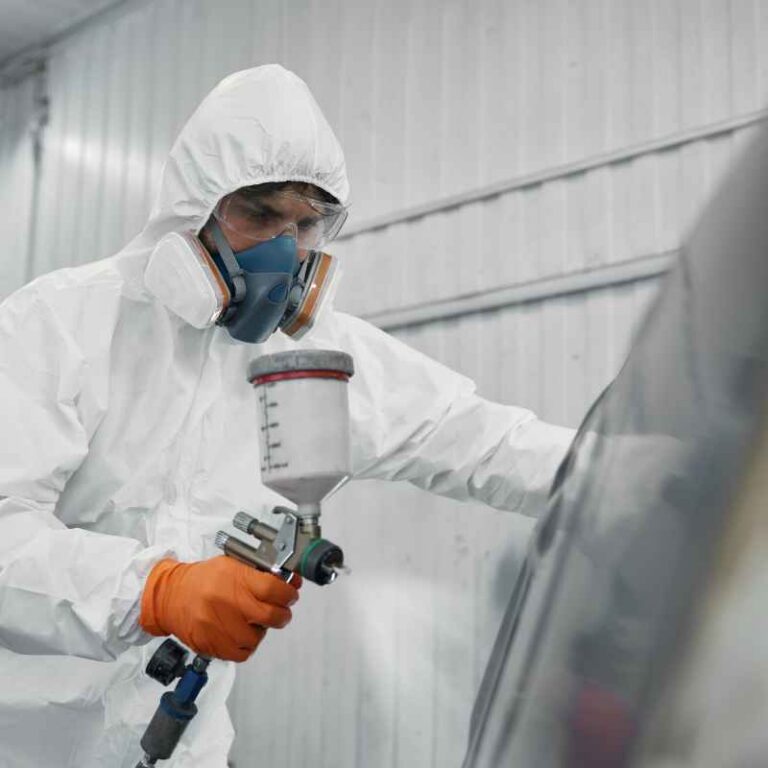
Before we talk about sanding, let’s quickly touch on what primer is and why we use it in car painting. Think of primer as the bridge between your car’s metal (or body filler) and the shiny paint you see. It has a few main jobs.
First, it helps the paint stick really well. Without primer, paint might just slide off or peel away easily. Second, primer fills in tiny scratches and imperfections on the surface.
It creates a nice, smooth canvas. Third, it can help prevent rust and corrosion, especially if you’re using a specific type of primer like epoxy primer. So, it’s not just a colored base; it’s a functional layer essential for a good paint job.
Primers come in different types, too. You might hear about etching primers, epoxy primers, urethane primers, and high-build primers. Each has its own strengths.
High-build primers, for instance, are designed to be sanded. They are thicker and can fill more significant imperfections. The goal of any primer, though, is to provide a uniform surface that the paint can adhere to and look good on.
Why Sanding Primer is So Important
So, why the sanding step? It might seem counterintuitive to sand a layer meant to smooth things out. But here’s the magic of it.
Even the best primer spray can leave tiny imperfections. You might see a few small dust nibs (tiny specks of dust that settled on the wet primer). There could be slight runs or drips if you sprayed a bit too heavy in one spot.
Sometimes, the surface just isn’t perfectly flat after the primer dries.
Sanding the primer smooths out all these little issues. It creates a perfectly flat, consistent surface. This is super important because the paint you spray on top will highlight every single bump and divot.
If the primer isn’t smooth, your final paint job won’t be either. Imagine trying to paint a wall with tiny bumps; the paint would show all of them. The same idea applies to cars.
Also, sanding the primer creates a slight “tooth” or grip. This means the color coat of paint can grab onto the primer even better. This enhanced adhesion is key for a paint job that lasts for years, resisting chips and peeling, especially when your car faces the elements like sun, rain, and road debris.
It’s the difference between a finish that looks good for a short while and one that stays beautiful for a long time.
My First Car Painting Mishap: A Sanding Story
I remember my first attempt at painting a car myself. It was an old pickup truck I was trying to restore. I was so excited to get to the color coat.
I’d spent ages sanding the old paint off, fixing dents, and applying body filler. Then came the primer. I followed the instructions, sprayed it on, and it actually looked pretty decent.
I thought, “Great! I’m ready for the red paint!”
I skipped the sanding step for primer. I just thought it was an unnecessary hassle. I loaded up the spray gun with my shiny red base coat and went to town.
The first few panels looked okay from a distance. But as I got closer, I could see it. The finish was dull in some spots, bumpy in others.
There were tiny little specks everywhere. It looked… amateur. Really amateur.
It wasn’t the smooth, glossy finish I had dreamed of. I was so disappointed. That truck taught me a hard lesson about not cutting corners, especially when it comes to prep work like sanding primer.
Choosing the Right Sandpaper
When you decide to sand primer, you need the right tools. The most important tool here is sandpaper. You don’t want to use sandpaper that’s too coarse.
That will just create new scratches you’ll have to fix later. You also don’t want sandpaper that’s too fine, or it won’t do much. The key is to use fine-grit sandpaper.
For most automotive primers, you’ll want to start with a grit in the range of 320 to 400. Some people even go a bit finer, like 600 grit, especially if they are using a water-based paint system or want an ultra-smooth finish. The specific grit you use can depend on the type of primer and what the paint manufacturer recommends.
Always check the technical data sheet for your primer and paint for the best guidance.
You can use dry sandpaper, but many professionals prefer wet sanding. Wet sanding uses water (often with a bit of soap) to keep the sandpaper clean and reduce dust. It also helps prevent the sandpaper from clogging up too quickly.
This makes it easier to get a smooth, uniform finish without creating new problems. When wet sanding, keep the surface and the sandpaper wet. This creates a lubricating effect.
Sandpaper Grit Guide for Primer
Starting Grit: 320-400
Finer Grit (Optional): 500-600
Why: To create a smooth surface without deep scratches.
Method: Wet sanding is often preferred for a cleaner finish.
How to Sand Primer Effectively
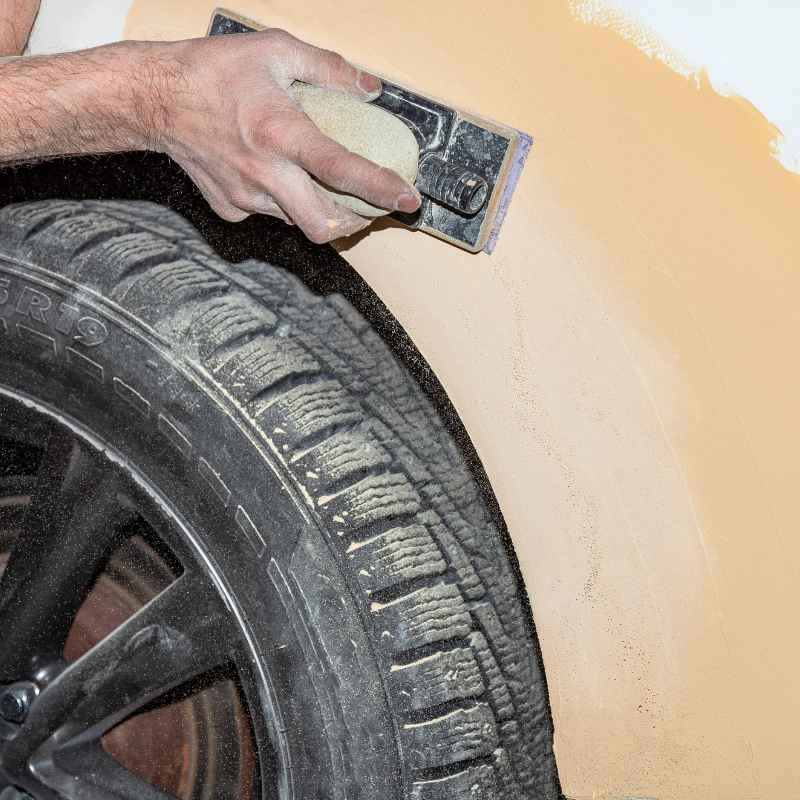
Okay, you’ve got your primer on, it’s dry, and you have your fine-grit sandpaper. Now it’s time to sand. Work in small sections.
Don’t try to do the whole car at once. This helps you focus on getting each area right.
Use a sanding block or a flexible sanding pad. This helps you keep the surface flat and avoid creating low spots or waves. If you’re sanding a flat panel, a rigid block is great.
For curved areas, you’ll need a flexible one. Keep the pressure even and consistent. You don’t need to press super hard.
Let the sandpaper do the work.
If you’re wet sanding, rinse the sandpaper frequently. Also, wipe down the surface you’re sanding often. This lets you see your progress and any areas you might have missed.
You’re looking for a uniform, dull finish. The primer will look consistent all over, with no shiny spots (which would mean you haven’t sanded them) and no deep gouges.
After you’ve sanded an area, you need to clean it thoroughly. Use a tack cloth to pick up any remaining dust. A tack cloth is a sticky cloth that traps dust particles.
Make sure there is absolutely no dust left. Dust is the enemy of a smooth paint job. It will get into your fresh paint and ruin the finish.
So, clean, clean, clean!
Step-by-Step Primer Sanding
- Dry Time: Ensure primer is fully dry. Check manufacturer specs.
- Gather Supplies: Fine-grit sandpaper (320-600), sanding block, water, mild soap (for wet sanding), tack cloth.
- Section Work: Sand in small, manageable areas.
- Pressure: Apply light, even pressure with a sanding block.
- Wet Sanding: Keep sandpaper and surface wet. Rinse often.
- Inspect: Look for a uniform, dull finish. No shiny spots.
- Clean Up: Wipe down thoroughly. Use a tack cloth to remove all dust.
When to Skip Sanding (Rarely!)
Are there times you don’t need to sand primer? Yes, but they are very specific. Some primers are designed as “direct-to-metal” (DTM) primers that also act as a high-build primer.
If the manufacturer specifically states that the primer can be painted over directly without sanding, and it doesn’t have any imperfections, then you might be able to skip it. However, this is uncommon for a show-quality finish.
Another rare instance is if you are using a very specific type of primer and paint system that is designed to be a single-stage system where the primer and color are integrated. In these cases, the manufacturer’s instructions are paramount. Always, always, always read the technical data sheets for your products.
They will tell you exactly what needs to be done.
But for most standard automotive painting processes, where you use a separate primer, sealer, base coat, and clear coat, sanding the primer is a non-negotiable step. It’s part of building up layers for a durable and beautiful finish. If you’re aiming for that professional look, don’t skip this.
It’s a foundational step.
Real-World Context: Different Surfaces, Same Principle
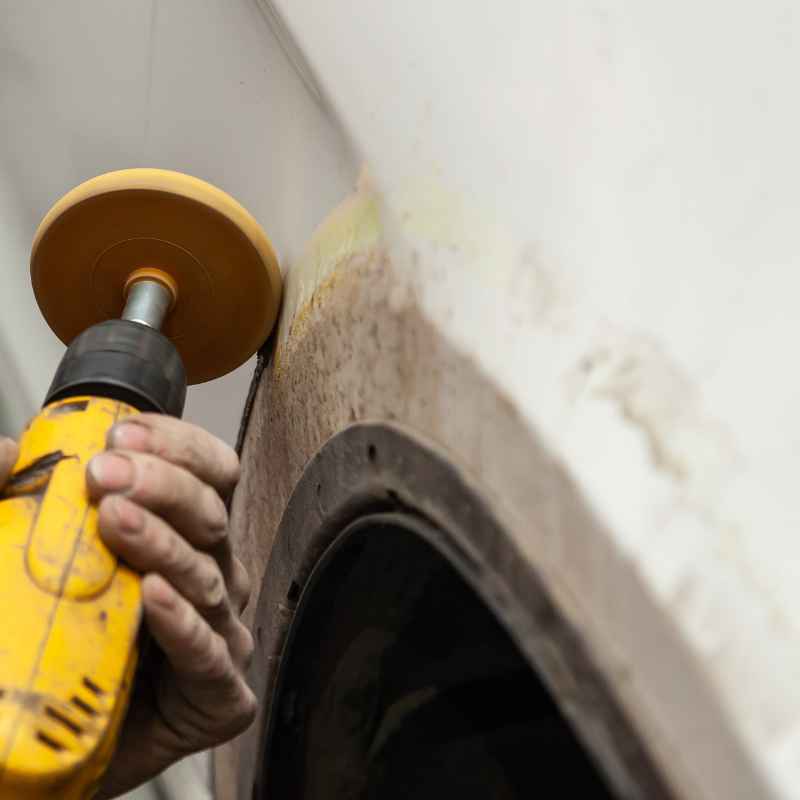
Think about the different parts of a car. You have large, flat panels like the hood and roof. These are generally straightforward to sand.
Then you have more complex areas like door jambs, inside fender wells, or around trim pieces. These areas can be trickier.
For tight spots or edges, you might need to use smaller sanding pads or even folded sandpaper. Sometimes, a soft foam block or a specialized sanding sponge can help get into curves and contours without creating sharp edges. The goal remains the same: a smooth, even surface.
The technique might adjust based on the shape.
Consider older cars versus newer ones. Older cars might have more rust and pitting that the primer needs to fill. This might mean using a thicker high-build primer and potentially a slightly coarser grit to start, but you’d still finish with a fine grit.
Newer cars, especially if they haven’t had major bodywork, might have primer applied over smoother surfaces, making the sanding process quicker.
The environment you’re painting in also matters. A dusty garage means you need to be extra diligent about cleaning. A humid environment can affect primer drying times.
If you’re painting outdoors, wind can blow debris onto the wet primer, necessitating more sanding later. Understanding these factors helps you anticipate issues and adjust your process, including how you approach sanding.
What This Means For You: Achieving a Better Paint Job
So, what does all this mean for your car painting project? It means that if you want a paint job that looks like it came from a professional shop, sanding primer is a vital step. It’s not about making more work for yourself; it’s about ensuring the best possible outcome for your hard work.
When is it normal to sand primer? Pretty much always when you’re painting a car with standard automotive paints. When should you worry?
You should worry if your primer has large imperfections like runs, heavy orange peel, or significant dust contamination. These might require more aggressive sanding, or even stripping and reapplying the primer. But for minor imperfections, fine-grit sanding is your best friend.
A simple check before you start sanding is to run your hand over the dried primer. Can you feel any bumps, ridges, or rough spots? If so, they need to be sanded down.
Even if it feels smooth, a light sanding with fine-grit sandpaper will ensure that the primer is perfectly uniform and ready for paint adhesion.
Quick Tips for a Smooth Primer Finish
Here are some quick tips to keep in mind:
- Read Instructions: Always check the technical data sheets for your specific primer and paint.
- Use Quality Materials: Cheap sandpaper can clog quickly or tear. Invest in good quality abrasives.
- Work in Good Light: Make sure you can see what you’re doing clearly.
- Cleanliness is Key: A clean work area prevents dust from contaminating your primer.
- Don’t Rush: Take your time with the sanding and cleaning steps.
Common Primer Issues & Sanding Solutions
Issue: Dust Nibs
Solution: Lightly sand with 400-600 grit. These tiny specks will be removed, leaving a smooth surface.
Issue: Slight Runs/Drips
Solution: Carefully sand down the raised area with 320-400 grit until flush. Feather the edges.
Issue: Orange Peel Effect
Solution: If mild, a 320-400 grit sand will usually level it. For severe orange peel, you might need coarser grit or to reapply primer.
Issue: Uneven Coverage
Solution: Sand until the primer is uniform. Apply a second coat if needed, then sand again.
Frequently Asked Questions About Sanding Primer
Do I need to sand epoxy primer?
Yes, generally you should sand epoxy primer before applying subsequent coats. While some epoxy primers can be painted over within a specific recoat window without sanding (called a “wet-on-wet” application), sanding provides a better mechanical bond for subsequent layers like urethane primers or base coats, ensuring maximum adhesion and preventing delamination.
What grit sandpaper should I use for primer if I’m painting a car?
For most automotive primers, a grit range of 320 to 400 is standard for initial sanding. If you’re aiming for an exceptionally smooth finish or using certain paint systems, you might go up to 500 or 600 grit. Always consult your primer and paint manufacturer’s recommendations.
Can I spray paint directly over sanded primer?
Yes, absolutely. The primary purpose of sanding primer is to prepare it for the next coat of paint, whether that’s another primer coat, a sealer, a base coat, or a single-stage paint. The sanded surface provides the necessary grip for the paint to adhere properly.
What happens if I don’t sand primer before painting a car?
If you don’t sand primer, you risk a poor paint job. The final finish will likely be dull, bumpy, and have visible imperfections from the primer layer. Adhesion will also be compromised, meaning the paint may peel, flake, or chip much sooner than it should.
It’s a critical step for durability and appearance.
Is it okay to use a power sander on primer?
You can use a power sander, like a DA (dual-action) sander, on primer, but you must use a fine grit (320-400 or higher) and be very careful. Power sanders can remove material quickly and can easily create an uneven surface or burn through the primer if you’re not experienced. For most DIYers, hand sanding with a block is safer and gives better control for primer sanding.
How long should primer dry before sanding?
Primer drying times vary based on the type of primer, temperature, and humidity. Always check the product’s technical data sheet. Generally, primers are ready for sanding once they are fully hardened, which can range from a few hours to 24 hours or more.
Trying to sand too soon can cause the primer to gum up the sandpaper and create a messy finish.
Final Thoughts on Primer Sanding
So, to answer the question directly: yes, you should absolutely sand primer before painting a car. It’s a small step that makes a monumental difference. It’s the foundation of a great paint job, ensuring your color coat goes on smoothly and sticks for years to come.
Don’t skip it!