How to Add a Second Battery for Car Audio (Isolator vs. DC-DC Charger)
Hey there! If you’re wondering how to add a second battery for your car audio system, you’re in for a treat. I’ve been down this road myself, upgrading my car’s sound system to pump out those deep bass notes without dimming my headlights or draining my main battery. Adding a second battery was a game-changer for me, and I’m excited to share what I’ve learned with you.
Whether you’re a car audio newbie or a seasoned enthusiast, this guide will walk you through everything you need to know to power up your system safely and effectively. It’s not as complicated as it sounds, and with a little patience, you’ll have your tunes booming in no time. Let’s dive in and get your car audio system rocking!
Quick Answer: Add a second battery by installing a battery isolator (or better, a DC-DC charger on 2015+ vehicles) between your main and second battery, running heavy-gauge power and ground cables, and connecting your amp to the second battery. This keeps your amp’s power draw from dimming your lights or draining the battery that starts your car.
Why Add a Second Battery for Car Audio?
Let me start with why I decided to add a second battery. A powerful car audio system, especially one with subwoofers and amplifiers, can pull a lot of power. My stock battery just couldn’t keep up—my headlights would dim, and my car struggled to start after long listening sessions. A second battery provides extra power to run your audio system without stressing the main battery, which handles your car’s essentials like starting and lights.
This setup is great for car audio enthusiasts who want loud, clear sound without risking a dead battery. It also helps prevent wear on your alternator and electrical system. I noticed a huge difference in performance after adding my second battery, and it gave me peace of mind knowing my car wouldn’t leave me stranded.
Benefits of a Second Battery
Adding a second battery transformed my audio experience. Here’s why I think it’s worth it:
- Consistent Power Supply: My amplifiers get steady power, so the sound stays crisp and loud, even during heavy bass tracks.
- Protects Main Battery: The second battery takes the load off the primary battery, keeping it ready to start the car.
- Prevents Electrical Strain: My alternator and wiring don’t get overworked, which means fewer repairs down the road.
- Longer Listening Time: I can enjoy my music with the engine off without worrying about draining the main battery.
- Better Sound Quality: Stable power means my amps perform at their best, delivering cleaner bass and highs.
These benefits made my drives way more enjoyable, but there are some things to consider before jumping in.
Things to Consider Before Adding a Second Battery
I learned a few lessons when I set up my second battery. Here’s what you need to think about:
- Space: You need room in your car for the battery. I put mine in the trunk, but some folks use the engine bay or under a seat.
- Cost: A good battery, wiring, and accessories can cost $200–$500. I spent about $300 on my setup.
- Weight: A second battery adds weight, which might affect fuel efficiency. My car’s a bit heavier now, but the sound is worth it.
- Maintenance: You’ll need to check both batteries regularly. I learned to keep an eye on connections to avoid corrosion.
- Alternator Capacity: A powerful audio system might need a high-output alternator. My stock one struggled until I upgraded.
Planning ahead saved me from headaches, so take time to think about your car’s setup and needs.
Best Second Battery Setup Pick
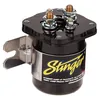
Stinger SGP32 High Current 200-Amp Battery Relay & Isolator for Most V
A 200-amp isolator protects your starting battery while powering a second battery for your audio system.
- Best for: Reliable isolation on older vehicles without a smart alternator
- Why we picked it: A name-brand 200-amp relay handles high-current audio setups without draining your starting battery.
- Main drawback: Won’t fully charge a second battery on 2015+ vehicles with smart/regulated alternators — see the note below on when you need a DC-DC charger instead.
Compare more second battery car audio options
 Option 1 Dual Battery Isolator Kit 12V – 140 Amp Voltage Sensitive Re
|
 Option 2 DS18 AK4 Complete 4 Gauge CCA Amplifier Installation Wiring
|
 Option 3 Renogy Deep Cycle AGM 12 Volt 100Ah Battery, 3% Self-Dischar
|
As an Amazon Associate we earn from qualifying purchases.
Tools and Materials You’ll Need
Before I started, I gathered everything I needed. Here’s what I used to add my second battery:
| Item | Purpose |
|---|---|
| Second Battery | Provides extra power for the audio system. I chose an AGM battery for safety. |
| Battery Isolator | Prevents the second battery from draining the main one. |
| Battery Box or Tray | Secures the battery safely in the car. |
| Heavy-Gauge Power Cable | Connects the batteries and handles high current. I used 4-gauge wire. |
| Ground Cable | Grounds the second battery to the car’s chassis. |
| Fuse and Fuse Holder | Protects the system from electrical faults. I used a 100-amp fuse. |
| Wire Cutters/Crimpers | Cuts and secures cables. |
| Screwdrivers/Wrenches | For securing connections and mounting the battery box. |
| Terminal Connectors | Connects cables to battery terminals. |
| Multimeter | Checks voltage and connections. |
| Electrical Tape/Zip Ties | Secures and insulates wiring. |
I got most of these at an auto parts store. Make sure your battery matches your audio system’s power needs—my 800-watt amp needed a deep-cycle AGM battery for best performance.
Choosing the Right Battery
Picking the right battery was a big decision for me. Here’s what I considered:
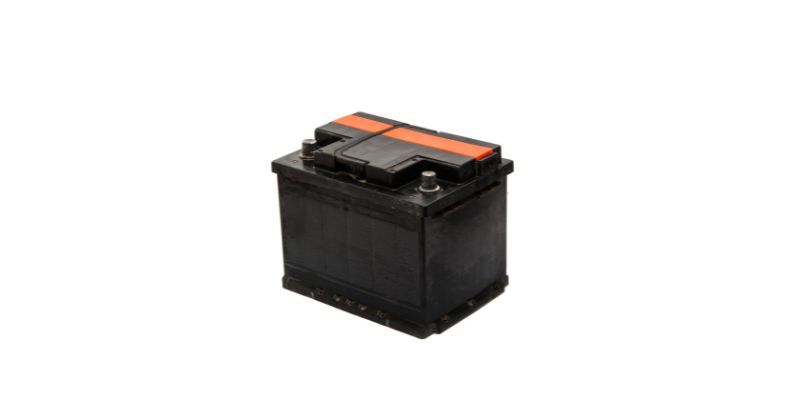
- Type: I went with an Absorbed Glass Mat (AGM) battery because it’s safe, maintenance-free, and handles deep discharges well. Lead-acid batteries are cheaper but can leak or spill.
- Capacity: Measured in amp-hours (Ah), this determines how long the battery can power your system. My 55Ah battery handles my setup perfectly.
- Size: Make sure it fits your car. I measured my trunk space before buying.
- Brand: I chose a reputable brand like Optima or XS Power for reliability. My Optima battery has been rock-solid for years.
Check your amp’s power requirements and match them to the battery’s specs. I talked to a car audio shop to make sure I got the right one.
Step-by-Step Guide to Adding a Second Battery
Here’s how I added a second battery to my car. Follow these steps, and you’ll be set:
Step 1: Plan Your Setup
I started by deciding where to put the battery. My trunk had enough space, so I chose a spot near my subwoofer. Make sure the location is secure and away from heat sources. I also planned my wiring route to keep cables short and safe from moving parts.
Step 2: Disconnect the Main Battery
Safety first! I disconnected the negative terminal of my main battery to avoid shocks or short circuits. I used a wrench to loosen the terminal and tucked the cable aside.
Step 3: Install the Battery Isolator
The isolator keeps the second battery from draining the main one. I mounted mine near the main battery in the engine bay. I connected the positive terminal of the main battery to the isolator’s input, following the instructions. This step was tricky, so I double-checked the wiring diagram.
Will My Second Battery Keep Charging From the Alternator?
Yes, as long as the isolator is wired correctly, the alternator charges both batteries whenever the engine is running — that’s the whole point of the isolator, letting current flow to the second battery while the engine runs and cutting it off when the engine is off so the audio system can’t drain your starting battery.
There’s an important catch on newer vehicles, though. A basic isolator (also called a voltage-sensitive relay or VSR) is just a gate — it opens and closes current flow but doesn’t regulate voltage. On most vehicles built since around 2015, the factory alternator is a “smart alternator” that adjusts its output based on what the starting battery needs, and it can throttle back or shut off charging once that battery reads full, even if your second battery is still low. On these vehicles, a basic isolator may never let the second battery reach a full charge.
If that’s your situation — your second battery seems to run down faster than it should, or never reads a full 12.6-13V after a drive — a DC-DC charger is the modern fix instead of a plain isolator. It actively regulates and boosts the charging voltage to the second battery regardless of what the smart alternator is doing with the main one, and it’s also the only safe option if your second battery uses a different chemistry (like lithium) than your starting battery.
Step 4: Mount the Second Battery
I secured my second battery in a battery box in the trunk. I bolted the box to the floor to keep it from moving. Make sure your battery is stable—mine rattled loose once before I tightened it properly.
Step 5: Run the Power Cable
I ran a heavy-gauge power cable from the isolator to the positive terminal of the second battery. I kept the cable away from hot or moving parts, using zip ties to secure it. I also installed a fuse near the main battery to protect the system. My 100-amp fuse has kept things safe.
Step 6: Connect the Ground Cable
I grounded the second battery to the car’s chassis. I found a clean metal spot in the trunk, sanded it to remove paint, and attached the ground cable with a bolt. A solid ground is key for performance—I had weak bass until I fixed a loose ground.
Step 7: Connect the Audio System
I connected my amplifier to the second battery’s positive and negative terminals. I used the same heavy-gauge wire to handle the power. Double-check polarity—mixing up positive and negative can fry your amp.
Step 8: Test the System
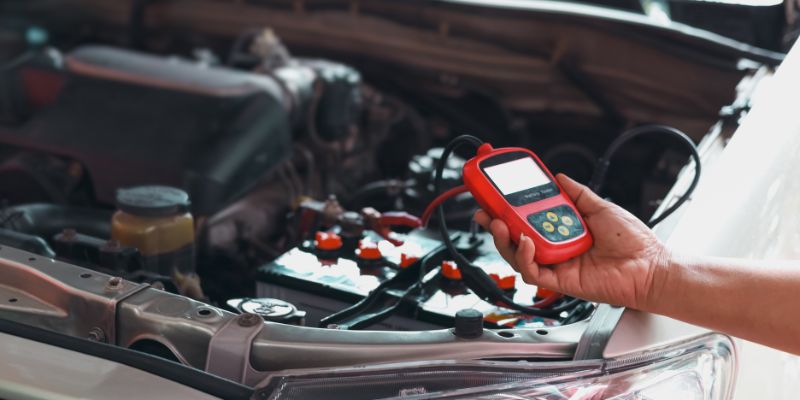
With everything connected, I reconnected the main battery and started the car. I used a multimeter to check the second battery’s voltage (around 12.6V when fully charged). I played some music, and the bass hit hard without dimming my lights. Success!
Step 9: Secure and Insulate
I wrapped all exposed connections with electrical tape to prevent shorts. I also used zip ties to keep cables neat and out of the way. A tidy setup looks professional and stays safe.
Common Mistakes to Avoid
I made a few blunders along the way, so here’s what to watch out for:
- Wrong Battery Type: I almost bought a cheap lead-acid battery, but AGM is better for audio. Check your system’s needs.
- Skipping the Isolator: Without it, your second battery could drain the main one. I forgot this at first and had starting issues.
- Poor Wiring: Using thin or low-quality wire can cause power loss. I upgraded to 4-gauge wire for better performance.
- Loose Connections: Loose terminals caused my system to cut out. I tighten everything now and check regularly.
- No Fuse: Skipping the fuse risks a fire. I learned to always include one near the main battery.
Avoiding these mistakes will save you time and keep your system safe.
Maintaining Your Dual Battery Setup
Once my second battery was installed, I learned to keep it in top shape. Here’s what I do:
- Check connections monthly for corrosion or looseness.
- Test both batteries’ voltage with a multimeter every few months.
- Charge the second battery if you use it with the engine off a lot.
- Clean terminals with a wire brush if you see buildup.
- Inspect wiring for wear or damage, especially where it rubs against metal.
These habits have kept my system running smoothly for years.
When to Upgrade Your Alternator
A second battery helps, but a powerful audio system can still strain your alternator. My stock alternator struggled with my 800-watt amp, so I upgraded to a 200-amp high-output alternator for $400. If your lights dim or your battery drains fast, talk to a car audio shop about an alternator upgrade. It’s a big investment but worth it for big systems.
Cost of Adding a Second Battery
Adding a second battery isn’t cheap, but it’s affordable compared to audio system upgrades. Here’s what I spent:
- AGM Battery: $100–$250
- Battery Isolator: $50–$100
- Battery Box: $20–$50
- Wiring and Fuse: $30–$100
- Tools (if needed): $20–$50
My total was about $300, but costs can reach $500 for high-end setups. DIY saves money, but professional installation can cost $100–$200 extra.
My Personal Experience
Let me share my story. When I upgraded my car audio with a new subwoofer and amp, my headlights dimmed every time the bass hit. It was annoying, and I worried about my battery dying. I decided to add a second battery after researching online and talking to a car audio buddy. I spent a weekend installing an AGM battery in my trunk, and the difference was night and day. My music sounds amazing, my lights stay bright, and I can listen with the engine off without worry. It was a lot of work, but seeing my system perform makes it all worth it.
Conclusion
Adding a second battery for your car audio system is a fantastic way to power up your music without stressing your car’s electrical system. I’ve seen firsthand how it transforms the listening experience, delivering booming bass and clear sound while keeping your main battery safe. From choosing the right battery to wiring it correctly, this guide covers everything I learned to make the process smooth and safe.
Whether you’re blasting tunes on a road trip or showing off at a car meet, a second battery can take your audio game to the next level. I hope my tips help you get started with confidence. Grab your tools, turn up the music, and enjoy the ride!
Frequently Asked Questions
Do I need a second battery for my car audio?
If your lights dim or your battery struggles with your audio system, like mine did, a second battery helps. It’s great for powerful amps and subwoofers.
Can I install a second battery myself?
Yes, I did it with basic tools and some patience. Follow the steps carefully, or hire a pro if you’re not comfortable.
What type of battery is best for car audio?
I chose an AGM battery for its safety and deep-cycle performance. It’s perfect for audio systems, unlike standard car batteries.
How much does it cost to add a second battery?
My setup cost about $300, including the battery and wiring. Prices can range from $200 to $500, depending on your gear.
Will a second battery hurt my car’s alternator?
It can if your alternator is weak. My stock one struggled, so I upgraded to a high-output alternator for my big amp.
How do I maintain a second battery?
I check connections monthly, test voltage every few months, and clean terminals if I see corrosion. It keeps my system running great.
Will my second battery keep charging from the alternator?
Yes, as long as the isolator is wired correctly and the engine is running. On 2015-and-newer vehicles with a smart alternator, though, a basic isolator alone might not fully charge the second battery — a DC-DC charger solves that by actively regulating voltage instead of just gating current flow.
Products related to this article
Sponsored / affiliate links. As an Amazon Associate I earn from qualifying purchases. I may earn additional commission from eligible campaigns.