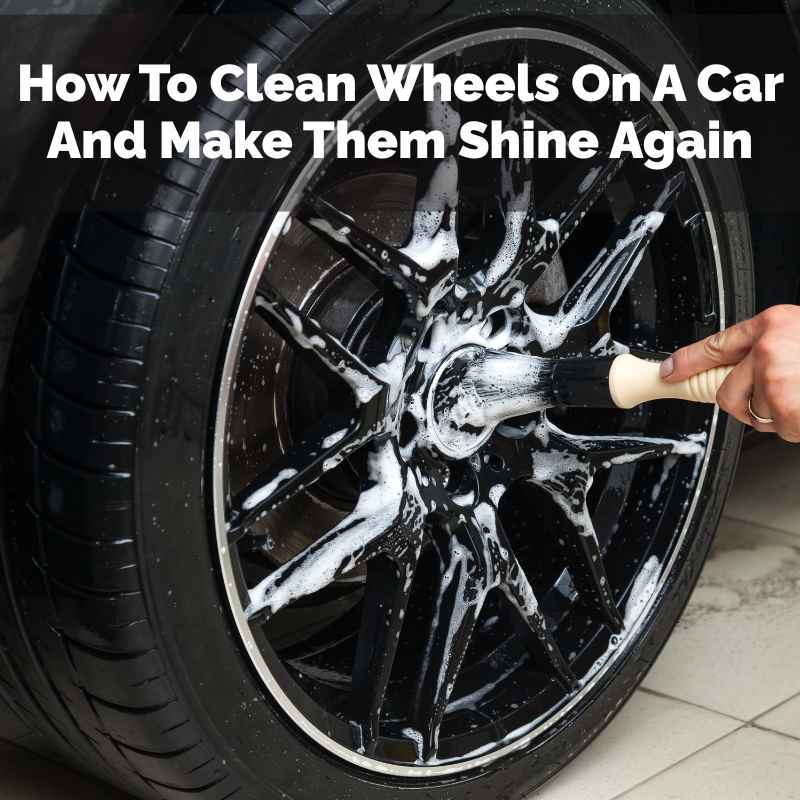
How To Clean Wheels On A Car And Make Them Shine Again
Cleaning your car wheels involves using the right products and techniques to remove brake dust, road grime, and other contaminants. A good cleaning process includes pre-rinsing, applying a wheel cleaner, scrubbing with a brush, and rinsing thoroughly, followed by drying to prevent water spots and achieve a shiny finish.
Understanding Your Car Wheels
Your car’s wheels are more than just round things that help you roll. They are vital parts of your vehicle. They also face some of the toughest conditions.
Think about it. They are constantly hit with dirt, water, salt (in winter), and hot brake dust. Brake dust is especially sticky.
It’s tiny metal particles from your brake pads wearing down. This stuff bakes onto your wheels from the heat. It can be really hard to remove if you let it sit too long.
Over time, this build-up can dull your wheels. It can even damage the finish if you’re not careful.
The type of wheels you have matters too. Most cars come with alloy wheels. These are made of aluminum or a mix of metals.
They are strong and look good. But they can also be coated. Some have clear coats, some have painted finishes, and some are polished or chrome.
Each of these can need slightly different care. For example, bare metal or polished wheels need gentler cleaners. Cheaper painted wheels might handle stronger stuff.
But it’s always best to start mild. You don’t want to strip off a protective layer or dull a shiny surface.
Steel wheels with hubcaps are another common type. The hubcaps are often plastic. They can get dirty too.
But cleaning the actual steel rim underneath is usually simpler. For this guide, we’ll focus mostly on alloy wheels, as they are the most common and often the trickiest to get truly clean and shiny.
Why Wheel Cleaning Matters
So, besides looking good, why bother with a good wheel clean? Well, there are a few reasons. First, keeping your wheels clean helps protect their finish.
Brake dust and road grime are acidic. They can eat away at clear coats. They can cause corrosion.
Regular cleaning stops this. It’s like putting on sunscreen for your wheels. You prevent damage before it happens.
This can save you money down the line. Replacing damaged wheels is not cheap.
Second, clean wheels can actually help your brakes work better. Okay, this is a small point. But dirt and grime can build up around brake components.
While it won’t stop your car, a cleaner wheel area is just healthier. It’s part of good overall car maintenance. Think of it like keeping your engine bay clean.
It’s not strictly necessary for performance, but it’s good practice.
Finally, and let’s be honest, it’s about pride. A car that’s clean all over just feels better. It looks more valuable.
It shows you care about your vehicle. And clean, shiny wheels make a huge difference. They are often the first thing people notice after the paint.
They complete the look. Making them shine again is incredibly satisfying.
Gathering Your Supplies
Before you dive in, having the right tools makes all the difference. Trying to clean wheels with just a sponge and dish soap often won’t cut it for tough grime. Here’s a list of what you’ll likely need:
- Wheel Cleaner: This is key. Get a cleaner specifically made for wheels. There are pH-neutral ones for delicate finishes and stronger ones for really tough brake dust. Read the label! If you have polished or chrome wheels, look for something safe for those.
- Tire Cleaner/Degreaser: While you’re at it, your tires need love too. A good tire cleaner will remove that black film.
- Brushes: You’ll want a few. A large, soft-bristle brush for the tire sidewalls. A medium-sized brush for the wheel faces. And a long, skinny brush (often called a wheel brush or barrel brush) to get into the nooks and crannies, spokes, and the barrel of the wheel.
- Microfiber Towels: You’ll need several. One for drying, one for applying protectant (if you use it), and maybe one for buffing.
- Bucket(s): Using two buckets is best. One for soapy water and one for rinsing your brush. This stops you from spreading dirt back onto the wheel.
- Hose with Spray Nozzle: For rinsing.
- Gloves: Wheel cleaners and degreasers can be harsh on your skin.
- Eye Protection: Always a good idea when working with chemicals.
- Optional: Tire Dressing: To make your tires look black and new again.
- Optional: Wheel Sealant or Wax: To protect the finish and make future cleaning easier.
Don’t feel like you need the most expensive stuff. Many budget-friendly products work wonders. The technique is often more important than the brand name.
The Step-by-Step Cleaning Process
Now for the action part. This is how you get those wheels looking amazing. Remember, patience is key.
Don’t rush this.
Step 1: Pre-Rinse
Start by rinsing your wheels thoroughly with water. This knocks off loose dirt and dust. It also cools down the wheels.
Hot wheels can make cleaners dry too fast. And that can leave spots or streaks. So, a good cool rinse is your first move.
Step 2: Apply Wheel Cleaner
Spray your chosen wheel cleaner generously onto one wheel at a time. Make sure to get into all the little openings and the barrel if you can. Let it sit for the amount of time recommended on the product.
This is usually 30 seconds to a couple of minutes. Don’t let it dry. If it’s a hot day, work on one wheel and rinse it before moving to the next.
Some cleaners change color when they start to work, which is neat to see. It shows they are reacting with the brake dust.
Wheel Cleaner Safety First
Always read the label on your wheel cleaner. Some are safe for all wheel types. Others are only for painted or clear-coated wheels.
If you have bare metal, polished aluminum, or chrome, be extra careful. Use a pH-neutral cleaner if unsure. Never mix different cleaning products.
Step 3: Agitate with Brushes
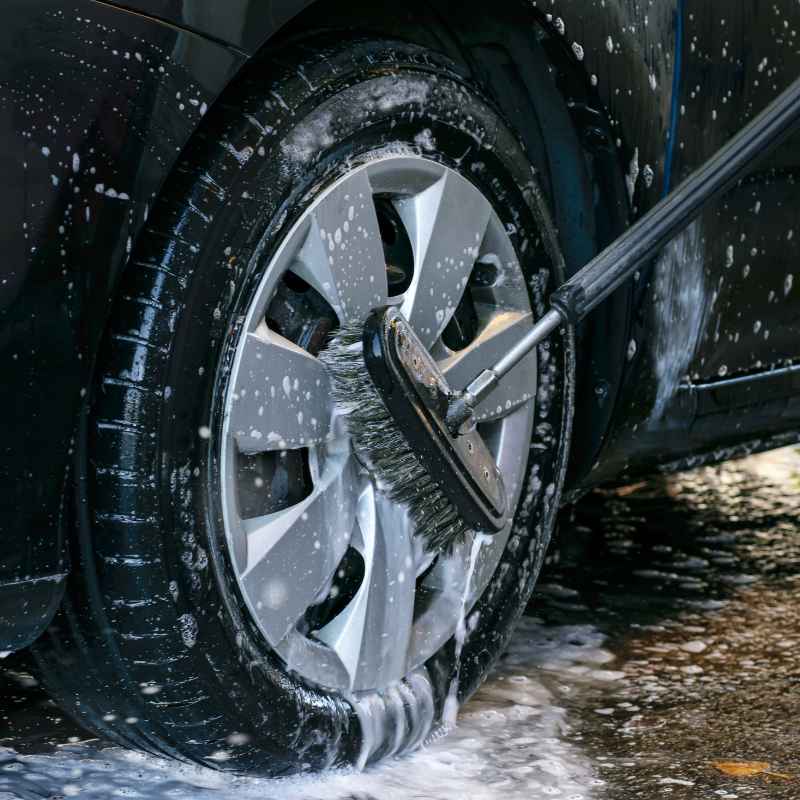
This is where the scrubbing happens. Take your medium brush and work it over the face of the wheel. Get into the spokes.
Use your skinny wheel brush for the barrels, lug nut holes, and any tight spots. Really scrub. You’ll see the dirt lifting.
Dip your brush in your clean rinse bucket if it gets loaded with grime. This step is super important. Just spraying cleaner isn’t enough.
You need to agitate to break up the baked-on stuff.
Don’t forget the tires! Scrub the tire sidewalls with your tire brush and some tire cleaner or even the wheel cleaner if it’s safe. Get rid of that dull, black film.
This makes a huge difference to the overall look.
Step 4: Rinse Thoroughly
Now, rinse each wheel completely. Make sure all the cleaner and loosened dirt is gone. You don’t want any residue left behind.
Rinse from top to bottom. Pay attention to the wheel wells too. Dirt loves to hide there.
A good, strong rinse is vital. It washes away the mess you just scrubbed off.
Step 5: Dry the Wheels
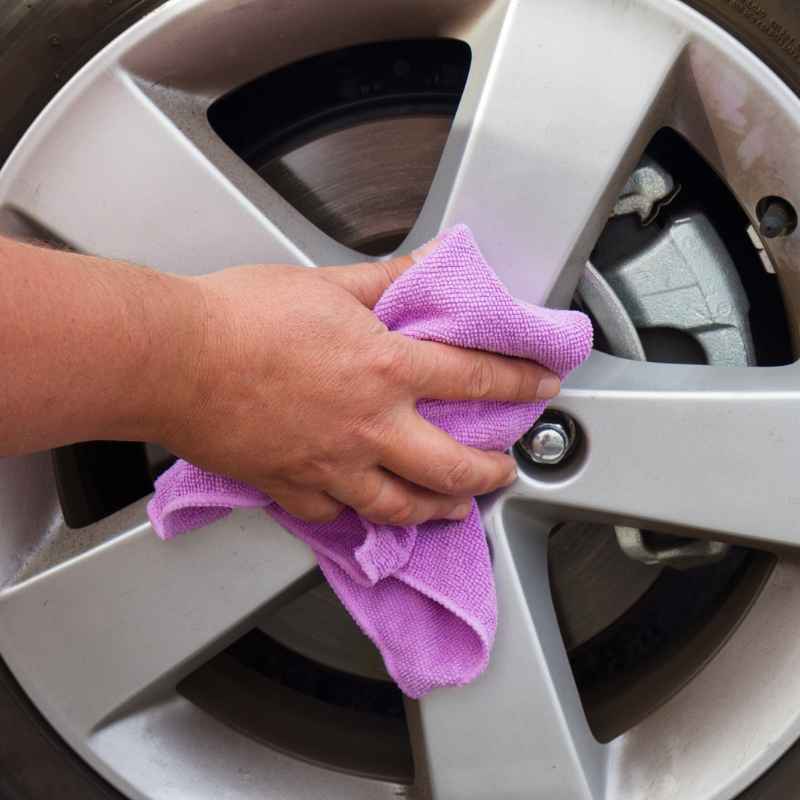
This step is often skipped, but it’s critical for that shine. Use clean microfiber towels to dry the wheels. Get into all the nooks and crannies.
Drying prevents water spots. Water spots are minerals left behind when water dries. They can etch into the finish.
Drying also allows you to see any spots you might have missed and buff them out.
I remember one time, I was in a hurry after washing my car. I just let the wheels air dry. Big mistake.
I ended up with white splotches all over my nice black rims. It took another round of cleaning and buffing to get them perfect again. Lesson learned: never skip the drying step!
Step 6: Treat Your Tires (Optional but Recommended)
Once the wheels are dry, you can apply a tire dressing. Spray it onto an applicator pad or a microfiber towel. Wipe it onto the tire sidewalls.
This makes them look deep black and gives them a nice, finished look. Avoid getting too much on the tire tread itself. You don’t want to make them greasy.
Tire Dressing Tips
Choose a water-based or solvent-based dressing. Water-based ones are usually easier to use and leave a more natural finish. Solvent-based ones can be more durable but might sling off if applied too heavily.
Always apply to a cool tire.
Step 7: Protect Your Wheels (Optional but Recommended)
For the ultimate finish and easier future cleaning, consider a wheel sealant or wax. These products create a protective barrier on the wheel surface. They make it harder for brake dust and grime to stick.
Apply it according to the product instructions. It usually involves wiping it on and buffing it off with a clean microfiber towel. This step takes a little extra time, but it’s worth it.
Dealing with Stubborn Grime
What if your wheels are really, really dirty? Like, “I haven’t cleaned them in a year” dirty? Don’t despair.
You might need a little more power. Here are some tips:
- Stronger Wheel Cleaner: If your initial cleaner didn’t touch it, try a more aggressive, but still safe, wheel cleaner. Look for ones that specifically target heavy brake dust.
- Iron Removers: These are specialized cleaners that react with iron particles in brake dust. They often turn purple as they work. They are very effective. Follow the instructions carefully.
- Clay Bar: For extremely stubborn bonded contaminants (like tar or industrial fallout), a clay bar can work wonders. Use it with a clay lubricant. This is more advanced and takes time.
- Power Washer (with Caution): A power washer can help blast away stubborn grime. Be careful though. Don’t use too high pressure. Don’t get too close. You don’t want to damage the wheel finish. Always use it after scrubbing, not as your primary cleaning tool.
- Soaking: For wheels that are extremely caked, you might need to let the cleaner dwell longer. Or, you could carefully use a spray bottle of diluted all-purpose cleaner (APC) to pre-soak very dirty areas.
I once worked on a truck that had never had its wheels cleaned properly. The brake dust was so thick, the wheels looked black. I had to use a strong wheel cleaner, let it soak for a good 10 minutes, and scrub with a stiff brush.
Then I used an iron remover. It took hours, but the result was amazing. The original silver alloy underneath was like new.
Myth vs. Reality: Brake Dust
Myth: Brake dust is just dirt.
Reality: Brake dust is made of tiny metal particles from your brake pads and rotors. It’s abrasive and can etch into your wheels if left unchecked. It’s also attracted to the metal of the wheel.
What If You Have Special Wheels?
Some wheels need extra care:
Polished Aluminum Wheels
These are often beautiful but very sensitive. They have a mirror-like finish that can be easily scratched or dulled. Use only pH-neutral wheel cleaners.
Avoid harsh brushes. A soft microfiber wash mitt or a very soft wheel brush is best. Always rinse and dry immediately to prevent water spots, which are very visible on polished surfaces.
Chrome Wheels
Real chrome plating is tough but can be pitted if neglected. Brake dust and road salt can cause it to corrode. Use cleaners safe for chrome.
A good quality chrome polish can help restore shine. For heavy oxidation, you might need a specific chrome cleaner. Avoid abrasive pads or steel wool at all costs.
Painted or Powder-Coated Wheels
These are generally quite durable. Most standard wheel cleaners are safe. The biggest enemy here is damage to the paint or clear coat.
If you see chips or peeling, it’s a sign the wheel might need refinishing. Be gentle around any damaged areas.
Black Wheels
Black wheels can be tricky to keep looking perfect. Brake dust shows up very clearly on black surfaces. Use a cleaner that rinses clear.
A good quality wax or sealant is crucial here to help prevent dust from sticking. Buffing with a clean, dry microfiber towel is essential to avoid swirl marks.
Quick Scan: Wheel Cleaning Mistakes to Avoid
- Using Dish Soap Exclusively: Might not be strong enough for brake dust.
- Using Harsh Chemicals: Like oven cleaner or bleach. They can ruin finishes.
- Scrubbing Dry Wheels: Always pre-rinse to avoid scratching.
- Letting Cleaner Dry: Can leave stubborn spots.
- Not Rinsing Properly: Residue can cause damage.
- Skipping the Drying Step: Leads to water spots.
- Using the Same Towel for Everything: Cross-contamination is bad.
Real-World Context: Why Wheels Get So Dirty
Let’s think about where your wheels live. They are the lowest part of your car. They deal with everything the road throws at them.
Rain mixes with road salt and grime. This creates a gritty, corrosive paste. Tire wear adds rubber particles.
And then there’s brake dust. As mentioned, it’s metal and carbon fiber. It’s flung off your brakes at high speed.
This dust gets incredibly hot. It bakes onto the wheel surface. The sticky nature of brake dust means it clings on tight.
Driving habits also play a role. Frequent hard braking generates more dust. Driving on dusty or unpaved roads means more physical dirt.
Parking near busy roads or construction sites exposes your wheels to airborne particles. Even the type of brake pads your car uses affects dust levels. Some performance pads are known for creating a lot of dust.
It’s a constant battle for your wheels to stay clean!
The design of the wheels themselves matters. Wheels with many thin spokes, complex designs, or deep barrels are harder to clean. They have more places for dirt to hide and stick.
Simple five-spoke wheels or full-face wheels might be easier to maintain. For the intricate designs, specialized brushes are a lifesaver.
What This Means for You: When is it Normal, When to Worry?
It’s normal for your wheels to get dirty. In fact, if your wheels aren’t dirty after driving, you might be driving too slowly or not much at all! Brake dust is a fact of life for most cars.
Road grime is also completely normal, especially if you drive in varied weather conditions.
When should you worry? Corrosion: If you see white, chalky spots that don’t scrub off, especially on alloy wheels, it could be corrosion. This happens when the protective coating is compromised.
Peeling or Chipping Paint: If the paint or clear coat on your wheels is flaking off, it means the protective layer is gone. This exposes the metal underneath to the elements. Deep Pitting: If you notice small holes or pits in the metal, it’s a sign of advanced corrosion.
This is hard to reverse and can weaken the wheel. Stains That Won’t Budge: Some industrial fallout or chemical stains can be permanent if left for too long. This is rare but possible.
* Brake Fluid Leaks: If you see oily residue or fluid around the wheel, check your brake system. This is a safety issue.
If you notice any of these issues, it might be time to consult a professional detailer or wheel repair specialist. Addressing these problems early can prevent them from getting worse and potentially saving you the cost of new wheels.
Simple Checks for Your Wheels
- Visual Inspection: Look for obvious signs of damage, corrosion, or peeling paint.
- Feel Test: Run your hand (carefully!) over the wheel after cleaning. Feel for rough spots that might indicate damage or embedded debris.
- Check for Leaks: Look for any oily or wet spots that shouldn’t be there.
Quick Fixes and Tips for Brighter Wheels
Here are some tips to keep your wheels looking their best:
- Clean Them Often: The best tip is regular cleaning. Don’t let brake dust and grime build up for months. A quick rinse and wipe-down every couple of weeks makes a huge difference.
- Wash Wheels First: When washing your car, do the wheels first. This way, you’re not splashing dirty wheel water onto a clean car body.
- Use the Right Brushes: Invest in a good set of wheel brushes. They are designed to get into all the nooks and crannies.
- Dry Them Properly: Always dry your wheels with clean microfiber towels. This prevents water spots and gives them a final shine.
- Apply Protection: Use a wheel sealant or wax. It makes them easier to clean next time.
- Consider Ceramic Coatings: For long-term protection, a ceramic coating for wheels is an excellent investment. It creates a very hard, slick surface.
One small trick I learned from a detailer friend is to use a dedicated wheel cleaning bucket. You can even mark it with a permanent marker. This way, you know it’s only for wheels and never mix it up with your car washing buckets.
Making Wheels Shine Again: A Quick Summary
Key Steps:
- Pre-rinse to cool and remove loose dirt.
- Apply a safe wheel cleaner.
- Scrub thoroughly with appropriate brushes.
- Rinse completely.
- Dry with microfiber towels.
- (Optional) Apply tire dressing and wheel sealant.
Frequent Questions About Cleaning Car Wheels
What is the best type of cleaner for car wheels?
The best cleaner depends on your wheel type. For most alloy wheels, a pH-neutral wheel cleaner is a safe bet. If you have heavy brake dust, you might need a slightly stronger cleaner designed for that. Always check if the cleaner is safe for your specific wheel finish (painted, chrome, polished, etc.).
Can I use the same soap I use for my car body to wash my wheels?
While car soap can remove light dirt, it’s usually not strong enough for the heavy brake dust and grime that accumulates on wheels. It’s best to use a dedicated wheel cleaner for effective results. Using car soap might mean you have to scrub much harder or won’t get them truly clean.
How often should I clean my car wheels?
It’s recommended to clean your car wheels at least once a month, or more often if you live in an area with harsh weather conditions (like snow and salt) or notice significant brake dust buildup. Regular cleaning prevents damage and keeps them looking their best.
Is it safe to use a power washer on my car wheels?
Yes, but with caution. Power washers can be effective at rinsing away dirt and cleaner residue. However, use a lower pressure setting and keep a safe distance. Never spray directly at close range, as high pressure can potentially damage wheel finishes, especially clear coats or sensitive materials.
What can I do about wheels that are already corroded?
For light corrosion or etching, a specialized wheel cleaner or metal polish might help. However, if the corrosion is deep or has caused pitting, it may require professional help. Repairing heavily corroded wheels can be costly, and sometimes replacement is the best option. Prevention through regular cleaning and protection is key.
Should I clean my tires and wheels separately?
It’s a good idea to use dedicated cleaners for tires and wheels. Tire cleaners are designed to remove road grime and UV protectants, while wheel cleaners target brake dust and road film. Some wheel cleaners are safe for tires, but using separate products ensures you’re using the most effective solution for each part.
Conclusion: Shine On!
Getting your car wheels to shine again is totally achievable. It’s not about magic products, but about consistent effort and the right approach. By understanding what makes them dirty and using simple, effective steps, you can overcome even the toughest grime.
Remember to always be gentle with your wheel finish, use the right tools, and be patient. Those sparkling wheels will make your whole car look so much better. Happy cleaning!
Products related to this article
Sponsored / affiliate links. As an Amazon Associate I earn from qualifying purchases. I may earn additional commission from eligible campaigns.