How To Do Car Detailing At Home Like A Professional
Have you ever looked at a sparkling clean car and wondered how they get it so perfect? Maybe you’ve tried washing your own car, but it just doesn’t seem to have that professional gleam. It’s frustrating, right?
You want your car to look its best, but the thought of complex tools or expensive shops can feel overwhelming. Well, guess what? You can achieve that showroom shine right in your own driveway.
It just takes a little know-how and the right approach.
Doing car detailing at home like a professional involves understanding the right tools, techniques, and products. It means breaking down the process into manageable steps, focusing on thorough cleaning and protection. This approach ensures a deep clean and a lasting shine, making your car look its absolute best with everyday items and careful effort.
Understanding Professional Car Detailing
Car detailing is much more than a simple car wash. It’s a meticulous process. It aims to restore a vehicle’s appearance.
It also protects its surfaces from damage. Professionals look at every inch of the car. They clean, restore, and protect both the interior and exterior.
This includes everything from the paintwork and wheels to the carpets and dashboard.
Think of it like giving your car a spa day. A regular wash might get the surface dirt off. Detailing goes deeper.
It addresses swirls marks in the paint. It cleans out every crevice. It makes the plastic trim look new again.
It even makes the tires look like they just rolled off the lot.
The goal is to bring the car back to its original, or even better, condition. This isn’t just about looking good. It’s also about preserving the car’s value.
A well-detailed car ages better. It’s easier to maintain over time. It shows you care about your investment.
My First Detailing Disaster (and What I Learned)
I remember my first attempt at “detailing” my old sedan. It was a sunny Saturday. I had just bought a shiny new bucket and a sponge that promised a scratch-free wash.
I enthusiastically lathered up the car, scrubbed like crazy, and rinsed. Then, I dried it with a bath towel I grabbed from the linen closet. The result?
Water spots everywhere. And worse, faint but noticeable scratches all over the paint. My stomach dropped.
I had actually made it look worse.
That bath towel was the culprit. It was too rough. It trapped dirt particles.
These particles acted like sandpaper. The bucket I used was also just a regular household bucket. It didn’t have a grit guard.
So, the dirt I washed off the car just swirled around. It got picked up by the sponge again. It was a fast track to a dull, scratched finish.
It taught me a valuable lesson: the right tools and gentle techniques are key. It’s not about brute force. It’s about careful steps and the correct materials.
Your Detailing Toolkit Essentials
The Basics You Need:
- Two buckets (one for soap, one for rinsing) with grit guards.
- A quality car wash soap (pH-neutral is best).
- Microfiber wash mitts (soft and absorbent).
- Multiple microfiber drying towels (plush and high-GSM).
- Wheel cleaner and a brush set (for tough brake dust).
- Tire dressing (for a lasting shine).
- Interior cleaner and protectant (for dashboards, vinyl, plastic).
- Glass cleaner and specific glass towels.
- Detailing brushes (for vents, seams, and tight spots).
Prepping Your Workspace and Car
Before you even touch a cleaning product, preparation is vital. This step ensures you work efficiently. It also prevents you from scratching your car.
You need the right environment. Choose a shady spot. Direct sunlight can cause soap and cleaners to dry too fast.
This leads to spots and streaks.
Make sure you have enough space to move around the car. You’ll be walking all around it. Clear away any nearby objects.
This includes garden tools or toys. You don’t want to accidentally bump into anything. Also, check the weather.
A calm day is best. Strong winds can blow dust and debris onto your wet car. This means you have to start over.
Next, gather all your tools and products. Have them within easy reach. This saves you time and effort later.
You don’t want to be searching for a brush while your soap is drying on the paint. Having everything ready makes the process smooth. It feels less like a chore and more like a plan.
The Wash: Technique Matters Most
The wash is the foundation of detailing. A proper wash removes the loose dirt. It also prepares the surface for further steps.
This is where the two-bucket method shines. Fill one bucket with your car wash soap solution. Fill the second bucket with plain water.
Dip your wash mitt into the soap bucket. Wash a section of your car. Use gentle, straight-line motions.
Avoid circular scrubbing. This can create swirl marks. After washing a section, rinse the mitt thoroughly in the plain water bucket.
This removes the dirt from the mitt. Then, dip it back into the soap bucket for the next section.
This method keeps your wash water clean. It stops you from spreading dirt back onto the car. Work from the top of the car downwards.
This is because the dirtiest parts are usually at the bottom. Wash the roof first. Then the hood and trunk.
Followed by the doors and sides. Finally, tackle the lower panels and wheels.
Rinse the car frequently. Don’t let soap dry on the surface. Especially in warm weather.
A good rinse washes away loosened dirt. It also prevents water spots. Use a strong stream of water.
This helps to sheet water off the car. It makes drying easier.
Wheels and Tires: A Dirty Job
Tackling Grime:
- Always clean wheels last. They are the dirtiest part.
- Use a dedicated wheel cleaner. Make sure it’s safe for your wheel type.
- Spray the cleaner on one wheel at a time. Let it dwell for a minute.
- Use a soft wheel brush to agitate brake dust and road grime.
- Use a smaller brush for lug nuts and wheel barrels.
- Rinse thoroughly.
- For tires, use an all-purpose cleaner or dedicated tire cleaner.
- Scrub tires with a stiff brush.
- Rinse tires well.
- Apply tire dressing once tires are dry.
Drying: The Art of a Spotless Finish
Drying is a critical step. It’s where many detailers miss the mark. Water spots are dried minerals.
They are left behind when water evaporates. To avoid them, dry your car immediately after rinsing. Use high-quality microfiber drying towels.
These towels are thick and absorbent. They trap water effectively. They are also soft enough not to scratch.
Lay the towel flat on a section of the car. Gently pat or blot the water. You can also use a large, sweeping motion.
But be careful not to press too hard.
Work quickly. Don’t let water air dry. If you see any remaining water droplets, use a separate, smaller microfiber towel to wick them away.
Pay attention to door jambs, mirrors, and around trim. Water often hides in these spots and can drip out later.
Another great tool for drying is a car dryer or a leaf blower. These tools blast water off the car. They are especially helpful for getting water out of panel gaps and mirrors.
If you have one, use it on a cool setting. This speeds up the drying process significantly. It also reduces the need for towels.
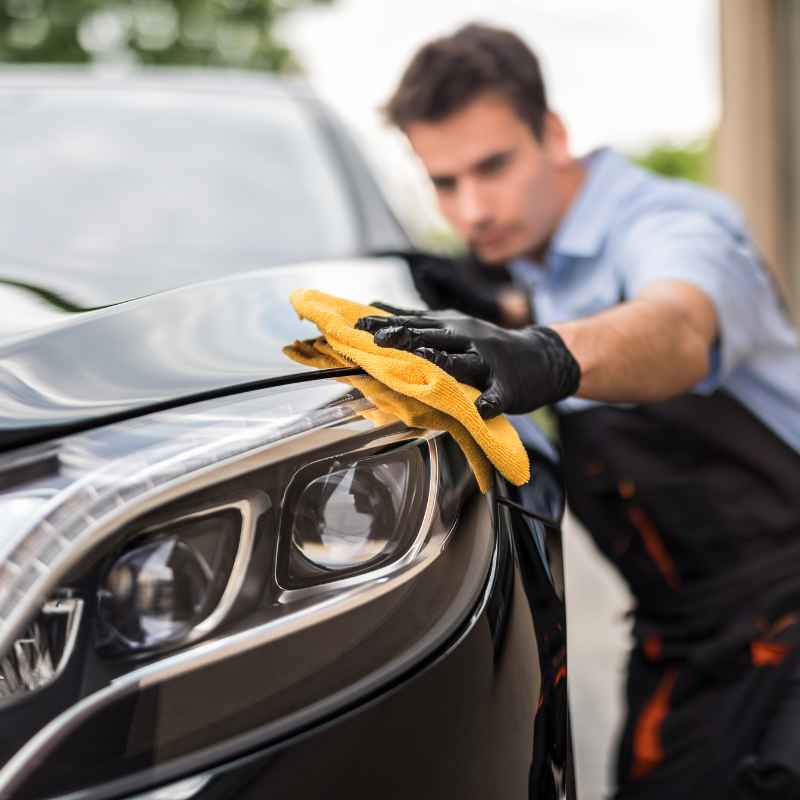
Paint Correction: Beyond the Wash
This is where true detailing magic happens. Paint correction removes imperfections. It makes the paint look like new.
It addresses swirl marks, light scratches, and oxidation. This usually requires a machine polisher. But you can achieve good results by hand.
It takes more effort, though.
You’ll need a paint cleaner or a mild polish. Apply a small amount to a foam applicator pad. Or use a microfiber applicator.
Rub it into the paint in a crosshatch pattern. This means going horizontally and then vertically. Work on small sections at a time.
About 2×2 feet.
Buff off the residue with a clean microfiber towel. Inspect your work. You should see a noticeable improvement.
For deeper scratches, you might need a more aggressive polish. Or professional help. It’s important to be patient.
Rushing this step can cause more damage.
The key is to use the right product for the level of defect. Start with the least abrasive product. If it doesn’t work, then move to something slightly stronger.
Always test in an inconspicuous area first. This ensures you don’t damage your paint.
Understanding Paint Defects
Common Issues and What They Mean:
- Swirl Marks: Tiny circular scratches. Often from improper washing.
- Scratches: Can be clear coat scratches (light) or deeper ones.
- Oxidation: Dull, faded paint. Caused by sun and weather.
- Water Spots: Mineral deposits left by dried water.
- Tar and Bug Spots: Tough stains that need special removers.
Protection: Sealing in the Shine
After cleaning and correcting the paint, you need to protect it. This is called sealing or waxing. It adds a layer of defense.
It also enhances the shine. There are several options available.
Waxes are traditional. They offer a warm, deep shine. They need to be reapplied more often, maybe every 1-3 months.
Look for carnauba waxes for a classic look.
Sealants are synthetic. They offer longer-lasting protection. They can last 6-12 months.
They often give a sharper, more reflective shine.
Ceramic Coatings are the most durable. They offer 2-5 years of protection. They create a hard, glass-like layer.
These are usually applied by professionals. But DIY kits are becoming more popular. They require very careful preparation.
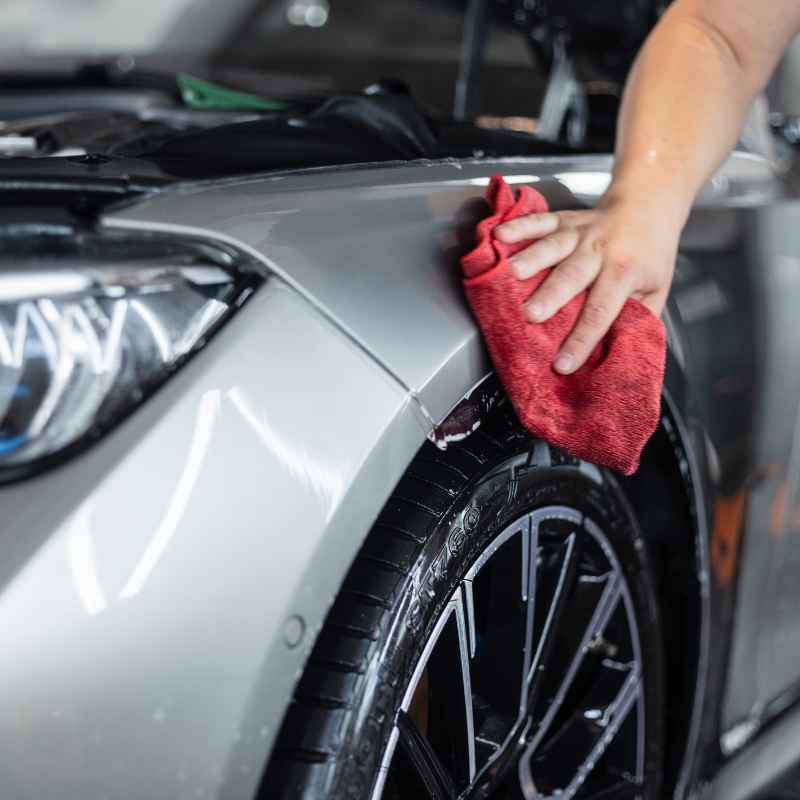
To apply wax or sealant, use a foam or microfiber applicator pad. Apply a thin, even coat. Work in small sections.
Then, buff off the residue with a clean microfiber towel. Don’t apply too much product. It just makes it harder to buff off.
And it doesn’t add more protection.
Don’t forget to protect other surfaces. Use a dedicated tire dressing. Apply a protectant to interior plastics and vinyl.
This prevents them from fading and cracking. A good glass cleaner and specific glass towels are essential for streak-free windows.
Quick Protection Tips
Fast Ways to Add Shine:
- Spray Waxes/Detailers: Great for a quick boost between washes.
- Quick Detailer Sprays: Use them with a microfiber towel to wipe away light dust or smudges.
- Tire Shine: Makes tires look new again and adds protection.
- Glass Sealants: Help water bead off your windshield.
Interior Detailing: A Clean Cabin Experience
The interior is just as important as the exterior. A clean interior makes driving more pleasant. It also improves air quality.
Start by removing all trash and personal items. Then, vacuum thoroughly. Use crevice tools for seats and the center console.
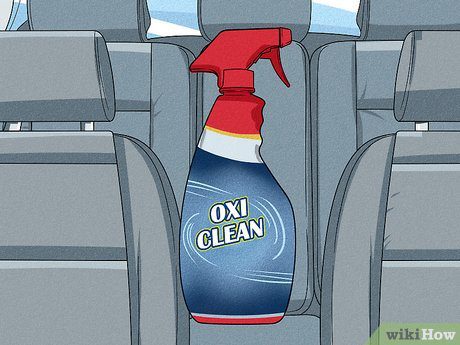
For carpets and floor mats, use a carpet cleaner. Agitate it with a brush. Then, blot or extract the moisture.
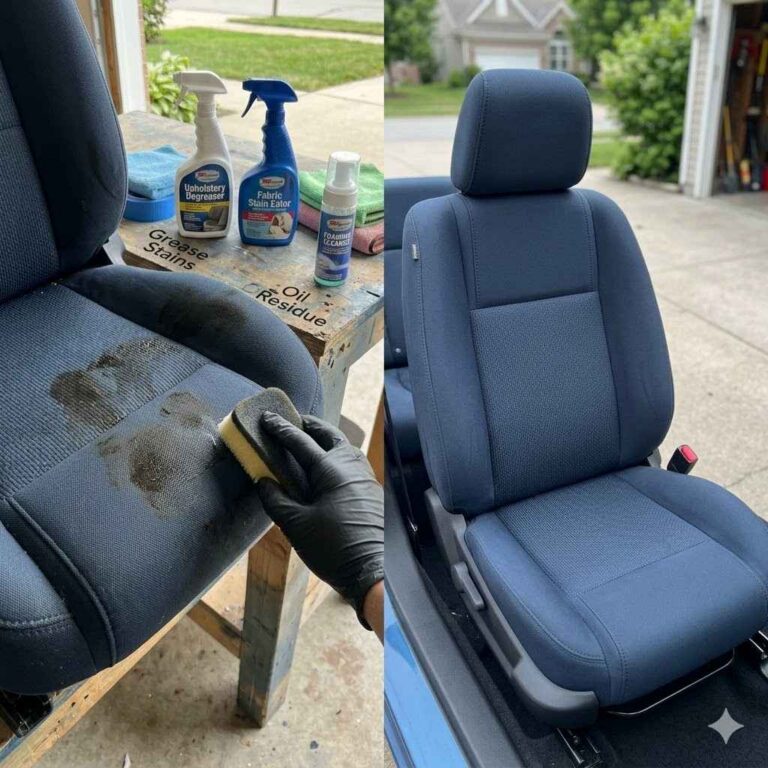
For upholstery, test a cleaner in an hidden spot first. Then, clean the entire surface.
Clean all hard surfaces. This includes the dashboard, door panels, and center console. Use an interior cleaner.
Apply it to a microfiber cloth, not directly to the surface. This prevents overspray onto electronics.
Use detailing brushes for vents, buttons, and seams. These tools reach where towels can’t. They lift out dust and grime.
For leather seats, use a dedicated leather cleaner and conditioner. This keeps the leather soft and prevents cracking.
Finally, clean all interior glass. Use a good glass cleaner. A clean windshield makes a big difference for visibility.
Ensure you clean the inside and outside of the windows. A streak-free finish is the goal.
Interior Quick Clean Checklist
Focus Areas:
- Vacuum: All carpets, seats, under seats, mats.
- Dash & Console: Wipe down, use brushes for vents.
- Doors: Panels, armrests, door pockets.
- Seats: Fabric, leather, or vinyl cleaning.
- Windows: Inside and out, streak-free.
- Pedals: Clean for better grip.
Maintaining Your Detailing Work
The hard work doesn’t stop after you finish detailing. Regular maintenance is key. This helps your car stay clean longer.
It also makes future detailing sessions easier.
Wash your car regularly. Aim for every 1-2 weeks. Use the two-bucket method.
This prevents new swirl marks from forming. Keep your car clean between washes. Use a quick detailer spray and a microfiber towel.
This wipes away dust and light dirt. It also adds a layer of shine.
Store your car in a garage if possible. This protects it from sun, rain, and bird droppings. If you park outside, use a car cover.
But make sure the car is clean before covering it. Otherwise, you can trap dirt.
Clean up spills inside the car right away. This prevents stains. Vacuum the interior regularly.
This stops dirt from getting ground into the carpets. Protect your paint with a good wax or sealant. Reapply as needed.
These simple habits make a big difference. They help maintain that professional, just-detailed look. It’s about consistent care, not just occasional deep cleans.
You’ll enjoy your car more when it always looks its best.
When is it Time for Professional Help?
While you can do a lot at home, some tasks are best left to the pros. If your car has deep scratches or heavy oxidation, a professional detailer has the tools and expertise. Machine polishers with advanced pads and compounds can remove serious paint defects.
Ceramic coatings, while DIY kits exist, often provide superior results and longevity when applied by an experienced professional. They can handle the precise application and surface preparation required for best results. Professionals also have access to specialized equipment.
This includes high-powered extractors for deep interior cleaning.
If you’re short on time or find detailing overwhelming, hiring a professional is a good option. They can restore your car’s look quickly and effectively. It’s an investment in your vehicle’s appearance and value.
Consider your comfort level and the car’s condition.
Professional vs. DIY Detailing
Key Differences:
| Feature | DIY Detailing | Professional Detailing |
| Cost | Lower (buy tools/products) | Higher (labor + premium products) |
| Time Commitment | Significant (hours per session) | Less for owner (drop off car) |
| Tools & Equipment | Basic to Intermediate | Advanced, specialized machines |
| Expertise Level | Learned through practice | Years of experience, training |
| Paint Correction | Light to moderate by hand/basic polisher | Heavy defects, advanced machine polishing |
| Ceramic Coatings | DIY kits available | Professional application, higher durability |
Frequently Asked Questions About Home Car Detailing
What is the most important tool for car detailing at home?
The most important tools are high-quality microfiber towels. They are essential for washing, drying, and buffing without scratching your paint. Also, the two-bucket system with grit guards is vital for a safe wash.
How often should I wash my car if I detail it myself?
For best results and to maintain the finish, aim to wash your car every 1 to 2 weeks. This prevents dirt and contaminants from bonding to the paint. Quick detailer sprays can help between full washes.
Can I remove deep scratches with DIY methods?
Deep scratches that go beyond the clear coat are very difficult to remove with DIY methods. For these, professional paint correction or even touch-up paint is usually needed. You can often remove very light scratches or swirl marks.
What’s the difference between car wax and sealant?
Car wax, often carnauba-based, provides a warm, deep shine and lasts a few months. Sealants are synthetic, offering longer-lasting protection (up to a year) and a sharper, more reflective shine. Both protect your paint.
How do I avoid getting water spots when drying my car?
Dry your car immediately after rinsing, using plush microfiber drying towels. Work from top to bottom and pat or blot the water. Using a car dryer or leaf blower can help remove water from crevices.
Work in a shaded area.
Is it safe to use household cleaning products for car detailing?
No, it’s generally not safe. Household cleaners can be too harsh. They might strip protective waxes, damage paint, or leave residues.
Always use products specifically designed for automotive use, like pH-neutral car soaps and dedicated cleaners.
What’s the best way to clean car interior glass?
Use a dedicated automotive glass cleaner. Spray it onto a clean microfiber glass towel, not directly onto the window. Wipe in one direction (e.g., horizontally on the inside, vertically on the outside) to easily spot streaks.
Bringing the Showroom Home
Achieving that professional car detailing look at home is totally doable. It’s about understanding the steps. It’s about using the right tools.
And it’s about gentle, careful techniques. You don’t need a fancy garage or expensive machinery to start.
Start with the basics: good microfiber towels and a solid washing process. Then, explore paint protection and interior cleaning. Each step adds to the overall brilliance.
Enjoy the process. Your car will thank you for it with a lasting shine and improved appearance.