How To Replace Car Window Glass Without Paying A Mechanic
Dealing with a cracked or broken car window is a real pain. It’s not just about how it looks; it’s also about safety and security. You might think you have to rush to a mechanic and pay a lot of money.
But what if you could handle some of this yourself? It’s often possible to
You can replace car window glass yourself by gathering the right tools, carefully removing the old glass and seals, preparing the frame, installing the new glass, and reassembling the door panel. This DIY approach can significantly reduce repair costs compared to professional services.
Understanding Car Window Replacement
Car windows are made of special glass. This glass is called tempered glass. It’s strong but designed to break into small, less sharp pieces if it shatters.
This is a safety feature. Windshields are different; they use laminated glass. Laminated glass has a plastic layer between two sheets of glass.
It cracks but stays in place more.
When a side or rear window breaks, it needs to be
The process involves getting the right replacement glass. You’ll need specific tools. Then, you carefully take apart the door panel.
You remove the old glass. You clean up the area. Finally, you install the new glass and put everything back together.
It’s a task that requires patience and attention to detail. But the reward is a fixed window and money saved.
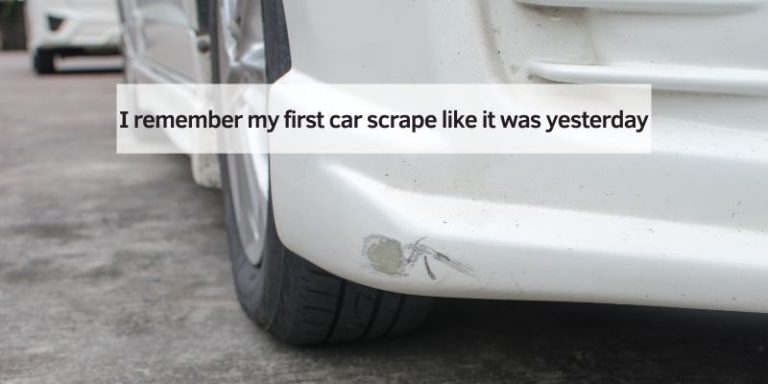
My Own Cracked Window Nightmare
I remember one sweltering summer day. I was driving home after a long day. The sun was beating down, and my car felt like an oven.
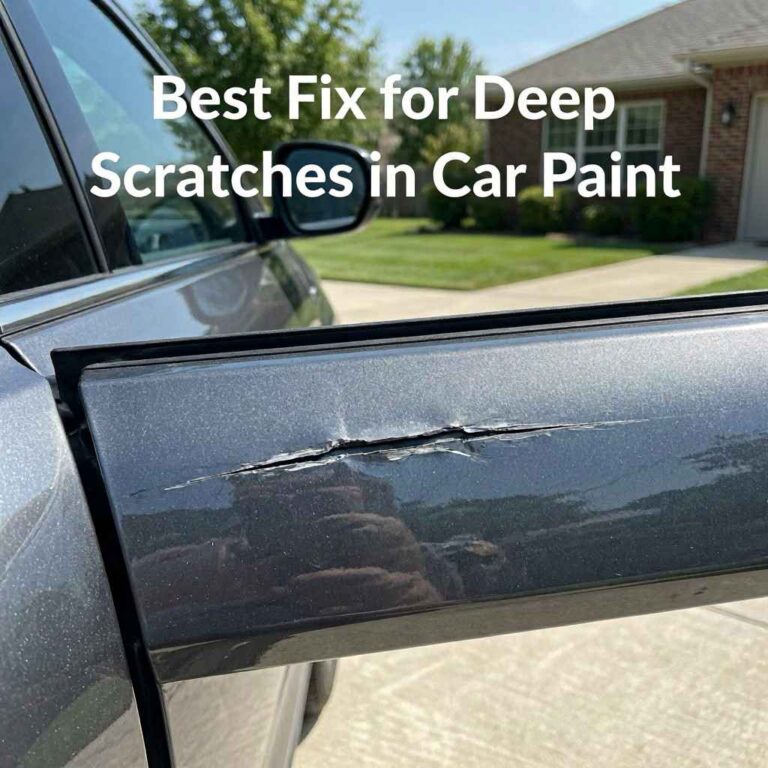
Suddenly, I heard a loud ‘crack!’ sound. My heart jumped. I looked over, and a spiderweb of cracks was spreading across my driver’s side window.
I had no idea how it happened. Maybe a rock from another car? Or a stray piece of debris?
Panic started to set in. I pictured the hefty bill from the auto glass shop. My car was exposed to the elements.
Rain could get in, and it wasn’t secure. I felt a wave of frustration. Why did this happen now?
I was so tired. The thought of taking it to a mechanic, waiting, and paying a lot seemed overwhelming. It felt like a huge, unavoidable expense.
I sat there for a moment, feeling defeated. The cracked glass was a constant reminder of the problem. I imagined driving around with that gaping hole.
Or worse, driving with the sharp, broken shards of glass. It was a mess. I knew I had to do something, but I felt stuck.
That feeling of helplessness is what pushed me to research DIY car window repair.
Essential Tools for DIY Window Replacement
Before you start, make sure you have these tools ready:
- New window glass: Get the exact one for your car model and year.
- Trim panel removal tools: These plastic tools won’t scratch your car’s interior.
- Screwdrivers: You’ll need Phillips and flathead types.
- Socket wrench set: Various sizes are helpful for bolts.
- Utility knife or razor blade: For cutting old seals.
- Gloves: To protect your hands from sharp glass.
- Safety glasses: Crucial for protecting your eyes.
- Shop vacuum: For cleaning up glass shards.
- Duct tape or strong packing tape: To hold the new glass temporarily.
- Silicone spray or lubricant: Helps parts slide easier.
Gathering Your Supplies
The first step is getting the right replacement glass. This is super important. You need the exact make, model, and year of your car.
You also need to know if it’s the driver’s side, passenger’s side, or a rear window. Ordering the wrong piece means you can’t do the job. Many online auto parts stores sell glass.
You can also check local auto glass shops. Sometimes, they sell to DIYers.
Next, gather your tools. You’ll need a set of trim removal tools. These are made of plastic.
They are designed to pry off interior door panels without scratching the paint or plastic. You’ll likely need screwdrivers, both Phillips head and flathead. A socket wrench set is also very useful.
You might encounter bolts holding parts in place. A utility knife or a sharp razor blade is also a must. It helps cut through old adhesive and seals.
Don’t forget safety gear. Wear sturdy gloves. Broken glass is sharp.
Wear safety glasses to protect your eyes. Seriously, this is not optional. Glass dust and small shards can fly.
A shop vacuum is great for cleaning up all the tiny glass pieces. You might also want some strong tape, like duct tape. This can help secure the new glass before you seal it up.
Lastly, a bit of silicone spray can help things slide into place more smoothly.
Step-by-Step: Removing the Old Window Glass
This is where the actual work begins. Take your time here.
- Lower the window: If possible, lower the window a few inches. This makes it easier to access the bolts or clips holding it. If the window is completely shattered, you’ll need to reach inside the door.
- Remove the door panel: This is often the trickiest part. Look for visible screws. They might be under small caps or behind door handles. Use your trim removal tools to gently pry around the edges. You’ll hear clips popping. Work your way around the entire panel.
- Disconnect wires and cables: Once the panel is loose, don’t yank it off. You’ll see wires connected to window switches, door locks, and speakers. Carefully disconnect these. There are usually small clips you press.
- Access the glass mounts: With the panel off, you’ll see the inside of the door. You’ll find a metal track. The glass sits in a bracket. There are usually bolts or clips holding this bracket to the glass.
- Remove the glass: Unscrew the bolts or release the clips that hold the glass bracket. If the glass is intact, you can carefully slide it up and out of the door frame. If it’s shattered, you’ll need to remove the larger pieces first. Use pliers for stubborn bits.
- Clean up debris: Use your shop vacuum to get every tiny piece of glass. Check the window channel and the bottom of the door. Small shards can cause problems later.
Removing the Old Window
First things first, you need to lower the window as much as possible. This gives you better access to the bolts that hold the glass in place. If the window is completely shattered, you might not be able to lower it.
In that case, you’ll have to work with the glass already broken. You’ll need to carefully remove any large pieces first.
Next, tackle the door panel. This is usually held on by screws and clips. Look for screws hidden under small plastic covers or around the door handle and armrest.
Once the screws are out, use your plastic trim tools to carefully pry the panel away from the door. You’ll hear little pops as the clips release. Work your way around the edge.
Be gentle so you don’t break the plastic clips or the panel itself.
Once the panel is loose, be careful. Don’t just rip it off. There are wires connected to things like the window switch, door lock actuator, and maybe speakers.
You need to disconnect these. They usually have small tabs you press to release them. Once all connections are undone, you can set the door panel aside.
Now you can see the inner workings of the door. You’ll find a metal track system that the window slides up and down in. The glass itself sits in a rubber or plastic channel within this track.
There are usually one or two brackets that hold the glass secure. These brackets are attached to the window regulator. You’ll need to find the bolts or screws that connect these brackets to the glass.
Unscrew these bolts. If the glass is still in one piece, you can carefully lift it out of the door frame. Sometimes, it’s helpful to have a second person to guide it.
If the glass is shattered, you’ll need to remove all the broken pieces. Use pliers to pull out any stubborn shards stuck in the seals or channels. Once the glass is out, use your shop vacuum.
Clean out every last bit of glass from the door cavity, the window tracks, and the bottom of the door. Tiny pieces can damage the new window or its mechanism.
Preparing the Door Frame for New Glass
A clean slate is key for a good installation.
- Clean the window tracks: Use a rag and a bit of cleaner. Make sure no old glue or rubber is left.
- Inspect the regulator: Check that the window regulator and motor are working okay. If they are damaged, fix them now.
- Replace worn seals: If the rubber seals in the window channel look old or cracked, replace them. This ensures a good seal against weather.
- Lubricate the channels: A little silicone spray helps the new glass slide in smoothly.
Preparing for the New Glass
Before you put in the new window, you need to prepare the area. This means cleaning out the window tracks thoroughly. Use a damp cloth to wipe away any dust, dirt, or old adhesive.
You want a clean surface for the new glass to seal against. Inspect the rubber seals that run along the window channels. If they look old, cracked, or worn out, it’s a good idea to replace them.
New seals will help prevent leaks and drafts.
Also, check the window regulator mechanism. This is the system that moves the window up and down. Make sure it’s working properly.
If you notice any bent parts or a motor that sounds strained, it might be best to repair or replace it now. It’s much easier to do this while the door panel is off. A little bit of silicone spray or lubricant applied to the window channels can help the new glass slide in much more easily.
You might also want to take a moment to look at the inside of the door itself. Are there any loose wires or cables? Is anything rusty or damaged?
This is the perfect time to address those minor issues. A clean, well-maintained door cavity will help ensure the new window works well and lasts longer. Think of it as giving your car door a little spa treatment.
Installing the New Car Window
This is the moment of truth. Precision is important.
- Position the new glass: Carefully lower the new window glass into the door frame. Guide it into the rubber channels.
- Align the bracket: Make sure the glass is seated correctly in its bracket or channel.
- Secure the bracket: Reinstall the bolts or clips that hold the glass bracket to the regulator. Tighten them securely, but don’t overtighten.
- Test the window: Before putting the door panel back on, connect the window switch temporarily. Run the window up and down a few times. Check that it moves smoothly.
- Reinstall the door panel: Reconnect all wires and cables. Carefully line up the door panel and press it back into place. Reinstall all screws and caps.
Installing the New Window Glass
Now for the exciting part: putting in the new glass. Carefully take your new window pane. Gently lower it into the door frame.
Guide it into the rubber channels where the old glass used to be. It should slide down fairly smoothly. You might need to wiggle it a bit to get it seated properly.
Once the glass is in the channels, you need to align its mounting bracket with the window regulator. This bracket is what connects the glass to the mechanism that moves it. Make sure it’s lined up correctly.
Then, reinstall the bolts or clips that secure the bracket to the glass. Tighten these firmly. But be careful not to overtighten them.
You don’t want to crack the new glass.
Before you put the door panel back on, it’s a good idea to test the window. Temporarily reconnect the window switch. Carefully run the window all the way up and all the way down a few times.
Does it move smoothly? Does it sound okay? If it seems to be binding or struggling, stop and check your alignment.
Make sure everything is seated correctly.
Once you’re happy that the window is working correctly, you can reassemble the door panel. Reconnect all the wires and cables you disconnected earlier. Make sure they click into place.
Then, align the door panel with the door frame. Press it firmly around the edges to snap the clips back in. Finally, reinstall all the screws and decorative caps you removed at the beginning.
Common Problems and How to Avoid Them
What could go wrong and how to fix it.
- Wrong Glass Ordered
- Always double-check your car’s make, model, and year. VIN numbers can help confirm.
- Damaged Door Panel Clips
- Use proper trim tools and be gentle. Replacement clips are cheap if needed.
- Window Won’t Move Smoothly
- Ensure glass is fully in channels and regulator is aligned. Lubricate channels.
- Water Leaks After Repair
- Check that all seals are properly seated and intact.
- Glass Chips During Installation
- Handle new glass with care. Ensure it’s aligned before tightening bolts.
Troubleshooting Common Issues
Sometimes, things don’t go perfectly. One common problem is ordering the wrong window glass. This is why it’s crucial to confirm your car’s exact details.
Checking the Vehicle Identification Number (VIN) can help ensure you get the right fit. Always double-check the part number before ordering.
Another issue is breaking the plastic clips that hold the door panel on. These can be brittle, especially on older cars. Using the correct plastic trim removal tools and being gentle can prevent this.
If a clip does break, they are usually inexpensive and easy to replace. You can find them at auto parts stores.
If the new window doesn’t move smoothly, don’t force it. First, ensure the glass is fully seated in its channels. Sometimes, it might be slightly out of alignment.
Also, check that the window regulator mechanism is working correctly and is properly attached to the glass bracket. A little more silicone spray in the channels might help. If water leaks after the repair, re-check all your seals.
Make sure they are pressed firmly into place.
Handling the new glass with care is important. It’s easy to chip or crack it during installation if you’re not careful. Ensure it’s properly aligned before tightening any bolts.
If you encounter a stubborn piece of old adhesive or rubber, take your time removing it. Patience is key to a successful DIY repair.
When to Call a Professional
Some situations are best left to experts.
- Complex Door Mechanisms: Luxury cars with advanced electronics.
- Rear Windshield Replacement: Often laminated and requires special tools/adhesives.
- Significant Damage: If the door frame itself is bent or damaged.
- Lack of Confidence: If you feel unsure or uncomfortable at any step.
When You Might Need a Pro
While many car window
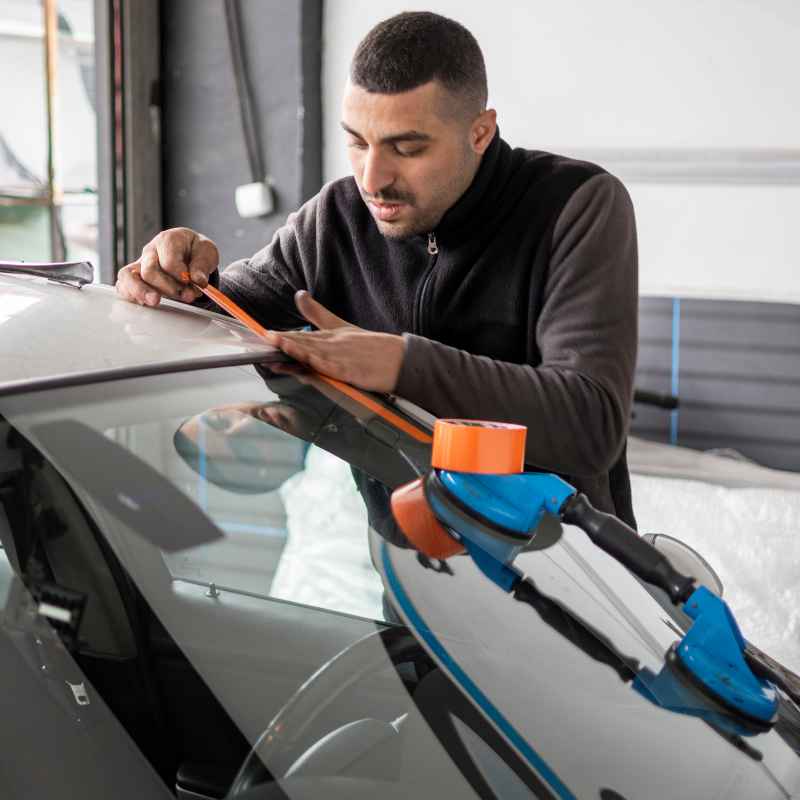
Replacing a rear windshield is also generally more involved. Rear windows are often laminated glass, not tempered. They require specific adhesives and curing times.
This is different from side or rear quarter windows. Trying to do this yourself might not result in a proper seal, leading to leaks. It also involves more safety considerations.
If the door frame itself has suffered damage, like a bend or a dent, you’ll need professional help. The frame needs to be straight for the new window to seal properly and function well. Also, if you’ve gone through the steps and feel overwhelmed or unsure, it’s okay to stop.
There’s no shame in calling a professional. Sometimes, peace of mind is worth the extra cost.
Cost Savings of DIY vs. Mechanic
A simple look at potential savings.
| Item | Estimated DIY Cost | Estimated Mechanic Cost |
|---|---|---|
| Replacement Glass | $50 – $150 | $75 – $200 |
| Tools (if new purchase) | $30 – $75 | $0 (included in labor) |
| Labor | $0 | $70 – $150+ |
| Total Estimated Cost | $80 – $225 | $145 – $350+ |
Note: Costs vary widely by vehicle and location.
The Satisfaction of Doing It Yourself
There’s a real sense of accomplishment that comes with fixing something on your car yourself. When that new window slides perfectly into place, and you hear the switch smoothly raise and lower it, it’s a great feeling. You’ve overcome a challenge.
You’ve saved money. And you’ve learned a new skill. This hands-on experience can make you feel more confident tackling other small repairs.
Think about the money you’ve saved. Mechanic labor rates add up quickly. The cost of just the glass might be similar, but you’re cutting out the labor charge entirely.
This can easily save you a hundred dollars or more. That’s money you can put towards gas, maintenance, or something fun. It’s a tangible benefit of taking on this project.
Plus, you gain valuable knowledge. You understand more about how your car works. You know how to remove interior panels without damaging them.
You know how to handle glass safely. This knowledge can be helpful down the road. It empowers you to make informed decisions about car maintenance.
It’s a win-win situation: a fixed car and a more capable you.

Conclusion: Taking Control of Your Repairs
Replacing a car window glass doesn’t have to be a daunting task. With the right tools, a clear understanding of the steps, and a bit of patience, you can successfully complete this repair yourself. It’s a rewarding process that not only fixes your car but also saves you money and boosts your confidence.
Remember to prioritize safety and take your time.
Don’t let the fear of a mechanic’s bill stop you from exploring DIY options. Many car repairs are within reach for the average person. This window replacement is a perfect example.
You’ve got this!
Frequently Asked Questions
How long does it usually take to replace a car window?
For a DIYer, it typically takes 2 to 4 hours. This includes gathering tools, removing the old glass, installing the new one, and reassembling the door panel.
Can I use regular glass from a hardware store?
No, you must use automotive-grade tempered glass. Regular glass is not designed for the stresses of a car or to break safely.
What if my window is completely shattered?
If the glass is shattered, you’ll need to be extra careful removing all the pieces. Wear thick gloves and safety glasses. A shop vacuum is essential for cleanup.
How do I know if I ordered the right window?
Ensure the glass matches your car’s exact year, make, model, and body style (e.g., 2-door vs. 4-door sedan). The VIN can help confirm the correct part.
Is it difficult to remove the door panel?
It can be the most challenging part for beginners. Take your time, use plastic trim tools to avoid damage, and be gentle when prying.
Do I need to replace the window seals?
It’s highly recommended, especially if they look old or worn. New seals ensure a watertight fit and can prevent future leaks.