
How to Fix a Gas Gauge on a Car (Diagnose & Repair Costs)
A gas gauge stuck on empty or full is usually a failing fuel sending unit, not the gauge itself — but check the 15-amp gauge fuse first, since that fix costs under $15 and takes five minutes. Ignoring it risks running the tank dry, which can overheat a fuel pump costing $390-$900 to replace. This guide covers the exact diagnostic order — self-test, fuse, wiring, sending unit — plus real resistance values and repair costs for each fix.
Insert your Affiliate Disclosure reusable block here.
Quick Answer
Most gas gauge problems come from a failing fuel sending unit, not the gauge. Check the gauges fuse first (under $15), then test for 12V and a clean ground at the wiring, then check the sending unit’s resistance with a multimeter as the float moves. DIY parts run $5 (fuse) to $50-$200 (sending unit); professional labor runs $100-$900+ depending on whether the sending unit is built into the fuel pump module.
What Is a Gas Gauge and Why Does It Matter?
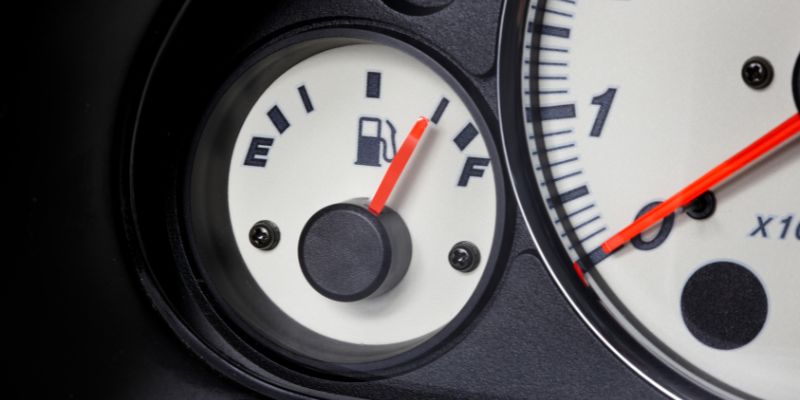
A gas gauge tells you how much fuel is in your car’s tank. It’s like a fuel tracker on your dashboard. If it’s broken, you might run out of gas unexpectedly, which is no fun. The gauge works with a part called the fuel sending unit — a float that measures fuel level and sends that reading to the gauge. When it fails, the gauge can show the wrong reading, like empty when the tank is full.
Fixing it saves money and keeps you safe. A broken gauge can stress you out, and running out of fuel might damage your car’s fuel pump. Let’s dive into how to fix it.
Common Reasons Your Gas Gauge Stops Working
Before fixing your gauge, you need to know what’s wrong. Here are the top reasons a gas gauge fails, ranked by how often they actually happen:
- Bad Fuel Sending Unit: This is by far the most common issue. The float or resistor in the tank wears out, corrodes, or gets stuck from constant motion rubbing the variable resistor contacts.
- Faulty Wiring or a Bad Ground: Loose or rusty wires — especially the ground wire near the tank — can mess up the signal from the tank to the gauge.
- Blown Fuse: A dead fuse stops the gauge from getting power at all. Cheapest and fastest thing to rule out.
- Broken Gauge or Cluster: The gauge itself might be faulty, especially in older cars. This is the least common cause.
- Corrosion or Dirt in the Tank: Rust or gunk in the tank can block the float or coat the resistor contacts.
Each problem has a fix, and the step-by-step guide below walks through them in the order a mechanic would actually check them — cheapest and fastest first.
Tools You’ll Need to Fix Your Gas Gauge
You don’t need a fancy garage to fix a gas gauge. Here’s a simple list of tools that cover every step below:
- Multimeter: To test the fuse, wiring voltage, and the sending unit’s resistance (about $20 at AutoZone).
- Screwdriver Set: For removing panels or the gauge cluster.
- Pliers and Wire Brush: To clean corrosion off connectors and the ground wire.
- Fuel System Cleaner: A $10 bottle can sometimes fix a sticky float without opening the tank.
- Owner’s Manual: To find your car’s fuse box location and self-test steps.
| Tool | Cost (Approx.) | Where to Get It |
|---|---|---|
| Multimeter | $20 | AutoZone, Amazon |
| Screwdriver Set | $15 | Home Depot, Walmart |
| Pliers/Wire Brush | $10 | Any hardware store |
| Fuel System Cleaner | $10 | Gas stations, AutoZone |
Best Multimeter Pick
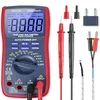
AstroAI True RMS Digital Multimeter
Auto-ranging with True RMS accuracy — the one tool every step in this guide actually uses, from checking fuse voltage to reading sending unit resistance in ohms.
- Best for: Testing fuse power, wiring voltage, and sending unit resistance in one tool
- Why we picked it: Auto-ranging means you don’t have to guess the right ohms/volts range before testing
- Main drawback: Basic model — not built for advanced diagnostics beyond DC voltage and resistance
Compare more gas gauge repair parts
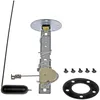 Replacement Part Dorman Universal Fuel Sending Unit Kit
|
 Fuse Kit JOREST 300Pcs Car Fuse Assortment Kit
|
 Cheap Fix First Chevron Techron Fuel System Cleaner
|
As an Amazon Associate we earn from qualifying purchases.
Step-by-Step Guide to Fix Your Gas Gauge
Work through these steps in the order below — cheapest and fastest checks first. Start with the self-test and fuse before moving to wiring and the sending unit, since a bad sending unit is the single most common cause but also the most involved one to confirm and replace. Always work in a well-ventilated area, away from sparks, since gas fumes are dangerous.
Step 1: Run the Instrument Cluster Self-Test
Most cars have a self-test for the dashboard gauges. Check your owner’s manual for the exact steps, but it’s usually simple. For my Toyota, I turned the headlights on and off three times, then held the odometer button. The gauge needle should sweep from empty to full on its own. If it doesn’t sweep at all, the gauge or cluster itself is the more likely culprit — that also answers whether the gauge is broken without opening anything else up first.
Step 2: Check the Fuse
A blown fuse can stop the gauge from working entirely, and it’s the fastest thing to rule out. Find your car’s fuse box (usually under the dashboard or hood) using the owner’s manual. Look for the fuse labeled “gauges” or “instrument cluster.” If it’s blown, replace it with a new one of the same amperage (about $5). Then test the gauge again before moving on.
Step 3: Test the Wiring
Wiring issues are tricky but fixable. Set your multimeter to 20V DC and check the voltage at the gauge. Pull the instrument cluster out (gently) and test the wires — you should see about 12 volts. If not, check the ground wire near the fuel tank for rust or corrosion. Clean it with a wire brush if needed; a loose or corroded ground is one of the most common wiring-side causes of a stuck or dead gauge.
Step 4: Inspect the Fuel Sending Unit
The sending unit is often the culprit, and this step takes more work since it’s in the gas tank. You might need to remove the back seat or drop the tank (check your manual). Set your multimeter to ohms, then test the sending unit’s resistance as you move the float by hand from empty to full. The resistance should change smoothly across the full range — if it doesn’t change at all, or it jumps erratically, the unit is bad and needs replacing.
What counts as a “good” reading depends on your car’s sender standard, since manufacturers don’t all use the same scale:
| Sender Standard | Empty Reading | Full Reading | Common On |
|---|---|---|---|
| Classic GM | 0 ohms | 90 ohms | Older GM cars and trucks |
| Classic Ford/Chrysler | 73 ohms | 10 ohms | Older Ford and Chrysler models |
| Modern universal | 240 ohms | 33 ohms | Most late-model Ford/Chrysler and aftermarket senders |
Step 5: Try a Fuel System Cleaner
Before replacing parts, try a cheap fix. Pouring a bottle of fuel system cleaner into the tank can free a float that’s sticking from gunk or varnish buildup. It’s not a miracle fix for a worn-out resistor or broken wiring, but it’s worth a shot for about $10. Drive a few miles afterward and check if the gauge starts moving again.
“A few years ago I filled up my old Toyota’s tank and watched the gauge stay stuck on empty. A bottle of fuel system cleaner ended up freeing the sticky float — no tank drop needed, and it saved me the cost of a sending unit.”
Step 6: Replace the Gauge or Sending Unit
If nothing above works, you may need a new gauge or sending unit. Parts alone run $50-$200 for a standalone sending unit and about $100 for a single replaceable gauge, but full professional repairs cost more once labor is added — especially if your sending unit is built into the fuel pump module, which is common on many 2000s-and-newer vehicles and requires dropping the tank either way. I recommend getting an OEM or direct-fit part from a site like RockAuto for quality. If this feels overwhelming, a mechanic can help.
| Repair | DIY Parts Cost | Professional Cost (Parts + Labor) | Notes |
|---|---|---|---|
| Fuse | $5-$15 | Under $100 (incl. diagnostic fee) | Cheapest fix — try this first |
| Wiring / ground repair | $10-$20 | $100-$250 | Cheap if the wiring is accessible |
| Sending unit (standalone) | $50-$200 | $250-$600 | Access often means dropping the tank |
| Sending unit (in fuel pump module) | $150-$300 | $400-$900+ (up to $1,500) | Common on many 2000s-and-newer vehicles |
| Gauge / instrument cluster | ~$100 (older separable gauge) | $200-$600 (full cluster) | Most modern cars replace the whole cluster |
📊 A fuel pump needs at least about 1/4 of a tank of gasoline to stay submerged and cooled. Running consistently low — easy to do with a broken gauge — lets the pump draw air instead of fuel, which can cause it to overheat and fail early. Source: Progressive, Life Lanes
Benefits and Drawbacks of Fixing Your Gas Gauge
Fixing your gas gauge has big perks. You’ll save money by not running out of gas, which can harm your fuel pump as noted above. It also reduces stress — no more guessing your fuel level. The downside is that some repairs, like replacing the sending unit, can be tough and time-consuming, especially if it’s built into the fuel pump module. If you’re not comfortable with that job, a mechanic charging $250-$900 is often worth it.
Personal Tips from My Experience
Here are my top tips for fixing a gas gauge:
- Start Simple: Check the fuse and try fuel system cleaner before diving into the tank.
- Stay Safe: Work in a well-ventilated area and avoid sparks near gas.
- Avoid My Mistake: I once ignored a loose ground wire, wasting hours before I checked it. Always check connections first.
- Use Quality Parts: A cheap aftermarket sending unit failed on me once. Stick with OEM or a reputable direct-fit brand for reliability.
Common Mistakes to Avoid
Don’t make these rookie errors:
- Skipping the Manual: Your car’s manual has specific steps and fuse locations for your exact model.
- Ignoring Safety: Gas fumes are no joke. Work carefully and away from sparks.
- Rushing the Job: Take your time to avoid breaking delicate parts like the gauge cluster or the float arm.
- Condemning the Sending Unit Too Fast: Confirm the resistance range for your specific make and model before buying a replacement — the “bad” reading you’re seeing might just be a different standard than you expected.
Frequently Asked Questions
Why Does My Gas Gauge Show Empty When the Tank Is Full?
A full tank but an empty-reading gauge usually means a bad fuel sending unit or a wiring issue. The float might be stuck, or corrosion could block the signal. Try a fuel system cleaner first, then check the wiring and ground connection with a multimeter.
Can I Drive with a Broken Gas Gauge?
You can, but it’s risky. Track your mileage and tank size to estimate fuel level instead. Check your owner’s manual for your car’s miles-per-gallon and tank capacity, and refill at around 75% of your estimated range to stay safe and keep the fuel pump submerged.
How Much Does It Cost to Fix a Gas Gauge?
Costs range from about $5 for a fuse to $250-$900+ for a professionally replaced sending unit. DIY parts alone run $50-$200 for a standalone sending unit, but a mechanic typically charges $250-$600 for labor, or $400-$900+ if the sending unit is built into the fuel pump module. Compare prices at AutoZone or NAPA.
What If My Gauge Needle Moves Erratically?
Erratic movement often means a sticky float or loose wiring. Try a fuel system cleaner to free the float first. If that fails, test the wiring and the sending unit’s resistance with a multimeter — a healthy sender changes resistance smoothly, not in sudden jumps.
Is Replacing the Sending Unit Hard?
It’s medium difficulty. You may need to remove the back seat or drop the tank, which takes time and a second pair of hands is helpful. Follow your specific repair manual, since access panels and mounting patterns vary a lot between models.
Why Does My Gas Gauge Look Different From the Driver’s Seat vs. the Passenger Seat?
This is usually parallax, not a malfunction. On an analog gauge with a curved or angled cluster lens, the needle can appear to point to a slightly different mark depending on your eye position relative to the gauge face — the same effect that makes a speedometer look different from an angle. Check the reading from directly in front of the gauge. If it’s still noticeably off even head-on, then a wiring or sending unit issue is more likely.
What Ohms Reading Should a Good Fuel Sending Unit Show?
It depends on your car’s sender standard — there’s no single universal number. Classic GM units typically run 0 ohms empty to 90 ohms full. Classic Ford and Chrysler units typically run about 73 ohms empty to 10 ohms full. Many modern universal senders use 240 ohms empty to 33 ohms full. Check your owner’s manual or a repair database for your exact spec, then confirm the resistance changes smoothly as the float moves from empty to full.
Conclusion
Fixing a gas gauge isn’t as scary as it sounds. Start with the cheap, fast checks — the self-test and fuse — before moving to wiring or the sending unit, since that’s the order that actually saves you time and money. My Toyota’s gauge is spot-on now, and I saved hundreds by doing it myself. For more on what each dashboard gauge actually measures, see our guide to what a gauge in a car does, or browse more DIY fix guides for other common repairs.
Products related to this article
Sponsored / affiliate links. As an Amazon Associate I earn from qualifying purchases. I may earn additional commission from eligible campaigns.