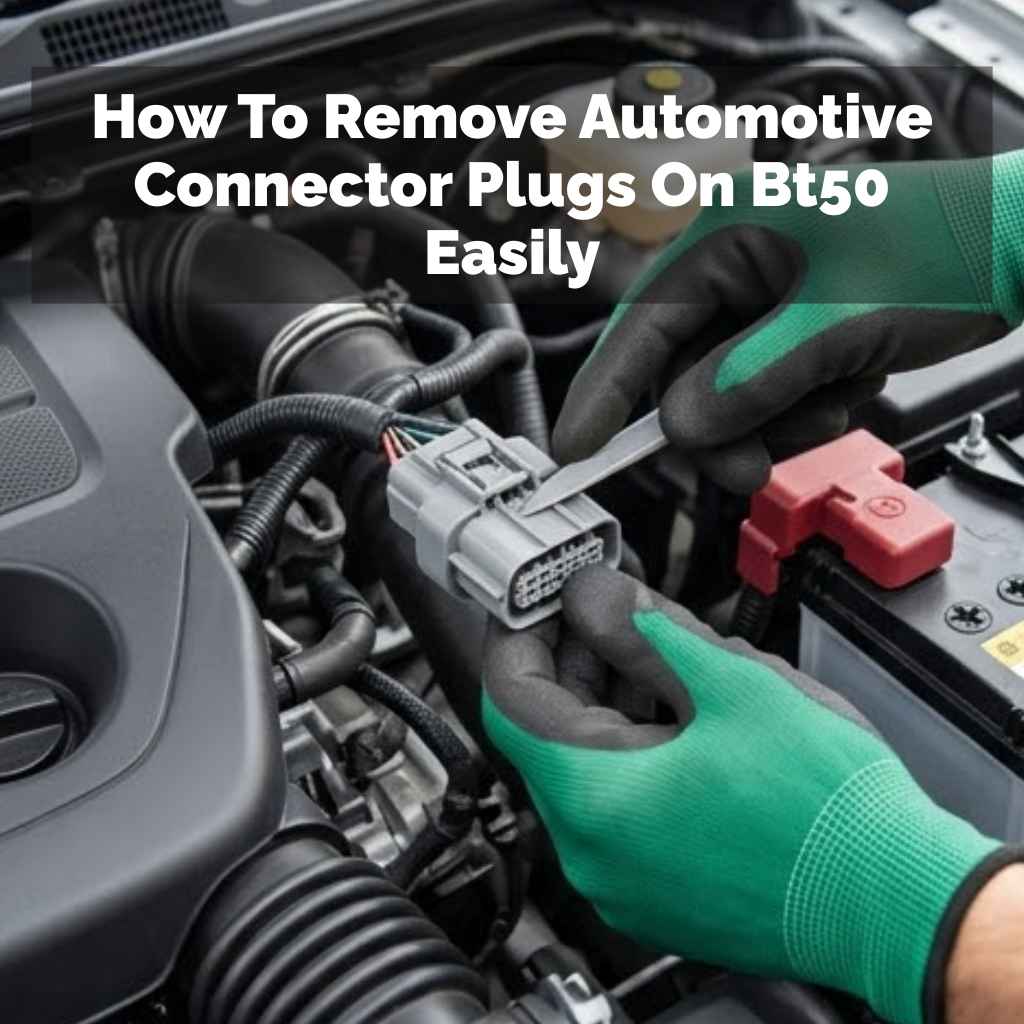
How To Remove Automotive Connector Plugs On Bt50 Easily
Automotive connector plugs can be tricky. They hold wires together tightly. Sometimes, they feel stuck.
You might need to remove one for a repair. Or maybe you are upgrading a part. It’s a common task for car owners.
But it can be frustrating if you don’t know how. This guide will help you. We’ll break it down simply.
You will learn to get those plugs out with no fuss.
Removing automotive connector plugs on a BT50 involves careful use of basic tools and understanding the locking mechanisms. Patience is key to avoid damaging the connectors or wires.
Understanding Automotive Connector Plugs
These plugs are special. They connect electrical wires in your car. Think of them as secure links.
They keep the electricity flowing where it needs to go. Your BT50 has many of them. They are in the engine bay.
They are also inside the cabin. Some might be under the dash. Others could be in the doors.
Each connector has a housing. This holds the metal pins. The housing also keeps out dirt.
It stops water from getting in. This is very important for electric parts. The connectors have locking tabs.
These tabs snap into place. They keep the plug from coming loose. Vibrations from driving can shake things.
The locks stop this from being a problem.
Most connectors are made of plastic. They are tough but can break. You need to be gentle.
Forcing them can cause damage. Damaged connectors mean bad electrical connections. This can lead to strange car problems.
It might be a warning light. It could be a part that stops working.
The shape of the plug tells you something. Some are round. Others are square.
They often have a specific key. This means they only fit one way. You cannot plug them in backward.
This prevents wiring mistakes. It adds another layer of safety for your car’s electrics.
Common Reasons for Connector Removal
Why would you need to remove a plug on your BT50? There are several reasons. One common one is upgrading parts.
Maybe you want new headlights. Or perhaps new fog lights. These might use different connectors.
You will need to unplug the old ones. Then plug in the new ones.
Repairs are another big reason. If a sensor fails, you might need to
Sometimes, simple maintenance needs this. You might need to access an area for cleaning. Or to check a wire for damage.
If a wire looks frayed, you might need to disconnect it. This lets you inspect it better. It also lets you make a repair if needed.
Diagnostic work is also key. When a mechanic checks your car, they might unplug things. This helps them test individual systems.
They can see if a problem is with a specific part. Or if it’s a wiring issue.
Tools You Might Need
You don’t need a lot of fancy tools. Simple things usually do the job. A good flashlight is a must.
Some connectors hide in dark places. You need to see what you are doing. Your phone flashlight can work too.
A set of small screwdrivers is handy. You might need a flathead. A Phillips head can also be useful.
Sometimes, a small screwdriver can help you gently pry. Or lift a locking tab. Always use the smallest size that fits.
You don’t want to scratch the plastic.
A small pick set is very helpful. These look like tiny dental tools. They have hooks and points.
They are perfect for reaching small tabs. You can gently lift them. You can also get into tight spots.
Be very careful with these. They are sharp.
A trim removal tool set is ideal. These are plastic. They are made to remove car interior parts.
They won’t scratch plastic or paint. They have flat edges. Some have hooks.
They are safer than metal tools. You can often find them online. Or at auto parts stores.
Sometimes, special tools are needed. This is less common for basic connectors. But for very specific plugs, there might be a tool.
If you see a specialized plug, do some research. Look up that specific connector type.
Always have some electrical tape ready. And maybe some zip ties. If a wire gets a little scraped, tape it.
If you remove something that needed to be held, zip ties can help secure it later.
Step-by-Step: Removing a Standard Connector Plug
Okay, let’s get to it. Imagine you see a connector. It’s plugged into something.
You need to get it off. What do you do first?
Step 1: Locate the Locking Mechanism. This is the most important step. Look closely at the connector. Where do the two halves meet?
You should see a tab. Or a lever. Or sometimes a small button.
This is what holds it in. It might be on the top. Or the side.
Sometimes it’s on the bottom.
Step 2: Examine the Tab/Lever. How does it work? Does it push in? Does it lift up?
Does it slide sideways? Most tabs need to be pressed down. Or squeezed inwards.
Some might have a little release clip you need to push.
Step 3: Apply Gentle Pressure. Once you know how the lock works, try it. Press the tab down. Or squeeze it.
While you are pressing, try to pull the connector apart. Use a slight wiggling motion. This can help it loosen.
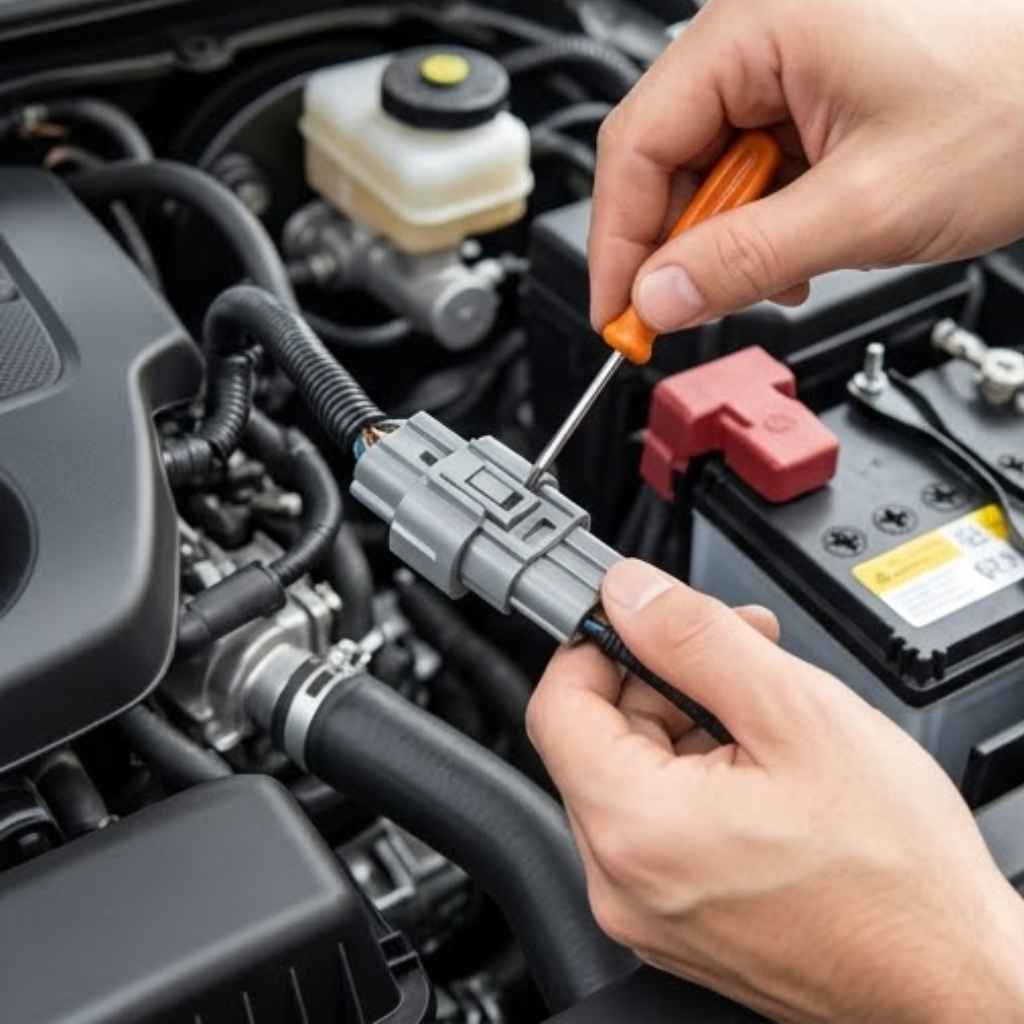
Step 4: Use a Tool if Needed. If your fingers can’t reach the tab. Or if it’s too stiff, use a tool. A small flathead screwdriver.
Or a trim tool. Gently insert the tool under the tab. Lift it or push it.
Be very careful not to break the plastic.
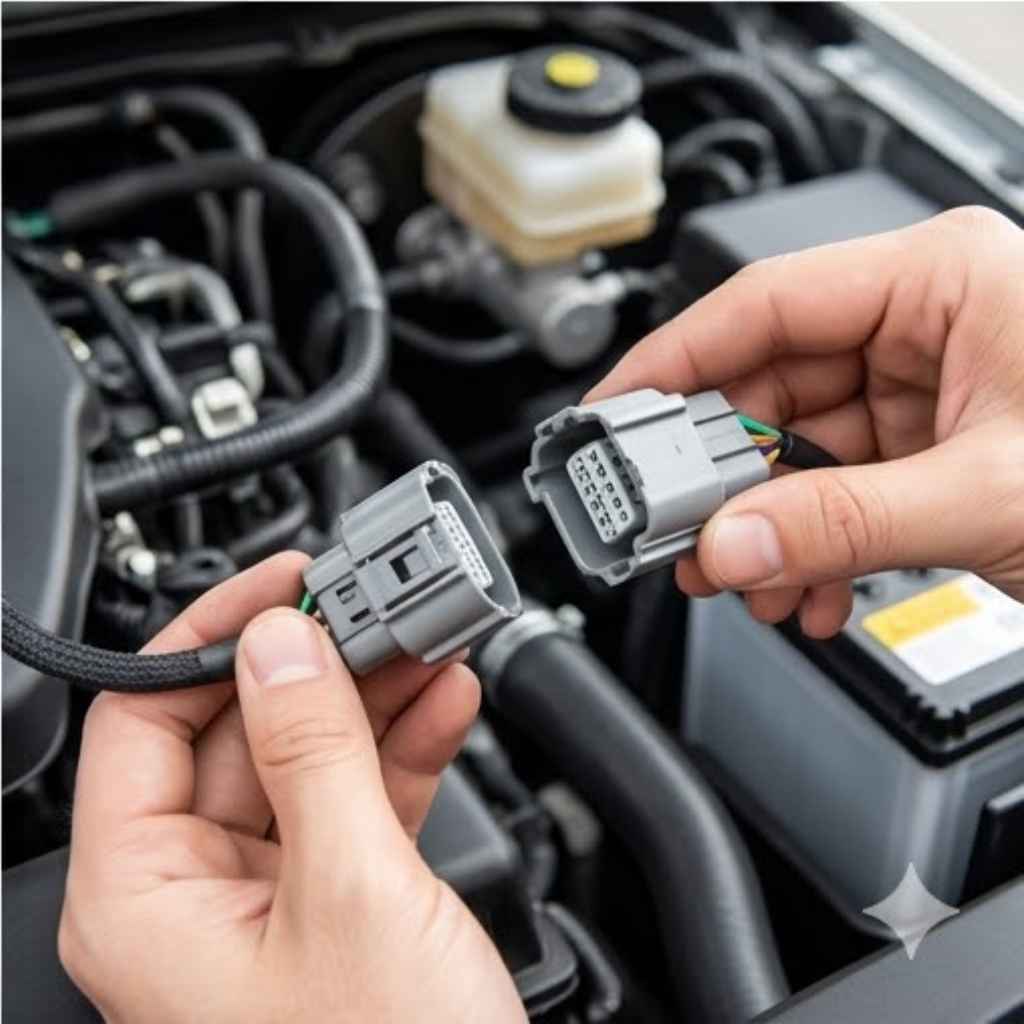
Step 5: Pull the Connectors Apart. Keep the lock disengaged. Then pull the two parts of the connector straight apart. Don’t twist them.
Or bend them. Just a steady pull. They should come apart easily.
If they are still stuck, double-check the lock. Make sure it is fully disengaged.
Step 6: Inspect for Damage. Once apart, look at the pins. Are they bent? Are they corroded?
Check the plastic housing. Are there any cracks? Is the locking tab still intact?
Good inspection helps prevent future issues.
This method works for many common plugs. But some are different. Let’s look at those.
Different Types of Connector Locks
Push-and-Pull: These have a tab you push straight down. Then you pull the connector. It’s very common.
Squeeze-and-Pull: These have tabs you squeeze inwards. Like little clips. You squeeze them and pull apart.
Slide-Lock: Some connectors have a small lever. You slide it one way to unlock. Then you can pull the connector.
Push-Button Release: A small button you press. This pops a tab. Then you can separate them.
Handling Tricky Connectors on the BT50
Your BT50 is a sturdy truck. But some connectors can be stubborn. Especially if they are old.
Or have been exposed to the elements. Corrosion can make them stick. Dirt can get into the lock.
Heat and cold cycles can also make plastic brittle.
I remember working on a friend’s old ute. It was similar to a BT50. The tail light connector was stuck fast.
It was wet inside. The metal pins were a bit rusty. I tried all the usual tricks.
Pushing the tab didn’t budge it. Squeezing the sides did nothing. I was worried I would break it.
The plastic felt really dry.
I grabbed a can of electrical contact cleaner. And a small spray bottle of penetrating oil. I sprayed a little contact cleaner around the seam.
I let it sit for a minute. Then I sprayed a tiny bit of penetrating oil. I waited again.
I used a small pick tool. I carefully worked it around the edge of the tab. I gently wiggled the connector.
Finally, with a small pop, it came free. I was so relieved. I cleaned the pins well.
Then I put a bit of dielectric grease in it.
Dielectric grease is a lifesaver. You can put a small dab inside the connector. Especially after you clean it.
It stops corrosion. It also helps make it easier to take apart next time. But only use a little.
Too much can interfere with the electrical connection.
Sometimes, a connector is just wedged in tight. If it’s in a bundle of wires, the bundle might be pulling on it. Try to gently move the wires around it.
Give yourself some slack. This can make a big difference. Patience is your best friend here.
Rushing usually leads to broken parts.
Connectors You Might Encounter
On a vehicle like the BT50, you’ll find a few main types. Knowing them helps you know what to expect.
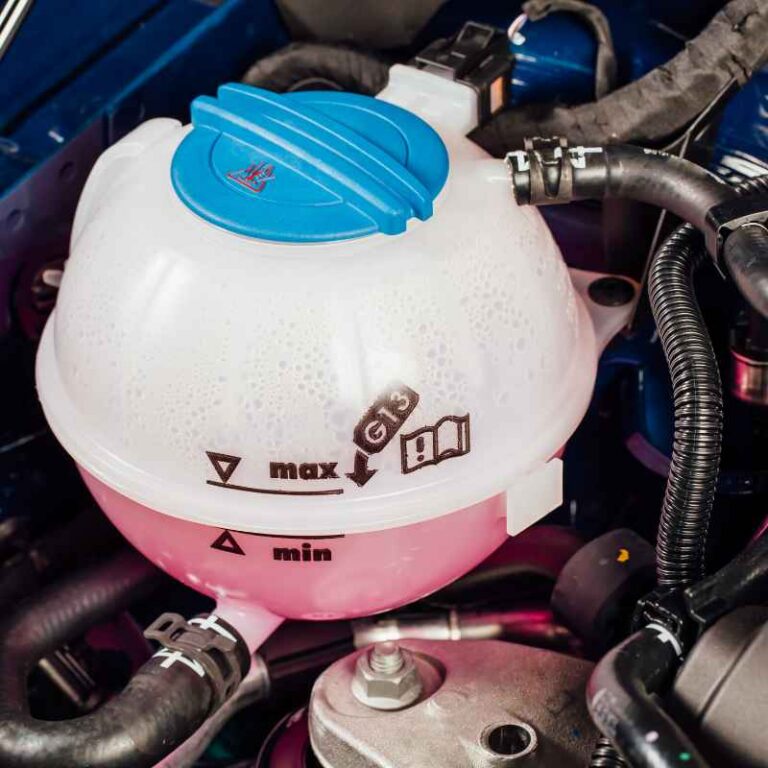
Sealed Connectors: These are common. Especially in the engine bay. They have rubber seals.
These keep water out. They often have a more complex locking mechanism. Look for a shroud.
Or an outer housing.
Unsealed Connectors: Found more often inside the cabin. They don’t need as much protection. They are usually simpler.
The locking tabs are often more exposed.
Weather Pack Connectors: These are very robust. They have a tough plastic housing. And often a secondary lock.
You might need a special tool. Or a very thin pick to release them. They are designed for harsh conditions.
Deutsch Connectors: These are industrial-grade. You see them on heavy machinery. And some high-end vehicles.
They are very reliable. They often have a locking ring or a push-button mechanism.
Bullet Connectors: These are simple. A male pin goes into a female sleeve. They usually just pull apart.
But sometimes corrosion makes them hard to separate.
Common BT50 Connector Locations
- Engine Bay: For sensors like the MAF, MAP, O2 sensors, throttle body.
- Headlights/Taillights: For bulbs and integrated units.
- Interior Fuse Box: Connecting to various modules.
- Door Panels: For window motors, speakers, door lock actuators.
- Dashboard: For climate controls, infotainment system, airbag modules.
When Not to Force It
It’s easy to get frustrated. When a connector won’t budge. But forcing it is a bad idea.
You risk breaking the plastic housing. This can be costly to replace. Sometimes these housings are part of a larger module.
You might break an expensive electronic part.
You can also damage the pins. If you pull too hard, the wires can pull out of the back of the connector. This is called “pulling the terminal.” It’s a nightmare to fix.
You have to get the wire back into the terminal. And crimp it properly. Or replace the terminal.
This requires special tools.
If a connector feels really stuck, stop. Take a break. Look at it again with fresh eyes.
Maybe you missed a lock. Or there’s a hidden clip. If you can’t figure it out, it’s okay to ask for help.
A mechanic has seen it all. They might know the trick for that specific plug.
Some connectors are designed to be difficult to remove. This is for safety. For example, airbag connectors.
They have special locking mechanisms. You need to be absolutely sure you are doing it right. If you are unsure, leave it to the professionals.
Messing with safety systems can be dangerous.
Connector Safety Checks
- Always disconnect the battery. Before working on electrical systems. This stops shorts. And protects you. Wait a few minutes after disconnecting.
- Do not yank. Gentle persuasion is key.
- Inspect before reconnecting. Make sure pins are clean and straight.
- Use dielectric grease sparingly. It helps, but too much is bad.
- If unsure, stop. Seek expert advice.
Real-World Scenario: Replacing a Headlight Bulb
Let’s walk through a common task. Changing a headlight bulb. On many vehicles, including the BT50, this might involve removing a connector.
You notice one headlight is dim. Or out. You get a new bulb.
You open the hood. You find the back of the headlight unit. There’s a wiring harness going into it.
This is your connector.
First, locate the battery. Disconnect the negative terminal. Wait a few minutes.
Now, look at the connector. It’s usually a fairly large, weather-sealed plug. You’ll see the locking tabs.
They might be on the sides. Or one on top and one on the bottom.
Try to push the tabs in. Or squeeze them. If it’s stiff, use a trim tool.
Gently pry under the tab. You might need to do this on both sides if there are two tabs. Keep the lock disengaged.
While holding the lock, pull the connector. Straight out. It might be a bit stiff due to the seals.
Give it a steady pull. Once it’s free, you can access the bulb holder. Remove the old bulb.
Insert the new one. Then, carefully push the connector back on. Make sure it snaps securely into place.
This is a basic example. But it shows the principles. Identify the lock.
Release the lock. Pull the connector. Reconnect it properly.
Quick Tip: Cleaning Corroded Connectors
If pins are a bit rusty or green:
1. Spray: Use electrical contact cleaner. Let it soak in.
2. Scrub: Use a small wire brush. Or a brass brush.
Gently scrub the pins. Get into all the nooks.
3. Rinse: Spray more cleaner to wash away debris.
4. Dry: Blow compressed air. Or let it air dry completely.
Then apply dielectric grease.
What This Means for You
Understanding how to remove automotive connector plugs is a valuable skill. It empowers you. You can do simple maintenance.
You can tackle minor repairs yourself. This saves time. It also saves money.
You don’t always need to go to a mechanic for every little thing.
Knowing these steps helps prevent damage. Instead of brute force, you use technique. This keeps your BT50 in good shape.
It ensures your electrical systems work reliably. A loose or corroded connection can cause big issues. Small problems can become expensive ones quickly.
It also gives you confidence. When you can diagnose a simple problem. And fix it yourself, it feels good.
You learn more about your vehicle. This knowledge is practical. It’s useful for any car owner.
Common FAQs About Removing Connector Plugs
How do I know which tab to press on a connector?
Look closely at the connector. The locking tab is usually raised or has a distinct shape. Often, it’s designed to be pushed down or squeezed.
If you’re unsure, gently probe around the edges with a plastic tool.
Can I use WD-40 to remove stuck connectors?
WD-40 is a water displacer and light lubricant. It might help free a stuck connector. However, it’s not ideal for long-term electrical connections.
It can attract dust. It’s better to use a dedicated electrical contact cleaner and then dielectric grease. For really stuck metal pins, a light penetrating oil might help, but clean it off thoroughly afterward.
What if the plastic connector tab breaks off?
This is a common issue with older connectors. If the tab breaks, the connector may no longer lock securely. You might need to use electrical tape to hold it together after reassembly.
For a more permanent fix, you can often buy
Are all automotive connectors the same?
No, not at all. There are hundreds of different connector types. They vary by manufacturer, application, and required durability.
Some are sealed for weather resistance, while others are simple plug-and-play. The locking mechanism can also differ significantly.
How do I reconnect a plug correctly?
Align the connector halves carefully. They should only fit one way due to their keying. Push them straight together until you hear or feel a click.
This click means the locking tab has engaged. Give it a gentle tug to ensure it’s secure. If it doesn’t click, check the locking tab is not obstructed and try again.
Is it safe to remove connectors with the battery connected?
It is generally safest to disconnect the battery negative terminal before working on any electrical connectors. This prevents accidental short circuits, which can damage components or cause sparks. If you must work with the battery connected, be extremely careful not to touch live wires or cause any unintended connections.
Conclusion
Removing automotive connector plugs on your BT50 doesn’t have to be a struggle. With the right tools and a bit of patience, you can do it yourself. Always remember to look for the locking tabs.
And apply gentle pressure. Avoid forcing things. This skill will serve you well.
It keeps your truck running smoothly.