How to Remove Stickers From Car Glass: A Simple Guide
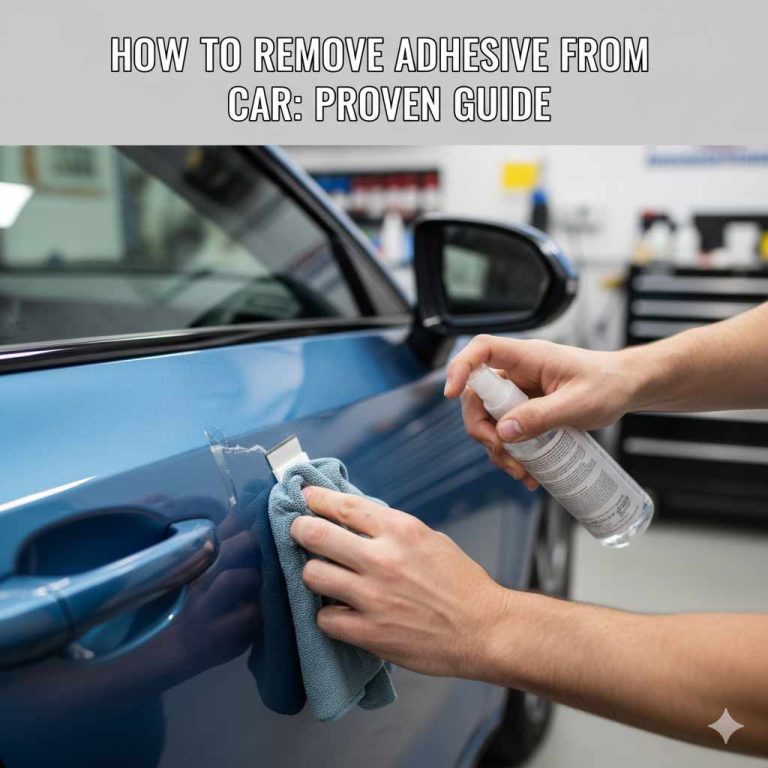
Removing stickers from car glass can seem tricky, especially if you’ve never done it before. Many people find it frustrating when they leave behind sticky residue or damage their windows. Don’t worry, though! How to Remove Stickers From Car Glass is actually a straightforward process. This guide provides you with a simple, step-by-step solution. We’ll cover everything you need to know to get rid of those annoying stickers without causing any harm to your car. Let’s get started!
What You’ll Need Before You Start
Before exploring the process, gather the necessary supplies. Having everything ready saves time and makes the job much easier. You won’t want to begin removing a sticker only to realize you’re missing a critical tool. Properly preparing your workspace and the car glass is also important. This preparation stage sets the stage for a smooth sticker removal operation.
Gathering Your Supplies
You’ll need a few common items that you might already have around the house. These items will help you remove the sticker safely and effectively. It’s always better to be prepared.
- A plastic scraper: A plastic scraper is your best friend. It’s important to use plastic so you don’t scratch the glass. Metal scrapers are too likely to cause damage. Look for one designed for automotive use. It should have a good edge to lift the sticker without causing scratches.
Plastic scrapers are designed with a blunt edge to protect surfaces. They provide the necessary leverage to lift the edges of stickers without leaving marks. The flexibility of plastic allows it to conform to the glass’s curves. This is especially helpful on curved windshields and windows. Be careful when handling the scraper, even though it’s plastic, excessive force can still potentially cause scratches.
- A heat source: A hairdryer is ideal. The heat softens the adhesive on the sticker, making it easier to peel away. A heat gun is an alternative, but be extremely cautious to avoid overheating the glass.
The heat generated by a hairdryer is sufficient to loosen the adhesive without damaging the glass. Direct the heat from the hairdryer onto the sticker for about 30-60 seconds to soften the adhesive. The heat breaks the adhesive’s bond, and the sticker becomes more pliable. This makes the sticker removal process less challenging. Avoid keeping the heat in one spot for too long, as it could potentially cause the glass to crack.
- Cleaning solution: Dish soap or a specialized automotive glass cleaner are suitable choices. These will help clean up any residual adhesive left behind.
Choose a cleaner that dissolves adhesive residue without harming the glass. Automotive glass cleaners are formulated to do exactly that. Dish soap can also work effectively, especially if mixed with warm water. Spray the cleaning solution onto the remaining adhesive after removing the sticker. Then, wipe it away with a clean cloth. This ensures a spotless and streak-free finish.
- A clean microfiber cloth: This is perfect for wiping down the glass without leaving lint or streaks. Paper towels are a decent substitute, but microfiber cloths offer superior performance.
Microfiber cloths are highly absorbent and gentle on surfaces. They trap dirt and adhesive particles. This leaves the glass exceptionally clean. Unlike paper towels, microfiber cloths won’t leave behind fibers. Their structure also ensures the glass is polished without causing scratches. Always ensure the cloth is clean before using it, to prevent any grit from scratching the surface. Regular washing maintains the cloth’s effectiveness.
- Optional: Rubbing alcohol or adhesive remover. For particularly stubborn residue, these can be very helpful.
Rubbing alcohol is a great solvent for adhesive residue. It helps break down the adhesive’s molecular structure, which facilitates removal. Adhesive removers are specifically made for this purpose. They offer more powerful solutions for difficult cases. Always test these substances in an inconspicuous area first. This makes sure they don’t damage your car’s paint or trim. Apply the remover to the residue. Let it sit for a few minutes. Then, gently wipe away.
Preparing Your Car Glass
Preparing the area is key to successful sticker removal. You’ll want to make sure your car is ready for the process. This involves cleaning the glass, and also considering the environment.
- Park in a shaded area: Avoid direct sunlight to prevent the glass from becoming too hot. This can make the adhesive more difficult to work with. If direct sunlight is unavoidable, try to work early in the morning or late in the afternoon.
Working in the shade helps the glass remain at a manageable temperature. Excessive heat from the sun can potentially make some adhesives more difficult to remove. This can lead to increased struggle during removal. Shade also helps you see the sticker and residue more clearly. You can spot any lingering adhesive more easily. It offers a more comfortable work environment, as well.
- Clean the glass: Wash the glass with soapy water or glass cleaner to remove dirt and debris. Clean glass helps you see what you’re working with. It makes the entire process cleaner.
Removing surface dirt ensures you’re working with a clean surface. Any grit or particles can scratch the glass. Cleaning also helps the cleaning solution spread evenly. It maximizes its effectiveness. Before the sticker removal process begins, you want a clear view of the area. This prevents scratching the surface during sticker removal. Wipe away any moisture or streaks with a clean microfiber cloth.
- Protect surrounding areas: Cover the dashboard and any nearby painted surfaces with a towel. This will protect them from any potential scratches or spills.
Using a towel provides a barrier between the glass and surrounding areas. This protects against accidental damage from tools or cleaning solutions. A towel provides a clean surface to place your supplies, as well. It reduces the risk of spills. Securing the towel with tape also helps, especially on windy days. Protection is important, even if you are careful. Accidents can happen, but preparation helps!

The Step-by-Step Guide to Removing Stickers
Follow these steps to remove stickers from your car glass. This guide simplifies the process to ensure success and minimal effort.
Applying Heat
Using heat is an important step. Heat softens the adhesive, and makes removal much easier. Proper application of heat is key.
- Turn on the hairdryer: Set the hairdryer to its lowest heat setting. Heat guns can be used, but must be used very carefully. You don’t want to crack the glass.
Starting with a low setting helps you to control the heat. This reduces the risk of overheating the glass or damaging any nearby trim. A lower heat setting also allows you to gauge the sticker’s response to the heat. If necessary, you can increase the heat gradually. This is especially helpful if the sticker is old or the adhesive is particularly strong.
- Direct the heat: Hold the hairdryer a few inches away from the sticker. Move it back and forth, ensuring you heat the entire sticker evenly.
Applying heat evenly ensures the adhesive softens uniformly. Concentrating the heat in one spot for too long can potentially damage the glass. Constantly moving the hairdryer prevents hot spots from forming. You want to focus on gently heating the adhesive, not damaging the glass. This method ensures even heat distribution across the sticker’s surface. It makes removal easier and prevents any problems during the process.
- Heat duration: Heat the sticker for 30-60 seconds. Observe the edges to see if they begin to lift. If the edges don’t lift, you might need a little more time.
The time needed for heating depends on the sticker’s age and adhesive type. A little patience at this stage is helpful. Overheating can cause problems, so it’s best to proceed slowly. Keep an eye on the edges. If they lift easily, you can move on to the next step. If not, continue heating for a short amount of time. Repeat the process until you achieve the desired effect. Be patient, as some stickers will require more time and heat.
Peeling the Sticker
Once the adhesive has softened, you can begin removing the sticker. This requires patience and a careful touch.
- Lift an edge: Using your fingernail or the plastic scraper, gently lift an edge of the sticker. If it doesn’t lift easily, apply more heat.
Starting with an edge gives you a point of leverage. This allows you to gradually peel the sticker away. If the edge doesn’t lift, it indicates that the adhesive isn’t softened enough. Don’t force it; applying more heat is usually the solution. Starting slowly also reduces the chance of tearing the sticker. If the sticker tears, you’ll need to work with smaller pieces.
- Slow and steady: Slowly peel the sticker away from the glass. Keep the angle consistent, and avoid pulling too quickly.
Peeling slowly minimizes the chance of tearing the sticker and leaving behind residue. A consistent angle helps to evenly distribute the force. This allows the adhesive to release smoothly. Rushing can cause tearing, which lengthens the process. Take your time, and move at a controlled pace. This will help you achieve the best outcome.
- Using the scraper: If the sticker resists, carefully use the plastic scraper to lift the edge as you peel. Avoid scratching the glass.
The scraper provides extra leverage when the sticker is difficult to remove. Use the scraper at a shallow angle. This helps to prevent scratching. Work slowly and observe how the scraper interacts with the adhesive. The scraper acts as a useful tool when the adhesive has not fully softened. Use the scraper with the utmost care.
Removing Adhesive Residue
After the sticker is removed, some adhesive residue may remain. This section details how to remove that.
- Apply the cleaning solution: Spray the glass with your chosen cleaning solution. This might be glass cleaner or soapy water. Ensure the area is thoroughly covered.
Applying the solution helps to loosen and dissolve the adhesive. It creates a lubricating surface. This makes the removal of any remaining residue easier. A thorough application ensures the solution reaches all parts of the residue. Apply the solution evenly across the entire area of the removed sticker.
- Let it sit: Allow the cleaning solution to sit for a minute or two. This lets it start working on the adhesive.
Allowing the solution to sit enables it to penetrate the adhesive. This makes the adhesive easier to wipe away. The soaking process softens the adhesive. This makes it less sticky. Don’t let the solution dry on the glass. This will cause it to be less effective. Waiting gives the cleaning solution enough time to lift and dissolve the adhesive.
- Wipe it away: Use a clean microfiber cloth to wipe away the residue. Rub gently and in a circular motion.
Using a microfiber cloth ensures you’re wiping the residue away without scratching the glass. Circular motions help to lift the adhesive. Don’t press too hard. Just use enough pressure to remove the residue. Continue wiping until all the residue is gone. Inspect the glass to ensure all traces are removed. This ensures the glass is clean and clear.
- Stubborn residue: For stubborn adhesive, try rubbing alcohol or an adhesive remover. Apply to the residue, let sit, and wipe.
Rubbing alcohol and adhesive removers are stronger than regular cleaning solutions. These are effective at dissolving tough adhesive. Apply a small amount to the residue. Let it sit for a few minutes. Then, wipe it away with a clean cloth. Always test these on a small, hidden area first. This makes sure they don’t damage your car. These solvents provide an added boost for the toughest adhesives. They are your allies for removing sticker residue.
Dealing With Different Types of Stickers
Different types of stickers might need slightly different approaches. Knowing these differences helps ensure the best results.
Paper Stickers
Paper stickers are the most common type. They can sometimes tear easily. Handle them with patience.
- Gentle heat: Apply heat cautiously, as paper can scorch. Less heat is usually required than with vinyl stickers.
Paper stickers are more sensitive to heat than vinyl. Too much heat can scorch the paper or cause it to disintegrate. Use a lower heat setting. Apply the heat for a shorter period. Watch for any signs of scorching. Adjust the heat level as needed to ensure the paper sticker doesn’t get damaged.
- Slow peeling: Peel slowly to prevent tearing. Lift the edges carefully, and avoid pulling too hard.
Paper stickers are more likely to tear when pulled quickly. Take your time when peeling. Work at a slow and steady pace. This reduces the risk of the sticker ripping. If the sticker tears, try using the scraper to assist with removal. This helps you to manage the situation and get the best results.
- Soapy water: Soapy water can be effective. Try soaking the sticker with soapy water to loosen the adhesive before scraping.
Soapy water can help to penetrate the adhesive on paper stickers. It’s often effective at softening the adhesive. Spray the paper sticker generously with soapy water. Let it soak for a few minutes. The water will soften the adhesive, making it easier to lift the edges. You can then gently scrape the sticker from the glass.
Vinyl Stickers
Vinyl stickers are more durable but may leave more residue. They require a different approach.
- More heat: Vinyl stickers often need more heat than paper stickers. Use a higher heat setting and longer application time.
Vinyl stickers are more resilient to heat. Applying more heat can help soften the adhesive. This makes it much easier to peel away. Start with a moderate heat setting, and slowly increase it. Apply the heat until you see the edges lift up. Avoid overheating, and inspect the glass frequently. This ensures you’re not causing any damage. Applying the correct amount of heat is critical.
- Scraping: Use a plastic scraper to remove the sticker and any residue. Ensure you maintain the correct angle.
A plastic scraper is a safe and helpful tool. It enables you to lift and remove vinyl stickers without damaging the glass. Use a consistent angle. It helps the scraper to glide across the surface. This lifts the edges of the sticker. With vinyl stickers, the scraper is your key tool. Proper use helps you to remove the sticker quickly.
- Adhesive remover: Adhesive remover is very effective with vinyl stickers. Apply after peeling to remove residue.
Vinyl stickers often leave more stubborn adhesive residue. Adhesive removers are designed to dissolve those residues. After peeling the sticker, apply the remover. Let it sit for a few minutes to dissolve any remaining adhesive. Wipe it away with a clean cloth. This will ensure that your glass is spotless. Be sure to follow the instructions on the remover. Use it in a well-ventilated area.
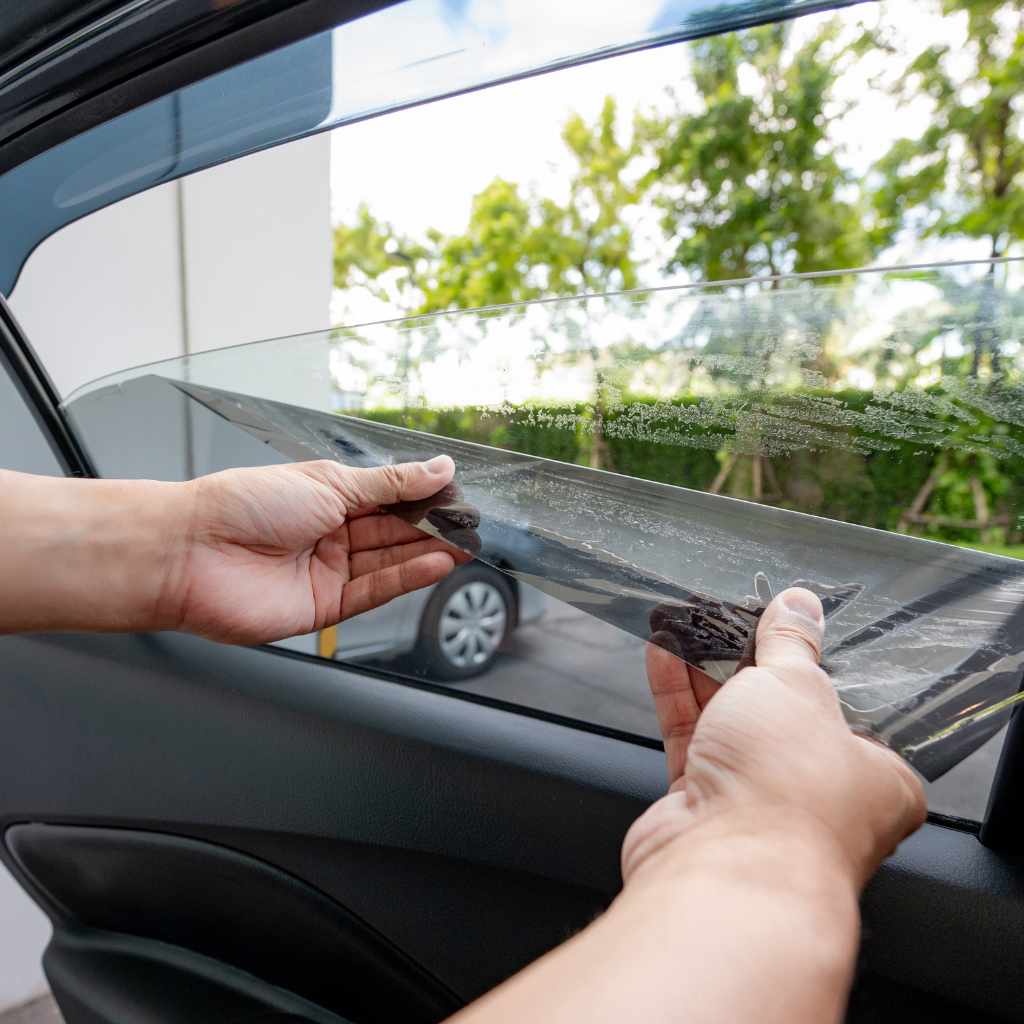
Window Decals
Window decals often have a protective layer that helps when removing them.
- Peel carefully: These often peel away in one piece, but be cautious with any protective layers.
Window decals are often designed to be easily removed. Look for a starting edge. Grasp the edge. Peel the decal slowly and steadily, at a consistent angle. Check for any protective layers that might remain on the glass. Remove them carefully, using the same method. The right technique prevents tearing or leaving residue behind.
- Cleaning solution: Use plenty of cleaning solution to remove any residue from the decal.
Even though window decals are usually easy to remove, some adhesive may still remain. Apply your cleaning solution liberally. Let it sit for a moment. This will help dissolve any remaining adhesive. Then wipe it away. For stubborn residue, you might need to try a stronger cleaning solution or adhesive remover. The right cleaning method is critical to achieve a clean finish.
- Inspect closely: Look for any remaining adhesive. Ensure that you have a completely clean surface.
After removing the decal, check the surface closely. Look at the glass from different angles. This helps you to identify any lingering adhesive. Ensure all residue has been removed. You want your windows to be as clean as possible. The goal is to leave the glass clear. This is the final step in ensuring the process is a success.
Alternative Methods
There are alternative methods for removing stickers. These approaches work well in certain situations.
Using Razor Blades (With Caution)
Razor blades can be helpful, but they can also be dangerous. Proper handling is important.
- Safety first: Use a new, sharp razor blade. Keep it at a shallow angle to the glass.
A new, sharp blade will cut through the adhesive. This will also minimize the risk of scratching the glass. A shallow angle keeps the blade away from the glass. This reduces the risk of scratching. Using a razor requires great care. It’s important to always prioritize safety.
- Lather the glass: Apply plenty of soapy water or glass cleaner to lubricate the glass.
Lubricating the glass reduces friction. This minimizes the risk of scratching the surface. The lubrication will enable the razor blade to glide. This helps the adhesive release with minimal effort. This will also help to prevent the razor from catching on any imperfections.
- Small strokes: Use short, controlled strokes. Be extremely careful to avoid gouging the glass.
Using small, controlled strokes gives you better control over the blade. This also reduces the risk of making accidental scratches. Work slowly and methodically. This will help you to prevent any damage. If you feel any resistance, stop immediately. Evaluate whether you need more lubrication, or a different approach.
Using Vinegar
Vinegar is a natural cleaning agent that works well. It is often a helpful tool.
- Apply vinegar: Soak a cloth with white vinegar and place it on the sticker.
Vinegar is a natural solvent that can help to loosen adhesive. The cloth will keep the vinegar on the sticker. It prevents it from evaporating too quickly. Ensure the cloth is soaked completely. Make sure all parts of the sticker are covered.
- Let it soak: Allow the vinegar to sit for 15-30 minutes. This will soften the adhesive.
Soaking the sticker helps the vinegar to break down the adhesive. This makes it easier to remove. Don’t rush this process. Give the vinegar enough time to work. During this time, the adhesive should soften. This will enable it to release its hold on the glass.
- Scrape gently: Use a plastic scraper to remove the sticker after soaking.
The soaking process should help to loosen the sticker. Use your scraper to lift an edge. Then gently peel the sticker away. If any residue remains, you can try cleaning the area again. Apply a cleaning solution and wipe. The goal is to remove any remaining adhesive, leaving the glass clean and clear.
Avoiding Common Mistakes
Knowing what mistakes to avoid helps you remove stickers with greater ease. Being aware of the things that can go wrong means you are better prepared.
- Using the wrong tools: Using metal scrapers can scratch the glass. Always use plastic.
Using the wrong tools is a common mistake. Metal scrapers are very likely to scratch the glass. They can cause permanent damage. Using the correct tools is critical. Always choose plastic tools for the best results. These tools can lift the edges of the stickers without causing any damage.
- Overheating the glass: Excessive heat can cause the glass to crack. Always monitor the temperature.
Overheating is a common mistake that can lead to damage. Make sure you don’t keep the heat in one spot for too long. If the glass feels too hot to touch, stop. Use a lower heat setting. If it gets too hot, the glass may crack. Always remain vigilant while applying heat. Regularly check the temperature to avoid problems.
- Forcing the sticker: Forcing a sticker can lead to tearing and residue. Use heat and patience.
Forcing the sticker causes tearing, and leaves residue. Be patient and take your time. If the sticker doesn’t come off easily, try more heat. Applying more heat softens the adhesive. The sticker will come off more easily. The use of force won’t help. This will only lengthen the process.
Real-Life Examples
Here are some examples of how these techniques have been applied, and the results achieved.
- A car owner removed an old registration sticker. They applied heat from a hairdryer. After 60 seconds, they used a plastic scraper to peel the sticker. They followed this by using glass cleaner to wipe away the residue. The glass was clean and free of any marks.
This is a clear example of the standard process in action. The individual followed the steps outlined, which led to a perfect result. This shows that the methods described are dependable and practical.
- A driver had a particularly stubborn vinyl sticker. They applied a specialized adhesive remover. After letting it sit for five minutes, they used the plastic scraper to remove the residue. A clean microfiber cloth was used for wiping. The result was a completely clean window.
This shows the effectiveness of using specific products for difficult adhesive. It highlights the importance of choosing the correct approach for the type of sticker.
Tips for Future Sticker Removal
Some simple steps help when removing stickers in the future. Preventative measures will simplify your tasks.
- Apply stickers carefully: Ensure that the glass is clean before applying any stickers.
A clean surface is key for many reasons. This helps to ensure the sticker bonds well. It also will make it easier to remove the sticker later. Before you apply a sticker, wipe the glass clean with glass cleaner. Use a microfiber cloth to remove any dust and fingerprints. This will ensure that the sticker has good adhesion.
- Consider sticker type: Choose stickers made from materials that are easy to remove.
When selecting stickers, consider their removability. Vinyl stickers might leave behind more residue. Paper stickers may tear. Choose the right kind of sticker for your needs. Always check reviews to see how others found it to work. Choose options designed for easy removal. This will save time and prevent problems.
- Document the process: Take notes on how you removed stickers in the past. This will help you in the future.
Keep a record of the methods you found successful. This information can be a valuable reference. The methods that worked well for one kind of sticker may work well again. When you encounter a similar situation, you will already have a plan of action. Keep notes of all products used. This will ensure your success next time.
Case Studies
These case studies show how these methods have proven helpful in real-world scenarios.
A car owner removed a parking permit sticker using a heat gun. They were careful to keep the heat gun moving. The process took about 45 seconds. The sticker came off cleanly, and there was no damage.
A driver needed to remove a window decal from their car. They used soapy water. After soaking for 20 minutes, the sticker slid off easily. There was very little residue.
How to Remove Stickers From Car Glass: Beyond the Basics
Some common questions and answers. Addressing these concerns often helps when learning How to Remove Stickers From Car Glass.
Frequently Asked Questions
Question: Can I use a metal scraper to remove a sticker?
Answer: No, you should not use a metal scraper. A metal scraper can scratch the glass. Always use a plastic scraper.
Question: What’s the best way to remove old sticker residue?
Answer: Use an adhesive remover or rubbing alcohol. Apply it to the residue. Let it sit for a few minutes. Then, wipe it away with a microfiber cloth.
Question: Is it safe to use a heat gun on car glass?
Answer: Yes, but with extreme caution. Keep the heat gun moving. Do not concentrate heat in one spot for too long to avoid cracking the glass.
Question: Can I use household cleaners instead of automotive cleaners?
Answer: Dish soap mixed with warm water can work. However, dedicated automotive glass cleaners are formulated for the job and may be more effective.
Question: How do I remove a sticker that’s torn?
Answer: If the sticker tears, apply heat to the remaining portion. Then, use a plastic scraper to carefully lift the edges. Repeat until the rest is removed. After removing, wipe up any leftover residue.
Final Thoughts
Now you have the knowledge needed to handle the job of How to Remove Stickers From Car Glass. You’ve explored the process, learned about the necessary tools, and discovered the best steps. Remember to always prioritize safety and take your time. Preparing your workspace is very important. Always be patient, and use the correct techniques to prevent damage. With practice, you’ll be able to remove stickers with ease. You now have the skills to keep your car’s glass looking great! Start your sticker removal project today. You’ll be enjoying clean, clear windows in no time.