What Is a Heater Core in a Car? Function, Symptoms & Cost to Fix
A heater core is a small radiator hidden behind your dashboard that uses hot engine coolant to warm cabin air — not the blower motor or thermostat, though both work alongside it. When it fails, expect weak heat, a sweet coolant smell, or a fogged windshield, with full replacement running $850–$1,950 per RepairPal’s 2026 estimates. This guide covers how it works, warning signs, DIY flushing and bypass options, and real replacement costs.
Insert your Affiliate Disclosure reusable block here.
Quick Answer
A heater core is a small radiator-like unit behind your dashboard that uses hot engine coolant to warm cabin air and defog your windshield. If it fails, expect weak heat, a sweet coolant smell, or a foggy windshield. Full replacement typically runs $850–$1,950 (RepairPal, 2026), though a temporary bypass costs far less.
What is a Heater Core in a Car?
At its heart, a heater core in a car is like a miniature radiator for your car’s heating system. It’s typically made of metal, often aluminum or brass, and has a network of small tubes and fins. Think of it as a heat exchanger. Its main job is to transfer heat from your engine’s coolant to the air that your car’s ventilation system blows into the passenger cabin. Pretty neat, right?
When your engine runs, it gets hot. The coolant circulating through the engine absorbs this heat. Some of this hot coolant is then diverted through hoses to the heater core, which is usually located behind the dashboard, near the HVAC (Heating, Ventilation, and Air Conditioning) system. As the hot coolant flows through the heater core’s tubes, the blower motor pushes air across its fins. This air picks up the heat from the coolant and gets blown back into the car through your vents, warming you up.
How the Heater Core Works with Your Car’s System
To truly appreciate the heater core, it helps to see how it fits into the bigger picture of your car’s heating and cooling. Your car’s engine needs to stay at an optimal operating temperature. For this, it uses a cooling system that circulates coolant (a mixture of antifreeze and water). This coolant absorbs excess heat from the engine and then releases it, often through the main radiator at the front of your car.
However, a portion of this warm coolant takes a detour. It’s routed to the heater core. Here’s a simplified look at the process:
- Engine Generates Heat: Your engine runs, creating a lot of heat.
- Coolant Absorbs Heat: The coolant circulates through the engine, absorbing this heat.
- Coolant Flows to Heater Core: Hoses direct some of this hot coolant from the engine circuit towards the heater core, which is nestled within your car’s dashboard.
- Air is Blown Over Fins: When you turn on your car’s heat, the blower motor pushes air through the heater core.
- Heat Transfer: As the air passes over the hot tubes and fins of the heater core, it picks up the heat from the coolant.
- Warm Air Enters Cabin: This now-heated air is directed through your car’s vents into the passenger cabin, providing warmth.
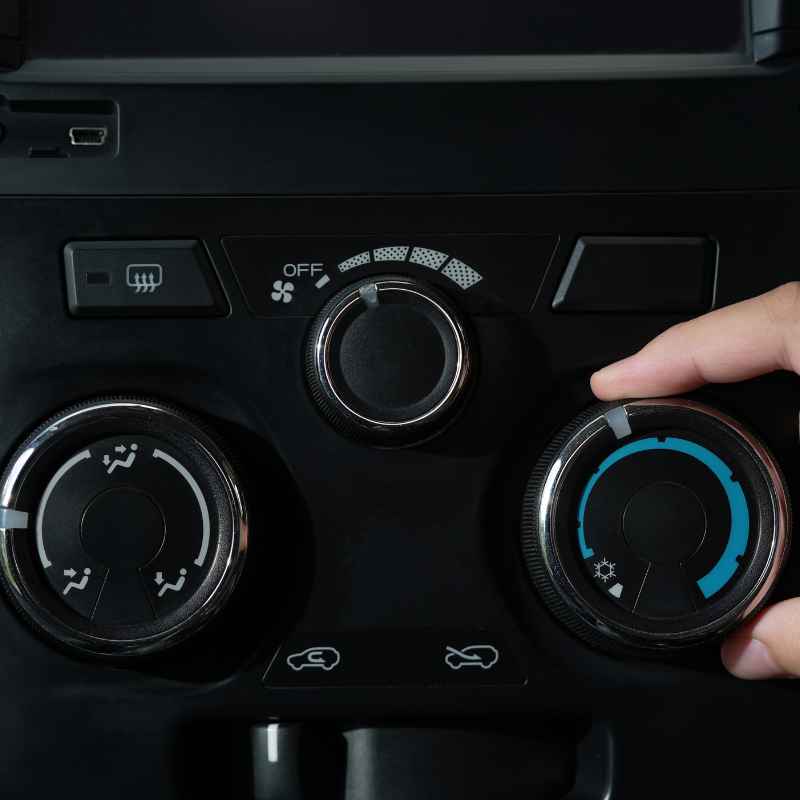
The flow of coolant to the heater core is controlled by a valve, often called a heater control valve. When you adjust your temperature settings from cool to hot, you’re essentially telling this valve to open and allow hot coolant to flow through the heater core. If you switch to cold, the valve closes, stopping or diverting the flow of hot coolant, and the system relies more on the ambient air or the air conditioning system.
Why the Heater Core Matters for Comfort and Safety
The heater core does more than keep you cozy — it plays a direct role in your comfort, your visibility, and even your car’s cooling balance. It’s essential for:
- Passenger Comfort: This is the most obvious one. Without a functioning heater core, your cabin will remain cold during cold weather, making driving unpleasant and, in extreme conditions, even dangerous due to hypothermia.
- Defrosting and Defogging: A working heater core is critical for clearing your windshield. Warm, dry air blown onto the inside of your windshield melts snow and ice and removes fog, ensuring you have clear visibility to drive safely. This function is a life-saver, especially in winter.
- Maintaining Optimal Engine Temperature (Indirectly): While the main radiator does the heavy lifting of cooling, the heater core also acts as a small radiator, dissipating a small amount of engine heat. In very cold climates, a completely blocked heater core could theoretically contribute to slight overheating in specific, extreme scenarios, though this is less common than the comfort and visibility issues.
Common Heater Core Problems and Symptoms
Like any automotive component, the heater core can develop problems over time. When it does, it usually lets you know through a set of tell-tale signs. Recognizing these symptoms early can save you from discomfort and potentially more significant repair costs.
Symptoms of a Bad Heater Core
Here are the most common indicators that your heater core might be having issues:
- No Heat or Weak Heat: This is the most prevalent symptom. If you turn your heat on and only cool or lukewarm air comes out, your heater core might be blocked or leaking internally.
- Sweet Smell Inside the Car: A distinct, sweet, maple syrup-like odor inside your cabin is a strong indicator of a coolant leak from the heater core. This coolant is being vaporized and blown into the cabin.
- Foggy or Greasy Film on the Inside of the Windshield/Windows: Leaking coolant can leave a residue on your windows. This film often appears as a greasy or waxy coating that is difficult to wipe away and can impair visibility.
- Coolant Leaks Under the Dashboard: You might find puddles of coolant on the passenger side floor mat or notice dampness in the footwell. This signifies a leak from the heater core or its associated connections.
- Engine Overheating: While not always directly caused by a heater core issue, if the heater core is severely clogged, it can restrict coolant flow, potentially contributing to the engine running hotter than usual. Conversely, internal leaks can lower the overall coolant level, leading to overheating.
- Constant Need to Top Off Coolant: If you find yourself frequently adding coolant to your car’s reservoir without any obvious external leaks, there’s a good chance the coolant is escaping into the cabin via a faulty heater core.
It’s important to note that some of these symptoms can also be caused by other issues within the HVAC system, such as a faulty heater hose, a bad water pump, or a malfunctioning blend door — see our full breakdown of causes if your heater is blowing cold air. However, a combination of these symptoms, especially the sweet smell and foggy windows, strongly points toward the heater core.
How Much Does It Cost to Replace a Heater Core?
Heater core replacement is one of the more expensive routine repairs precisely because parts are cheap and labor is not — reaching the core means tearing into most of the dashboard. Total cost typically runs $850 to $1,950 at an independent shop, with luxury and German vehicles often exceeding $2,500.
📊 The U.S. national average for heater core replacement is $1,370–$1,902 — parts run $494–$617, labor runs $876–$1,285. — Source: RepairPal Heater Core Replacement Cost Estimator, 2026
| Cost Factor | Typical Range | Why |
|---|---|---|
| Parts (heater core only) | $90–$300 (up to ~$650 on luxury models) | Small, mass-produced part — cheap on its own |
| Labor | $876–$1,285 | Dashboard, console, and sometimes airbags must come out to reach it |
| Total (independent shop) | $850–$1,950 | National average, most vehicles |
| Total (luxury/German vehicles) | $2,500+ | More complex dash assemblies, pricier OEM parts |
| Temporary bypass (not a repair) | $100–$300 | Reroutes coolant around the core instead of replacing it |
How Long Does Heater Core Replacement Take?
Most shops need 4 to 10 hours of labor, and the range depends almost entirely on how much has to come apart to reach the core. Compact cars usually take 5–6 hours, standard sedans 6–7 hours, SUVs 7–8 hours, and pickup trucks 8–10 hours because of larger dashboards and more HVAC ductwork. That labor time — not the part itself — is what drives the bill.
Heater Core Troubleshooting: A Beginner’s Guide
Before assuming the worst, a little basic troubleshooting can help confirm if your heater core is indeed the culprit and if it’s a problem you might be able to tackle yourself, or at least understand better when talking to a mechanic.
Step 1: Check Your Coolant Level
Low coolant can mean no heat. Pop your hood and check the coolant reservoir. If it’s low, and you don’t see any external leaks, the coolant might be leaking internally into the cabin. You can find coolant reservoirs usually on the side of the engine bay. Never open a hot radiator cap; wait for the engine to cool completely.
Step 2: Inspect for Interior Leaks
Carefully check the passenger side floorboard and under the dashboard for any dampness or puddles. Feel the carpet; is it wet or sticky? If you find coolant there, it’s a significant clue.
Step 3: Look for the Sweet Smell
Is there that distinct sweet odor inside your car, especially when the engine is warm? This is often the most telling sign of a heater core leak.
Step 4: Observe Your Windshield
Does your windshield develop a greasy or foggy film that’s hard to wipe off, even shortly after cleaning it? Turn on your defroster. If it struggles to clear the fog or leaves streaks, the residue might be from leaking coolant.
Step 5: Test Heater Output
Start your engine and let it warm up. Turn your heater on to the highest setting. Do you feel warm air, or is it cool? If it’s cool, the problem could be a lack of coolant flow through the heater core due to blockages or leaks.
Step 6: Examine Hoses (With Caution)
Locate the heater hoses that run from the engine compartment into the firewall (the barrier between the engine and the cabin). These are usually two rubber hoses. Feel them (carefully, they can be hot). If one is hot and the other is cool, it might indicate a blockage within the heater core. Check the hose connections for any visible leaks.
For a more in-depth look at testing coolant flow, always prioritize safety and refer to your vehicle’s specific repair manual for precise locations and procedures.
Heater Core Replacement: Is it DIY-Friendly?
Replacing a heater core is often considered one of the more complex DIY repairs. This is primarily because the heater core is buried deep within the dashboard assembly. Accessing it typically requires removing a significant portion of the interior components, including the dashboard, passenger consoles, and various ductwork.
What’s Involved in Heater Core Replacement?
The basic steps for replacing a heater core usually involve:
- Draining the Coolant System: It’s crucial to drain all the old coolant before disconnecting any hoses to prevent a messy and potentially hazardous spill.
- Disconnecting Hoses: The two fluid hoses connecting the heater core to the engine’s cooling system need to be carefully disconnected.
- Disassembling the Dashboard: This is the most time-consuming part. It involves removing steering wheel components, instrument panels, glove boxes, center consoles, potentially airbag modules, heating/ventilation ducting, and more. Auto parts retailers like AutoZone often have videos or diagrams that can help visualize this.
- Removing the Old Heater Core: Once accessible, the old heater core can be unbolted and removed.
- Installing the New Heater Core: The new unit is fitted into place, ensuring it’s securely mounted.
- Reassembling the Dashboard: All the components removed are carefully put back in reverse order, making sure all clips, screws, and electrical connections are reconnected properly.
- Refilling and Bleeding the Coolant System: The system is refilled with the correct coolant mixture, and air pockets are removed (this process is called bleeding) to ensure proper coolant circulation.
- Testing: The system is run to check for leaks and verify that the heater is working correctly.
Tools You Might Need
A successful heater core replacement typically requires a comprehensive set of tools, including:
- Socket wrench set (metric and standard)
- Screwdrivers (Phillips and flathead)
- Pliers
- Trim removal tools (plastic pry tools to avoid damaging interior panels)
- Torque wrench
- Coolant recovery/drain pan
- Funnel
- Gloves and safety glasses
- A service manual specific to your vehicle (highly recommended!)
Try This First: How to Flush a Clogged Heater Core
If your heat is weak but you’re not seeing coolant leaks or a sweet smell, the core may just be clogged with rust and scale rather than actually failed — and a backflush can restore flow for a fraction of the cost of a full replacement. Here’s the basic process:
- Drain the cooling system: Let the engine cool completely, then drain the coolant into a recovery pan.
- Disconnect both heater hoses: Locate the two heater hoses at the firewall and disconnect them from the heater core.
- Attach a backflush tool: Connect a dedicated heater core backflush tool (or a garden-hose-and-compressed-air setup) to one hose fitting.
- Flush in the reverse direction: Run water — combined with air pressure, if your tool supports it — backward through the core to dislodge rust and scale, letting it drain out the opposite hose until the water runs clear.
- Reconnect, refill, and bleed: Reattach both hoses, refill with the correct coolant mix, and bleed air from the system before test-driving.
A backflush won’t fix an internally leaking heater core (that requires replacement), but it’s worth trying first for weak-heat symptoms with no visible leak.
Best Heater Core Flush Kit Pick

Lisle 60900 Heater Core Hose Backflush Tool
A single-purpose tool built to attach to a garden hose and backflush a clogged heater core exactly the way described above.
- Best for: DIYers trying a backflush before paying for full replacement
- Why we picked it: Lisle is a long-standing professional tool brand and this tool is purpose-built for exactly this job
- Main drawback: Water-only — no compressed air assist, so heavier clogs may need a stronger flush gun
Compare more heater core repair tools
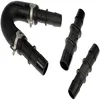 Option 1 Dorman 626-001 Heater Core Bypass Kit
|
 Option 2 Prestone AF2100 50/50 Antifreeze, 1 Gal
|
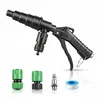 Option 3 QUFYSK Air + Water Coolant Flush Gun
|
As an Amazon Associate we earn from qualifying purchases.
Heater Core Bypass: A Temporary Fix, Not a Repair
If the core is actively leaking and you need the car driveable right away, a heater core bypass kit reroutes coolant around the core entirely instead of through it. It works by disconnecting both heater hoses at the core and joining them together with a length of pipe, so coolant keeps circulating through the engine without ever passing through the leaking core.
A bypass stops the leak and the sweet-smelling vapor, and it typically costs $100 to $300 — far less than a $850–$1,950 replacement. The trade-off: it completely disables cabin heat and windshield defrost until the core is replaced and reconnected, so it’s a stopgap for warm-weather driving, not a real fix.
When to Call a Professional
Given the extensive disassembly required, if you’re not comfortable working with automotive interiors or don’t have the time, hiring a qualified mechanic is often the best option. The cost of labor can be significant because of the time involved, but it ensures the job is done correctly and safely, especially dealing with sensitive components like airbags or complex wiring harnesses. A reputable shop, like one recommended by organizations like the National Institute for Automotive Service Excellence (ASE), will have the expertise and specialized tools needed.
Heater Core vs. Radiator: What’s the Difference?
It’s easy to confuse the heater core with the main radiator, as both handle heat exchange using coolant. However, they serve distinct purposes and are located in very different places. For more on keeping the main radiator itself in good shape, see how to clean a car radiator the right way.
| Feature | Heater Core | Radiator |
|---|---|---|
| Primary Function | Heats the cabin air. Dissipates a small amount of engine heat into the cabin. | Cools the engine coolant by dissipating heat into the outside air. |
| Location | Inside the dashboard, within the HVAC system. | At the front of the vehicle, typically behind the grille. |
| Size | Much smaller, designed for interior heating. | Much larger, designed for significant heat dissipation to the external environment. |
| Airflow Source | Blower motor (interior fan). | Vehicle’s forward motion and/or a dedicated cooling fan. |
| Coolant Flow Context | Part of the engine’s cooling circuit, branching off to warm the cabin. | The primary component for releasing excess heat from the entire cooling system to the atmosphere. |
Think of it this way: the main radiator is like the big, workhorse air conditioner for your car’s engine, keeping it from getting too hot. The heater core is like a small, personal heater inside your house, using some of that engine’s residual warmth to make your living space (the car cabin) comfortable.
Preventative Measures to Extend Heater Core Life
While heater cores can fail due to age or manufacturing defects, proper maintenance of your car’s cooling system can significantly prolong its life. Here are some key preventative measures:
- Regular Coolant Flushes: Follow your vehicle manufacturer’s recommended schedule for flushing and replacing the coolant. Dirty or old coolant can become corrosive and clog passages within the heater core. A coolant flush and refill is a recommended maintenance item.
- Use the Correct Coolant: Always use the type and mixture of coolant recommended in your owner’s manual. Using the wrong type can lead to corrosion or chemical reactions that damage cooling system components, including the heater core. You can often find suitable coolants at auto parts stores like O’Reilly Auto Parts.
- Maintain Proper Coolant Level: Ensure your coolant reservoir is always at the correct level. Low coolant can lead to overheating and stress on all parts of the cooling system. If you’re unsure how coolant level relates to overheating in general, see whether turning the heater on helps an overheating car.
- Address Leaks Promptly: If you notice any coolant leaks, even small ones, get them repaired immediately. A leak elsewhere in the system can put extra strain on other components or indicate a failing part.
- Avoid Running on Low Coolant: Never run your engine for extended periods if you know the coolant level is low.
By taking these steps, you help keep the entire cooling system in good working order, which in turn protects the heater core from unnecessary stress and potential damage. For a broader look at what actually regulates cabin temperature beyond just the heater core, see what controls heat in a car.
Frequently Asked Questions (FAQs)
If My Heater Is Blowing Cold Air, Is It Always the Heater Core?
Not always. While a faulty heater core is a common cause, cold air can also be due to a low coolant level, a stuck thermostat, a bad water pump, or a problem with the blend door inside your HVAC system that directs air. Your mechanic can help diagnose the exact cause.
How Much Does It Cost to Replace a Heater Core?
Total cost typically runs $850 to $1,950 at an independent shop, with the U.S. national average landing at $1,370–$1,902 per RepairPal’s 2026 estimator — parts cost $494–$617 and labor runs $876–$1,285, since most of the dashboard has to come apart to reach the core. Luxury and German vehicles often exceed $2,500. Shop around for quotes, and ask whether a backflush or bypass could be tried first.
Can I Drive My Car With a Leaking Heater Core?
It’s generally not recommended to drive for long periods with a leaking heater core. The coolant leak can lead to your engine overheating if the coolant level drops too low. Additionally, the sweet-smelling coolant vapor can be irritating or even harmful to breathe in over time. If you must drive, keep a close eye on your temperature gauge and pull over if it starts to climb.
What Is a Heater Core Flush? Is It the Same as a Coolant Flush?
A heater core flush specifically targets the heater core to remove rust and scale blockages, usually by running water (and sometimes compressed air) backward through it with a dedicated backflush tool. A coolant flush is a broader process that drains and replaces all the coolant throughout the entire cooling system — engine, radiator, and heater core together — rather than targeting the heater core alone.
How Long Does It Take to Replace a Heater Core?
Most shops need 4 to 10 hours of labor. Compact cars typically take 5–6 hours, sedans 6–7 hours, SUVs 7–8 hours, and pickup trucks 8–10 hours, since larger dashboards and more HVAC ductwork mean more disassembly to reach the core.
What Is a Heater Core Bypass, and Is It a Real Fix?
A heater core bypass reroutes coolant around a leaking core instead of through it, using a length of pipe to join the two heater hoses together. It’s not a real fix — it’s a $100–$300 stopgap that stops the leak and keeps the engine cooling system working, but it completely disables cabin heat and defrost until the core is actually replaced.
Can I Flush a Heater Core Myself?
Yes, if the symptom is weak heat with no visible leak or sweet smell — a clog from rust and scale is often fixable with a DIY backflush using a dedicated tool. Drain the coolant, disconnect both heater hoses at the firewall, run water (and air, if your tool supports it) backward through the core until it runs clear, then reconnect, refill, and bleed the system. A backflush won’t fix an internal leak, which requires replacement instead.
The heater core is a small part with an outsized job — get the diagnosis right before paying for a repair. If your symptoms point to a clog rather than a leak, try a backflush first; if you need to keep driving with a leaking core, a bypass buys time without the full replacement cost. And when it does need replacing, expect the bill to reflect labor hours, not the part itself.
Products related to this article
Sponsored / affiliate links. As an Amazon Associate I earn from qualifying purchases. I may earn additional commission from eligible campaigns.