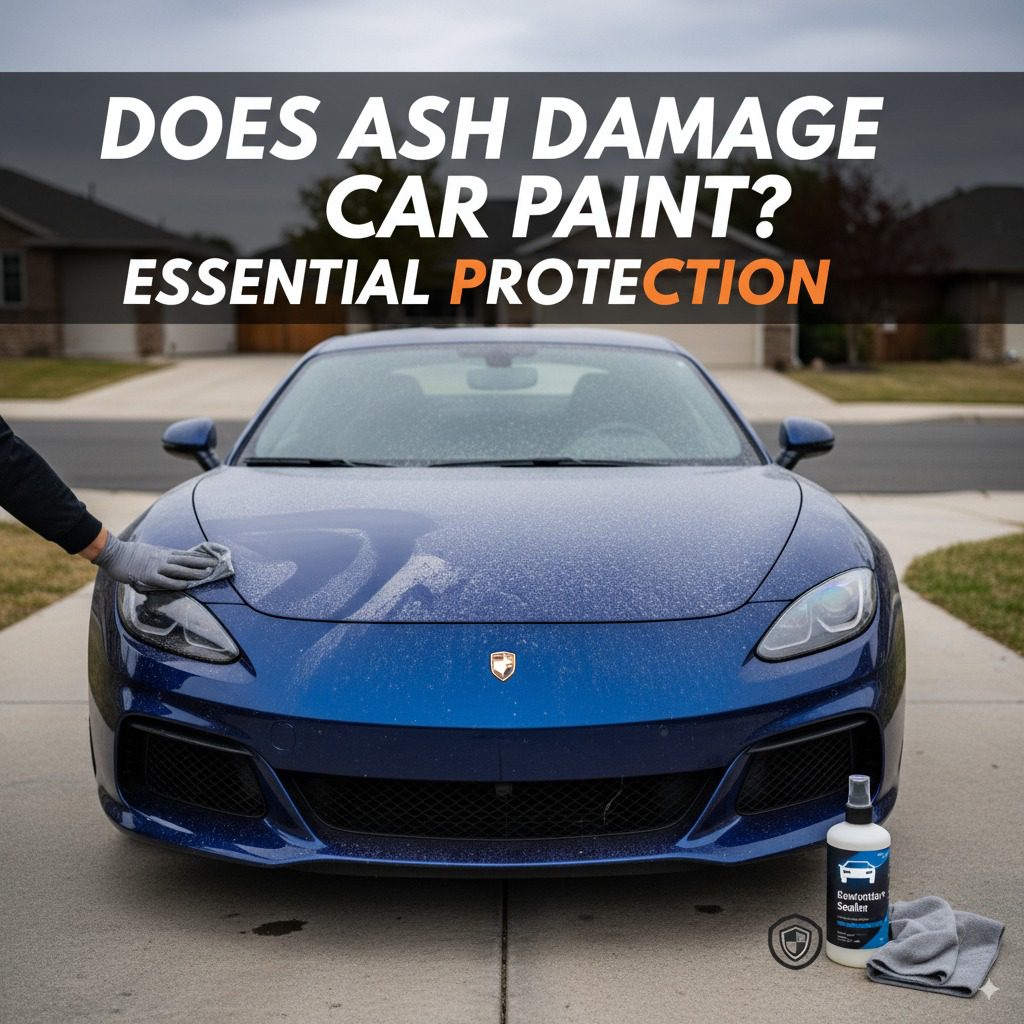
Does Ash Damage Car Paint? Essential Protection
Yes, ash can definitely damage your car’s paint. Depending on the type of ash and how long it sits on your vehicle, it can cause etching, scratching, and dullness. Promptly and gently cleaning your car after ash exposure is crucial for essential protection.
Dealing with ash after a wildfire or even a fireplace incident can be a real headache for car owners. You might step outside to find your once-sparkling ride covered in a fine, gray dust. It looks harmless enough, but the question many ask is: does ash damage car paint? The short answer is yes, it can. Ash isn’t just dirt; it’s a collection of fine particles, often with abrasive qualities and sometimes acidic components, that can cling to your car’s surface. Ignoring it can lead to problems that are harder and more expensive to fix later. But don’t worry! With the right approach, you can safely clean your car and protect its paintwork. We’ll walk you through exactly what you need to know and how to do it, step by step.
Understanding Ash and Your Car’s Paint
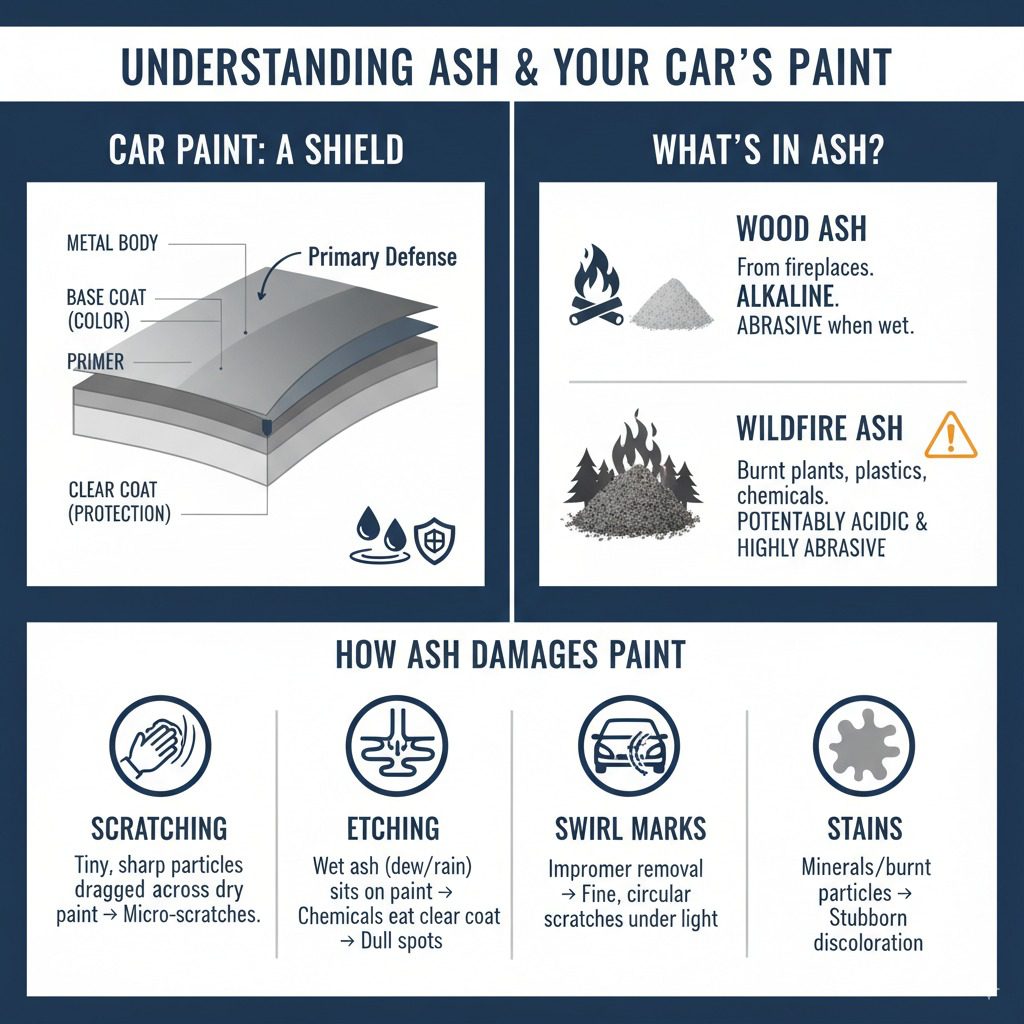
To truly protect your car, it helps to understand why ash is a concern for your paint. Car paint is a complex system, typically consisting of several layers: the base coat (which provides the color), and a clear coat on top. This clear coat is your car’s primary defense against the elements. It’s tough, but it’s not invincible.
What’s in Ash?
Ash is the powdery residue left after something burns. The composition of ash varies greatly depending on what was burned:
- Wood Ash: This is common from fireplaces or bonfires. It’s alkaline and can become abrasive when mixed with moisture.
- Wildfire Ash: This can be much more aggressive. Wildfire ash can contain various materials like burnt vegetation, plastics, and chemicals, making it potentially acidic and highly abrasive.
How Ash Can Damage Paint
The damage ash can cause to your car’s paint usually happens in a few ways:
- Scratching: Ash particles are tiny but can feel sharp and gritty. When you try to wipe ash off a dry surface, you’re essentially dragging these tiny abrasives across your paint, creating micro-scratches. Over time, these accumulate and make the paint look dull.
- Etching: If ash sits on the paint for a long time, especially if it becomes wet (from dew or rain), its chemical properties can start to eat into the clear coat. This is known as etching. You might see dull spots or discolored areas where the ash was concentrated. Acidic ash from wildfires is particularly prone to causing etching.
- Swirl Marks: These are the fine, circular scratches you often see on car paint under direct light. Improperly removing ash is a common cause of swirl marks.
- Stains: In some cases, particularly with wildfire ash, minerals and other burnt particles can leave behind stubborn stains that are difficult to remove.
The Danger of “Dry Wiping” Ash
This is perhaps the most critical point for anyone dealing with an ash-covered car. When you see ash on your car, your first instinct might be to grab a rag or a brush and wipe it off. Please, resist this urge! This is the fastest way to cause serious damage.
Here’s why dry wiping is a no-go:
- Abrasive Action: As mentioned, ash particles are tiny, hard grains. When you wipe, you’re pushing these grains around on the paint surface. Think of it like sanding your car with super-fine sandpaper.
- Embedded Particles: If the ash is slightly damp or the paint is warm, particles can stick. Wiping can then dig these particles deeper into the clear coat.
Imagine trying to clean a dusty table with a dry cloth. You’re likely just smearing the dust around and potentially scratching the surface. Car paint is much more delicate than a sturdy table!
Essential Tools for Ash Removal
Before you even think about touching your car, gather the right supplies. Using the correct tools makes the job easier, safer for your paint, and more effective. You don’t need a garage full of professional detailing gear; a few key items will do.
Here’s what you’ll need:
- Water Source: A hose with a spray nozzle is ideal. If you don’t have a hose, you can use several buckets of clean water.
- Gentle Car Wash Soap: Choose a pH-neutral car wash soap. Avoid household detergents like dish soap, which can strip protective waxes and damage your clear coat. Look for products specifically labeled for automotive use. A good example is Meguiar’s Gold Class Car Wash or similar.
- Wash Mitts: Use soft, plush microfiber wash mitts. These are designed to trap dirt particles away from the paint surface. Have at least two mitts: one for the upper parts of the car and one for the lower, dirtier parts.
- Drying Towels: High-quality microfiber drying towels are essential. They are highly absorbent and soft, minimizing the risk of scratches during the drying process. Look for “waffle weave” or “plush” microfiber drying towels.
- Buckets: Use at least two 5-gallon buckets. One for your soapy water and one for rinsing the wash mitt. This is part of the “two-bucket wash method,” which is crucial for preventing scratches.
- Wheel Cleaner and Brush (Optional but Recommended): Ash can get caked on wheels. A dedicated wheel cleaner and a soft-bristled brush will help tackle this.
- Pressure Washer (Optional): If you have access to one, a pressure washer on a low setting can be very effective for rinsing off loose ash before you start washing. Make sure to use a wide fan spray and keep a safe distance.
Step-by-Step Guide: Safely Removing Ash
Now that you have your tools and understand the risks, let’s get to the actual cleaning process. This method prioritizes safety for your car’s paint.
Step 1: Rinse, Rinse, Rinse!
This is the most crucial step. Before you touch your car with a wash mitt, you need to remove as much of the loose ash as possible with water. Use your hose or pressure washer (on a low setting and wide spray) to thoroughly rinse the entire vehicle. Start from the roof and work your way down, allowing the water to carry the ash away from the surface. Pay attention to panel gaps, trim, and wheels where ash can accumulate.
Why this step is vital: This pre-rinse removes the majority of the abrasive ash particles, significantly reducing the risk of scratching your paint during the washing phase.
Step 2: The Two-Bucket Wash Method
This technique is a game-changer for preventing scratches and swirl marks. You’ll need your two buckets.
- Fill one bucket with clean water. This is your rinse bucket.
- Fill the second bucket with water and add your pH-neutral car wash soap.
- Dip your clean wash mitt into the soapy water bucket.
- Gently wash one section of your car at a time (e.g., the roof, one door). Use straight-line motions, not circles, to minimize scratching.
- After washing a section, thoroughly rinse the wash mitt in the clean water (rinse bucket). This removes the dirt and ash trapped in the mitt.
- Now, dip the clean mitt back into the soapy water bucket and proceed to the next section of your car.
- Repeat this process until the entire car is washed. Always work from top to bottom.
This method ensures you’re not reintroducing dirt and ash back onto your paint with each pass of the mitt.
Step 3: Rinse Away the Soap
Once you’ve washed the entire car, rinse it thoroughly with clean water. Again, start from the top and work your way down. Ensure all soap residue is removed. You can do a final “sheeting” rinse by removing the spray nozzle from your hose and letting water flow freely over the car; this can help reduce water spots.
Step 4: Gentle Drying
Never let your car air dry, especially after a wash, as this can lead to water spots and streaks. Use clean, high-quality microfiber drying towels.
- Gently lay a drying towel over a section of the car.
- Pat or blot the water away.
- Alternatively, you can use a gliding motion, but ensure minimal pressure.
- As the towel becomes damp, switch to a fresh, dry one. Avoid using the same towel over the entire car if it becomes saturated.
If possible, a leaf blower or a dedicated car dryer can also be used for a touch-free drying experience, further minimizing contact with the paint.
Step 5: Clean the Wheels and Tires
Ash can be particularly stubborn on wheels. After you’ve rinsed the car thoroughly, address the wheels. Use a dedicated wheel cleaner (ensure it’s safe for your wheel type – check manufacturer recommendations, like those found on CustomShop.com’s guide to wheel cleaners) and a soft wheel brush. Rinse them thoroughly. Tires can be cleaned with your car wash soap and mitt or a separate brush.
Advanced Protection: What to Do After Washing
Once your car is clean and dry, it’s the perfect time to apply a layer of protection. This will make future cleaning easier and shield your paint from environmental contaminants.
Waxing or Sealant Application
Applying a quality car wax or paint sealant adds a sacrificial layer to your clear coat. This layer will block UV rays, repel dirt and water, and provide scratch resistance.
- Waxes: Offer a deep shine and warm glow but typically last 1-3 months. Carnauba waxes are popular for their aesthetic qualities.
- Paint Sealants: Are synthetic polymers that offer longer-lasting protection, often 4-6 months or more, and a slick, durable finish.
- Ceramic Coatings: For the ultimate protection, a ceramic coating can last for years, offering incredible hardness, chemical resistance, and hydrophobic properties. However, these often require professional application or significant DIY skill.
Application is usually straightforward: apply a thin, even layer with an applicator pad, let it haze according to product instructions, and then buff off with a clean microfiber towel.
Ceramic Spray Coatings
For an easier, quicker option that still offers significant protection, consider a ceramic spray coating. These are designed to be applied like a spray wax but offer durability closer to sealants. They are excellent for topping up existing protection or as a standalone protective layer, especially after a thorough ash cleaning.
When to Seek Professional Help
While most ash contamination can be handled with a careful DIY approach, there are times when professional help is the best option.
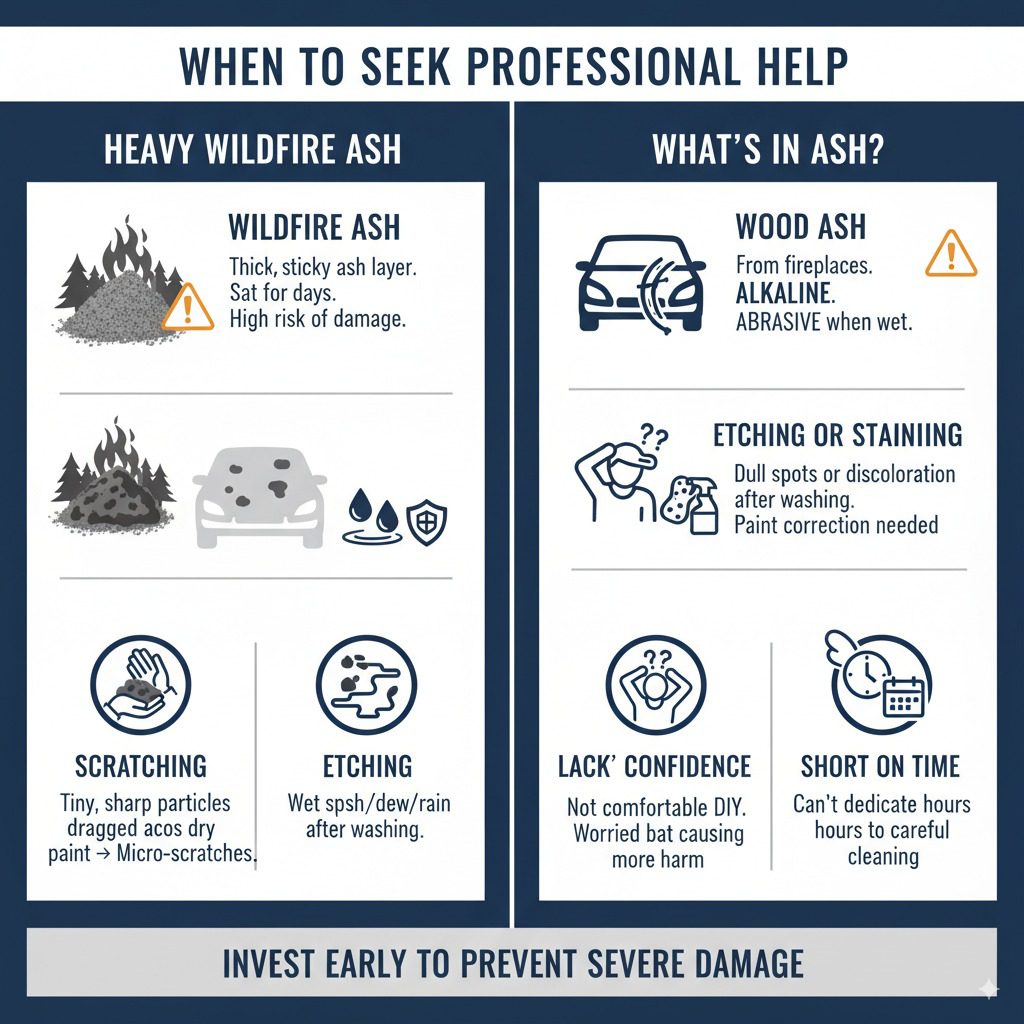
- Heavy Wildfire Ash: If your car was particularly inundated with thick, sticky wildfire ash, especially if it sat for days, the risk of damage is higher. A professional detailer has specialized tools and knowledge to handle severe contamination without making it worse.
- Etching or Staining: If you notice dull spots or discoloration on your paint that don’t come off with washing, it might be etched. A professional can often correct this through paint correction (polishing).
- Lack of Confidence or Time: If you’re not comfortable with the process or simply don’t have the time, a professional detailer can ensure your car is cleaned and protected correctly.
It’s always better to invest in professional help early than to try and fix severe damage later.
Frequent Questions about Ash and Car Paint
Q1: Can ash from a fireplace damage my car?
Yes, ash from a fireplace can damage your car’s paint. While often less aggressive than wildfire ash, fireplace ash is alkaline and abrasive. If left on the paint, especially when wet, it can lead to etching and scratching. Always rinse and wash your car thoroughly after exposure.
Q2: How quickly should I wash my car after it’s covered in ash?
As soon as possible is best. The longer ash sits on your car, the more time it has to potentially etch into the paint, especially if moisture is present. Aim to rinse and wash your car within 24-48 hours of exposure.
Q3: Is it okay to use a car wash vacuum to suck up ash?
No, it’s not recommended to use a vacuum to suck up ash from your car’s paint. Regular vacuums, even car wash vacuums, can have abrasive parts or generate static that can pull particles in a way that causes scratches. The best method is always a thorough rinse with water first.
Q4: My car is covered in ash, and it rained. What should I do?
Rain mixed with ash can be particularly damaging as it creates a more potent etching solution. You should wash your car as soon as the rain stops. Follow the two-bucket wash method very carefully, ensuring a thorough rinse to remove the ash-rain mixture.
Q5: Can I protect my car before ash falls?
Yes! Having a good coat of wax, sealant, or ideally a ceramic coating on your car before ash exposure will provide a better barrier. These protective layers make it easier to rinse the ash away and prevent it from bonding directly with your clear coat.
Q6: What if the ash has already caused dull spots or scratches?
If you notice dull spots (etching) or visible scratches from ash, a simple wash won’t fix it. You’ll likely need to perform paint correction. This involves using a mild abrasive polish to level the clear coat around the damage. For minor issues, a DIY polishing compound might work, but for significant damage, consulting a professional detailer is recommended.
Conclusion: Keep Your Car Shining
Ash may seem like a simple nuisance, but as we’ve seen, it can pose a genuine threat to your car’s appearance and paint integrity. By understanding that ash is abrasive and can even be chemically reactive, you can approach the situation with the right precautions. The key takeaway is simple: never dry wipe ash off your car. Always start with a thorough rinse to lift as much of the particulate matter as possible. Then, utilize the two-bucket wash method with a gentle soap and soft mitts to safely clean the remaining residue. Proper drying with clean microfiber towels and applying a protective wax, sealant, or coating afterwards will further safeguard your vehicle’s finish.
Remember, taking the time for these steps not only protects your investment but also saves you from costly repairs down the line. By following this guide, you can confidently handle ash contamination and keep your car looking its best, even after the most unexpected environmental challenges. Happy detailing!