How to Clean a Car Radiator the Right Way (Full Guide)
Cleaning a car radiator is a straightforward maintenance task that prevents engine overheating and extends the life of your vehicle. This guide walks you through the complete process step by step, from gathering supplies to safely flushing the system at home.
Simply put, cleaning your car radiator means flushing out old coolant, removing debris from the fins, and refilling with fresh antifreeze. Do this every 30,000 miles or as your owner’s manual recommends to keep your engine cool and avoid costly breakdowns.
Key Takeaways
- Cleaning a car radiator prevents overheating, the #1 cause of summer breakdowns according to AAA.
- You need basic tools: a wrench, drain pan, new coolant, distilled water, and a soft brush.
- Always flush with distilled water, not tap water, to avoid mineral deposits inside the system.
- Dispose of old coolant responsibly — it’s toxic to pets, children, and the environment.
- Inspect hoses and the radiator cap while you work to catch small problems early.
What You Need to Clean a Car Radiator
Before you start, gather everything required for the job. Having the right tools on hand makes the process faster and prevents frustrating trips to the auto parts store.
The supplies fall into two categories: tools and consumables. Most items are inexpensive and reusable.
Tools and Equipment
- Drain pan (at least 2 gallons capacity)
- Socket wrench or screwdriver (depending on your drain plug type)
- Funnel
- Soft-bristle brush or compressed air gun
- Safety gloves and eye protection
- Shop rags or paper towels
- Garden hose (for rinsing the fins only)
Consumables and Fluids
- New coolant/antifreeze (check your owner’s manual — use the correct type)
- Distilled water (1–2 gallons)
- Radiator flush additive (optional, for heavy deposits)
- New radiator cap (recommended preventatively)
- New coolant reservoir cap (optional)
Tip: Use distilled water instead of tap water. Tap water contains minerals that can form scale inside the radiator and engine block, reducing heat transfer and clogging passages over time.
According to the Car Care Council, cooling system problems account for nearly 47% of all vehicle breakdowns. Many of these failures start with neglected coolant that becomes acidic and loses its protective properties.
How to Clean a Car Radiator Step by Step
Follow these steps carefully. Each one builds on the last, and skipping steps can leave debris or air pockets in the system. Work on a cool engine only — never open the radiator cap when the engine is hot.
Step 1: Prepare the Vehicle
Park on a level surface and let the engine cool completely — at least one hour after driving. Place the drain pan under the radiator drain valve. Most radiators have a petcock (plastic drain valve) at the bottom corner.
If yours does not, you may need to disconnect the lower radiator hose.
Step 2: Drain the Old Coolant
Turn the drain valve counterclockwise slowly. The old coolant will flow into the drain pan. Some systems require removing the radiator cap to vent air and speed up draining.
Once fully drained, close the valve by turning it clockwise — do not overtighten.
Warning: Coolant is highly toxic. Keep it away from children and pets. Do not pour it down a drain, onto the ground, or into a storm sewer. Collect it in a sealed container and take it to an auto parts store or hazardous waste facility.
Step 3: Flush with Distilled Water
Close the drain valve, then fill the radiator with distilled water through the filler neck. Replace the cap and run the engine with the heater on “hot” for 10–15 minutes. This circulates the water through the engine block and heater core, loosening deposits.
Let the engine cool, then drain the water. Repeat this process until the drained water runs clear.
Step 4: Add Radiator Flush (Optional)
If you see heavy rust or scale in the drained fluid, use a chemical radiator flush additive. Follow the product instructions — most require adding the flush to the water, running the engine for a specified time, then draining again. After the flush, rinse with distilled water one more time.
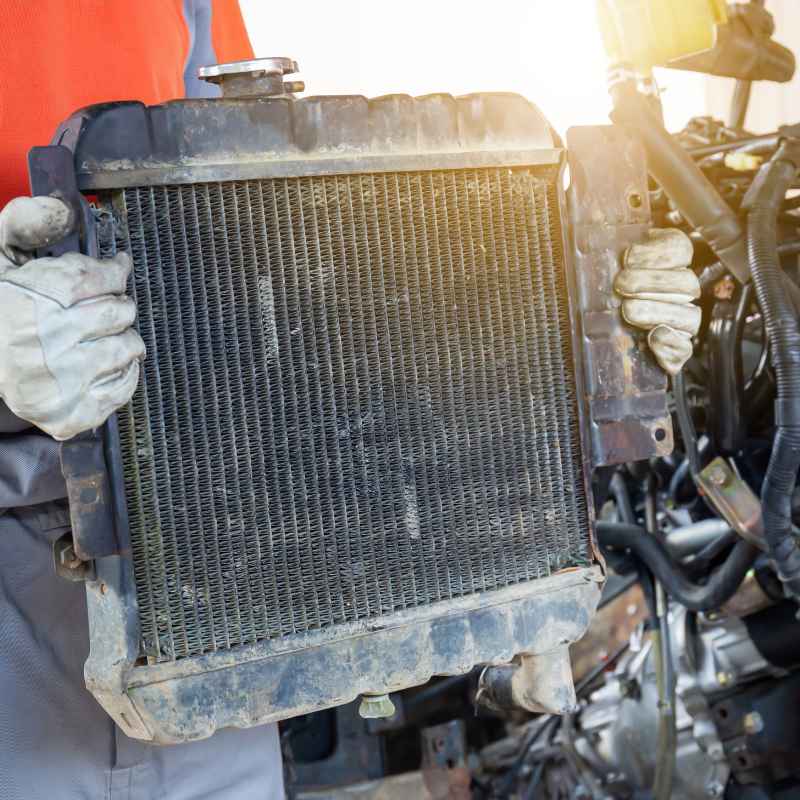
Step 5: Clean the Radiator Fins
Use a soft brush or compressed air (blowing from the engine side outward) to remove bugs, dirt, and debris from the fins. Do not use a pressure washer — it can bend the thin aluminum fins and block airflow. Bent fins can be straightened carefully with a fin comb.
Step 6: Refill with Fresh Coolant
Mix the new coolant with distilled water according to the ratio on the bottle — typically 50:50 for most vehicles. Pour the mixture into the radiator using a funnel until full. Then fill the coolant reservoir to the “Full” line.
Replace the radiator cap and reservoir cap securely.
Step 7: Bleed Air from the System
Run the engine with the heater on “hot” and the radiator cap off. Watch for bubbles rising in the filler neck. Add more coolant mixture as the level drops.
Once the air stops bubbling and the coolant level stabilizes, replace the cap. Test drive the vehicle and check the reservoir level again after the engine cools.
- Always work on a cold engine to avoid burns.
- Use distilled water for every flush and mix cycle.
- Never reuse old coolant — it loses corrosion inhibitors.
- Replace the radiator cap if it shows cracks or rust.
- Check hoses for bulges, cracks, or soft spots while the system is empty.
The Automotive Maintenance and Repair Association reports that 90% of cooling system failures are preventable with regular maintenance. Proper flushing and refilling at recommended intervals is the single most effective prevention.
Why You Should Clean Your Radiator Regularly
Coolant does more than prevent freezing. It contains corrosion inhibitors that protect aluminum, iron, and plastic components inside the cooling system. Over time, these additives break down and the coolant becomes acidic.
Old coolant turns dark brown or rusty and begins to deposit sludge in the radiator core, heater core, and engine passages. This sludge reduces heat transfer and forces the cooling fan to run more often, wasting fuel and putting extra strain on the water pump — and it’s often the hidden reason a car’s heater blows cool air even after properly heating the car takes longer than it should in winter.
- Prevents engine overheating: A clean radiator transfers heat efficiently, keeping the engine in its optimal temperature range.
- Extends water pump life: Clean coolant lubricates the water pump seal. Dirty coolant wears it out faster.
- Protects against corrosion: Fresh coolant neutralizes acids that eat away at metal components from the inside.
- Improves heater performance: Sludge in the heater core reduces cabin heat output in winter.
- Reduces breakdown risk: Cooling system failure is a leading cause of being stranded on the road.
Consumer Reports notes that neglecting cooling system maintenance can reduce engine life by up to 25%. A simple radiator flush every two years or 30,000 miles costs under $50 in supplies — far less than a new radiator or engine.
Common Mistakes When Cleaning a Car Radiator
Even experienced DIYers make errors that reduce the effectiveness of a radiator flush. Avoid these common pitfalls.
| Mistake | Why It Hurts | Fix |
|---|---|---|
| Using tap water for the flush | Minerals leave scale deposits that clog passages | Always use distilled water |
| Opening the radiator cap when hot | Pressurized coolant can cause severe burns | Wait for engine to cool completely |
| Skipping the heater core flush | Sludge stays trapped, reducing heater output | Run engine with heater on during flush |
| Not bleeding air after refill | Air pockets cause overheating and poor heater performance | Bleed system with cap off and engine running |
| Mixing different coolant colors | Chemical reactions can form gel that clogs the system | Use the exact type specified in your manual |
Each of these mistakes is easy to avoid with a little preparation. The extra few minutes spent on correct procedures can save you hundreds of dollars in repairs later.
Important: If your coolant is orange, pink, blue, or purple, do not assume it is interchangeable with green coolant. Many modern vehicles use OAT (Organic Acid Technology) or HOAT (Hybrid Organic Acid Technology) formulations that must not be mixed with conventional green coolant.
How Often Should You Flush Your Radiator?
The ideal flush interval depends on the type of coolant your vehicle uses and your driving conditions. Check your owner’s manual first — it overrides any general recommendation.
As a rule of thumb, most vehicles with conventional green coolant need a flush every 30,000 miles or 2 years. Vehicles with extended-life coolant (usually orange, pink, or purple) can often go 100,000 miles or 5 years before the first change.
- Conventional green coolant: Every 30,000 miles or 2 years.
- Extended-life (OAT) coolant: Every 100,000 miles or 5 years initially, then every 50,000 miles.
- HOAT coolant: Every 60,000 miles or 4 years — check the specific product label.
- Severe driving conditions: Frequent towing, extreme heat, or stop-and-go traffic halves the recommended interval.
- Low coolant level: If you top off frequently, flush more often because topping introduces contaminants and dilutes additives.
According to NAPA Auto Parts, coolant should be tested annually for freeze protection and pH level. A simple test strip from any auto parts store takes 30 seconds and tells you if the coolant still has adequate corrosion protection.
If the coolant looks rusty, milky, or has particles floating in it, flush immediately regardless of mileage. These signs indicate contamination or internal engine damage that needs attention.
Signs Your Radiator Needs Cleaning
Your vehicle gives clear warnings when the cooling system needs maintenance. Recognizing these signs early can prevent a breakdown.
- Temperature gauge runs hotter than normal — even slightly higher readings indicate reduced cooling capacity.
- Coolant appears dark, rusty, or oily — healthy coolant is bright and translucent in its original color.
- Sweet smell from the hood — coolant vapor may indicate a leak or that the coolant is breaking down.
- Heater blows cold air — sludge in the heater core blocks warm coolant from circulating through it.
- Coolant level drops frequently — the system may be pushing old coolant out of the overflow due to blockages.
- Visible debris on radiator fins — bugs, dirt, and road salt reduce airflow and cooling efficiency.
- Cooling fan runs constantly — the system tries to compensate for poor heat transfer from a dirty radiator.
Any one of these signs is a good reason to inspect and clean your radiator. Ignoring them typically leads to overheating, which can warp the cylinder head or blow the head gasket — repairs costing several thousand dollars.
Chemical Flush vs. Water Flush: Which Works Better?
You have two options when flushing the radiator: plain distilled water or a chemical flush additive. The right choice depends on the condition of your current coolant.
| Feature | Water Flush | Chemical Flush |
|---|---|---|
| Cost | Free (just water) | $8–$15 per bottle |
| Time required | 20–30 minutes | 45 minutes to 1 hour |
| Effectiveness on light deposits | Good | Good |
| Effectiveness on heavy rust/scale | Poor | Excellent |
| Safety | Safe on all systems | Safe when used per instructions |
| Residue risk | None | Must be fully drained |
For routine maintenance where the coolant is still relatively clean, a water flush with distilled water is sufficient. For vehicles with neglected coolant showing rust, scale, or sludge, a chemical flush additive breaks down deposits that water alone cannot remove.
Tip: If you are unsure about the condition of your system, start with a water flush and see how clean the drained water is. If it runs clear, you are good. If it looks dirty or rusty, follow up with a chemical flush before refilling with fresh coolant.
Final Thoughts
Cleaning a car radiator is a simple DIY job that protects your engine and saves you money. Flush with distilled water, use the correct coolant type, and stick to the interval in your owner’s manual. A clean radiator keeps your engine cool, your heater working, and your car reliable for years to come.