How To Clean A Car Radiator Without Removing It (Easy Way)
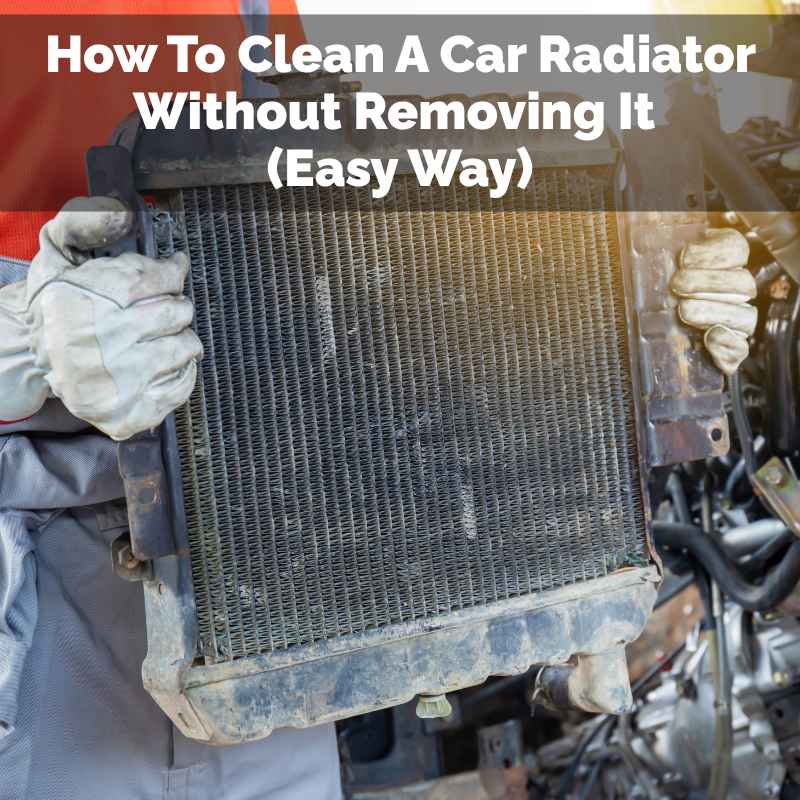
Cleaning a car radiator without removal is possible by flushing the system with water and cleaner. This process helps remove debris and coolant buildup from the outside and inside. It’s a DIY-friendly task that can prevent overheating and extend your radiator’s life.
The goal is to restore its cooling efficiency.
Understanding Your Car’s Radiator
Your car’s radiator is a key part of its cooling system. It works hard to keep your engine from getting too hot. Think of it as your car’s personal air conditioner.
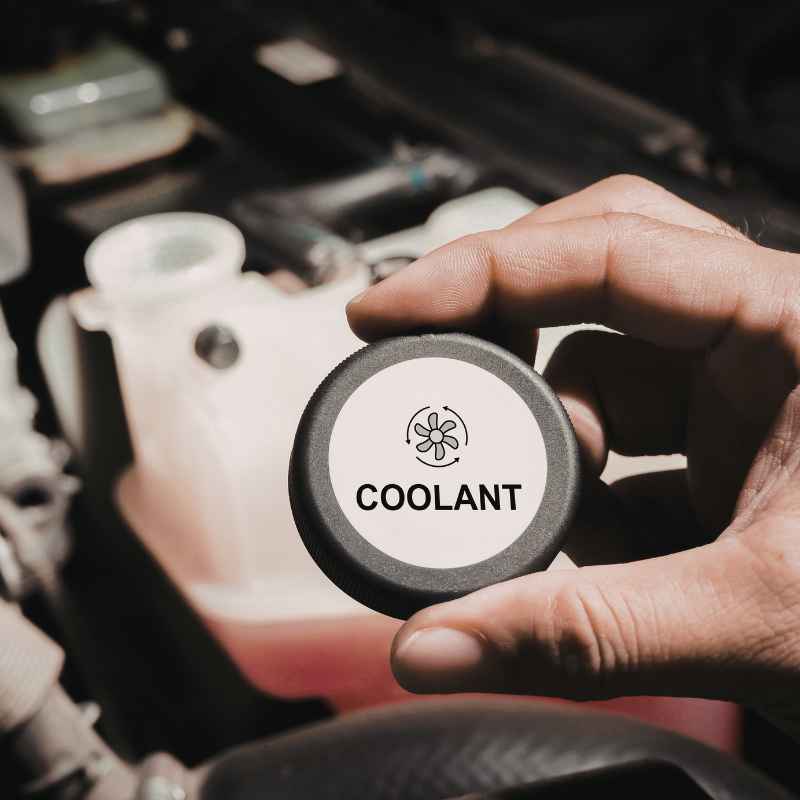
It uses coolant, a special mix of water and antifreeze. This fluid circulates through the engine. It picks up all the heat the engine makes.
Then, the hot coolant flows to the radiator.
The radiator has many thin metal fins. These fins are designed to let air flow through them. As you drive, air passes over these fins.
This air cools the hot coolant inside. The cooled coolant then goes back to the engine. This cycle repeats constantly.
It keeps your engine running at its ideal temperature. This prevents serious damage.
But over time, things can go wrong. The outside of the radiator can get clogged. Leaves, bugs, dirt, and road grime can build up.
This blocks the airflow. If air can’t get through the fins, the radiator can’t cool the coolant well. This is when your car starts to overheat.
The inside can also get clogged with rust and sediment. This stops coolant from flowing freely.
Why Cleaning the Radiator Matters
A clean radiator is vital for your car’s health. Overheating is a major engine killer. It can cause warped cylinder heads, blown head gaskets, and other costly repairs.
Regular cleaning is preventative care. It’s like brushing your teeth to avoid cavities. You’re stopping small problems before they become big, expensive ones.
When the radiator’s fins are blocked externally, the engine has to work harder. This can affect fuel efficiency. Your car might not perform as well.
You might notice a dip in gas mileage. This is because the engine is struggling to stay cool. It’s not running at its best efficiency.
Internally, rust and scale can form. This happens as coolant ages or if the wrong type is used. These deposits act like insulation.
They stop heat from transferring from the coolant to the radiator fins. This reduces the cooling capacity. It also makes it harder for the coolant to flow.
This can lead to hot spots in the engine.
So, keeping both the outside and inside of your radiator clean ensures optimal cooling. It means your engine stays at the right temperature. It helps your car run smoother.
It can even save you money on gas and repairs down the line. It’s a simple maintenance task that offers big rewards.
Personal Experience: The Day the Fan Wouldn’t Stop
I remember one sweltering summer day, driving on the highway. My trusty old sedan, Sparky, started acting up. The temperature gauge was climbing way past normal.
I thought, “Oh no, not now!” The electric cooling fan seemed to be running non-stop, even when I’d turned the car off for a few minutes. That was a bad sign.
I pulled over at the next exit. I popped the hood. The smell of hot metal and something faintly sweet, like burnt syrup, filled the air.
It was the smell of hot coolant. I could see the radiator through the grille. It looked like it had a full blanket of bugs and leaves stuck to it.
It was a mess. I remember feeling a knot of panic in my stomach. Was this a quick fix, or a tow truck job?
I had always assumed cleaning the radiator meant draining all the coolant and taking the whole thing out. That sounded like a job for a mechanic. I was already imagining the bill.
But then I thought about the bugs. They were so thick! It felt like they were stopping any air from getting through.
I wondered if just cleaning the outside could make a difference. I decided to give it a shot before calling for help. It was a gamble, but I was hoping for a simple solution.
How to Clean Your Radiator Exterior
Cleaning the outside of your radiator is often the easiest part. You can do this with simple tools you likely have at home. It’s all about clearing away the debris that blocks airflow.
This allows your radiator to breathe freely again.
Gather Your Supplies
First, let’s get what you need ready. You’ll want a garden hose with a spray nozzle. A soft brush or a car wash mitt can also be helpful.
For tougher grime, a mild automotive degreaser or a specialized radiator cleaner is good. Always check the cleaner’s label to make sure it’s safe for your car’s materials.
Safety first! Make sure your car’s engine is completely cool. Never try to clean a hot radiator.
You could get severely burned by hot coolant or steam. Also, wear gloves and eye protection. This protects you from dirt and any cleaning chemicals.
The Cleaning Process
Start by gently rinsing the radiator from the front. Use your garden hose. Aim the water spray at a moderate pressure.
You want to dislodge loose debris like leaves and bugs. Spray from top to bottom. This helps wash the gunk away.
If there’s still stubborn stuff stuck to the fins, you can use your soft brush or mitt. Work gently. The fins are thin and can bend easily.
Try to scrub in the direction of the fins. This avoids bending them. If you’re using a cleaner, spray it onto the fins.
Let it sit for a few minutes, as the product directs. Then, rinse it off thoroughly with the hose.
Pay attention to the areas between the radiator and the air conditioning condenser (if your car has one). These spots often trap a lot of dirt. Make sure you get all the cleaner off.
Leftover cleaner can damage the materials over time. Once you’re done rinsing, let the radiator air dry. You should be able to see through the fins much better now.
Radiator Exterior Cleaning Tips
- Engine Cool: Always work on a cold engine.
- Gentle Touch: Fins bend easily. Use a soft brush and light pressure.
- Top to Bottom: Rinse and clean from the top down.
- Rinse Well: Make sure all cleaner is washed away.
- Check AC Condenser: Don’t forget the area behind the radiator.
How to Clean Your Radiator Interior (Flushing)
Cleaning the inside of your radiator is called flushing the cooling system. This process removes old coolant, rust, and scale from the engine block, heater core, and radiator itself. It’s a bit more involved but very important for long-term cooling system health.
We’re talking about preventing blockages that hurt performance.
When to Flush
Most car manufacturers recommend flushing the cooling system every 30,000 to 60,000 miles. Check your car’s owner’s manual for the exact interval. If you’re unsure when it was last done, or if you’re seeing signs of problems like overheating, it’s a good time to flush.
If you just bought a used car, flushing is a smart first step.
Gather Your Supplies for a Flush
You’ll need several things for this job. First, you’ll need new coolant. Make sure you buy the correct type for your car.
Using the wrong coolant can cause serious problems. Check your owner’s manual. You’ll also need distilled water.
Tap water has minerals that can cause scale. You’ll need a flush chemical or cleaner. Some people just use water, but a cleaner helps a lot.
You’ll also need a drain pan to catch the old coolant. A funnel is a must. Old rags or shop towels are handy.
Protective gloves and eye protection are essential. Lastly, you might need pliers to remove hose clamps.
Radiator Interior Flushing Checklist
- Correct Coolant: Buy the type specified for your car.
- Distilled Water: Essential for mixing coolant and rinsing.
- Flush Chemical: To break down rust and scale.
- Drain Pan: Large enough to hold all old coolant.
- Funnel: For adding new fluids.
- Tools: Pliers for clamps, screwdriver if needed.
- Safety Gear: Gloves and eye protection.
The Flushing Procedure
Step 1: Drain the Old Coolant. Make sure the engine is cold. Locate the radiator drain plug. It’s usually at the bottom of the radiator.
You might also have a petcock valve. Place your drain pan underneath. Open the drain plug slowly.
Let all the old coolant drain out. It’s usually a mix of green, orange, or pink liquid. This old fluid is toxic.
Do not let it go down storm drains. Dispose of it properly.
Step 2: Flush with Water. Close the drain plug. Fill the radiator with plain distilled water. Use your funnel.
Put the cap back on. Start the engine. Turn the heater to its highest setting.
This opens the heater core, so it gets flushed too. Let the engine run for about 10-15 minutes. This circulates the water.
Turn off the engine. Let it cool down completely. Drain the water out using the drain plug.
Step 3: Use the Flush Chemical. Now, add the radiator flush chemical to the radiator. Follow the instructions on the cleaner’s bottle. Usually, you add it with distilled water.
Close the radiator cap. Run the engine again for the time specified by the cleaner. Again, have the heater on high.
This allows the cleaner to work its way through the whole system. Turn off the engine. Let it cool.
Drain this mixture completely. You might be surprised by how dirty this flush water looks.
Step 4: Rinse Thoroughly. After draining the cleaner, you need to rinse out all traces of it. Fill the radiator with distilled water again. Run the engine for a few minutes.
Turn it off. Let it cool. Drain the water.
Repeat this rinsing process until the water coming out is crystal clear. This could take a few rinses. It’s important to get all the cleaner out.
Step 5: Add New Coolant. Once you’re sure the system is clean and all water is drained, it’s time for fresh coolant. Close the drain plug securely. Mix your new coolant with distilled water according to the manufacturer’s instructions.
Usually, it’s a 50/50 mix. Pour this mixture into the radiator using your funnel. Fill it until it’s close to the top.
Put the radiator cap back on.
Step 6: Bleed the System. This is a crucial step. Air pockets can cause overheating. Start the engine.
Keep the heater on high. Watch the temperature gauge. As the engine warms up, the coolant will expand.
You may need to add more coolant to the radiator as the level drops. You might see small bubbles coming out of the bleed screw or radiator neck. This is air escaping.
Keep adding coolant until no more bubbles appear. Some cars have specific bleed screws. Others just need the cap off and the engine running.
Consult your manual. Once no more air comes out, and the engine reaches normal operating temperature, turn it off.
Step 7: Final Check. After the engine has cooled down, check the coolant level in the radiator and the overflow reservoir. Top them off if needed. Keep an eye on the temperature gauge for the next few drives.
Check for any leaks. You’ve just given your car’s cooling system a deep clean!
Radiator Interior Flush – Key Steps Recap
| Step | Action | Notes |
|---|---|---|
| 1 | Drain Old Coolant | Engine must be cold. Use a proper drain pan. |
| 2 | Water Flush | Fill with distilled water, run engine, drain. |
| 3 | Chemical Flush | Add cleaner, run engine per instructions, drain. |
| 4 | Rinse Thoroughly | Repeat water flush until water runs clear. |
| 5 | Add New Coolant | Use correct coolant/distilled water mix. |
| 6 | Bleed System | Remove air pockets while engine runs. |
| 7 | Final Check | Check levels after cooling, monitor car. |
Real-World Context: Why Does My Radiator Get Dirty?
It’s easy to forget about the radiator until there’s a problem. But its location and job make it a magnet for all sorts of things. Understanding why it gets dirty helps us appreciate the need for cleaning.
Environment and Road Conditions
Think about where you drive. If you travel on country roads, you’ll encounter more leaves, twigs, and mud. If you’re in the city, you’ll deal with road grime, oil slicks, and dust.
Bugs are a year-round problem in many places. They splatter against the front of your car, and many end up lodged in the radiator fins.
Road construction areas can be especially bad. They throw up a lot of dust and debris. Even parking your car under trees can lead to sap and leaves collecting on the grille.
The longer these things sit there, the harder they are to remove. They bake on in the sun.
Car Design and Airflow
Cars are designed to pull air through the front. This airflow is essential for cooling. The grille is the main entry point.
The radiator sits directly behind it. This design means anything flying at the front of your car is likely to hit the radiator. Many cars also have air dams and other aerodynamic features that can sometimes trap debris.
Modern cars often have multiple cooling components stacked together. The air conditioning condenser sits in front of the radiator. This means the condenser catches a lot of the initial impact from road debris.
Then, whatever gets through hits the radiator. This double layer can get packed with gunk.
Lack of Regular Maintenance
The biggest reason a radiator gets excessively dirty is simply a lack of attention. Most people don’t think about their radiator’s exterior until their car overheats. They might wash their car regularly, but the radiator is often hidden behind the grille.
It doesn’t get the same kind of attention as the paint or the wheels.
Similarly, the inside of the cooling system is out of sight, out of mind. Old coolant breaks down over time. It loses its anti-corrosive properties.
This allows rust and sediment to form. Without regular flushing, these deposits build up. They create clogs that severely hinder the system’s ability to function.
What This Means for You: Identifying Issues
Knowing how to clean your radiator is great, but you also need to know when it’s a problem. Not all radiator dirt is the same. Some things are minor, while others signal a more serious issue.
When It’s Normal
A few leaves, some bugs, or a light dusting of road grime on the outside of your radiator are usually normal. Especially after a long trip or a season change. These are things you can usually address with a simple hose rinse.
Similarly, seeing the temperature gauge climb slightly in very hot weather or when going uphill is often normal.
A small amount of sediment in the old coolant when you drain it is also not usually a cause for alarm. It suggests that some minor rust or scale has formed over time. This is why regular flushes are recommended.
It’s a sign that the system has been working, but it’s time for a refresh.
When to Worry
If the exterior of your radiator is completely caked with mud, bugs, and leaves, that’s a problem. It means airflow is severely restricted. This will definitely cause overheating.
If you notice coolant leaks around the radiator or hoses, this is serious. It requires immediate attention. A hissing sound or steam coming from the engine area is also a warning sign.
Inside the cooling system, if the old coolant you drain is thick and sludgy, like mud or paste, that’s bad. It indicates a significant buildup of rust and debris. If the coolant level drops rapidly, and you can’t find any external leaks, you might have an internal leak, like a blown head gasket.
This is a major repair.
Another sign to watch for is a temperature gauge that stays high consistently, even after cleaning the exterior or flushing. This could mean the radiator is internally blocked beyond repair, or there’s another issue with the cooling system, like a bad water pump or thermostat.
Quick Radiator Health Check
Look: Are the fins clear or covered in gunk?
Listen: Is the cooling fan kicking on when it should?
Watch: How does your temperature gauge behave?
Smell: Do you smell hot coolant or burning?
Quick Tips for Radiator Care
Keeping your radiator happy doesn’t require constant work. A few simple habits can go a long way in ensuring it performs well.
- Regular Exterior Rinse: While washing your car, take a moment to rinse the radiator fins from the outside with the hose. This simple step prevents heavy buildup.
- Use the Right Coolant: Always use the coolant specified in your owner’s manual. Mixing types or using tap water can harm the system.
- Follow Flush Schedule: Stick to the recommended cooling system flush intervals. This is the best way to prevent internal corrosion and clogs.
- Check Coolant Level: Make it a habit to check your coolant reservoir level when you check your oil. Low coolant is a clear sign of a potential problem.
- Address Small Issues: If you notice a tiny leak or a small drip, get it checked. Small issues can quickly turn into big, expensive ones.
When to Call a Mechanic
Persistent Overheating: If cleaning and flushing don’t solve overheating issues.
Major Leaks: Significant coolant loss or visible puddles under the car.
Strange Noises: Grinding or hissing sounds from the front of the car.
Engine Warning Lights: Especially if related to temperature or coolant.
Uncertainty: If you’re not comfortable performing the flush yourself.
Frequently Asked Questions About Radiator Cleaning
Can I just use a pressure washer on my car radiator?
It’s generally not recommended to use a high-pressure washer directly on your car’s radiator fins. The strong spray can easily bend or damage the delicate fins, which will reduce the radiator’s efficiency. A garden hose with moderate pressure is much safer and usually effective enough.
How often should I clean the outside of my radiator?
It’s a good idea to give the outside of your radiator a quick rinse every few months, or whenever you notice significant debris like bugs or leaves. A thorough cleaning might be needed once or twice a year, especially if you drive in areas with a lot of debris.
What happens if I don’t flush my cooling system?
If you don’t flush your cooling system regularly, old coolant can break down. This leads to rust and scale buildup inside the radiator, engine block, and heater core. This buildup can cause clogs, reduce cooling efficiency, lead to overheating, and potentially damage your water pump or other cooling system components.
Can I use straight water in my radiator if I don’t have coolant?
No, you should never use plain water as a permanent coolant. Water alone doesn’t have the necessary boiling or freezing protection. It also lacks the anti-corrosion additives that protect your cooling system components.
Distilled water is only used for flushing and rinsing during maintenance.
Is it okay to mix different colors of coolant?
Absolutely not. Coolants have different chemical compositions. Mixing them can cause them to react, forming a sludge that can clog your cooling system.
Always use the specific type of coolant recommended for your vehicle, as stated in your owner’s manual.
How do I know if my radiator needs to be replaced?
You might need a new radiator if it’s severely corroded internally, has leaks that can’t be repaired, or if the fins are so damaged that cleaning won’t restore proper airflow. If a flush doesn’t resolve persistent overheating issues, the radiator itself might be the failing component.
Conclusion
Keeping your car’s radiator clean, both inside and out, is a vital part of maintenance. It prevents costly engine damage and keeps your car running smoothly. You’ve learned that cleaning the exterior is a simple task.
You also know how to perform an internal flush to remove buildup. These steps can be done without removing the radiator. With the right tools and a bit of care, you can ensure your engine stays cool.
Drive with peace of mind knowing your cooling system is in good shape.
Products related to this article
Sponsored / affiliate links. As an Amazon Associate I earn from qualifying purchases. I may earn additional commission from eligible campaigns.