How to Wire a Car Stereo: Wire Colors, Steps & No-Harness Guide
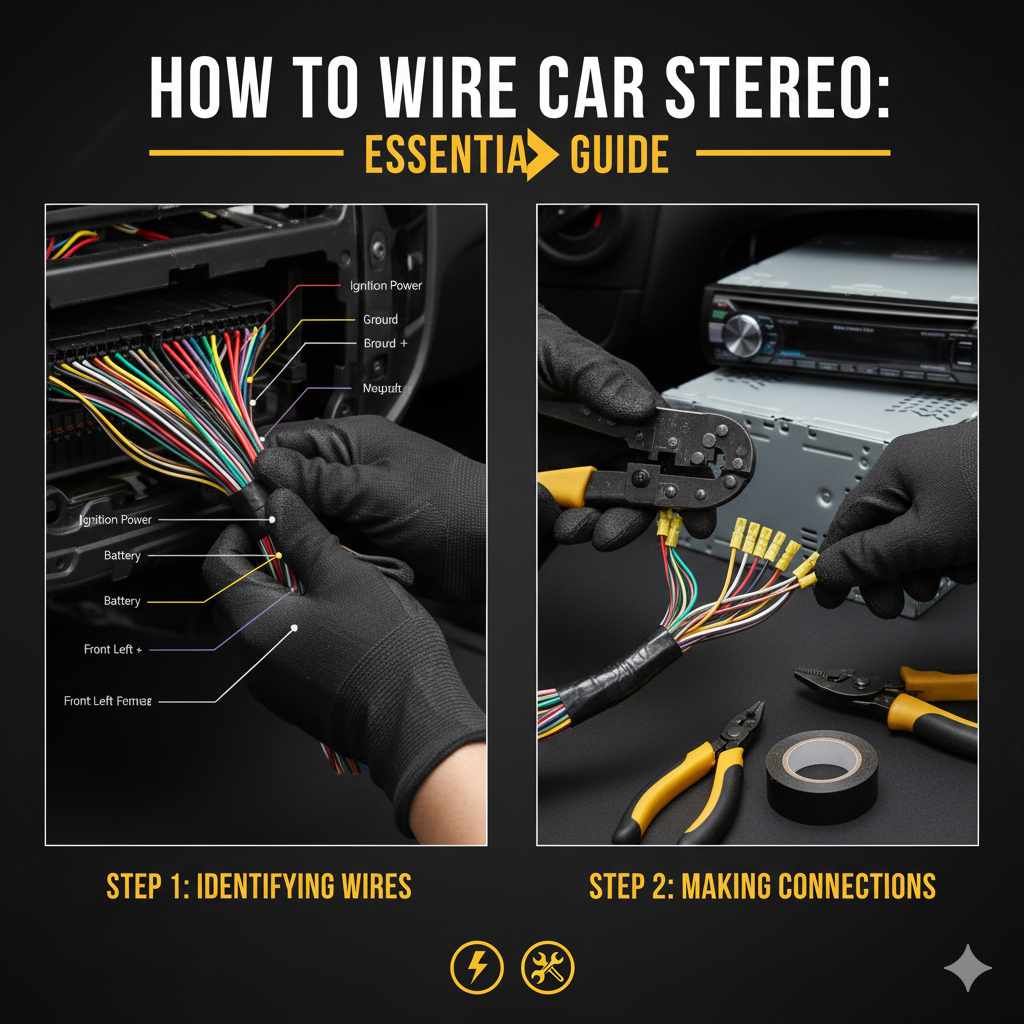
Most aftermarket car stereos use a standard color code — yellow for constant power, red for ignition, black for ground — so wiring one yourself comes down to matching those wires correctly and using a harness adapter when you can. Get it wrong and you risk a blown fuse or a fried stereo. Below is the full wire color breakdown, the 7-step install process, and what to do if you don’t have a harness adapter.
Quick Answer: Standard aftermarket wire colors are yellow (constant 12V), red (ignition/accessory), black (ground), blue (amp/antenna turn-on), and orange (dimmer), with white/gray/green/purple for speakers. A harness adapter lets you match these to your car’s factory plug without cutting any wires — always test with a multimeter before connecting if you’re not using one.
Why Wire Your Own Car Stereo?
Upgrading your car’s stereo system is one of the most satisfying DIY projects for any driver. It can dramatically improve your audio experience, making commutes more enjoyable and road trips sing. Beyond the sonic benefits, tackling this project yourself can also save you a good chunk of change compared to professional installation costs. Mechanics and car audio shops often charge a labor fee that can sometimes rival the cost of the stereo itself!
Learning to wire a car stereo also empowers you. Instead of feeling intimidated by car electronics, you gain confidence and practical skills. This knowledge is transferable, helping you understand your car’s electrical system better for future projects. Plus, you get the satisfaction of a job well done, knowing your music is powered by your own efforts!

Understanding Your Car Stereo Wiring
Before we dive into the actual wiring process, it’s crucial to understand the basics of car stereo wiring. Most aftermarket stereos come with a wiring harness—a bundle of wires that connect to your car’s existing electrical system. Your car, in turn, has its own factory wiring harness that the original stereo was connected to. The goal is to connect the aftermarket stereo’s harness to your car’s harness.
The Different Wires: What Do They Do?
Most wiring harnesses, whether for your car or your new stereo, use a standard color-coding system. While not every manufacturer sticks to it perfectly, it’s a very helpful guide. Knowing what each wire generally controls will make the process much smoother.
These color codes follow the E.I.A. (Electronics Industry Association) standard used by most aftermarket head unit manufacturers, as documented by Sonic Electronix’s wiring harness color guide. Here’s the full breakdown:
| Wire Color | Function | Notes |
|---|---|---|
| Yellow | Constant 12V Power (Battery) | Powers memory/clock even with the ignition off |
| Red | Ignition (Accessory) | Powered only when the key is on |
| Blue | Power Antenna / Amp Turn-On | Triggers antenna or external amplifier |
| Black | Ground | Must connect to clean, bare chassis metal |
| Orange | Dimmer / Illumination | Dims the display with headlights on |
| White / White-Black | Left Front Speaker (+/-) | Paired with black stripe for negative |
| Gray / Gray-Black | Right Front Speaker (+/-) | Paired with black stripe for negative |
| Green / Green-Black | Left Rear Speaker (+/-) | Paired with black stripe for negative |
| Purple / Purple-Black | Right Rear Speaker (+/-) | Paired with black stripe for negative |
This color code is a general guideline, and it’s always best to consult the wiring diagrams that come with your new stereo and your car’s manual (if available) or reputable online resources for your specific vehicle. Factory wiring colors don’t always match aftermarket conventions, so test with a multimeter rather than assuming colors line up.
Harness Adapters: Your Best Friend
While you _can_ wire a car stereo without a harness adapter, it’s generally not recommended for beginners and can lead to a less secure and less reliable connection. A vehicle-specific wiring harness adapter, often called an aftermarket wiring harness, is a small, inexpensive piece that plugs directly into your car’s factory wiring harness and has bare, color-coded wires that match your new stereo’s harness. This bypasses the need to cut and splice into your car’s original wires, making the process much simpler, safer, and reversible.
You can find these adapters at most car audio stores or online retailers. Just search for “[Your Car Year, Make, Model] stereo wiring harness adapter.”
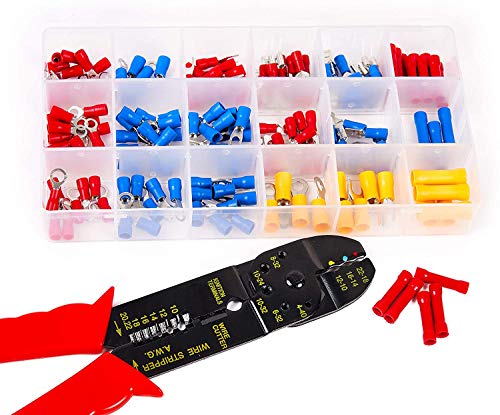
Our Pick: Belva BKIT150 158 Piece Car Audio Terminal Connector Ki
Best for: Anyone splicing wires with butt connectors instead of a harness adapter
Why we picked it: Includes the 3-in-1 crimping tool plus 158 matched terminals — twisting wires and taping them is exactly what leads to intermittent sound down the road.
Main drawback: Overkill if you’re only doing one simple harness-adapter swap.
View Our Pick on Amazon ($14.99)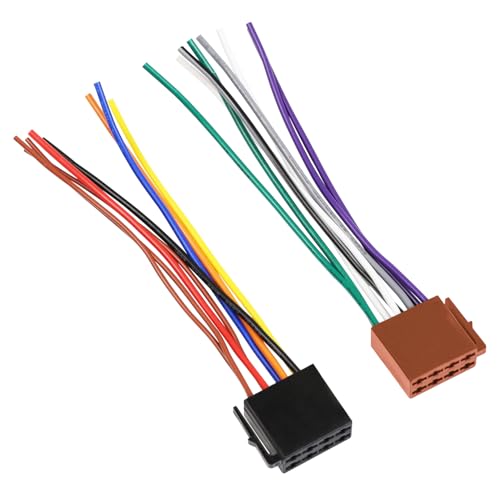 |
Universal ISO Car Radio Stereo Wiring Harness Adapter 8Pin C Best for: The easiest, safest way to wire a new stereo Why: Plugs into your car’s factory harness and gives you color-coded wires that match your new stereo — no cutting required. Drawback: ISO-style adapters don’t fit every vehicle — confirm compatibility with your specific make/model first. Check on Amazon ($8.54) → |
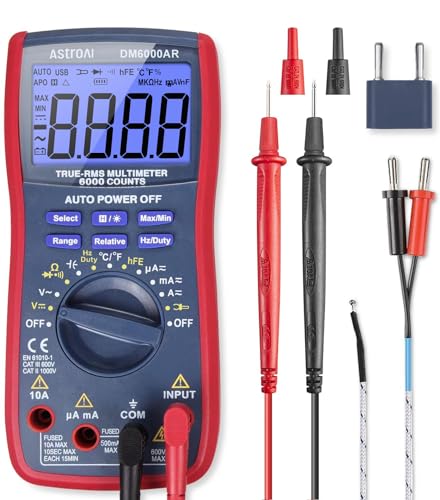 |
AstroAI Digital Multimeter and Analyzer TRMS 6000 Counts Vol Best for: Confirming which wire is which before you connect anything Why: Factory colors don’t always match aftermarket conventions — a multimeter tells you for certain instead of guessing. Drawback: Takes an extra few minutes per wire versus just trusting the color chart. Check on Amazon ($34.99) → |
 |
GOOACC 5PCS Auto Trim Removal Tool Kit No-Scratch Pry Tool K Best for: Removing dash trim without cracking the plastic clips Why: A flathead screwdriver is the #1 way to snap a trim clip — these nylon pry tools won’t scratch or gouge your dashboard. Drawback: Cheaper kits can flex under stubborn, well-glued trim panels. Check on Amazon ($5.54) → |
Tools and Supplies You’ll Need
Gathering your tools before you start is key to a smooth installation. Having everything ready means you won’t have to stop mid-job to hunt for a missing item.
Here’s a list of essential tools and supplies:
New Car Stereo: Obviously!
Vehicle-Specific Wiring Harness Adapter: Highly recommended to simplify the process and ensure proper connection.
Wire Strippers: For safely removing insulation from wires.
Wire Crimpers: To securely attach connectors to wires.
Wire Connectors: Usually crimp connectors (like butt connectors) or heat-shrink connectors for a secure, insulated connection.
Flush Cutters or Pliers: For removing dashboard trim panels.
Screwdrivers (Phillips and Flathead): Various sizes will be helpful.
Socket Wrench Set: Sometimes needed for removing mounting brackets.
Electrical Tape: For extra insulation and securing connections.
Wire Ties (Zip Ties): To neaten up the wiring harness.
Owner’s Manual for Your Car: To help locate specific components and understand your vehicle’s layout.
Stereo Installation Manual: This will come with your new stereo and will have specific wiring instructions for the unit.
Optional: Multimeter: Useful for testing wires to confirm power and ground signals, especially if you don’t have an adapter.
Step-by-Step Guide: How to Wire a Car Stereo
Let’s break down the process into manageable steps. Remember, safety first! Always disconnect your car battery before you begin any electrical work.
Step 1: Disconnect the Battery
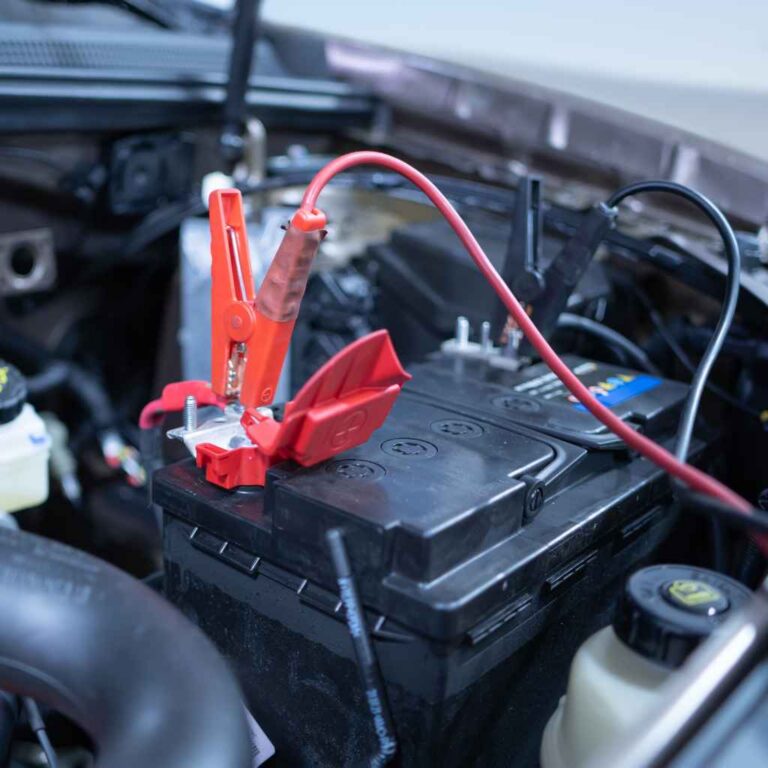
This is non-negotiable. Open your car’s hood and locate the battery. Using a wrench, loosen the nut on the negative (black, often marked with a “-“) terminal. Remove the cable from the terminal and secure it away from the battery post so it can’t accidentally re-connect. This prevents short circuits and protects you from electrical shocks.
Step 2: Remove the Old Stereo
This often involves removing trim pieces around the dashboard.
Consult your car’s manual or look for online guides specific to your car model. Many plastic trim pieces can be pried off gently using a plastic trim removal tool or even a flathead screwdriver (be very careful not to scratch or gouge the plastic).
Once the trim is off, you’ll usually see screws holding the factory stereo in place. Remove these.
Carefully pull the old stereo out of the dashboard.
You’ll see a wiring harness plugged into the back of the factory stereo. Unplug this. You might also find an antenna cable.
Step 3: Prepare the New Stereo Harness
This is where the magic happens, especially if you’re using an adapter.
If you have a wiring harness adapter:
Take your new stereo’s wiring harness and your vehicle-specific harness adapter.
You’ll need to connect the wires from the stereo harness to the adapter harness. This is often done outside of the car for easier access.
Match the colors! For example, connect the red wire from the stereo harness to the red wire on the adapter, the yellow to yellow, and so on.
Use crimp connectors or heat-shrink connectors for a secure and insulated connection. Don’t just twist wires together and tape them – this is prone to failure.
Insertion:
1. Strip about 1/2 inch of insulation off the end of each wire.
2. Insert one wire into a crimp connector (like a butt connector).
3. Use wire crimpers to squeeze the connector onto the wire.
4. Insert the other wire into the other end of the connector.
5. Crimp that wire.
6. For heat-shrink connectors, you’d insert both wires, crimp, and then use a heat gun or lighter to shrink the tube and seal the connection.
Double-check your connections. Ensure every wire on the stereo harness is connected to its corresponding color on the adapter harness. If you’re unsure about a wire’s function (like the dimming wire), check your manuals.
Example Wire Connection Table (Stereo Harness to Adapter Harness):
| Stereo Harness Wire | Adapter Harness Wire | Function |
|---|---|---|
| Red (Ignition) | Red (Accessory) | Provides power only when the car is turned on |
| Yellow (Battery) | Yellow (Constant) | Supplies constant power for memory and clock retention |
| Black (Ground) | Black (Ground) | Connects to the vehicle chassis for grounding |
| Blue (Antenna/Amp) | Blue (Antenna/Amp) | Powers the electric antenna or amplifier turn-on lead |
| Orange (Illumination) | Orange (Illumination) | Adjusts stereo display brightness with headlights |
| White (+/-) | White (+/-) | Left Front Speaker positive/negative wires |
| Gray (+/-) | Gray (+/-) | Right Front Speaker positive/negative wires |
| Green (+/-) | Green (+/-) | Left Rear Speaker positive/negative wires |
| Purple (+/-) | Purple (+/-) | Right Rear Speaker positive/negative wires |
Note: Speaker wires will usually have a positive (+) and a negative (-) wire for each speaker. The adapter harness should have corresponding positive and negative wires that will connect to your car’s factory speaker wires.
If you are NOT using a wiring harness adapter (not recommended for beginners):
This method involves cutting the factory connector off your car’s wiring harness and splicing your new stereo’s harness directly into those wires.
You’ll need to carefully identify each wire according to your car’s factory service manual or reliable online diagrams.
Match the stereo’s wires to your car’s wires based on their function (e.g., red to ignition, yellow to constant power, black to ground, speaker wires to speaker wires).
Crimp or solder connections securely and insulate thoroughly with electrical tape or heat-shrink tubing. This method requires more confidence and knowledge of automotive electrical systems.
Step 4: Connect the Antenna and Harness
Plug your car’s factory antenna cable into the back of your new stereo.
Plug the prepared stereo wiring harness (connected to the adapter harness) into the corresponding port on the back of your new stereo unit.
Step 5: Test the Stereo
Before you put everything back together, it’s crucial to test your new stereo.
Reconnect the negative terminal of your car battery.
Turn your car’s ignition to the “Accessory” or “On” position.
Your stereo should power up. Test basic functions like volume, turning it on/off, and switching between radio, CD, or auxiliary inputs.
Crucially, test all your speakers. Make sure they are all working correctly and sounding distinct. If a speaker isn’t working or sounds distorted, double-check the wiring for that specific speaker pair. A common mistake is crossing positive and negative wires for a speaker, which can cause it to sound tinny or not work at all.
Step 6: Mount the New Stereo
Once you’ve confirmed everything works perfectly, it’s time to secure your new stereo.
If your new stereo requires a mounting sleeve or dash kit, install that first according to its instructions.
Carefully slide the new stereo into the dash opening or mounting kit until it clicks into place or is secure.
Tuck the wiring harness and any excess wires neatly behind the stereo. Use zip ties to organize them and prevent them from rattling or getting pinched.
Reinstall any dashboard trim pieces you removed. Make sure they snap back securely.
Reinstall any screws that held the original stereo or the trim in place.
Step 7: Final Battery Connection and Test
With the stereo securely mounted and trim reinstalled, connect the negative battery terminal you disconnected earlier. Tighten the nut securely.
Start your car and turn on the stereo. Do a final sound check to ensure everything is working as expected.
Check that the clock and radio presets haven’t been lost if you connected the constant power wire correctly (yellow wire).
Wiring Your Car Stereo Without a Harness Adapter – When and Why
While overwhelmingly recommended, there are situations where you might find yourself needing to wire a car stereo without a harness adapter. This is most common in:
Very old vehicles: Older cars might not have readily available or affordable adapter harnesses.
Unique or custom installations: In some custom builds or heavily modified vehicles, standard adapters may not fit specific wiring configurations.
Budget constraints: Though the adapter is inexpensive, in extremely tight DIY budgets, some might choose to skip it.
However, it’s important to reiterate that wiring a car stereo without a harness adapter is significantly more complex and carries a higher risk of error. It requires a deeper understanding of automotive electrical systems and can potentially damage your vehicle’s wiring or the new stereo if done incorrectly. If you must go this route, meticulous research for your specific car model’s wiring diagram is paramount. Always use a multimeter to verify wire functions before making any connections.
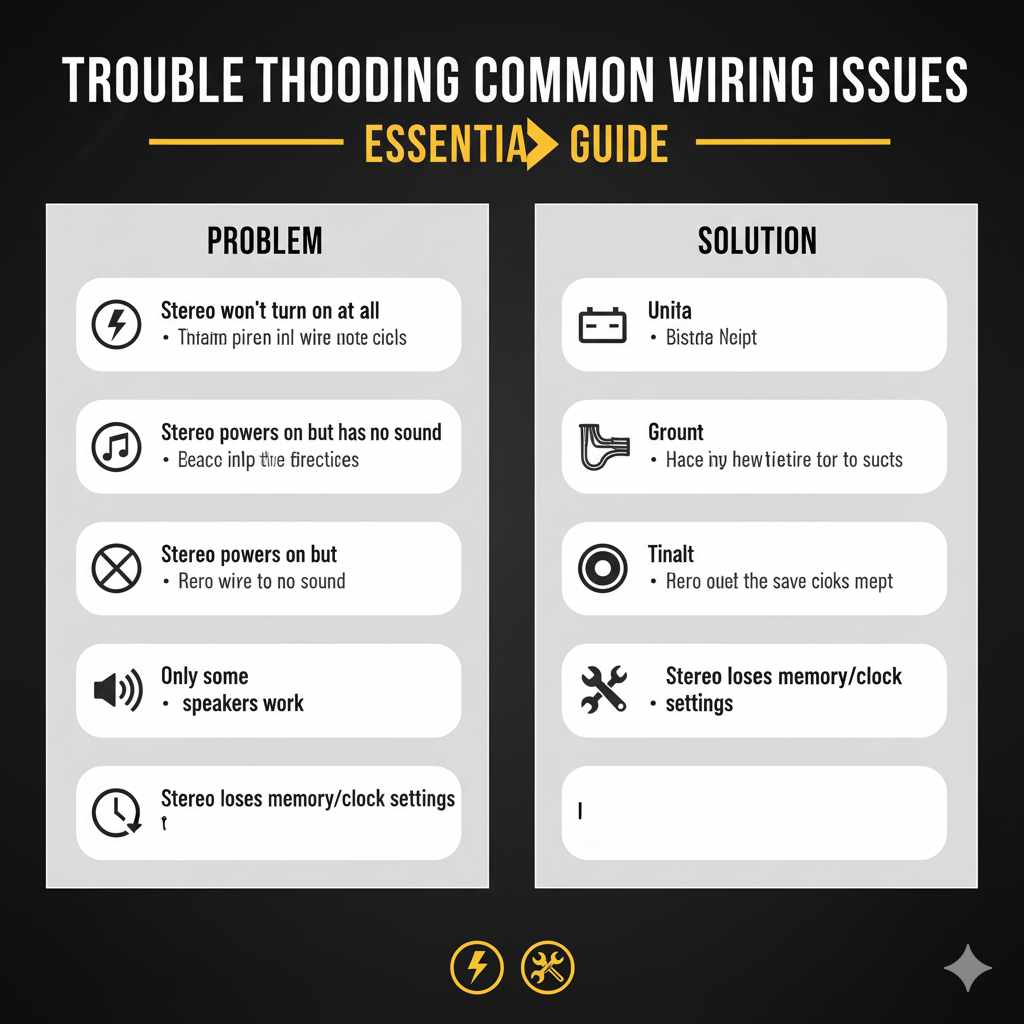
Troubleshooting Common Wiring Issues
Even with the best intentions, sometimes things don’t work perfectly on the first try. Here are a few common issues and how to fix them:
Stereo won’t turn on at all:
Check the battery connection: Is the negative terminal firmly reconnected?
Check power wires: Verify that the Red (Ignition) and Yellow (Constant) wires are securely connected to the correct sources in your car’s harness (or adapter). Use a multimeter to check for 12V power on these wires when the ignition is on and when it’s off, respectively.
Check the Ground wire: Ensure the Black (Ground) wire is connected to clean, bare metal on your car’s chassis. A poor ground is a frequent culprit.
Stereo powers on but has no sound:
Check speaker wires: Ensure all speaker wires (positive to positive, negative to negative) are correctly connected for all speakers. Even one misconnected speaker wire can cause issues.
Check stereo settings: Some stereos have a mute function or specific audio output settings that might be misconfigured.
Amplifier issues (if applicable): If you have an aftermarket amplifier, ensure its turn-on wire (usually connected to the stereo’s blue wire) is correctly wired and that the amp itself has power and ground.
Only some speakers work:
Focus on the non-working speaker wires: Carefully re-examine the connections for the specific speaker(s) that are not functioning. Ensure they are matched correctly (e.g., green wires for the left rear speaker).
Check for shorts: Make sure no bare speaker wires are touching each other or any metal parts of the car.
Stereo loses memory/clock settings when the car is off:
Check the Yellow (Constant 12V) wire: This wire must be connected to a source that provides power even when the ignition is off. If it’s only connected to the ignition (Red) wire, this problem will occur.
Dashboard trim doesn’t fit back correctly:
Wiring bundle is too large: Ensure all wires are tucked neatly and organized with zip ties.
Stereo not seated properly: Make sure the stereo is fully inserted into its mounting sleeve or dash kit.
* Incorrect dash kit: If you used an aftermarket dash kit, ensure it’s the correct one for your vehicle and installed properly.
Fuse keeps blowing repeatedly:
Check for a short to chassis: A bare wire touching metal on the power or ground side is the most common cause — re-inspect every connection point, especially anywhere wires pass through a metal panel.
Check the ground connection: An incorrect or missing ground can cause the fuse to blow the moment power is applied.
Don’t just upsize the fuse: Installing a higher-amp fuse to “fix” repeated blowing hides a wiring fault and risks a fire — find and fix the short instead.
Frequently Asked Questions (FAQs)
What tools are absolutely essential for wiring a car stereo?
At a minimum, you’ll need wire strippers, wire crimpers, wire connectors (like butt connectors), screwdrivers, and a way to safely remove dashboard trim (like a trim tool or flathead screwdriver). A vehicle-specific wiring harness adapter is also highly recommended.
How important is using a wiring harness adapter?
It’s extremely important for beginners. It simplifies the process immensely, ensures a secure connection without cutting your car’s original wires, and makes the installation reversible. It’s the easiest and safest way to wire a car stereo.
Can I connect speaker wires directly without connectors?
While it might seem like a quick fix, twisting wires together and taping them is not secure. Connections can loosen over time, leading to intermittent sound or complete failure. Using proper crimp connectors or soldering and heat-shrinking is vital for a reliable installation.
Why doesn’t my new stereo remember my settings when I turn off the car?
This usually means the “constant 12V power” wire (typically yellow) is not correctly connected or isn’t receiving power. This wire powers the stereo’s memory and clock when the car is off. It needs to be connected to a wire in your car that always has power.
What if my new stereo doesn’t have a wire color that matches my car’s harness?
Always refer to the wiring diagrams that came with both your new stereo and your car (or a reliable online source for your vehicle). You’ll need to match wires by function (e.g., ignition, constant power, ground, speakers) rather than relying solely on color matching, especially if you’re not using a color-matched harness adapter.
Conclusion
Wiring a new car stereo comes down to matching wire functions, not just colors, and using a harness adapter whenever you can. If you’re planning to add an amplifier, subwoofer, or a full multi-speaker upgrade rather than just swapping the head unit, see our complete guide to wiring a car audio system for grounding, gauge sizing, and amp installation.
Products related to this article
Sponsored / affiliate links. As an Amazon Associate I earn from qualifying purchases. I may earn additional commission from eligible campaigns.