How to Fix Missing Paint on Car: Genius Solution
Don’t let that missing car paint get you down! You can easily fix chips and scratches yourself with a simple, step-by-step process using touch-up paint. This guide breaks down everything you need to know, from choosing the right paint to making your car look great again, saving you time and money on professional repairs.
Seeing bare metal peek through a chip in your car’s paint can be bothersome. It’s not just about looks; exposed metal can also lead to rust, which is a bigger problem down the road. But the good news is, you don’t need to be a professional to fix these little imperfections. With a few simple tools and a bit of patience, you can tackle missing paint on your car and restore its smooth, protective finish. This guide is designed to make the process clear and easy, even if you’ve never done it before.
Why Does Car Paint Go Missing?
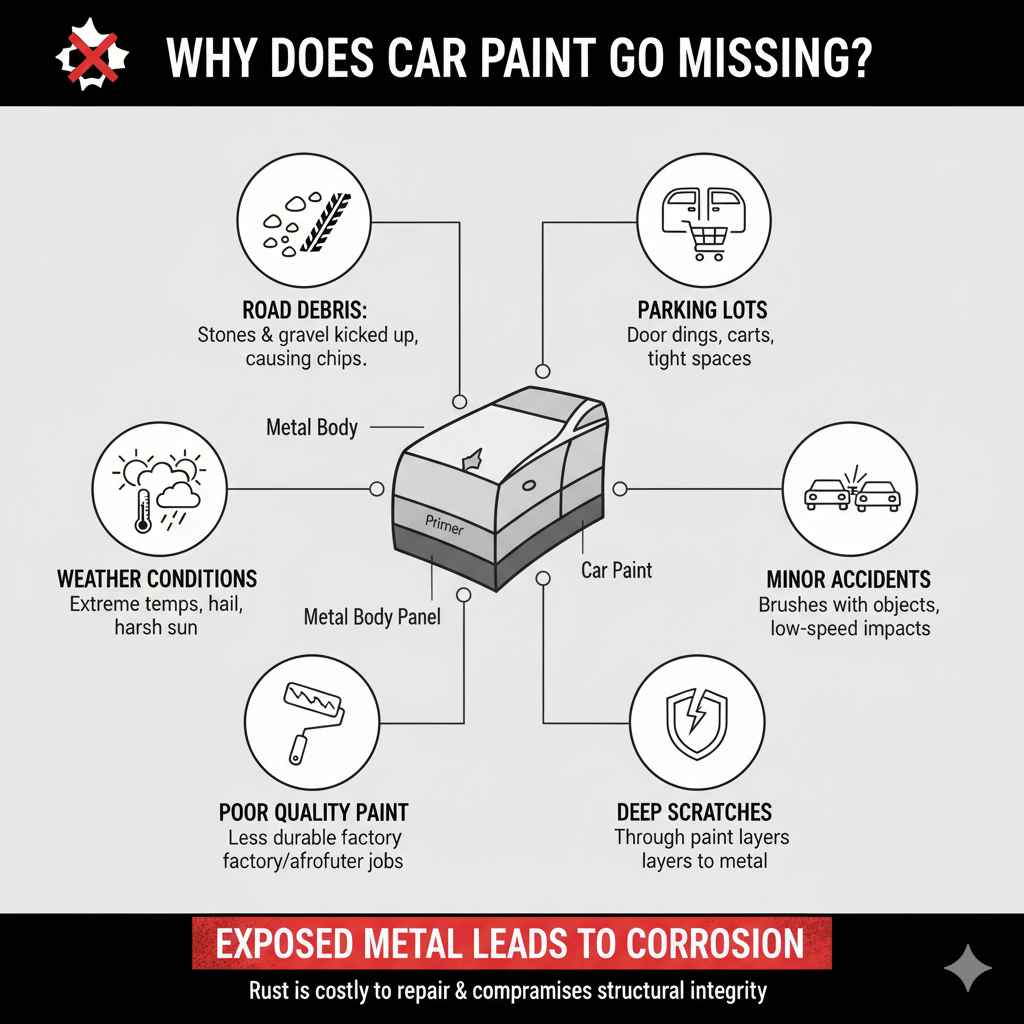
Car paint is tough, but it’s not invincible. Several everyday occurrences can lead to paint chips and scratches. Understanding these common culprits can help you prevent future damage and appreciate why fixing them is important.
- Road Debris: Small stones and gravel kicked up by other vehicles are a primary cause of chips. These can hit your car with surprising force, breaking through the paint layers.
- Parking Lots: Minor bumps from other car doors, shopping carts, or even walls in tight parking spaces can scratch or chip your paint.
- Weather Conditions: Extreme temperatures, hail, and even harsh sunlight can degrade paint over time, making it more susceptible to damage.
- Minor Accidents: Whether it’s a brush with a bush or a low-speed fender bender, impacts can cause paint loss.
- Poor Quality Paint Jobs: Sometimes, factory paint or aftermarket jobs might not be as durable as they should be, leading to premature chipping.
The most important reason to fix missing paint is to protect your car’s body from corrosion. The primer and paint layers act as a barrier against moisture. Once that barrier is broken and the metal is exposed, rust can begin to form, which can be much more costly and difficult to repair.
Is Fixing Missing Paint a DIY Job?
Absolutely! For small chips and minor scratches, fixing missing paint is a fantastic DIY project. It doesn’t require specialized tools or extensive automotive knowledge. The key is to be meticulous and follow the steps carefully. This approach not only saves you money on professional detailing or body shop visits but also gives you the satisfaction of improving your car’s appearance yourself. For larger damage or extensive rust, it’s always best to consult a professional, but for those common little chips, you’ve got this!
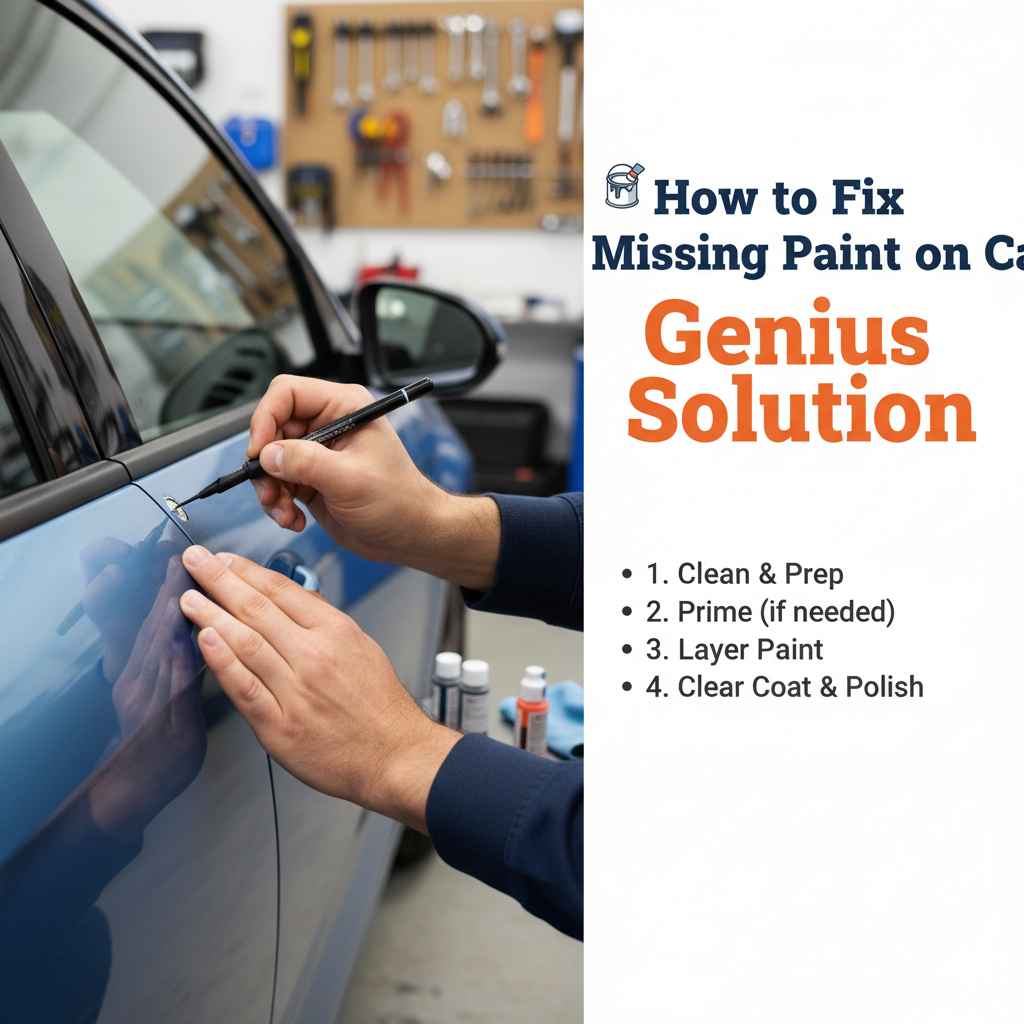
The Genius Solution: Touch-Up Paint
The “genius solution” for fixing missing paint on your car is using touch-up paint. This is a specially formulated paint that comes in a small bottle or pen, often with a brush or applicator. The goal is to fill the damaged area, seal it, and match the surrounding paint as closely as possible.
What You’ll Need:
Gathering the right supplies before you start will make the process much smoother. Here’s a list of essentials:
- Touch-Up Paint Kit: This usually includes the color-matched paint and a clear coat.
- Primer (optional but recommended for bare metal): If the chip has gone down to bare metal, primer is crucial for adhesion and rust prevention.
- Degreaser/Rubbing Alcohol: To thoroughly clean the damaged area.
- Car Wash Soap and Water: For initial cleaning.
- Microfiber Towels: For drying and wiping.
- Painter’s Tape (optional but helpful): To mask off the surrounding area.
- Fine-Tip Applicator (like a toothpick or a fine brush if not included): For precise application.
- Mild Automotive Clay Bar (optional): For removing contaminants if the paint is dull.
- Automotive Wax/Sealant: For finishing.
Finding Your Car’s Paint Code
This is arguably the most critical step. For the best match, you need your car’s exact paint code. Manufacturers use specific codes to identify exact paint colors, as variations can exist even within the same model year. You can usually find this code in a few common places:
- Driver’s Side Door Jamb: Open the driver’s door and look for a sticker on the frame of the car body.
- Under the Hood: Some manufacturers place a sticker on the firewall or the underside of the hood.
- Owner’s Manual: Check your car’s manual; it often has a section detailing where to find this information.
- Glove Compartment: Less common, but some vehicles have a sticker here.
Once you find the sticker, look for a section labeled “Paint Code,” “Color Code,” or similar. It will be a combination of letters and numbers. With this code, you can then purchase the correct touch-up paint from an auto parts store, dealership, or online automotive paint supplier. Reputable online retailers often let you search by make, model, and year, but having the code ensures accuracy.
If you can’t locate the code, your dealership can usually find it by your car’s Vehicle Identification Number (VIN). You can also often buy generic touch-up paint pens that come with a selection of colors and applicators, but these are less likely to be a perfect match.
Step-by-Step Guide to Fixing Missing Paint
Now that you have your supplies and your paint code, let’s get to work! We’ll break this down into simple, manageable steps.
Step 1: Thoroughly Clean the Area
This is non-negotiable! Any dirt, wax, or grime in the chipped area will prevent the touch-up paint from adhering properly and can lead to a poor finish or even future peeling. First, wash the entire car or at least the panel you’ll be working on with car wash soap and water. Rinse thoroughly and dry with a clean microfiber towel. Then, use a degreaser or rubbing alcohol on a clean cloth to wipe down the specific chip and the surrounding area. This removes any lingering residue.
Step 2: Prepare the Chip
Inspect the chip closely. If there are any loose flakes of paint, you need to remove them. Use a small, sharp craft knife or a very fine-grit sandpaper (like 600-grit or higher) to gently smooth down any rough edges. The goal is to have a clean, relatively smooth surface to work with. Be gentle; you don’t want to create more damage.
Step 3: Apply Primer (If Needed)
If your chip has exposed bare metal, this is where primer comes in. Primer helps the paint adhere to the surface and provides a protective layer against rust.
Application Tips for Primer:
- Shake the primer bottle or pen well.
- Use a very fine-tip applicator (like a toothpick or the fine brush from your kit).
- Apply a small amount of primer directly into the bare metal area of the chip. Don’t overload it.
- Aim to fill the depth of the chip with primer, keeping it contained within the damaged area as much as possible.
- Let the primer dry completely according to the product’s instructions. This can take anywhere from 15 minutes to an hour. You might see a slight swelling or a matte finish when it’s dry.
Some touch-up kits include a primer pen. If yours doesn’t and you’ve hit bare metal, purchasing a small universal automotive primer is a good idea.
Step 4: Apply the Color-Matched Paint
This is the main event! Shake your touch-up paint bottle or pen vigorously for at least a minute to ensure the pigment is well mixed.
Application Tips for Color Paint:
- Less is More: It’s better to apply multiple thin coats than one thick coat. Thick coats can sag, pool, and look messy.
- Use a Fine Applicator: If your paint has a brush, use light strokes. If not, a toothpick or the fine brush tip works well.
- Dabbing Technique: Gently dab the paint into the chip, trying to fill the void. Avoid brushing widely across the surrounding good paint.
- Multi-Layer Approach: Apply a thin layer, let it dry for about 20-30 minutes (or as per product instructions), and then apply another thin layer. Repeat this process until the paint level is slightly above or flush with the surrounding paint surface.
- Painting the Edges: Pay attention to the edges of the chip. You want to build up the paint gently to cover the exposed edges.
You can use painter’s tape to mask off the area immediately surrounding a larger chip. Apply the tape, leaving just the chip area exposed, and carefully apply your paint. This helps prevent smudging the good paint.
For very small chips, you might apply paint directly with the pen or brush. For larger chips that have exposed primer, you’ll want to build up the color layers to match the depth of the original paint.
Step 5: Apply the Clear Coat
Once the color coat is completely dry (this can take several hours, or even overnight, depending on the paint and humidity), it’s time for the clear coat. The clear coat provides protection, adds shine, and helps blend the touch-up into the surrounding paint.
Application Tips for Clear Coat:
- Shake the clear coat well.
- Apply thin, even coats, just like the color paint.
- Again, use a dabbing motion to fill the chip and slightly build up the surface.
- Allow each coat to dry thoroughly before applying the next.
- The goal is to create a smooth surface that’s flush with the original paint. You might need 2-3 thin coats.
The clear coat might look a bit dull when it’s first applied, but it should become glossy as it cures. Allow the clear coat to cure fully, which can take 24-48 hours.
Step 6: Level the Touch-Up (Optional but Recommended)
After the clear coat has fully cured, you might notice the touch-up area is slightly raised compared to the surrounding paint. This is common. To achieve a perfectly smooth finish, you can carefully level it.
Leveling Process:
- Wet Sanding: This requires a very light touch and fine-grit sandpaper. Use sandpaper that’s 2000-grit or higher. Dip the sandpaper in water. Gently sand the raised clear coat in a back-and-forth motion, only over the touch-up area. Apply very light pressure. The idea is to gently sand down the high spots without touching the surrounding paint.
- Compounding: After wet sanding (or if you skipped sanding), use a small amount of automotive rubbing compound on a clean microfiber cloth. Gently rub the touched-up area. This will help polish the area and blend it in.
Important Note: This step is for advanced users or those with a steady hand. If you’re unsure, you can skip this and achieve a good result without it. A slightly raised touch-up is better than a sanded-through area.
Step 7: Polish and Protect
Once the touch-up is leveled and smooth, it’s time for the final polish. Use a fine automotive polish or swirl remover on a clean microfiber cloth. Gently buff the repaired area. This will bring out the shine and help the repaired spot blend seamlessly. Finally, apply a coat of car wax or a paint sealant to protect the entire area.
Choosing the Right Touch-Up Paint: A Quick Guide
The effectiveness of your repair hinges on the quality and compatibility of your touch-up paint. Here’s a quick breakdown of types and considerations:
| Type of Touch-Up Product | Pros | Cons | Best For |
|---|---|---|---|
| Paint Pens | Easy to use, precise tip, good for very small chips. | Can be tricky to get an even coat on larger chips, ink can dry quickly. | Tiny nicks, small stone chips. |
| Brush-in-Bottle | More paint capacity, better for slightly larger chips, allows for layering. | Brush can be a bit thick for tiny chips, requires a steadier hand. | Small to medium scratches, slightly larger chips. |
| Custom-Mixed Aerosol Cans | Professional-grade, excellent color match, covers larger areas quickly. | Requires more prep (masking), risk of overspray, more expensive. | Larger scratches, significant paint loss areas on flat panels. (Often requires professional application for best results). |
| Primer/Base Coat/Clear Coat Kits | Comprehensive solution, ensures proper adhesion and depth, best professional-looking result. | Requires multiple steps and drying times, can be more complex. | Chips down to primer or metal, aiming for the best possible finish. |
Always ensure your purchased paint is specifically stated to match your car’s year, make, model, and paint code. If you’re unsure about the depth of your damage, it’s always best to err on the side of caution and plan to use primer.
When to Seek Professional Help
While touch-up paint is a fantastic solution for minor paint issues, there are times when it’s best to let the professionals handle it. Here are a few signs that you might need to call a body shop:
- Deep Scratches: If the scratch is deep enough that you can feel a significant gouge with your fingernail, or if it has gone through all layers of paint and into the metal, it may require professional attention.
- Large Areas of Missing Paint: For areas larger than a dime or where paint is peeling extensively, DIY touch-up might not provide a satisfactory or durable result.
- Rust Formations: If you see visible rust (orange, flaky material) on or around the chip, this needs to be treated carefully. Extensive rust can compromise the structural integrity of the panel. A professional can remove rust properly and apply appropriate treatments before repainting.
- Complex Panels: Areas with intricate curves, body lines, or textured surfaces can be challenging for DIY repairs.
- Lack of Confidence: If you’re not comfortable with the process or worried about making the problem worse, it’s always better to get an expert opinion.
A professional body shop has the tools, experience, and specialized materials to handle more severe damage, ensuring a seamless and long-lasting repair. For instance, tools like auto body repair tools are often used for more significant work.

Frequently Asked Questions About Fixing Missing Car Paint
1. How long does touch-up paint last?
With proper application and care, touch-up paint can last for many years. Factors like UV exposure, harsh weather, and further physical damage can shorten its lifespan. A good application includes primer and clear coat for maximum durability.
2. Can I use regular nail polish instead of touch-up paint?
While an immediate cosmetic fix can be attempted with nail polish in a pinch, it’s not a recommended long-term solution. Nail polish isn’t formulated for automotive paint’s durability, UV resistance, or bonding agents. It will likely fade quickly, peel, and won’t offer any protective qualities against rust.
3. What’s the difference between a scratch and a chip?
A scratch is generally a line where paint has been scraped away. A chip is typically a more localized area where a piece of paint has been removed, often due to an impact, revealing the primer or metal below.
4. How many coats of touch-up paint should I apply?
It typically takes multiple thin coats to fill a chip and match the surrounding paint level. For both the color coat and clear coat, apply 2-3 thin layers, allowing each to dry between applications. The goal is to build up the paint gradually until it’s flush with the original surface.
5. Do I really need primer if it’s not down to bare metal?
If the chip hasn’t reached bare metal but has removed the color coat and exposed the primer layer underneath, you can usually proceed directly with the color coat. However, if you’ve removed any paint down to the metal (often a grey or silver surface), primer is essential for adhesion and rust prevention.