How To Remove Car Tint Film Without Damaging Your Window
Car tint can look sharp. It makes your car cooler. It also adds privacy.
But sometimes, you need to remove it. Maybe it’s old and peeling. Maybe the tint is illegal.
Or you just want a change. Removing car tint can be a real headache. The film sticks hard.
The glue is tough. And you really don’t want to crack your car window. It’s a common problem many car owners face.
But with the right steps, you can do it yourself. This guide will walk you through it. We’ll make sure you get the job done right.
Removing car tint film safely involves patience and the right tools. Common methods use heat and a special solution to loosen the adhesive. Then, you carefully peel the film. Cleaning up leftover glue is key. This process helps prevent window scratches and damage.
Understanding Your Car Tint Film
Before you start, let’s talk about car tint. It’s not just one layer. Most car window tint has a few parts.
There’s a thin plastic film on top. This is what you see. Underneath that film is a layer of adhesive.
This glue is what holds the tint to the glass. Sometimes, there’s also a scratch-resistant coating. This coating is on the very outside of the tint.
Or it might be part of the film itself. Some older tints might also have metal particles. These can affect radio signals.
Or they might be dyed to get their color.
Knowing these layers helps you understand why removal can be tricky. The adhesive is the main challenge. It gets baked by the sun over time.
This makes it stick even tighter. It also makes it brittle. So, when you try to pull it off, it might come off in tiny pieces.
This is where the real frustration begins. You end up with small bits of plastic and glue all over your window. It can feel impossible to get it all clean.
But don’t worry, we have ways to tackle this.
Gathering Your Tools and Supplies
Having the right gear makes all the difference. It turns a tough job into a manageable one. For removing car tint, you’ll need a few key items.
Think of it like preparing for a DIY project. The more prepared you are, the smoother it goes. Most of these items are easy to find.
You can get them at most auto parts stores. Some you might already have at home.
First, you’ll need a heat source. A good hair dryer works well. A heat gun is even better, but be careful.
You don’t want to overheat the glass. Next, you need a good razor blade scraper. A new, sharp blade is important.
It helps cut through the stubborn tint. Make sure it has a handle. This gives you better control.
You’ll also need a spray bottle. Fill this with hot, soapy water. Dish soap is fine.
A few drops in hot water will do. Some people also like to use a ammonia-free window cleaner.
Other helpful items include:
- Microfiber cloths: For cleaning and wiping away residue.
- A clean bucket: To hold your soapy water.
- Gloves: To protect your hands from heat and chemicals.
- A trash bag: For all the old tint and scraps.
- A plastic scraper or putty knife: For edges and stubborn spots.
- Rubbing alcohol or a Goo Gone type product: For tough glue residue.
Having these ready will save you trips back to the store. It also keeps you from stopping mid-job. That can make you lose momentum.
And nobody wants that when they’re dealing with sticky tint!
Step-by-Step Tint Removal Process
Now, let’s get to the actual work. The goal here is to soften the tint and the glue. Then, we peel it away.
This method is for the inside of the car window. Trying to do the outside is different and usually not recommended. The tint film is applied to the inside surface.
Step 1: Clean the Window
First, make sure the window is clean. You don’t want dirt getting trapped. Use your window cleaner and a cloth.
Wipe down the inside of the glass. This makes sure you are working with a fresh surface. It also helps the tools slide better.
Step 2: Apply Heat
This is a crucial step. Use your hair dryer or heat gun. Hold it about six inches from the window.
Move it back and forth constantly. Don’t focus the heat on one spot for too long. You want to warm the tint film.
You should feel it get a little soft. This loosens the adhesive underneath. This step takes patience.
You might need to heat a small section at a time. Work in small areas. This prevents the tint from cooling down too fast.
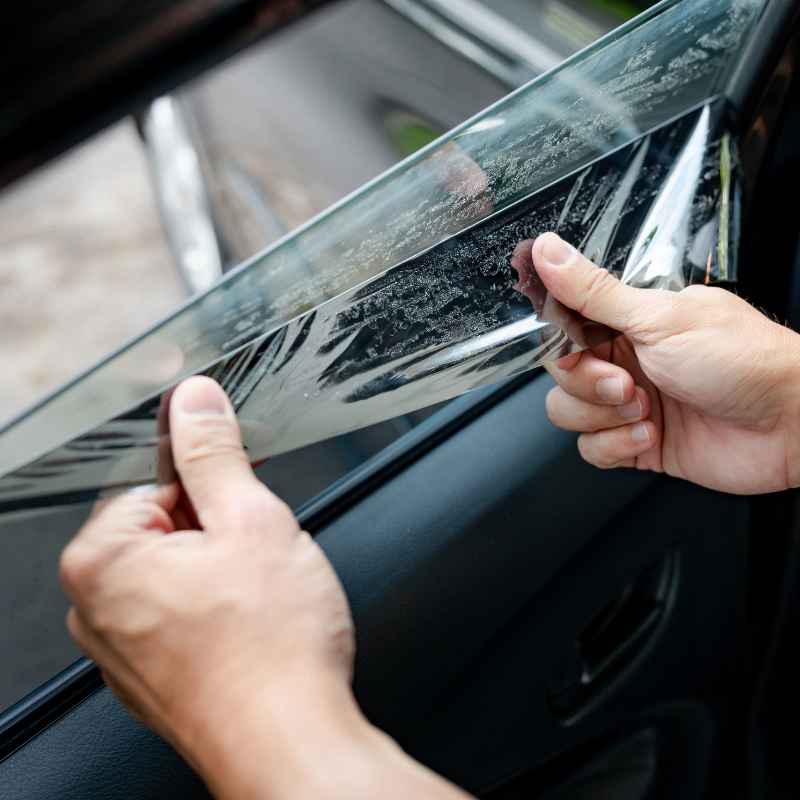
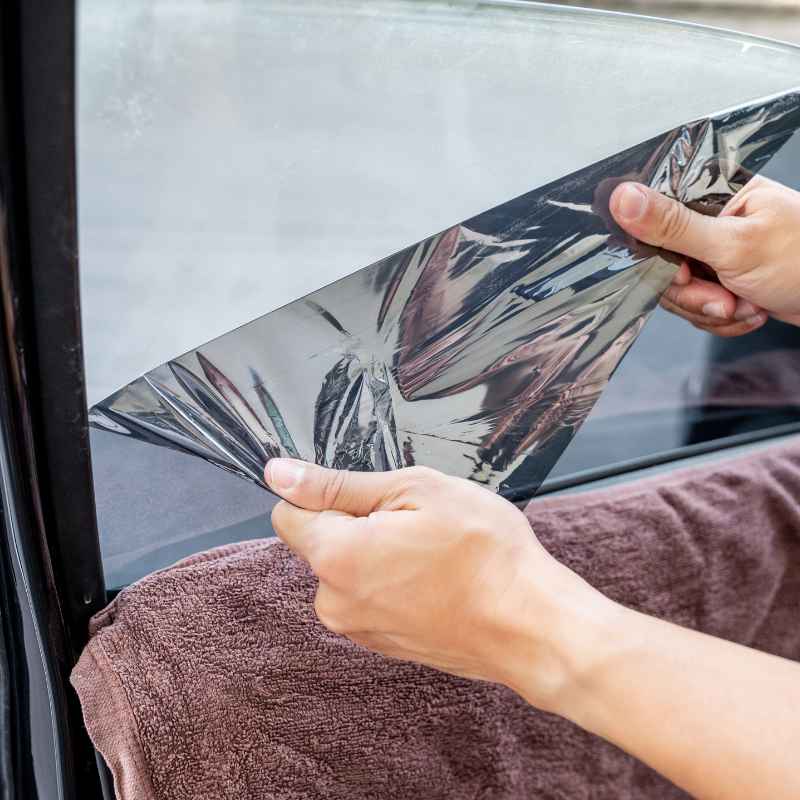
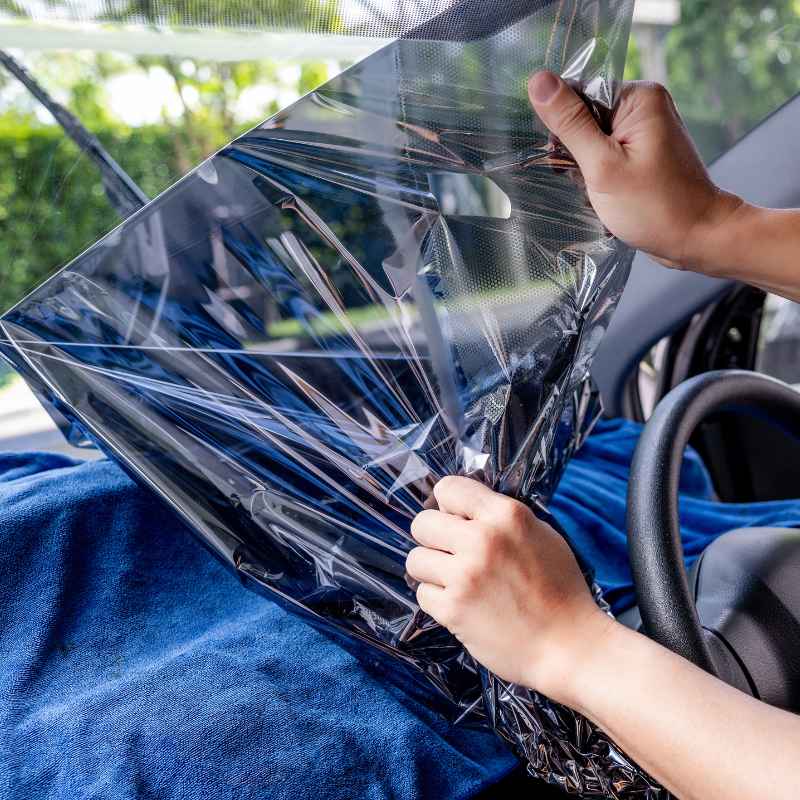
Step 3: Start Peeling
Once a section is warm and soft, find a corner. You can use your fingernail or a plastic scraper to lift a corner. Once you have a corner lifted, start to peel the tint slowly.
Pull at a low angle, close to the glass. Try to keep the peeling smooth. If it starts to tear, stop.
Apply more heat to that spot. Then try again. If the tint is breaking into small pieces, that’s okay.
You’ll deal with that next. The key is to be steady. Don’t yank the tint off.
Step 4: Scrape Away Remaining Film and Glue
This is where the razor blade scraper comes in. Wet the area you are working on with your hot, soapy water. Hold the razor blade at a shallow angle.
Gently scrape away any remaining tint film. Be careful not to dig into the glass. Scrape in one direction.
Wipe the blade often on a cloth. Then, spray more soapy water. You’ll likely find a lot of glue residue.
Keep the glass wet while you scrape. This helps the blade glide. It also lifts the glue.
Take your time here. This is the most tedious part.
Step 5: Clean Up Stubborn Glue
Even after scraping, you might have sticky spots. This is very common. For these tougher areas, you can use a special adhesive remover.
Products like Goo Gone are great. Rubbing alcohol also works well. Apply the cleaner to a cloth.
Dab it onto the glue spots. Let it sit for a minute or two. Then, try scraping again.
Or rub with the cloth. You might need to repeat this a few times. For really baked-on glue, you might need to let the solution soak a bit longer.
Gentle, consistent effort is better than aggressive scraping.
Step 6: Final Wash and Dry
Once all the tint and glue are gone, give the window a thorough cleaning. Use your regular window cleaner. Wipe it down with a clean microfiber cloth.
Make sure there are no streaks. You want the window to look like new. Check it in the light from different angles.
This helps you spot any missed spots. A clean, clear window is the final reward for your hard work.
Tips for Different Tint Types
Dyed Tints: These lose their color over time. They often peel off more easily. The glue is still the main issue.
Metallized Tints: These have metal flakes. They can be harder to remove. The heat helps soften them.
They might break into smaller pieces.
Ceramic Tints: These are higher quality. They are often more durable. They can be a bit tougher to remove.
Patience is key.
Factory Tint: Some cars come with tint from the factory. This is usually not a film. It’s dyed into the glass.
You cannot remove this type.
Common Mistakes to Avoid
It’s easy to make mistakes when removing car tint. Knowing these pitfalls can save you trouble. Many of these come from rushing the job.
Or from not using the right tools. The most common mistake is damaging the glass. This can happen with too much force.
Or using a dull blade. Always use a sharp, new razor blade. And hold it at a low angle.
Never use a metal tool that isn’t a scraper.
Another mistake is using too much heat. Overheating the glass can cause it to crack. Especially if there’s already a small chip or scratch.
Keep the heat moving. Don’t concentrate it in one spot. Also, be careful with ammonia-based cleaners.
Some older tints might react badly. They can smudge or smear the tint. Stick to ammonia-free products for tint removal.
Or just use hot, soapy water.
Not cleaning up all the glue is another common issue. People often think they’ve got it all. But tiny sticky spots can remain.
These can attract dust. They can make the window look dirty. And they can be hard to spot until later.
So, be thorough with your glue removal. Use good lighting. Check the window from different angles.
Contrast Matrix: Normal vs. Concerning Signs
Normal:
- Tint peeling in small pieces.
- Adhesive residue left behind.
- Needing to scrape multiple times.
- Glass feels slightly warm after heating.
Concerning:
- Glass making cracking sounds.
- Razor blade digging into glass.
- Sudden dark spots appearing on glass.
- Window feels excessively hot to the touch.
Dealing with Stubborn Adhesive Residue
Adhesive is often the biggest challenge. Glue can be incredibly stubborn. It’s designed to stick strong.
Over years of sun and heat, it gets baked on. This makes it harder to soften. And it makes it more likely to leave a mess.
If your usual soap and water isn’t cutting it, don’t despair. There are stronger options.
Commercial adhesive removers are your best bet. Goo Gone is a popular choice. It’s made for sticky stuff.
Follow the instructions on the bottle. Usually, you apply it, let it sit, then wipe or scrape. Another option is WD-40.
It can help break down some adhesives. Spray it on. Let it work for a few minutes.
Then try scraping.
Rubbing alcohol is also effective for many glues. Isopropyl alcohol, the higher the percentage, the better. It evaporates quickly.
This means you might need to reapply it. But it’s less messy than some other solvents. Always test any product on a small, inconspicuous area first.
This is especially true if you’re unsure about your car’s window coatings.
Remember to keep the area wet while you work. This helps lift the glue. And it prevents the tools from sticking.
Work in small sections. Clean the area thoroughly after you’ve removed the glue. This ensures no residue is left behind.
It’s a bit of a process. But with persistence, you can get that glass perfectly clean.
Quick-Scan Table: Essential Tools
| Tool | Purpose | Tip |
| Hair Dryer/Heat Gun | Softens tint and glue | Keep moving, don’t overheat |
| Razor Blade Scraper | Removes tint and glue | Use new, sharp blades; low angle |
| Spray Bottle (Hot Soapy Water) | Lubricates and lifts | Use good dish soap |
| Microfiber Cloths | Cleaning and drying | Have plenty on hand |
| Adhesive Remover (e.g., Goo Gone) | Tackles tough residue | Test on a small area first |
When to Call a Professional
While removing tint yourself is often doable, there are times when it’s best to get help. If you have a classic car or a very expensive vehicle, you might want a pro. If your windows have any special coatings, professionals know how to handle them.
They have specialized tools and chemicals.
If you’ve tried and you’re getting nowhere, it’s okay to give up. Stubborn glue can be very frustrating. A professional detailer has dealt with this many times.
They can remove the tint quickly and safely. It might cost a bit more. But it can save you a lot of stress and potential damage.
Especially if you’re worried about cracking the glass. Or if the tint is particularly old and brittle.
Also, if you have any doubts about the process, ask an expert. They can assess the situation. They can tell you if it’s something you can do.
Or if it’s better left to them. Sometimes, the cost of a professional is worth the peace of mind. It ensures the job is done right.
And your windows remain in perfect condition. It’s a good option if time is also a factor. They can often do it much faster than you can.
The Importance of Patience and Care
Let’s circle back to something crucial. Removing car tint requires patience. It’s not a quick job.
Especially the glue removal part. Rushing through it leads to mistakes. It can lead to scratches on your glass.
Or you might not get all the glue off. And you might end up with a streaky, imperfect window. That’s not the goal.
Think of it like peeling a stubborn sticker. You have to be gentle. You have to work at it.
Small, steady movements are key. Don’t force anything. If something feels too hard, apply more heat or your cleaning solution.
Let it do the work for you. This is where expertise comes from. It’s not just knowing the steps.
It’s understanding how the materials behave. And having the patience to work with them.
I remember one time, I was trying to remove some really old tint from a truck. The glue was like concrete. I got so frustrated.
I started scraping harder. I ended up putting a tiny scratch near the edge of the window. It wasn’t big, but I knew it was there.
I learned a valuable lesson that day. It’s better to take an extra hour. It’s better to use a little more cleaner.
Than to risk damaging the window. That experience stuck with me. It made me always approach these jobs with more care.
Final Cleaning and Inspection
Once you’re done with the heavy lifting, the final clean is important. It’s not just about making the window look shiny. It’s about confirming you’ve done a good job.
Use a quality glass cleaner. Spray it on generously. Use a clean microfiber cloth.
Wipe in a consistent pattern. For example, side to side. Then use a dry cloth and wipe up and down.
This helps you see streaks better.
Hold a flashlight at an angle to the window. Look for any remaining glue spots. Or any hazy areas.
These can be missed in normal light. If you see anything, don’t panic. Go back to your adhesive remover.
Or use rubbing alcohol. Tackle those spots again. A perfectly clear window is the goal.
And it is achievable with a final, careful inspection.
Don’t forget to check the window seals and trim. Sometimes, tint adhesive can get onto these parts. Make sure you clean them too.
So the whole window area looks fresh. This attention to detail makes the whole job look professional. It shows you cared about the outcome.
And that makes all the difference.
Frequently Asked Questions About Car Tint Removal
How long does it take to remove car tint?
It varies a lot. Simple tint removal might take 1-2 hours. Older or very stubborn tint, especially the glue, can take 3-4 hours or even longer per window.
Patience is key.
Can I use a razor blade on my car windows?
Yes, but very carefully. Always use a new, sharp blade. Hold it at a very shallow angle to the glass.
Keep the glass wet with soapy water. Never force it or use a dull blade, as this can scratch the glass.
What happens if I use a razor blade too aggressively?
You can scratch your car window. This can be a permanent mark. In severe cases, you might even chip the glass.
It’s always better to be gentle and use more heat or a stronger cleaner if needed.
Is ammonia bad for car window tint removal?
Ammonia can damage some types of window tint. It can cause it to smudge or streak. It’s safer to use ammonia-free window cleaners or simply hot, soapy water for the initial removal.
For stubborn glue, specific removers are better.
Will removing tint damage my car’s defroster lines?
Yes, it can. The rear window has thin heating elements (defroster lines). You must be extremely careful when scraping the rear window.
Use a plastic scraper or very gentle scraping. Never use a razor blade on the defroster lines.
Can I just leave old tint on?
You can, but old tint often looks bad. It can bubble, peel, or fade. It might also be illegal in your area.
Removing it often improves the look of your car and your visibility.
How do I know if my car has factory tint?
Factory tint is usually integrated into the glass itself. It’s not a film you can peel off. If you try to scrape it and nothing happens, or it feels like part of the glass, it’s likely factory tint.
This type cannot be removed by standard tint removal methods.
Conclusion
Removing car tint film is a task that requires patience and the right approach. By gathering your tools, following the steps carefully, and taking your time, you can achieve a clean, scratch-free window. Remember that the adhesive is often the hardest part.
But with the right cleaners and a gentle hand, it can be conquered. Don’t rush. Be thorough.
And enjoy your newly clear windows!